 If you use Canon’s excellent multi-flash E-TTL II, you can get great results with simple speedlites like the 430EX.
But you have to know how the system works. There are a few gotchas – like the sensitivity of the E-TTL system to highlights: one reflecting item in your shot and the entire picture is underexposed. except that reflective item.
One other thing to know is the way you set ratios. This is under-explained in the existing literature, and yet, is very simple once you know it.
You can divide your remote flashes into “groups” A, B, and C. The options for setting up these groups are are A+B+C, A:B, and A:B C.
A+B+C simply means “fire all as one big group”.
A:B means “I have set one or more of my flashes (including the one on the camera, if that is enabled to flash) as group “A”, and one or more flashes as group “B”. I want to fire so that the ratio between group A and B is as set; e.g. if I set 4:1, then the “A” flashes fire four times more brightly than the “B” flashes”. So unlike the Nikon CLS system, which sets “stops with respect to neutral exposure”, the Canon system sets “ratios with respect to each other”. Not difficult: just another way of looking at it.
The one mode that gets most people is A:B C. (Note, just a space between the B and the C). This option simply means “A and B are as before, but any flashes in group “C” will fire at high power and this group will not be taken into account when calculating overall picture exposure”. This means you use group “C” to light up a white background.
Like in the pictures here of my son Jason, which I took in five minutes this morning before work. Including setting it all up. Pictures like this one:
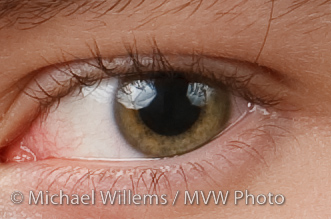
This picture was shot as follows: on our left, the “A” flash firing through an umbrella. On our right, the “B” flash also firing into an umbrella (you can see that in the reflections in his eye – you do always focus on the eyes, right?). And behind Jason firing at the white wall behind him, the “C” flash, aimed at the wall. All three of these are 430EX speedlites. On the camera, a 580EX II speedlite. This on-camera flash is disabled; it simply drives the three 430s. The system is set to A:B C, with an A:B ratio of 4:1 (the camera left side of the face is four times, i.e. two stops, brighter than the camera right side).
Simple, really.
If you want to learn more about this subject, Michael teaches Flash at Henry’s School of Imaging, or for more in-depth or customised training, privately, to a wide range of clients.


