Happy holidays

Whatever you are celebrating, do it well and enjoy. And take lots of photos, in which you fill the frame and expose well, perhaps using fast lenses and a mix of flash and available light. And did I mention “fill the frame”?

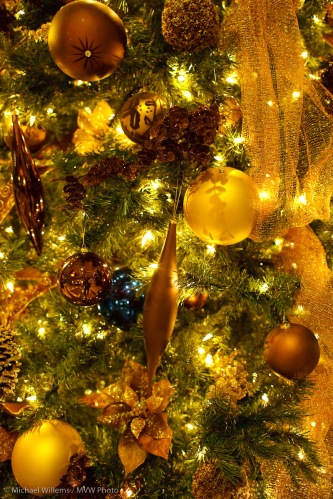
Oh and who spotted me reflecting in that ball, at the Wyndham hotel in Phoenix (avoid it: “free high-speed Internet” is free LOW speed: high speed is $10 more – and in a city with free parking, the only parking at the Wyndham is compulsory $24 valet parking)?

And that is also a reminder to hold your camera upright for shots that need this (we call that “portrait orientation”, because it is suitable for…..)

Back to today: Merry Christmas!

It's good when you fail

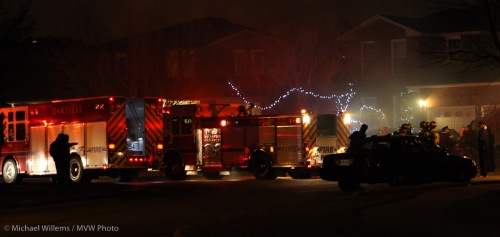
As a news shooter, I get into my car whenever there is a possibly significant accident or fire in the vicinity. But it is good when you fail to get a picture because the fire fails to spread, like just now.

And if the fire brigade manages to put out the chimney fire before it spreads significantly, you can afford to think “hey, that looks kind of festive, the red lights mixed with the Christmas lighting”.

So although that family needs to spend the night elsewhere because of smoke- and water-damage, the home can be fixed.

And since this is a photography blog: 3200 and 1600 ISO at f/2.8 with a 70-200 f/2.8L IS lens. That gave me shutter speeds of around 1/30th second. Which with IS is doable.

Next year again

Here’s the setup I described earlier, that I used to shoot the Santa pics. My tripod-mounted (and cable-fired) Canon 1Ds MkIII and twin Bowens Gemini 400 Ws strobes into umbrellas, fired with Pocketwizards. The camera is powered with the mains adapter so it never turns off.

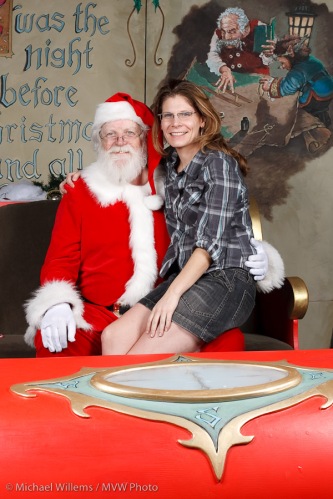
And here for good measure is pone ore shot I took there, showing Santa and an admirer:

Ho Ho Ho!

A portrait technique

One very good portrait technique is to have a person in the foreground, and then to have one or more people in the background, out of focus, adding to the mystery, the story. So you wonder what the story is.

A bit like this picture of two lovely students at my recent Phoenix workshop:

Ideally, the second person would be even farther and would perhaps be looking at the subject instead of looking at the camera, but you get the idea.

How do you do this?

  • You use a “fast” lens (low f-number), open wide to, say, f/1.8.
  • You would be using aperture mode or perhaps manual for this.
  • You can use flash, although at f/1.8 you would most likely not need to.
  • You would accurately focus on the closest eye. Using one focus point.
  • If the ISO is very hiogh and the lught low you can get some noise (“grain”) – in that case consider making the picture black and white, which “likes” a bit of noise.

Have fun taking holiday season portraits of all your visiting relatives!

Holy

Santa shots all day today. I love those shoots.

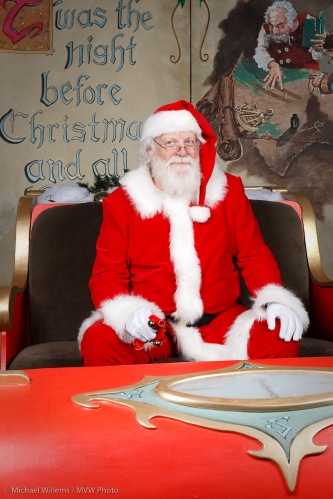
We had the fortune of having the Real Santa at Hopedale mall (check his beard, that is how you can tell – yes, it’s real, so it’s Santa himself).

I have no idea why some photographers scoff at this type of photography. I love it. And so do the customers, and so does Santa himself.

Family snapshot tip

If you are new to cameras, let me give you a quick tip for the holidays.

When you shoot pictures of your family, use “slow flash” (enable “slow” on Nikon, or use Av mode on Canon)  and an ISO of 400 or even more if it is dark indoors. That allows the background light to show, as well.

You will need flash, too, around the tree. But rather than the popup flash, use an external flash. And above all, do not do this with that flash:

Instead, do this:

That’s right – point the flash backward above you. Your happy snaps (photojournalists call them “grip and grins”)  will be infinitely better.

Wakey wakey…

A customer (an international teaching hospital in Toronto) called me just now for a last-minute shoot (an award ceremony by the Board of Directors). Unfortunately, with a client on his way, I could not take the job.

So I called every photographer I knew in and around Toronto. Amazingly, none but two answered: most were still asleep. Few of the others called back.

The fact that no photographer was able to take a last-minute job did not surprise me. The fact most were unable to be reached, did. For those of you who want to be photographers, great news: you can get up after 9AM!

Oh and if you were not on my call list it is because I do not have your number.

The shot? It fell through, they decided without a photographer, no ceremony.

What memory cards do I need?

This is a frequently asked question. Like many such questions, it has some suggestions rather than one definitive answer. And those suggestions are:

  1. Buy brand name cards. Lexar and Sandisk are the main brands, and they are very good electronically. They have anti-aging mechanisms built in that some cheaper cards do not.
  2. Get a lot of them. Often, I would rather have two 8GB cards or even four 4GB cards than one 16GB card. This spreads your risk. Memory cards die, get lost, get stolen, and so on.
  3. Speed is less important unless you shoot sports (many repeated shots) or video. For video, the sustained throughput (the small 1-9 number surrounded by a circle) is very important. But if you do not shoot video or constant shutter mode shots such as in sports, speed only affects the read/write time from buffer to card and from card to computer, (not the quality) and you may well prefer a $30 “slow” card ran a $150 “Super Generation 6 Extra Extreme Screaming Speed Pus Pro” card.
  4. That said, I think everyone should have one very fast card – for when you shoot repeated large images.
  5. Do not open the camera when the LED at the back, that indicates “wait, I am writing to the card” turns off.
  6. Format your card every time you re-insert it into the camera – but only after you have copied all you images to the computer and made a backup.
  7. Use a CF/SD card reader for connecting to the computer. Many people find this more convenient than connecting the camera. The choice is yours, though.

I hope that is useful – and remember, shoot a lot and fill those cards, especially this season.

Nick

OK, so I spent the day photographing St Nicholas, i.e. Santa Claus, in the mall. The real one (pull his beard, it’s the genuine thing).

So how do you do this? See yesterday for the tethering article, but I thought it might be useful for you to see how this is done in other equipment terms.

I used, and with the help of my assistant Daniel set up, the following in this order:

  • Lights:
  1. Two 400 Ws strobes (Bowen) on light stands, firing into umbrellas.
  2. A pocket wizard on each light to fire it.
  3. Power set to 4/5 as a starting point
  • Camera:
  1. Canon 1Ds MkIII, with power supplied by mains adapter.
  2. A tripod
  3. Wire release for the camera.
  4. 50mm f/1.4 lens (any lens would have done)
  5. Pocket wizard (to fire the other two)
  • USB cable to the computer.
  • Computer, tethered as per yesterday’s article

First, I set my camera to manual exposure, 100 ISO, 1/125th second, f/8. Then I set the lights to that, using a light meter.

Then I tried a test shot without  flash:

This is very important. I wanted the ambient light in the mall, which varied due to a large skylight, to not affect exposure. So that picture above should look dark. Else variance in the sunlight will affect my pictures. One lovely thing about studio lighting is that it is consistent.

Then I did a custom white balance (I had to shoot JPG for the printing company, so this was very important). So I shot a grey card on Santa’s seat, and set my custom WB to that exposure.

Then I set the camera “style” settings to extra saturation by one click. (I am shooting JPG and we have bright Santa- and kid-colours).

And then I was ready. Here’s me:

Having tuned a bit (set my aperture to f/9 instead of f/8 to reduce exposure a bit), I am now ready for shots. And for Santa!

And the great thing is that I was able to stay at these settings all day. And every picture was sharp as a tack, exposed perfectly, and the right neutral colour. This is what I love about studio light. Even in a mall, with a portable studio. Of course it is important to check every now and then that you are still set right – JPG, 1/125th sec, 100 ISO, f/9. But if you make no mistakes, you get the same great light all day.

And Jolly Old Nick will be happy, as will the kids – and more importantly, their parents.

Question du jour

Reader bkkphotographer ask this:

A friend in Bangkok is replacing his 5D Mark 1 with a newer body. He offered to sell me the 5D.

1. I think the 5D would be a step-up from my 30D in terms of quality, even if it is the original model.
2. BUT I don’t have the L lenses that would use its capabilities and I might be disappointed. True?
3. Would you ever consider a second-hand body? If so what checks should I do before buying?

My take:

Yes, the 5D is great. I used to own one – great camera. Just because there is a 5D MkII and soon a MkIII, MkIV and MkV, no reason that the 5D will not do what it always does. And it is full frame.

Grab it if it is good. You will not be disappointed. Even without “L” lenses. For instance, the 50mm f/1.8 lens is what I used today all day to do pro shots. This is the cheapest lens Canon sells. It is brilliant. And this is a full frame camera, so 50 would be 50.

What to watch for? The 5D had a service recall – the mirror can let go. Free fix by Canon. Has this been done. And the 5Dis a bit of a dust magnet. Is the sensor clear? And do you have a new battery?

Take some test shots, check accurate focus etc; find out above the above, have Canon do the fix if needed; buy a new battery if needed; and go for it. Great camera.