Big News about Little Flashes

For those of you in the Toronto Area who want to learn more about flash, there’s some great opportunities coming up in the next days:

  1. For advanced, pro, emerging pro users, I teach an Advanced Flash” evening workshop in Toronto’s historic Distillery District on May 4, and there is still space! You will learn about the subtle differences between CLS/iTTL and e-TTL, you will learn about balancing light creatively, and much more. See here: http://www.cameratraining.ca/Schedule.html
  2. On 30 May (new date) Joseph Marranca and I are teaching a full day advanced light workshop in my country home in Mono, Ontario, just an hour north of Toronto. A great opportunity to make some great creative shots! See and book here: http://www.cameratraining.ca/Mono-Day.html
  3. For amateurs who want to get advanced in their flash use and practice what they learned, I wrote the all-new “Get Out and Shoot” workshop for Henry’s School of Imaging, and I and other experts will be teaching this Get Out and Shoot from May on across the GTA: check Henry’s School of Imaging to book!

Take advantage of these unique opportunities and kick-start your use of flash and light this month. Sign up today and enjoy sharing your passion with the pros and with other enthusiasts.

A reader asks: Manual? Why?

A reader asks:

“Question: I understand why you would use most of the modes ( av, tv, etc.) but what are the main applications where one would/should use the manual mode? Thks”

Great question.Why use manual? Here’s why you want to use manual (“M”) exposure mode (the dial on top of your camera).

  • Predictability. If you set the camera to manual exposure mode, your settings are, well, set. Turning your camera a little to the right or left will not now change your exposure. Imaging you are shooting in a room with predictable light, but your subjects walk in wearing white suits, then black suits, then white suits again.
  • Hard to measure subjects. How are you going to measure fireworks? It cannot be done in any automatic mode since when the metering is done, it’s all over.

That means you will want to use manual exposure mode in the following circumstamces:

Some photographers say “always, and use a meter”, but for me, the above captures it nicely.

PS: be careful: there are many types of manual. See here: http://blog.michaelwillems.ca/2010/03/11/manual/

Tip time: studio setup

A few quick setup tips – for portable studios like mine, here today for a corporate shoot:

Portable Photo Studio Setup Tips

Portable Photo Studio Setup

In no particular order:

  • Roll the paper the way I am showing here. Like a toilet roll: roll from the top. That way you get more available height.
  • The backdrop stand goes in a bag. Ensure that when you put it back in the bag, the large holes show. That way you can see which sidebar is the middle one – you may not need it (like me here).
  • Ensure cables are out of the way. Wrap them around light stands to avoid them hanging out too far where people can trip over them.
  • Always bring a power bar.
  • Use tape or something large on the floor to tell models where to stand and how to orient themselves.
  • Tell subjects “baby steps only when I ask for adjustments”. Else they always turn too far.
  • Start with the body. Then the head. Then the eyes.
  • Arrange to have a test subject available. Else your first client is the test, and that looks unpfofessional.
  • Use a tripod. Adjust height as needed.
  • Camera to 100 ISO and auto ISO off.
  • Camera on manual, 1/125th second, f/8, and use a meter to adjust the lights to that.
  • Test shot one: no flash. It has to be dark!
  • Test shot two: flash, but no subject (focus manually). It has to be white!

That is, I trust, helpful. Efficiency is all, or a two-hour shoot can turn into four hours with setup and takedown.

A studio like this one, the one I built this morning, took me half an hour to build and 15 minutes to take down.

About wide angles:

I often get asked “what wide angle lens should I get?”. Of course that is a difficult question to answer: there is no “should” about it. But in general, unless of course you are shooting an African lion safari, wide angle lenses are the most flexible.

Here’s my son Jason driving the car the other day:

Why do I use a wide angle lens for this?

  • Wide angle lenses allow the introduction of perspective, as I explained in a post a couple of days ago.
  • You can use them close to a subject and still get enough in.
  • You can get the environment to “wrap around” the subject, as in the picture above.
  • It is easy to focus them, with very wide depth of field even at large apertures.
  • It is easy to stop them from shaking (the longer the lens, the more susceptible to blur).

So is it “the wider the better”? Yes, pretty much, but watch out for a few things:

  • In close-up portraits, wide is not the best, unless you want large noses.
  • Lenses can distort perspective in the corners, so avoid people in the corner unless you want conehead-shaped distortion in them.
  • They can be imperfect in the far corners.
  • They can distort angles even when you would rather that they did not.
  • Your flash may not cast light as wide as your lens.

So not a panacea for all cases. But in general, wide is great and at least one of your lenses ought to be very wide – in the range of 10-20mm on a crop camera, and 16-35 on a full-frame camera.

Tip: Become a bag-person.

Quick Tip of the day: carry some small things at all times. Namely:

  • Plastic bags – to put things into, absorb shocks in your camera bags, stop things from moving around, and heck, even to throw up into if you’re sick.
  • Microfiber Cloths – to regularly clean your lenses and the back of your camera’s LCD, and also to absorb shocks in your bag.
  • A cheap 1″ paint brush – dust that does not get onto your camera will not get into your camera.
  • A “bulb”-type air blower – ditto.
  • Shower caps from hotel rooms – to wrap around your camera when it rains – poke a hole at both ends and you’re better protected than without.

These cost almost nothing, weigh almost nothing, and are worth more than than their weight in gold for a photographer. Solutions can be low-tech.

And another few sports tips

Since I just got back from shooting a junior Lacrosse game, here’s another few quick tips.

And they do not apply just to Lacrosse!

  • As said yesterday: look for action and emotion.
  • If you are shooting through Plexiglas, shoot straight through it and get close to it. You may need to bend down to minimize reflections from behind you.
  • Bring a soft cloth to clean that Plexiglas.
  • Avoid shooting from the penalty box in pro games of hockey and lacrosse. In junior games you may be able to get away with it without getting hit by projectiles. Safety first, though…
  • Bring bottled water and a snack.
  • Indoors, shoot manual. Tonight I shot at 1600 ISO, f/2.8, 1/320th second. Pretty typical values for an arena.
  • And as also said yesterday: shoot a lot. It took me 400+ shots to get enough good ones: I aim to submit 6-10 images.

Here’s one I like:

Quick sports checklist

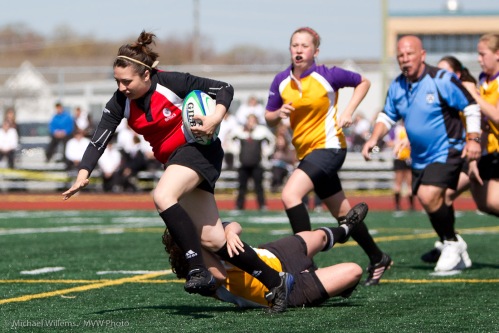
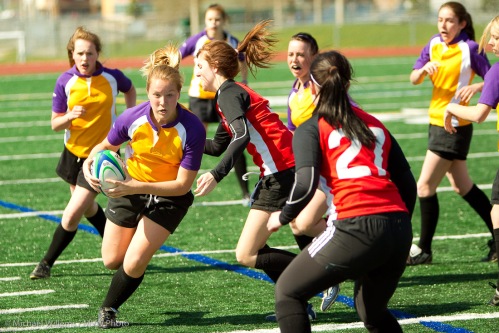
Inspired by yesterday’s Rugby game and tomorrow’s Lacrosse game, both of which I shot/will shoot for newspapers, here’s a little checklist for the 1D Mark IV and similar cameras for sports like this:

What to bring:

  • Camera
  • Backup camera
  • Spare batteries
  • Spare memory cards
  • Rain protection
  • Pens, notepad/paper
  • Business cards
  • Assignment sheet (so you can prove you are official)
  • Mobile phone

Camera setup:

  • Continuous drive shutter
  • AI Servo/AF-C mode
  • One focus spot
  • For these sports, custom function III-4 set to “1”, AF Tracking priority (so that a player who comes in front does not quickly cause focus to shift)
  • On my 70-200 2.8L IS lens, IS on, but set to position 2 (that means, suitable for panning). If your IS/VR lens has only “on” and “off”, select “off”.
  • Record all images to both cards (the “1”-series cameras have this option for extra safety)
  • Size you want

As for exposure, the need is for fast shutter speeds. 1/320th or faster.

While there are several ways to achieve that, I do it as follows:

  • Outdoors, I use aperture mode wide open (f/2.8) and ISO as needed, say 200 ISO, to get super fast shutter speeds. Outdoors I can often get settings like 200 ISO, 1/4000, f2.8; or 200 ISO, 1/2000, f4.
  • Indoors I generally use manual mode after metering and checking histograms. I am not afraid to go to 1600 ISO to get to fast-enough shutter speeds. Inside I can often use settings like 1600 ISO, 1/400, f2.8.
  • I could also use manual and enable auto-ISO, but I have not used auto ISO in an important assignment. I like to set my own.

Positions are sports-specific: more later. But a golden rule: follow the ball; follow the action; follow emotion. In that order!

One more tip: shoot the jersey numbers and the roster, so you can write the right cutlines. I was not happy that rugby players do not have the numbers on the front of their Jerseys.

And one last tip: shoot a lot. A “keeper ratio” of one in 10 to one in 30 is not unusual in sports. And with digital, it’s free.

I hope that helps all you budding sports photographers.

Exiftool, a great exif tool

A tip for y’all today. If you take digital pictures, get Exiftool.

Exiftool is a free utility by Phil Harvey that allows you to see (and even alter, but seeing is the main thing) the entire range of EXIF data embedded in your image.  Not just what your camera maker wants you to see – no: everything. Hundreds of fields, like the exact zoom setting of your lens. The focus spot you used. Much, much more.

ExifTool is a command line utility and it’s free, from here (link).

(Additional tip: open a command line (terminal) window, type “exiftool” and a space, then drag the image you want to know about  from your desktop into that command line window.  This avoids the need totype long complex filenames.)