Shooting airplanes

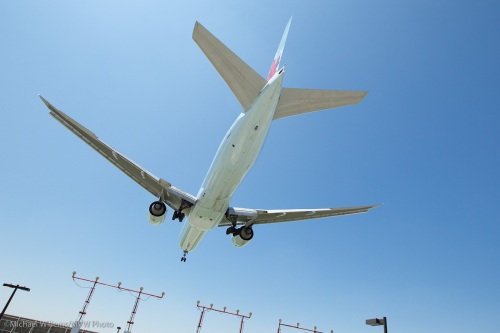
And I mean with a camera, of course. That is what I did yesterday, with my student and friend Ray, at Pearson International Airport’s runway 24R. Where the aircraft are seemingly about to land on your car:

Airplane about to land

Airplane about to land at YYZ

Yes, that is my car, and yes, I do trust aircraft and pilots. And yes, I have about 250 hours in Cessnas, all over the planet, so I understand how it’s done.

So let’s talk about taking airplane pictures. Do I have any tips? Of course I do.

First about preparation.

  1. Check the runways and check where you can shoot. Even without a scanner, if the wind is from the west, runway 27 might be in use; if it from the north, runway 36 is more likely. (the numbers times ten are the compass direction). Take sun into account as well – you do not want to shoot into the sun if you do not have to.
  2. If you can, bring a scanner, and set it to tower frequencies (like 118.70 MHz AM). That way you will know who is about to land. Listen for “Heavy” – those are the big aircraft.
  3. Park where it is allowed. Getting arrested or told to move helps no-one. Look for other enthusiasts.

About the lens.

  • If you use a lens with image stabilisation, you can use it if you are not moving the lens. If you are moving the lens, because the aircraft is close, turn it off (or use “mode 2/active VR” on expensive lenses).
  • It may be tempting to think “I need a long lens”. And maybe you do. You get nice pictures like this:
Turboprop Landing

Turboprop Landing

And like this:

Small jet landing

Small jet landing

But if in fact you are close to a runway, contrary to what you first think,  you probably will want a wide angle lens.

Wide is good:

  • it is forgiving with focus
  • it is forgiving with motion blur
  • it is forgiving with depth of field. All good.

And you may need a wide lens just to get it all in. You can get pictures like this, with dramatic perspective:

Air Canada Jazz landing over a phone box

Air Canada Jazz landing at YYZ

Now exposure and other camera settings.

  • Set the camera to continuous drive (you press, it keeps clicking away)
  • Set the camera to continuous focus (“AI Servo” or “AF-C”)
  • Preferably, use manual exposure mode.  I used manual, 1/500th second, f/8, and 200 ISO for most of today’s pictures. I measured this off the bottom off the first aircraft.
  • Use 1/800th second if you can to freeze motion. But when shooting turboprops, 1/400th or perhaps 1/320th is good to show some blur in the props.

The better your exposure in camera, the less work you have to do afterward.

Finally, composition.

Big aircraft are good.

Big aircraft

A large aircraft landing

Even better, add some foreground object, so show perspective and scale. Like here:

BA aircraft landing at YYZ over a phone box

BA aircraft landing at YYZ

Or here:

Air Canada landing at YYZ

Air Canada landing at YYZ

Or here:

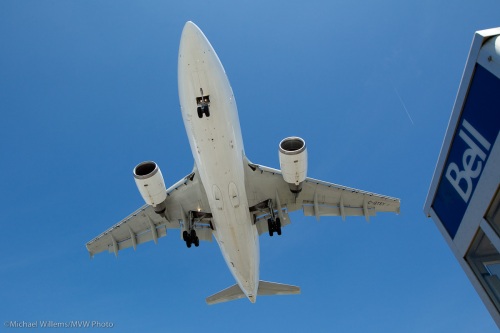
Aircraft about to land, over Bell Phone Box

Aircraft about to land

That is my advice. And above all, keep in mind that this is supposed to be fun. Don’t sweat it is not all images are sharp. There’s another plane coming soon.

And if (like me) you go home with 600 pictures, you will have to cull 90% of them, and that hurts. But it’s got to be done!

Why set White Balance when you shoot RAW?

When you shoot RAW (as you probably should if your pictures are important t0 you) then your in-camera image processing settings are not important. Setting like colour space (AdobeRGB or sRGB), sharpening, noise reduction, colour saturation, saturation, white balance, and more.

They are not applied, just attached to the sensor information as “suggestions”. You can always set, or change, them later in Lightroom, Photoshop, or whatever you use.

So why set Light Balance in the camera anyway? It is time-consuming, and if those settings are not permanent, why bother?

First, if you shoot RAW, you should turn off all image settings that make the preview look very different from the RAW image. Set your camera to “normal” picture style and disable auto lighting optimization, lens correction, extra contrast, and so on. I have written about that before on this blog.

Then, white balance. Why you might want to set it:

  1. Your images will look more like the finished product. You will get a better idea of “what you are getting”
  2. You know whether to correct anything.
  3. They will also look better, so you will feel better about your skills
  4. Most software will take the White Balance setting at least as a suggestion, so you can start off in Lightroom, say, with colours already almost right.

    Against this: it takes time. So what I DO IS THIS:

    • Not worry about it
    • If shooting in a studio, and I have time, I set it to Flash
    • If shooting a sunset, or late day light, or snow on a sunny day, and I have time, I set to daylight
    • If shooting in Tungsten light, and I have time, I set to Tungsten
    • But when in a hurry and at all other times than those above, set it to auto.

    That’s simple, no?

    Filter or hood? Which one trumps?

    A reader emailed me this question:

    First of all, I really enjoyed your Travel and Photo Journalism presentation on Saturday, thank you for some great information. Also the Flash Presentation was very informative.
    I use a Canon XSI with a Sigma 18-200mm as a walk-about lens. The lens has a good lens hood, however I also have a circular polarizing UV filter on the lens and , with the lens hood on, I have difficulty adjusting the filter.  I typically don’t use a tripod so I run out of hands and fingers at the wrong time! Because of this complication I don’t use the Hood most of the time, any suggestions as to the benefits of the hood vs. the filter if I can only use one.

    Good question, and one that may be useful for others too.

    I still advise using both… I have a 70-200 and with the hood it’s quite tricky to adjust the polarizer: but I still do it quite often.

    So I would say:

    • Lens hood: always. For stray light as well as for damage protection.
    • Polarizer when you need it (when the skies are blue, etc, or you want to reduce reflections, or you need to cut light).
    • Both when you can, and especially when you are shooting against strong light

    I feel the reader’s pain… it’s one of those things where we wish it was different – but it isn’t… 🙂

    Favourite lenses: the 35mm prime

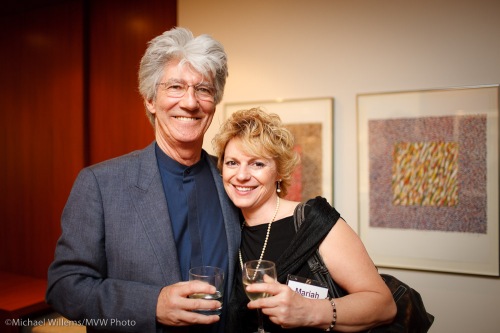
    The 35mm prime is my favourite “event” lens. On a full frame camera it makes images like this, right out of the camera (shot at a corporate event the other day):

    An image made with the 35mm f/1.4 lens on a full frame camera

    35mm f/1.4 lens on a full frame camera

    In other words, this is a great lens for portraits at events, of one or two people. The ideal length (on a crop camera you would want a 24 mm lens, which would give you the same angle).

    I was originally reluctant to use this. Surely a zoom lens is better. Yes?

    Actually, no. The prime lens, although it necessitates walking back and forth a bit, is great, because:

    • It is relatively light and small
    • It is very sharp
    • It is fast – f/1.4. Meaning it goes to a low “F” number, which means that you can go to that low F-number in low light; it also means that when you shoot at even a slightly higher F-number,like 2.0 or even 2.8, it is very sharp indeed.
    • It enforces the right discipline: many images are just right because I move the right way.

    We overestimate the need for zooms. When shooting an event that involves pictures like the one above, this prime lens gives me excellent, repeatable, consistent, and professional results. What more can you want?

    Oh, and one more note: a quick start guide for events:

    • Use an external flash.
    • Aim that flash behind you, as I have pointed out many time here.
    • Set your camera to manual mode: start at f/4, 1/30th, at 400 ISO.

    But you can’t shoot at low aperture numbers.

    Right?

    Wrong. The above picture was shot at f/1.6. I used that aperture and 400 ISO at 1/60th second, because I wanted optimal image quality, and yes, you can shoot at low “F” numbers with a wide angle lens without running into depth of field issues.

    So: go for it. And above all: have fun. Your pictures are guaranteed to be better than Uncle Fred’s.

    Manual flash or TTL flash?

    You know (if only because I have discussed it before) that you can set your flash to manual or TTL. I thought I would revisit this, and show you some shots I took Wednesday.

    Manual means you set the power level; TTL means the camera fires a preflash and measures the return, and then sets the power level based on that. TTL (Nikon calls its version i-TTL, Canon calls its version e-TTL) is the default setting (the panel on the back of your flash says something like “TTL”).

    An on-camera flash

    An on-camera flash

    Unlike David Hobby, I tend to use TTL most of the time, not  manual.

    TTL is a major revolution in camera technology, because it allows you to shoot varying scenes without having to worry about distance. In particular, you can bounce anywhere you like, off a different wall for every shot, and you can use whatever modifiers you like, and not worry about measuring. And you can use “fast flash” to exceed the camera’s flash sync speed – useful on sunny days.

    A sample, shot with TTL on Wednesday:

    Pretty bartender at a reception

    Bartender at a reception, shot using TTL

    Indeed as David points out, TTL has drawbacks: the major one being that it’s not perfect. Its measuring is finicky. If you always aimed your viewfinder at an 18% grey surface you would be fine, but the meter is in evaluative mode, and on top of that it has an undocumented bias toward the focus point. All that means that if I focus on a black area I get grey (too bright), and if I focus on a white area I also get grey (too dark). So I need to use flash exposure compensation. And check the back of the display frequently.

    TTL’s pluses, then, are:

    • You can use it anywhere, any time.
    • You do not need to meter or set anything.
    • You can do it when the subject varies.
    • You can bounce off varying surfaces, like when you shoot an event and both you and the subjects are constantly moving around.
    • You can exceed your camera’s flash sync speed by using “fast flash” (“auto FP flash”in Nikon terms)
    • You can use any modifiers you like

    And its minuses:

    • It can be infuriatingly inconsistent.
    • Your subject’s brightness makes a difference.
    • Reflections can spoil a picture by underexposing it.
    • You’ll need to do more post-production work, as in a fast-moving event, where the setup changes with each shot, quite a few images will be half a stop under or over.
    • You’ll even miss a few images.

    So TTL is great when things are predictable, but it is also very useful when things are not predictable (like when you, and they, move).

    Now let’s move to manual flash. Manual is the opposite to TTL: it is utterly predictable and consistent but you need to do all the work, and it is totally useless when you and the subject move.

    So I use manual when:

    • I want consistency, and I can ensure that nothing moves (like in studio portraits).
    • I have time to meter.
    • The flash is just adding light, like an accent, or like fill on a sunny day, when the exact power level is not that important (if the flash were a bit under or over it would not make a material difference to the image)
    • I am using Pocketwizards, e.g. for outdoors shots – which will therefore need to be predictable.

    Don’t get me wrong, I love the predictability of manual flash firing, not to mention the predictability of the use of Pocketwizards.

    So in fact I shoot manual flash if possible, and if not, then TTL.

    Do I sound like I am contradicting myself? No. Because I shoot events. And events mean I need to be on my feet in a constantly changing environment. And that is when TTL shines (pun intended). Every shot I am in a different room, and I bounce off different surfaces. So that is why I usually use TTL.

    And when using TTL, it is all about knowing how it is going to react, and being able to solve the problems. That is what I teach in my courses (e.g. at Henrys School of Imaging, and in the all-day course coming up on 30 May, and in Las Vegas on July 12+13, and many more times in between). There’s a lot of problem solving, involving tools like:

    • Flash lock (FEL/FVL)
    • Fast flash
    • Flash compensation
    • Knowing exactly what it will do

    Remember, while a setup shot has to be right, in a fast-moving event, the objective is to get within half a stop to a stop, as long as you shoot RAW.  And believe me, this is eminently doable.

    Another sample from Wednesday, where bright ambient light necessitated 1/400th second, which meant using Fast Flash:

    Oakville's mayor Rob Burton and family

    Oakville's mayor Rob Burton and family

    Snacks, also from Wednesday:

    Snacks at a high-end reception

    Snacks at a high-end reception

    Do try to bounce, and use you camera on manual settings (flash is still measured). The following may work, but only if you are lucky:

    A photographer using popup flash

    Photographer using popup flash

    I would like to see her shots, but I know they would be better if she used an external flash and bounced it off the ceiling behind her!

    Ten Portrait Tips

    Here’s ten important portrait tips for you today:

    1. Use the right lens. A lens in the 35-100mm range is best (on a crop camera). A 50mm f/1.8 lens can be had very affordably, and this length (equivalent to 80mm) is great for headshots.
    2. Think about your lighting. Natural light is best (from a north facing window). Avoid direct flash: when using flash, bounce it off a white or near-white wall or ceiling or use other modifiers or off-camera flash. Use a hair light when needed to separate a person from the background. Consider adding a splash of colour. Match the light to the mood, and realise that good light is all about the shadows.
    3. Closest eye sharp. Ensure that the eyes are sharp. Nothing else needs to be sharp, but the closest eye in particular has to be in focus.
    4. Think about the environment. If this is an environmental portrait, use a wider angle lens and show the subject interacting with, or surrounded by, that background. But if the background is not meaningful, blur it.
    5. Get the Moment! Shoot a lot, so you will catch the right moment, not the cheesy expressions.
    6. Catchlight: ensure the eyes show a little catch-light. If not, they look lifeless.
    7. Off-centre composition: do not put your subject, or your subject’s eyes, in the centre of your photo: Uncle Fred does that. Instead, use off-centre composition (“the rule of thirds”).
    8. Directing: never tell your subjects you are posing them: say “positioning” instead.
    9. Positioning: Angle your subjects unless they are very thin. In multiple-person groups, make little groups, use a combination of “sit”, “stand” and “lean”, and use joiners to join the groups. having a subject lean into the camera is often flattering.
    10. Props – consider using props that are meaningful (an author holding a book, for instance).

    An environmental portrait sample:

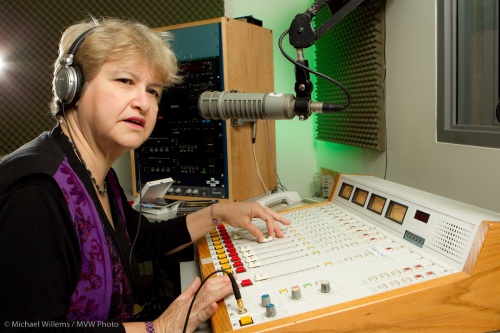
    Victoria Fenner

    Audio Expert Victoria Fenner in the studio

    And another one: a headshot, but still environmental:

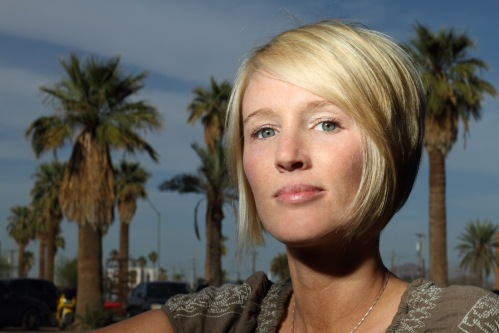
    Christy Smith of Studio Moirae

    Christy Smith of Studio Moirae

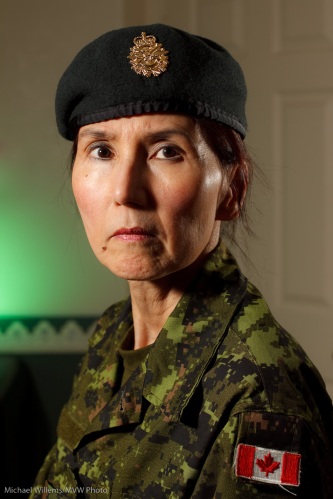
    And here’s a traditional headshot:

    A Female Soldier

    Army Reserves Private

    There are of course legion more tips and tricks, but the above will get you going. There will be more tips coming!

    If you want to learn more, and “hands on”, then come for a short, effective, course – send me an email to hear when and where. Like the all-day Advanced Lighting course on May 30 in Mono, Ont: there are still spaces.

    My shoot tonight

    The second of two shoots: first I shot a politician,and then I shot lawyers. (No – with a camera).

    I love shooting corporate events.

    Glasses, ready for wine

    Glasses, ready for wine

    Food

    Food.. aahh. excellent food

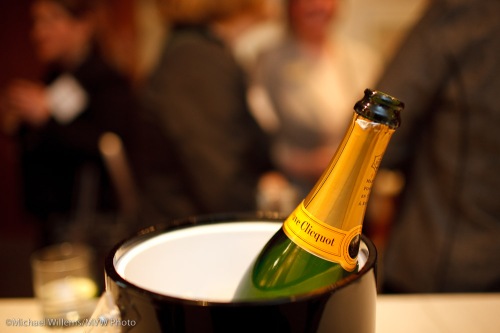
    Veuve Cliquot

    Veuve Cliquot

    I get to shoot happy people and I even get to eat a snack or two. What’s not to like?

    Tech: I used my 35mm prime lens on the 1Ds Mark II, and the 70-200 on the 1D Mark IV. Both cameras had a flash – aimed, of course, behind me.

    What should I buy next?

    As you know, I invite reader questions on this teaching blog, and I try to answer them on the blog.

    A member of last weekend’s audience at the Photo Show wrote me some very kind words about how he enjoyed my seminars. He then added:

    I am just entering the world of photography as a hobby and just have a quick question.  So far, my equipment consists of the Canon T1i with the kit lens.  I have also purchased an accessory kit for the camera that contained a bag, UV Haze filter, and a spare battery.  I was wondering what you would recommend as my next move.  I am interested in the 50mm 1.8 lens and plan on picking it up this week, but where should I go from there?  A polarizing filter?  An external flash? An additional lens?  Any input/advice you could provide would be greatly appreciated.

    Interesting question – and a good one. As beginners in photography, there seems to us to be an infinite array of “must have” goodies, and it is important to decide where to spend our dollars.

    So here’s my take on this. First of all, I think the choice is right:the Digital Rebel (any variety” XTI, XS, XSi, T1i, or T2i) is a great camera.

    Canon T2i Digital SLR

    Canon T2i Digital SLR

    Not that there are bad cameras:today’s cameras are all great. While the Pros virtually all use Canon or Nikon, the offerings by Sony, Olympus, and Pentax are also great. It’s whatever you like best – how does it feel, how do the menus look to you: any small SLR will do exactly what a large expensive one does, so it is whatever you like.

    So you have chosen a camera. And you have bought a spare battery (a must!) and hopefully also a few extra memory cards (I like 4GB cards: that size “fits on a DVD”).

    More important than the camera is a lens. By all means start with the kit lens, but add the 50mm f/1.8 lens as soon as you can. (On Nikon starter cameras you need to manually focus that lens; on some others, there is no cheap 50mm lens availanel. This is one reason I like Canon). On a small DSLR, the 50mm f.1.8 lens works like an 80mm lens (50 x 1.6; a small sensor appears to magnify the lens length), and 80mm is perfect for portraits. And the large aperture (f/1.8, a low “f-number”) enables you to dramatically blur backgrounds and achieve very selective focus (“narrow depth of field”). Use this lens to take available light portraits and everyone will love their professional quality.

    So what’s next? Here is my list.

    1. A flash. I would go for a 430EX II flash. You can read all about flash on this blog – and why you never aim it straight at the subject from on top of the camera (which is the worst possible place to mount a flash). Bounce the flash and you’re good with great light.
    2. A wide angle lens. A lens in the range of 10-20mm would be fabulous. Search this blog for “Wide Angle” to see why, and to see what these lenses can do.
    3. Then a long lens (say in the 70-200mm range), especially if you shoot things like sports, wildlife, or if you do a lot of studio portraits or other photos that need “zooming in”.

    Then, and in no particular order, I would think of adding utilities, such as:

    1. A sturdy tripod
    2. A good camera bag (or “photography bag”: my camera does not go in a bag!)
    3. Lens hoods for each lens
    4. A circular polarizer filter
    5. A Hoodman Hood Loupe
    6. Perhaps some flash modifiers, like Honl bounce cards.

    And from that point on, “it depends”. On what you like – and by then you will have a good idea.

    The list goes on, but the good news: in the past, we used to spend $20 every time we used our camera. Today, that is gone: no more film or developing, So take that same money and use it for stuff that lasts, instead. In the end, you still spend less, and you end up with great equipment.

    And keep in mind that lenses last forever: a good lens (with a low “F”-number”, i.e. a “fast lens”) will keep its value for decades. The same applies to flashes.

    And above all – take some training. Even with one camera and lens, once you know how it works, you can do miracles!

    Soon: review of the Honl Softbox

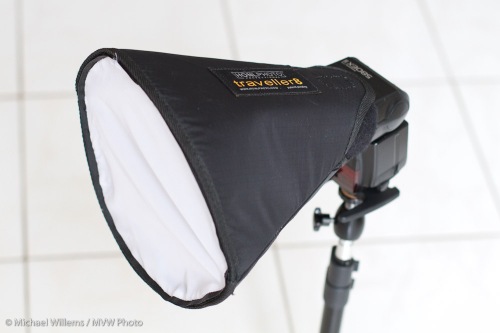
    I have been using the Honl Photo Traveler 8 softbox, and will post a review soon: in the next week, if I can.

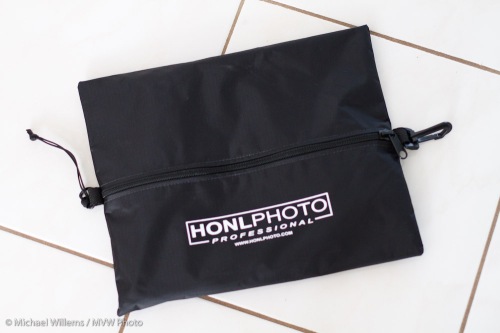
    Here’s the softbox, packed in its optional traveling case:

    Honl Photo Traveler 8 softbox

    Honl Photo Traveler 8 softbox

    And here, unpacked, assembled, and attached to a speedlite:

    Honl Photo Traveler 8 softbox

    As always, the convenience and sturdiness is what sets these Honl products apart. We can all do things in a thousand ways, but:

    • When your customer (or worse, your customer’s personal assistant or PR person) is tapping their fingers and getting visibly impatient and you know you have an hour to go to even set up your shoot, every second counts.
    • When you have to personally carry everything you use, every gram counts.
    • When it has to fit into bags, every fraction of an inch counts.
    • When you shoot for a living and hence throw things about, every bit of sturdiness counts.
    • And when you are far from home, every bit of reliability counts.

    I think that is why I like these Honl products so much: it is obvious that Dave Honl lives in the same world as I do. And I suspect, the same world many of you live in. And no, Dave is not paying me for this; and yes, I plan to do more workshop together with him like the one I did in Phoenix in March: stay tuned.

    But first, a review, soon, of the softbox, and some tips for its use.