Replacing the sun

The sun, most photographers would agree, is not the friendliest light. It is like a studio with one direct light:

  • Too contrasty for the camera’s dynamic range to handle dark to light;
  • It throws shadows;
  • It makes smooth surfaces (like, um, skin)  look wrinkly.

So you get this, of Joseph Marranca on Monday at the Mono, Ont venue of the advanced creative light workshops:

Back yard in sunshine, by Michael Willems

Back yard in sunshine

Nice, but it suffers from all the problems of direct sunlight.

When you would rather have this, two seconds later when the sun went behind a big sky-mounted softbox: a cloud.

Back yard in shaded light, by Michael Willems

Back yard in shaded light

Nice and soft. Saturated colours. Smooth.

Now the only problem is that if you want highlights, you don’t get them. Can’t we have both?

Yes. And that is where flash comes in.

In the portrait shot below of Oakville’s mayor, yesterday, I first took away the sun, using a diffuser. And then I added a flash. Off-camera , with a Honl grid and a Honl quarter CTO gel (with my white balance set to flash). Plus a bit of fill flash on the camera.

Oakville's mayor Rob Burton, photo by Michael Willems

Oakville's mayor Rob Burton, June 2010

I think that being in control is better than just relying on too-harsh direct light. Do you agree?

Flash balancing, step by step

Many of you have asked me to give a simple step-by-step instruction of how to balance light using flash. OK, so here we go.

Step one: the normal shot.

Say you are shooting outdoors. And the background is bright. So you get this shot:

Flash demo photo by Michael Willems

1. Background too bright

OK for the foreground – but the background is too bright.

Step two: expose the background right

So you need to darken it. If, say, you are in Aperture mode, just use exposure compensation of, say, -1 to -2 stops. Now you get this:

Flash demo photo by Michael Willems

2. background ok, foreground too bright

Great, the lake is visible.

But now the foreground is too dark. So you need to brighten it.

Step three: expose the foreground with flash.

OK: turn on your flash. That gives you this:

Flash demo photo by Michael Willems

3. Better, now with flash

Much better. If the foreground is too bright, use flash exposure compensation (not exposure compensation!) to darken the flash. Or if it is too dark, you are probably too far away – get closer or use higher ISO, if able.

If your shutter speed exceeds your flash sync speed (around 1/200th second), reduce it or use Auto FP Flash/High Speed Flash (in that case, get really close).

Now you can make shots like this:

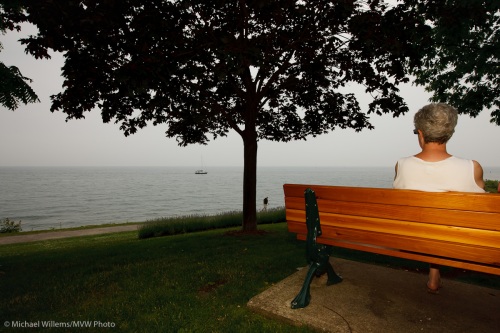
A Park Bench in Oakville (Photo by Michael Willems)

A Park Bench in Oakville shot with flash

(Can you also see the half CTO warming gel I used?)

And you can get more dramatic: here, I underexposed the background by two or more stops:

A Stop Sign in Oakville (Photo by Michael Willems)

A Stop Sign in Oakville (Photo by Michael Willems)

Have fun!

Workshops

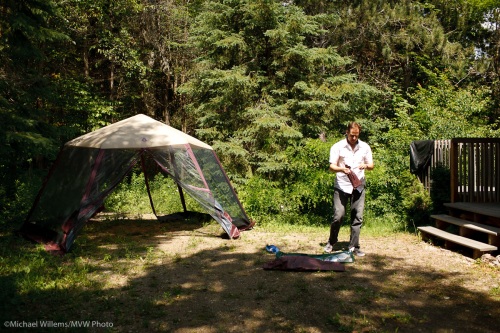
I have done two workshops in the last two days, and am preparing for the Vegas one with David Honl in a couple of weeks time (read on, below). Workshops are fun for all concerned and add tremendously to your ability to create great shots. Read all the books you like, but doing in an interactive learning environment is how to really learn.

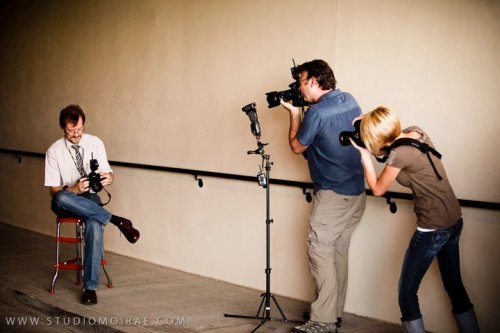
Saturday was “Creative Lighting”, with Joseph Marranca. We taught a group of students some advanced flash techniques using small flashes:

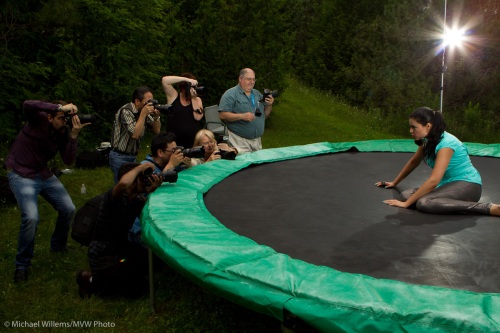
Students at the workshop in Mono, Ont (Photo by Michael Willems)

Students at the workshop in Mono, Ont

This is a great course and we will be doing it again soon. Everyone goes home with knowledge and experience – and with portfolio shots.

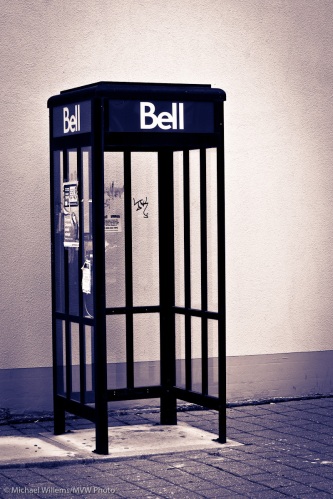
Then on Sunday, I led a group of students through Oakville for the School of Imaging, for “Creative Urban Photography”.

Phone box in Oakville, Ont (Photo by Michael Willems)

Phone box in Oakville, Ont

Now I take a moment to regroup and to prepare for many more.

One exciting pair of workshops coming up in Las Vegas, NV on July 12 and 13.

I am teaching “Advanced Flash” – for amateurs and pros who really want to learn how small flashes work. When to use TTL, and when manual? What are the four technical items you need to know? What are the catches to TTL? How to overcome them? When to use what modifier? Why and when to use gels?

To make it even better, it’s not just theory and technical stuff. I am once again joined in these workshops by David Honl. Yes, the David Honl of the excellent line of modifiers, and the David Honl who shot Saddam Hussein’s trial (with a camera). Yes, that one. Dave will take students through making some great creative shots using small flashes and modifiers, and all participants get to go home with these portfolio shots.

Read up on this workshop here – there’s space, but do book soon to be sure.

Photography is better and easier than ever, once you learn the small flash technique that enable you to do really creative lighting with real ease. Come to Vegas and find out how.

Dave Honl shooting Michael Willems (with a camera)

Dave Honl shooting Michael Willems in Phoenix, March 2010

Battery tips

Sunday’s country workshop in Mono, ON prompts me to talk for a moment about batteries.

Background: We used small speedlights Sunday, with simple and effective Honl modifiers and gels. The studio lights and large softboxes stayed packed away.

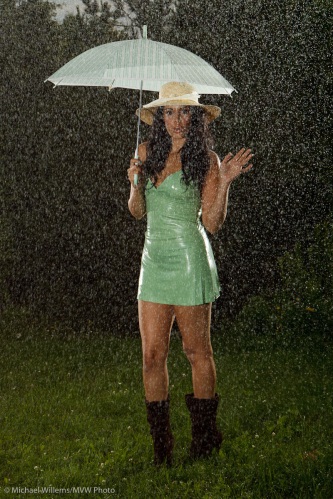
Tara Elizabeth in the rain, by Michael Willems

Tara Elizabeth in the rain

In a shot like this, you make the background darker by “nuking the sun”: overpowering the sunlight with flash.

Overpowering the sun takes, um, power.

In general, therefore, you will set your Pocketwizard-powered speedlites to full power. On many shots we have five speedlites firing at full power. Full power gives you not that many flashes – in the order of maybe 100 flashes if you are lucky.

To use flash effectively, then, here are a few practical tips:

  • Turn off the “Auto power down” on your flashes (this is in your flash custom functions).
  • Move the flashes as close as you can to your subject (remember the inverse square law).
  • Allow 3 or more seconds for the flashes to recharge before you shoot again.
  • Occasionally, fire a test flash to verify that  all flashes are still working.
  • Use NiMH rechargeable batteries.
  • Ensure these are “low self discharge” types like Sanyo Eneloop, etc.
  • Carry a lot of spares. Several sets per flash.
  • Before each new shot setup, replace them. So you never run out.
  • Use a “conditioning charger” that can discharge your batteries fully before charging. I have three of the Lacrosse chargers (check Amazon or the web).

And yes, go wild, and use speedlites for creative purposes!

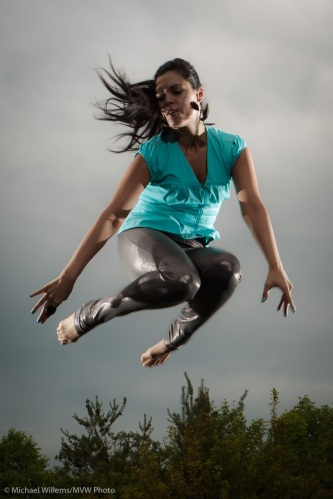
Model Tara Elizabeth, photographed by Michael Willems

Model Tara Elizabeth

Tara Elizabeth, photographed by Michael Willems

Tara Elizabeth

Tara Elizabeth, photographed by Michael Willems

Model Tara Elizabeth striking a pose

Tara Elizabeth, photographed by Michael Willems

Tara Elizabeth and umbrella

Effects

Lightroom 3 has cool develop effects built in. I hardly ever use them, because I generally like to think of photography as something that is mainly done in the camera. But I must say, sometimes it is fun to go wild.

Take the “aged photo” effect. Desaturated, basically. Which seems very appropriate for this picture, taken today in Oakville during a Henrys “Creative Urban Photography” outdoor workshop I taught:

A 1958 Dodge, shot in Oakville by Michael Willems

1958 Dodge, shot in Oakville

Or this wall texture:

Wall texture, shot in Oakville by Michael Willems

Wall texture, shot in Oakville

So I suppose my message is: don’t feel bad when you want to do some post-production.

Tara

Model Tara, that is, today, on a workshop in Mono:

Model Tara Elizabeth shot by Michael Willems

Model Tara Elizabeth

How did I get the background to look blue?

By using a gel. A Honl photo gold/silver reflector plus a half CTO gel, combined with my white balance set to tungsten. That makes her face neutral but the background blue.

And notice the hair light is purple? That’s to match the dress.

Here’s course participants having fun:

Model Tara Elizabeth in Mono, Ont

Model Tara Elizabeth in Mono, Ont

A quick reminder for you:

Namely… expose the background first, then the foreground.

Not like this:

(background too bright)… but like this!

Look at the background. That is what I exposed for using Aperture and Shutter and ISO,. Then I worried about the foreground (flash/TTL).

If you do not know this technique, now is the time to learn.

Now what?

I shot a corporate event the other day, and it taxed me. I shall explain how, and how you can get good (meaning sharp, well lit and well exposed ) shots in bad light.

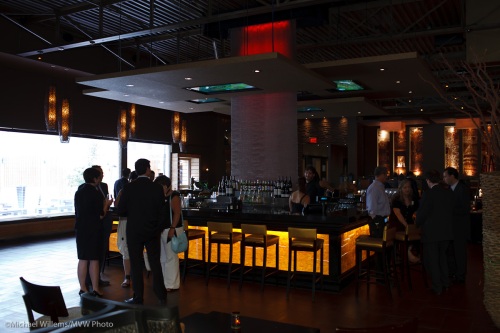
When I walked in to the venue, I saw the problems:

  1. Extremely bright on one side (direct sun); very dark on the other side (too dark to see the camera)
  2. Virtually no bounce (high black ceilings and walls)

Like this:

Venue with difficult light, by Michael Willems

Venue with difficult light

Except with 300 lawyers and corporate clients.

So I set to work. And here’s what I did.

Mitigate the problem:

  • Shoot by the window using natural light and high-ish to very high ISO if anyone looks at the window
  • Shoot outdoors, when people move outdoors.
  • Find one or two spots where the light does kinda work and concentrate on those.
  • Move people to a wall where you can bounce a bit.

Handle the problem:

  • Use super high ISO if you must.
  • Use fast lenses.
  • Shoot RAW.
  • Use TTL – and know it.
  • Watch your meters carefully.
  • Avoid moving too much – even when you move half an inch it can put people in totally different light. See the previous point!
  • Be ready quickly. I carried three cameras with three lenses. Ouch. a 1Ds MkIII with a 35mm f/1.4, a 1D MkIV with a 16-35mm f/2.8 lens, and a 7D with a 70-200 f/2.8 lens.
  • I used bounce cards (Honl Photo reflectors, and outdoors,a 1/2 CTO Honl Photo gel) and a Fong thing (I even used a Fong Lightsphere with a Honl bounce card Velcro’d behind it – worked am charm).
  • Work out your best settings for each area and if the area is consistent as an area, set those in manual mode.
  • Shoot a lot.
  • Also shoot things that do not move, like food and furniture.
  • Do more then usual post-production. Yes, some prints will be under-or over-exposed all or part, but if you know your craft and get “close enough” in camera, then you will be able to finish them on the computer.

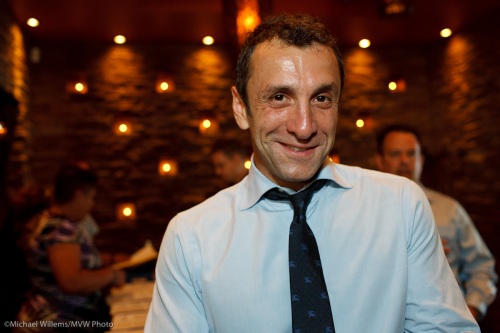
This way I got prints like:

Indoors, in a good(-ish) area:

Good area in a bad-light location, shot by Michael Willems

Good area in a bad-light location, f/2.0, 800 ISO, 1/50th sec

Outdoors, with a half CTO gel:

A couple shot at an event, by Michael Willems using a half CTO gel

A couple shot at an event, by Michael Willems

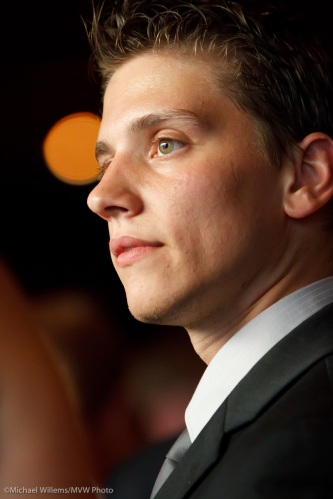
Indoors, long and with a 7D at 3200 ISO using available light:

Naural light shot using 7D at 3200 ISO, and a long lens, by Michael Willems

Naural light shot using 7D at 3200 ISO

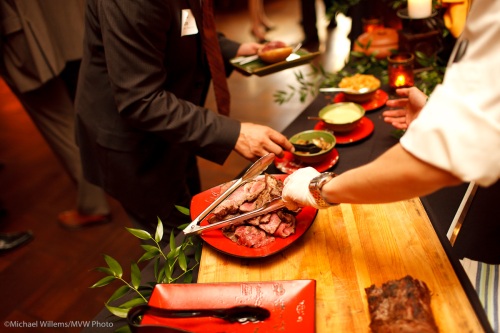
Food:

Food at an event, shot by Michael Willems

Food at an event

At this event I used all the tricks I know, and it was hard work. But I got good pictures, of course.

If you want to learn some of the lighting tricks of the trade, and hone your skills in the flash area, join Joseph Marranca and me in Mono, Ontario tomorrow, Saturday 26 June. There are only two places left!

Piecing it together

Remember my recent post about how you need to tell a story with your pictures, but in a way that makes the viewer piece together that story?

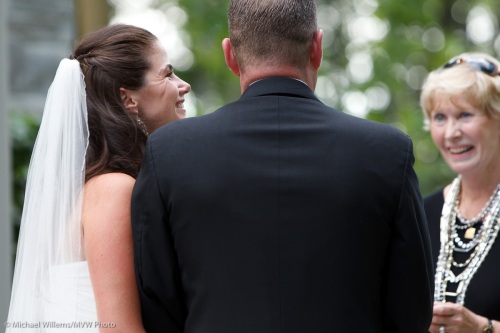
One way to do that is by adding a second person in your portrait background, but having that second person blurred out. You sawa variant of this in the wedding cake picture, with dad in the background.

But this technique works especially well when there are two or more people, and especially when there is a relationship between these persons. Like in this nice wide-angle image of the bride and groom:

Groom with bride, by photographer Michael Willems

Groom with bride, by photographer Michael Willems

The centre of attention is the groom (unusually, because of course most of the rest of the wedding photos emphasize the bride, not the groom).  And then, a few milliseconds later, you clearly see the bride, and that she is smiling, and she is looking at her new husband.

More technical detail:

  • The wide angle makes the perspective show.
  • A good lens, which allows a wide aperture, and proximity to the subject, blurs the background.
  • Flash was bounced off the wall behind me, on my left (so the subject is hit with photons from the front).
  • The camera is in manual (“M”) mode; Exposure is set to light the room well.

Sometimes, not showing things that normally you would, also works. Look at the groom: we have no idea what he is thinking.

Knowing Looks, by Miochael Willems

Knowing Looks

Well, of course we do, we can guess – and that is what this is about.

Try it yourself now, this type of portrait! Aperture open all the way on a fast lens.

Interesting viewpoints

It is interesting how little law enforcement officers actually know about the law.

I was in Toronto today to shoot a law firm event. I also took a few street shots, and these show that it appears that Toronto Police, of which right now there are about five million in the streets in gaggles of ten or so, are mistakenly under the impression that:

  1. I took pictures of them from the back but not the front (false, as the pictures below show).
  2. This is somehow not allowed (false).
  3. They should have editorial control over what I photograph (false).
  4. They are allowed to see my camera’s pictures (false).
  5. It is only OK for “legitimate” photographers to take photos of things, what with terrorism and so on (false).
  6. Taking photos for “illegitimate” purposes is illegal (um, a truism, but not a useful one).
  7. Terrorists use cameras just like mine (false).
  8. Taking a picture for a legitimate purpose is OK, but taking a picture if you are a protester is not OK (false).
  9. You need a release to take a photo of a police officer or anyone else (false).
  10. If I take a picture of a cop I need to show ID, tell them who I am, tell them why I am taking those pictures (false), tell them who I work for (four or five times), and give them a business card (false).

I took this snap of some police officers today:

Toronto officers about to interrogate a photographer

Toronto officers about to interrogate a photographer

So these officers did not see me take that picture, but they saw me take the next one:
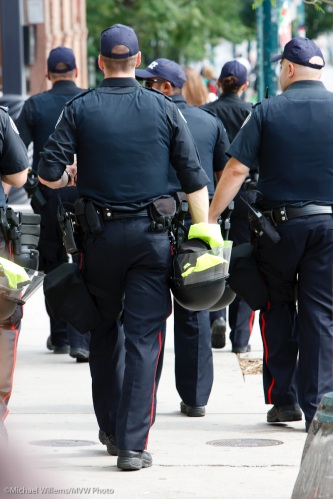
Toronto officers about to interrogate a photographer

Toronto G20 police officers

Next they interrogated me “because I only took a picture from them from the back but not the front”.

Since these officers have my business card, I assume CSIS (Canada’s secret service) also does, now. So, CSIS and Toronto police, please note: I have spent time in Libya, Saudi Arabia, Iraq, East Germany, and many other such places. They are different from Canada because:

  • Unlike in Canada, Big brother is always watching. Police everywhere.
  • Unlike in Canada, in those countries authorities can do (mean, restrict) pretty much what they want, whatever the “law” says. Impromptu interrogations are common: “it’s not allowed unless you prove why it should be”. Law, schmaw.
  • We here, on the other hand, have the rule of law. Law, not whatever a cop thinks.

Alas, Toronto today felt just like those countries. The officers were courteous, but they were wrong – very wrong.  I am a fervent capitalist, CSIS and Toronto Police, but you have just made me into a G20 protestor. Get lost, G20, if my civil liberties need to be trampled upon because of a visit by a bunch of stupid foreign bigwigs, and Mr Harper’s need to spend $1m to impress them with horses, fake lakes, and four-wheel bikes.

G20 police presence

G20 police presence

And no, officers, I am afraid that you are wrong in all the above points. I do not need a release to take a picture, you cannot see my pictures unless I have done something wrong, photography is not only allowed for “legitimate” photographers, and I am allowed to photograph security fences and cops. Whose salary, incidentally, my taxes pay.

Of course I cooperated, not wishing to be arrested just before an event I was shooting.  And alas, I shall not have time to go back downtown while the G20 is on. I wish I could, because our civil liberties, including the right to take photographs without permission, really should be defended, and restrictions should be questioned. Apparently, it’s needed.