When you shoot people, you often need to clean up their skin just a little.
Permanent features can be lightened a little, while temporary blemishes can be removed. Don’t get me wrong, I am not advocating changing people into something they are not, but a little work is often the secret to a good photo.
So here’s a Lightroom trick that helps you see where problems are likely to occur. This is not always easy to see, but with my trick it’s a doddle.
Take a RAW image into Lightroom. Ensure that exposure etc are good. You should see something like this:
Looks good (and being a photo of me, that is rather an achievement).
Oh yeah?
Then take this into Lightroom’s Develop module, and:
- Go to the HSL (Hue, Saturation, Luminance) section.
- Ensure you have selected the Luminance controls.
- Now decrease the orange luminance all the way (-100).
- Red and/or Yellow can go to -100 also, but sometimes work better at 0 or even at +100 – try it to see. (And in people with different skin colour, different directions and amounts may be needed for all three orange, red and yellow – but it’s still those three).
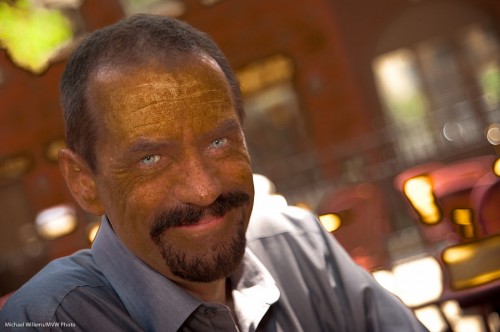
You now get this rather disconcerting view:
Light is fine; dark is fine: but the areas with rapid transitions between light and dark are the possible problems. These “mottled” areas show you two things:
- Where you may need to concentrate your Lightroom or Photoshop efforts;
- Where this person may develop skin issues in later life.
On that last point: as a photographer, I see the damage the sun causes. My skin is relatively clear (I grew up in the Netherlands and the UK), but still, as you can clearly see there’s likely to be areas I can be slightly improved.
Anyway – this technique should speed up such “improvement” work as you may want to do.


