Lightroom Tip: Perspective

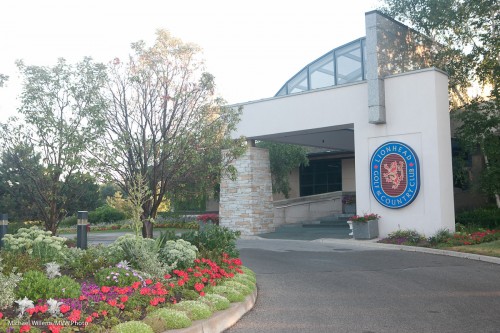
When you aim your camera up, you get converging verticals – like this:

You can use an expensive tilt-shift lens to fix that.

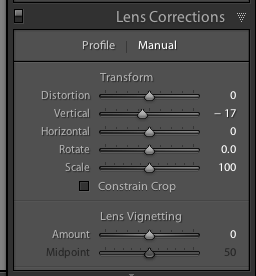
But there is an easier way: in the Lightroom “Develop” module, find “Lens Corrections”, go to the “Manual” tab, and you see this:

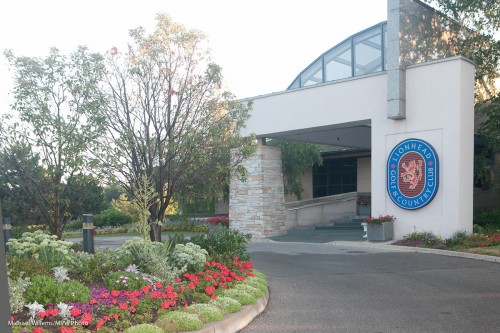
Pull “Vertical” to the left a little (as I did above), and you get this:

The verticals have been disciplined!

All you now need to do is crop off the edges (see bottom left).

Simple – takes only a second. Lightroom rocks!


Shoot vertical!

Remember – a very very quick tip today – that when you shoot one or two people, it’s often best to shoot vertical. Turn your camera a quarter turn – shutter above, not below – and fill the frame, and get close.

Regular programming will commence soon!

Why aim back?

You remember the Willems 400-40-4 rule (the “444 rule”)? If not, check under “ARTICLES” above. Part of that rule: indoors, aim the flash 45 degrees behind you.

Behind? Why?

Of course the main reason is that this way, the light will come from 45 degrees above, well ahead of the subject, rather than from “right above their head” – i.e. the angle of light onto your close-by subjects is good.

But the other reason is also worth mentioning – I am unsure I have pointed that out explicitly. Namely…. If you aim your flash forward, some light will go forward directly to your subject. And what does that do? Cast a shadow: the bane of flash photos. That’s something to watch for very carefully, especially when there is a wall, say, behind your subject.


Another student question

Shannon asks:

I really enjoy reading your blog, and I have a question/possible blog topic… I’m wondering how to deal with all the large raw files that I am uploading into lightroom. The other day, I had an alert come up that said that I had no more room on my computer for the files.. lol. So, I purchased a fairly large external hard drive, and thought I would move a bunch of the pictures onto it so that I would have more room. But I found it difficult to figure out how to move all the files out of lightroom and onto the external hard drive, and Im also not sure how I could access them in lightroom again unless I re-import them… do you have any ideas as to how to deal with this/managing all the files? I’d rather not delete the files if possible.

Great question.

And good news. Lightroom makes it easy. You can have your files live anywhere you like, anywhere at all – and you can move the files. Anywhere, any times.

Now for moving files.

  • When you move files using Lightroom, that is the end of the job. Lightroom knows where they now live since it moved them.
  • When you move files outside Lightroom, using your PC or Mac, then you are not moving anything “out of Lightroom”. You are just moving them, and now need to tell Lightroom where they now live. Lightroom will now show them with a question mark. Meaning, it does not know where they are. Simply right-click and “find missing files”.

As for where files live: I recommend files on an external drive; and the catalog file on that drive als (and everything backed up!). You may find this a useful post also in that regard.

Does that help? If not, a short coaching session will help sort it all out. Stick with Lightroom, sort it out – it is worth it!


Recompose during events?

A students asks:

What are your thoughts with focus and recompose when shooting events or portraits? Since it is very difficult to always move the single focus point, especially with event photography, I feel that sometimes focus and recompose is better. However, I have also read through other websites that doing the ‘focus and recompose’ technique could affect quality of the picture.

Good question.

Moving the focus point is always more accurate (because of geometry and because you might move), when you have the time – but it does take that small amount of time. So yes, I do that when I can – when I am shooting at, say, f/5.6 or brighter, and when I have a second.

When I do not, I just usse the central focus point – which on most cameras is the most sensitive! – and live with any small inaccuracies.

So if I simplify it is:

Recompose when it is dark or you are in a hurry; and move the focus point when you have time or when you need great accuracy.


On/off?

Quick note about turning your camera on and off.

Don’t, not all the itme. Just let it time out and go to sleep.. It uses almost no power that way. And you don’t wear out the switch. Touch the shutter briefly to eke up th camera when you need it.

But note: the camera will briefly turn on when you hit the shutter and some other switches.

And – and this took me time to figure out – when you move many lenses. The lens, when jarred, can talk to the camera, which will wake up!

Finally: it’s good practice to turn off and on when switching lenses. If only because the dust shaker will operate just when dust is likely to get in.

Why I shoot stills

I am sometimes asked “why don’t you shoot more video? Why stills? Video is much richer, no?”

In my opinion: not necessarily so.

First, there are the practical issues:

  • Video is harder to shoot.
  • You need more equipment (stabilizing rigs, audio systems, focus systems).
  • It is much larger, mening slow to transfer and needing much larger hard disk space.
  • You need much (much) more time to edit.

But there is another reason. Still photos give you time to look.

A video is like a collection if stills where you only get 1/30th second to study each one. A still photo, on the other hand, is something you can ingest, savour, distill, and study.

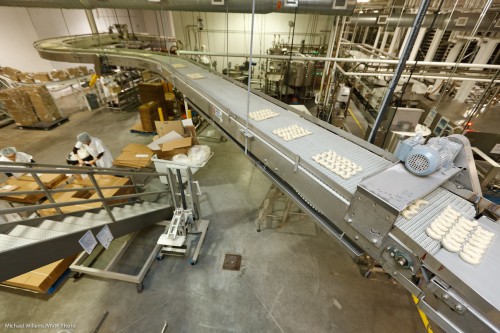
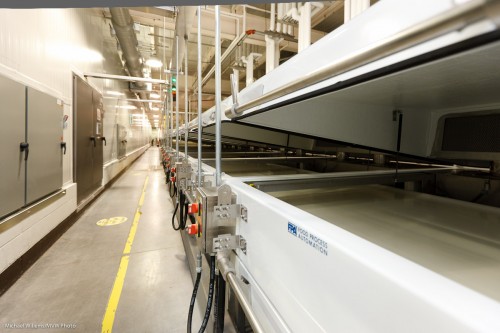
The need to do this is easily seen in complex photos, like this recent wide angle factory shot:
Food manufacturing facility (Photo: Michael Willems)

But the same is true for every photo. Even a simple portrait (of Courtney, my recent assistant, during a recent Sheridan College course I taught) can make you look, and look again; work out the story; get to the person in a way video cannot easily do.

Courtney Craig (Photo: Michael Willems)

Video chews it all for you; stills make you do some of the work.

My analogy: looking at stills is more like reading a book instead of watching the movie. And I like reading books.


Merry Christmas

To those of you who celebrate it: Merry Christmas. To those of you who celebrate Hanukkah: Happy Hanukkah. To those of you who celebrate yet other holidays: enjoy them.

And to those of you who just like to have a good time: Enjoy, but enjoy responsibly.

Christmas tree decorations (Photo: Michael Willems)

And try to take some pictures like this, where the many lights you see in this season are thrown out of focus. As said here before: when your aperture is wide open, they become circles (except near the edge where the can be part circles; when the aperture is stopped down, however, you will see the shape of the aperture (a hexagon, usually).

Enjoy, and see you back here tomorrow.


Open wide!

I mean – wide angle lenses are more useful than most people realize. As frequent readers here know, I do tend to say this over and over. And let me reiterate it here, again.

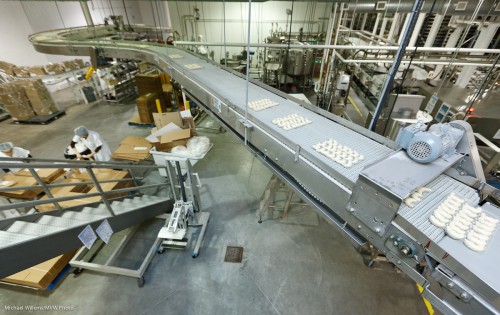
Last week I shot an industrial food facility. And again, the shots I like most are the wide angle shots – like 16mm on a full-frame camera (that is 10mm on your crop DSLR).

And that gets us shots like this:

Industrial Food Facility (Photo: Michael Willems)

Industrial Food Facility (Photo: Michael Willems)

Industrial Food Facility (Photo: Michael Willems)

A wide angle lens, especially when you get close, introduces – you know it – depth, three-dimensionality, perspective, size, and hence drama; and above all, it gives a 2-D still photo credibility.

So if you do not have one yet, ask Santa now (*and you can also ask him for a gift certificate for personal training while you are at it – ask me how).

A “wide” lens is a 10-20mm lens, that order, when you are using a crop DSLR, or a 16-35 or 17-40 when using a fill-frame camera.


Photograph your life this month!

Life is short, and precious; and photography is the one way we can commit today’s image, today’s person, to eternity. No-one can ever take today’s “you” away once you have a photo!

So I urge you to take pictures – all the time. Learn to do it well (hint: I and many others can help).

And to have professional pictures taken, while you learn to do it yourself. Like this, from a recent family shoot:

How many of you have pictures like that of yourself?

This holiday season may be a good opportunity! If Santa gives you a new camera, ten hers is my assignment:

  • Spend the week before New Year’s Eve practicing;
  • Read this blog and search it;
  • And then on New Year’s Eve, photograph your entire family.

That way you will have those memories forever.