DOF and small sensors

You know how small-sensor compact cameras do not allow narrow depth of field (DOF)? That is why you have a DSLR! On a small camera, everything is in focus and you cannot blur backgrounds.

Yes… but!

The “but” is that small cameras also allow very close images to be taken. And as you know, proximity means shallow DOF.

So that is how I can take a picture like this one yesterday with my new iPad (and as sensors go, they don’t come much smaller):

Look at the top left corner: is that blurry, or what?

So when we say that a small sensor does not allow shallow DOF, we mean “from the same vantage point”. That much is true. But if you can get close, you can still get very shallow DOF.


What’s in YOUR bag?

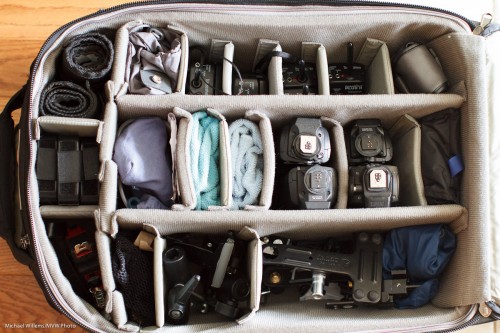
My flash/lighting bag as it is today:

It contains, from top left:

  • Two rolls of Honl Photo gels
  • Flashzebra Cables to connect Pocketwizards to speedlights
  • Six pocketwizards
  • Light meter (and spare battery)
  • Three Honl Photo grids (2×1/4″ and 1×1/8″)
  • Cables and a Fong thing
  • Speedlite feet and a microfibre cloth
  • Trays for Pocketwizards, and a microfibre cloth
  • Four speedlights
  • Rain pouch
  • Knife, tape, tape measure
  • Three Ball heads
  • Flash/umbrella attachments for light stands
  • Grips, cables, “thingies”.

In addition to this I carry another speedlight, more Honl modifiers including the large and small Traveller softbox, a tripod, a bag of light stands and umbrellas, and up to four large lights (Bowens) with a softbox.

Pretty large kit but then, I need to light some pretty unexpected situations, and with this kit I know I can.


The Histogram

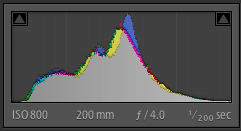
You may have been told that a “good” histogram looks like this – all the way from black blacks (left) to white whites (right):

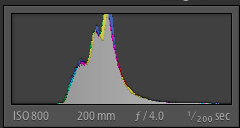
So this one is bad: no blacks, no whites:

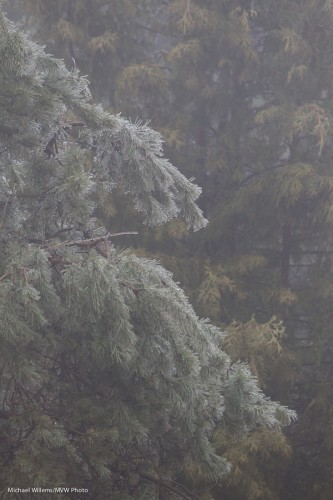
As they say: it ain’t necessarily so. Not at all, in fact. The second histogram belongs to this foggy image:

While if we changed the histogram to what you thought was a “good” one, we get this:

Which is all very well if you intended that – and you might well, but it is not how that morning looked. It looked like the first image.

So here’s the skinny:

The histogram should go all the way to the left (pure black) if there are (or if you want there to be) blacks in the scene, and it should go all the way to the right (pure white) if there is (or if you want there to be) pure white in the scene.


Lightroom 4 PV2010/PV2012

When you import images in (or handle images in) Lightroom4, you can choose the “Process version”: 2010 or 2012 (or even older). The new default is 2012, which gives you all sorts of new tools and a new interface.

In the Develop module, the first choice under “Camera Calibration” looks like this (2012 being the default):

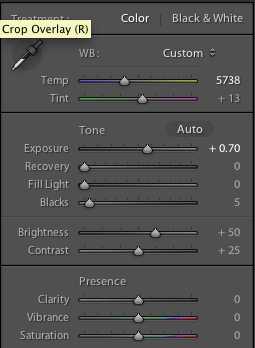
The old edit basic pane with LR 3 was like this:
The new one is very different and looks like this:
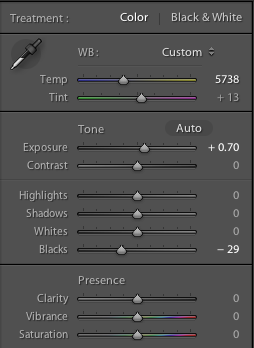
The problem is that the new process version (“PV”) has “auto highlight recovery”.

So when I shoot an image with a blown out background, as I do in many shots like this, I used to see:
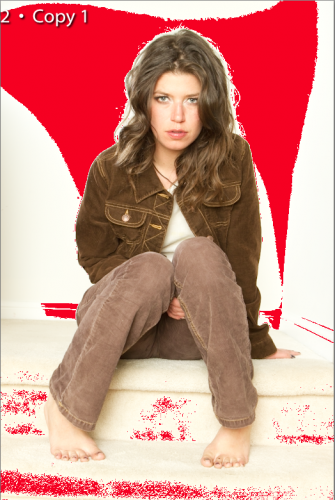
The red areas are Lightroom’s way of indicating a blown-out area where all detail has been lost.

Just as I like it.

But in PV2012, Lightroom assumes that blown-out highlights are a mistake, and automatically, without giving me the option to disable this, brings them back! Which is quite easy from a RAW image, so now I see detail where I do not want any:
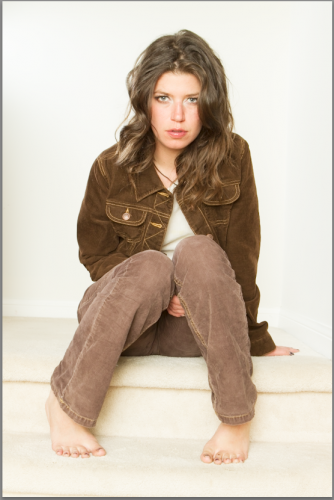
So now the only way is to set “Whites” up (by perhaps +50 to +80 on the slider), or do a curve adjustment. The Whites adjustment gives me this:
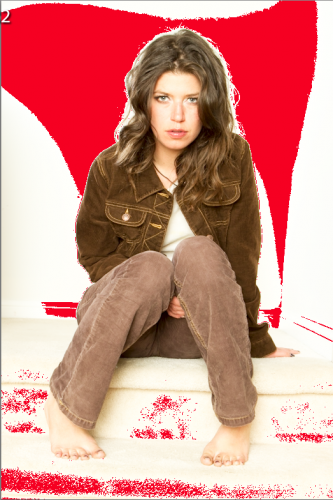
The drawback is that now I need to do this manually, and that it does affect the rest of the image.

So here’s my tip: one way around this is to go back to PV2010, which you can do with individual images or with entire shoots. That way you get the old controls – and the old behaviour – back for the images you choose to handle this way.

When converting, you may want to convert to the new PV only on an image by image, or at least a shoot by shoot, behaviour.

Another way to “disable” the automatic conversion that has been suggested to me (but that I have not tried – it may take a little work to get to the same appearance as in PV2010):

  1. Create a curve that is linear 1:1 from lower-left to somewhere close to upper right, and then curves straight up to the top.  You may need a few points to get this to stay straight below the curve.
  2. Save the curve.
  3. Import a fresh image or reset one that’s already in, and apply that tone curve.
  4. Now create a preset that just has that tone curve.
  5. Now, anytime you want to “disable” the automatic highlight recovery, just apply that preset.  You can do it to any number of images at once, even applying it on import.

And you should probably convert at some stage – Lightroom 4, although it has a few minor issues and is slower than LR3, is very good and has some compelling new features.

 

Composition technique

When I shoot, I like to frame properly in the camera. This can be hard, “seeing what is where in the frame”, and in images like this, missing out a piece like the lights top left, or just not positioning the models properly in the camera, would be bad.

In general, carefully composing can be the difference between a snapshot and a pro shot.

So what do I do?

I “defocus” my eyes, and look away, into the top right corner of the image (that helps me defocus). Then I see the shapes as pure shapes, and I see all edges at once. This allows me to then compose properly and avoid cutting off bits. Then I shoot.

That’s the way it’s done. Try it and see.


Light.. action!

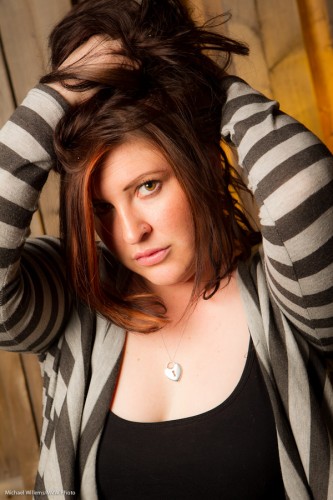
I shot a few shots of Kelly, the hair stylist for a shoot the other night.

Here she is:

Nice. So how did I light that?

Here’s how.

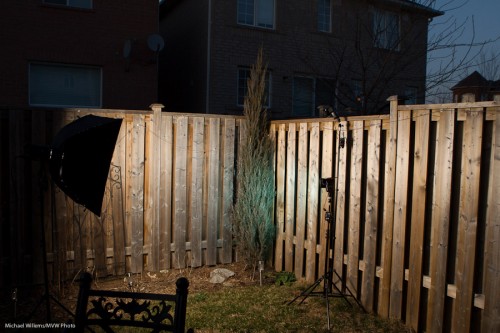
I used my 1D Mk4 camera in manual mode, equipped with a Pocketwizard to drive the following flashes:

  • A 400 Ws Bowens light with a Bowens softbox. Powered by a battery (the Travel Kit); driven by a Pocketwizard.
  • A 430EX flash with a Honl Photo 1/4″ grid and a Honl Photo gel (green in the pullback shot above; egg yolk yellow in the real shot) to light up the background. This was also fired by a Pocketwizard, connected via a Flashzebra cable.

The other flash was a spare and I did not use it. I set y exposure for a dark background, then metered the flashes with a light meter. I used the speedlight to light up the background to provide hair separation, since I could not get it in the back aiming forward to light the hair, which I would otherwise have done.

A fairly simple setup for a nice shot, no?


Batteries

A few tips about batteries:

  • Always carry a spare for your camera (and everything else).
  • LiIon batteries do not mind being charged without first being discharged, so charge them every time they go down – every day if you like.
  • Once a month, exchange the spare with the camera battery, and top up if needed.
  • For flashes, use NiMH batteries. These recharge more quickly between flashes. Plus, they save you money.
  • And these do like to be occasionally discharged before charging again. You can get a “conditioning charger” for this (Lacrosse or Maha).
  • These also discharge quickly by themselves, so top up before a shoot!

Do all this, and you are ready to live without battery hassles.


Small changes, big effect

Small changes in your images can have big effect. That is why you should compose carefully.

Preferably when shooting, but often enough you can also do this in post-production.  You can:

  • Crop to remove elements that should not be in the image.
  • Crop to achieve symmetry.
  • Crop to achieve the rule of thirds.
  • Tilt for all the above as well.
  • Or change your camera orientation.
  • Or zoom in/out. All for the same reasons: to get a good composition.

Take this image, taken by a student:

Yeah I look tired: let’s blame the light (this was deliberately harsh, with direct flash).

But let’s crop to use the Rule of Thirds, and also let’s use a quick healing tool to remove the stuff on the left (done quickly for the purposes of this demo):

If I had had time I would have removed the light switch also, of course. Preferably when shooting, by hiding it behind the person.

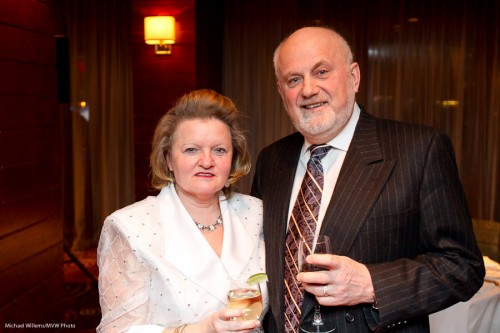
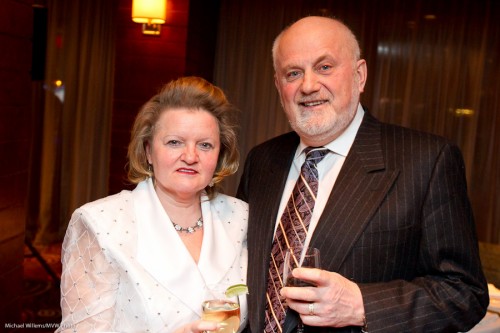
Or look at this image before/after:

Wonderful couple, but a slight tilt to the left makes it (and the couple) more even, a better composition:

And finally this Uncle Fred shot:

Which when I turn the camera becomes an Uncle Mike shot: