Rumour debunked

Staff in several photography stores have been mistakenly saying that the Canon 600EX flash cannot be used as a master with 430EX slaves.

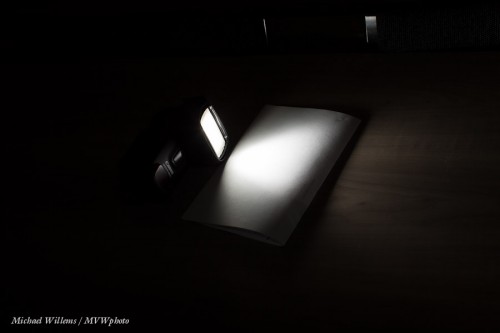
Wrong. It certainly can. Proof:

A 430EX acting as slave to the 600EX on my camera.

The 600EX has both radio-controlled remote abilities, and light-controlled abilities like the previous generation. You can choose which type to use: set it to light control and it’s just like a 580EX flash.

Rumour debunked, I hope.

Finishing a picture

I often shoot studio shots. And these often need finishing – you cannot always shoot what you want in the camera, for very practical reasons. Like space.

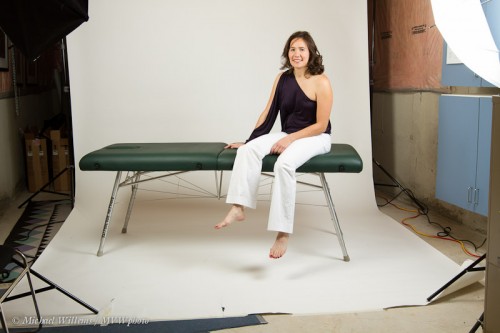
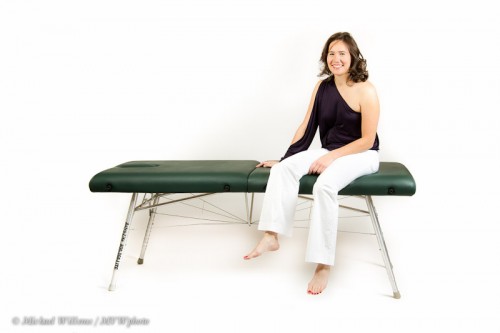
Take this for example.  My friend and client Sarah, a physiotherapist, needed some portraits, including a shot of her with her table. We shot these Friday night. My studio is small, and even with a wide background, the table only just fit:

But “just” is enoughn.

So now the post work. I chose to do this in Lightroom’s “Develop” module, as usual.

  1. First, I straighten the image.
  2. Then I change the whites to make them fuller white.
  3. Then I adjust any other exposure paramaters.

These adjustments are minimal except for the whites: Lightroom 4 dims my overexposed areas; but I want them overexposed, since this is for white background web use. I shot them overexposed too – blinking furiously – but Lightroom sees latitude in the RAW file and pulls the whites back from what I did. So I correct that (“Whites” and “Highlights” adjustment).

And now I do the rest. I first use the clone too to roughly fill in the sides:

That’s rough, but a good beginning.

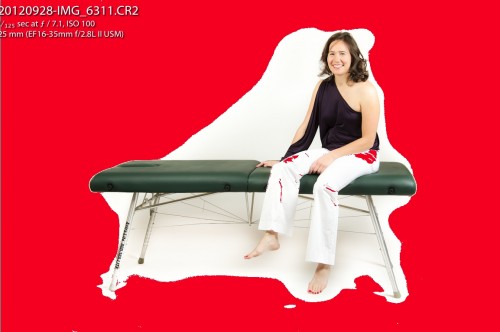
Now I turn on the overexposure warning (the right-side triangle in the histogram), and I use the local adjustment brush set to +2 exposure to fill in the whites properly. Once that is done, I see:

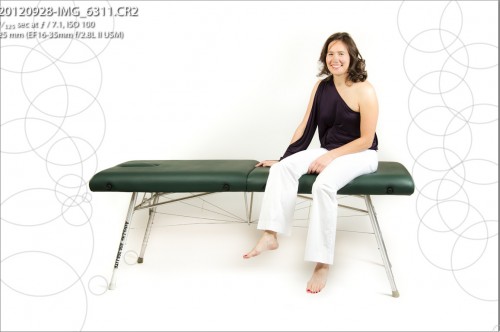
I then make last minute adjustments (such as using the brush to decrease the overexposure on the legs), and then I have my finished image, ready to go on the web:

That does not take long – that’s how it is done in Lightroom. Yes, I could have done it in Photoshop, but that would take longer. What I can do in Lightroom, I do in Lightroom – fortunately, that is almost everything.


A-sailing….

The Dutch are a seafaring nation and I spent many days sailing, as a kid.

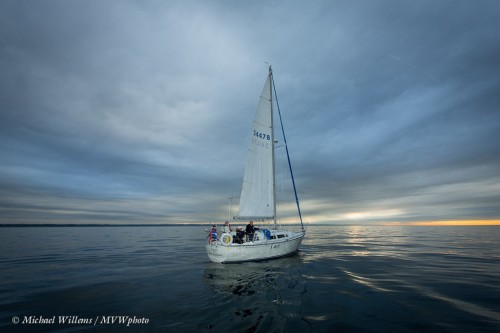
The last few weeks I have been lucky enough to go sailing with some very nice new friends. I am going to share a few of the photos I made last night.

First, for shots in the boat, and for shots showing “wide” landscapes use a wide angle lens. You get that “world wrapped around your subject” feeling, as in this shot of Lucy:

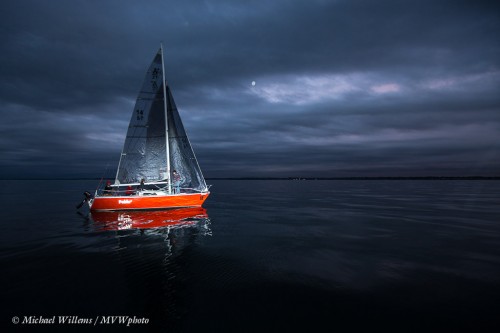
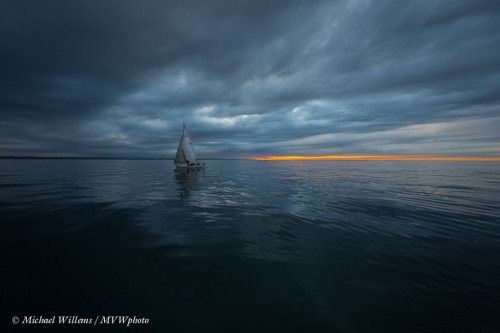
Can you see in the image above that The Speedlighter Strikes Again? if not, here is an even more clear example: I made the boat stand out like an almost ghostly apparition:

For that, I exposed the background dark, and use my flash, zoomed manually to 135mm, to light the boat.

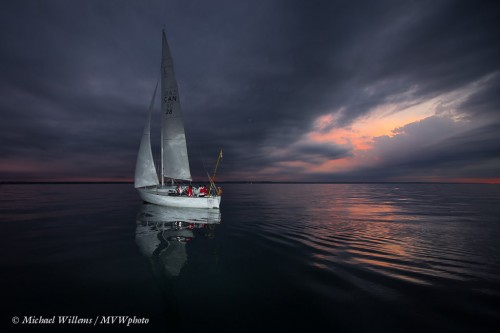
I also made sure I got enough setting sun:

As well as background objects of interest:

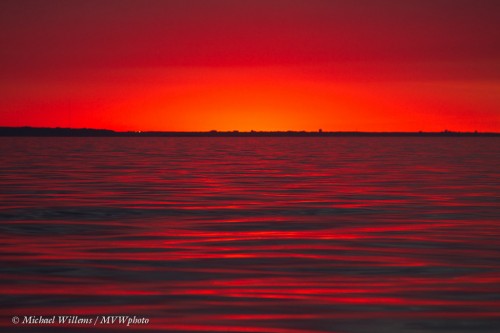
And the sunset itself. Sailing is great for photography becuase there is no foreground clutter!

The skies were cloudy. I love clouds with wide angles.

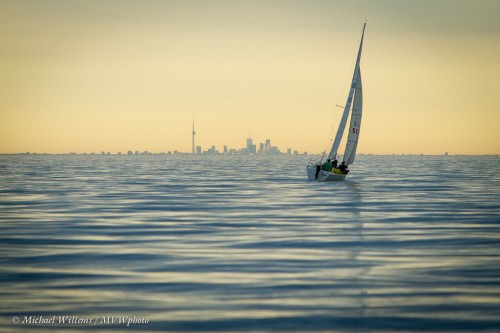
And as you saw in picture three, I also like the long view. Here’s Toronto again:

Lessons from the shott:

Hope for interesting skies. Expose the background well. I used manual mode for everything. Light up close objects with flash. Use wide angles but also bring a long telephoto lens.

I’ll share one more:

Tropics? Nope, Lake Ontario. Speedlighting rocks.


..and more hardware.

Today, a further hardware tip.

One of the lenses I had looked at by Keno-san of Canada Camera Repair (see prior post) was my 50mm f/1.2L prime lens. It was never the sharpest, and I figured a $2,000+ lens should be pretty sharp even wide open. The inspection turned into a repair, but not a very expensive one – under $175 for the repair, including a new rear lens element.

Good news: it is indeed sharper than before: I can now use this lens in available light situations. (The lesson in this: lenses should last forever and a well adjusted lens is worth having – lenses are therefore worth inspecting and repairing.)

Here’s a handheld (both) shot at f/1.2:

And detail:

The testing process also prompts me to remind you of a few important things:

  1. First of all: Do not be too critical. 50mm at f/1.2 is silly if you want more than a few millimeters of depth of field.
  2. Best use a lens test kit.
  3. Use a very small focus area to test focus. I used the “spot focus” option on the 1Dx.
  4. Focus elsewhere, then come back and focus on your subject
  5. Eliminate shake issues by using a tripod or fast shutter speed.
  6. Avoid “fully open”. Every lens is better when stopped down a little. That is why you buy an f/1.2 lens: not just to use at f/1.2, but also so it’s sharp at, say, f/2.0. (just like an f/1.8 lens would be sharp perhaps at f/2.8).
  7. Learn how consistent any issues are. A little back focus is fine, for instance, if your camera has a micro-adjust setting. But only if it is consistent.
  8. Focus in bright light. Use your center focus point; have the camera perpendicular to the surface you are focusing on.
  9. Focus is dependent on aperture, on distance from your subject, and on light intensity. If I adjust for close-by shots in my office, I need -15 on this lens; but at a distance, zero is what is needed. You need to adjust to an average that reflects what you shoot. Like (1 metre distance at f/2.8 in bright open shade”. Yes, this is complicated!

I used this setup:

That gets me to a micro-adjustment of around -15 for close-by shots (on a scale of -20 to +20): I focused on the “o”.

As said, this is complex. I would keep it simple; avoid shooting too wide open, shoot at least 1 metre away, say; and adjust lenses to an average (for you) situation.

For my 50mm lens, the conclusion is clear: “When shooting wide open, if the subject is very close by, apply a -10 to -15 micro-adjustment. But for subjects far away, or for shots at f/4 or smaller, apply no auto-adjustment. By default, therefore, leave it off.”

Yes, this stuff is indeed complicated. But so is flying an airplane: complexity is sometimes necessary for best results.


Cameras!

Today, a post about hardware.

I am selling my 1Ds Mark 3 (see this ad here), because 1 1Dx, a 7D, and a 1Ds is one camera too many – two will do.

At the same time, I am doing a general cleanup. I recommend you do the same. This includes:

  1. Checking what I do not need anymore and getting rid of it or selling it.
  2. Organizing to pack things where they should go.
  3. Checking for common faults, like screws on lens bases coming undone (see an earlier post!).
  4. Checking for missing items (filters, battery covers, etc) and replacing those.
  5. Having all my lenses checked or repaired if needed. If you are in the Toronto area: Kino-san of camerarepair Canada does a great job and is very charming – and knowledgeable.
  6. Replacing batteries on Pocketwizards (these are Alkaline: they need to last without being used).
  7. Recharging all my NiMH batteries also.
  8. Cleaning all my equipment! First the outside, with a brush. Then inside if there is mirror dust – with a blower. Lenses too! And then, if I must, the sensors – with a blower first, then with antistatic brushes or wet pads (in that order) if I really have to.
  9. Making sure I have all serial numbers recorded
  10. Making and storing a picture of each piece of equipment for insurance purposes.

And then I am done, ready for the fall and winter shoots. Looks like I am shooting a lot of events, food, interiors, portraits, and Bat Mitzvah parties this month and next.  And you can hire me too, by the way – for photography or fort private training)!

But it all starts with a well-organized equipment.

Tripod trio

Debbie asks: “Time to invest in a really good tripod. What is your favorite and why? I have a 7D and with my new lens 70- 200 my current tripod makes me nervous: time to get a heavy duty one. But I’m also looking for a light on that I can carry.”

Good question.

There are basically three types of tripod.

The first is light and cheap and basically disposable. These cost around $50, are made out of plastic, so not provide good mounts or stability but nevertheless can be a good option when traveling and expecting to perhaps lose the tripod.

The second option is the heavy, big, sturdy, tough tripod. Usually made out of steel, these cost in the range of $200, and will last forever, and they are solid, have a hook for sandbags, etc. The problem is that these tripods are heavy, and therefore more for studio than for outdoors or travel use.

Then the option you may want to look at: a good carbon fibre tripod. These are as sturdy as the steel tripods, but weigh less. A great option for frequent use, travel use, and location use. Manfrotto and other top brands make these: expect to pay up to $1,000 or more, but they will last you forever. I have recently seen Chinese carbon tripods for around $300: they may be an option but beware, they may or may not be quite as sturdy.

Whatever you get: get a good tripod. Pictures a simply better, sharper, clearer. Not just the very long exposures! When people say ” I don’t need one”… I’m not so sure!

Don’t forget to think carefully about the head. I prefer ball heads but there are many options. Try the mechanism, see how easy it is to handle, how it handles vertical shots, etc. You may also want to make sure your tripod has a hook for sandbags or other weights.

And finally, when you cannot take or use a tripod, consider a good monopod. These too can be worth their weight in gold.

Have fun… Invest, and enjoy the shake free results.

Pythagoras Today

I am often asked: “why do you tilt?” in some pictures?

For many reasons, as I have pointed out before here: to get a more dynamic picture; to move the important subject into the Rule of Thirds areas; and so on – but also, very often, for a simple and alomost “pedestrian” reason: Pythagoras.

What I mean is this: the hypotenuse of a right-angle triangle is longer than either of the other sides.

Take a photo: a rectangle with 3:2 ratio of the sides. Pythagoras teaches us that the hypotenuse is the longest line in that square: if the long side is, say, 3 units long, and the short side is 2 units long, then the length of the hypotenuse is the square root of (3 squared plus 2 squared), or the square root of 13, which is about 3.6.

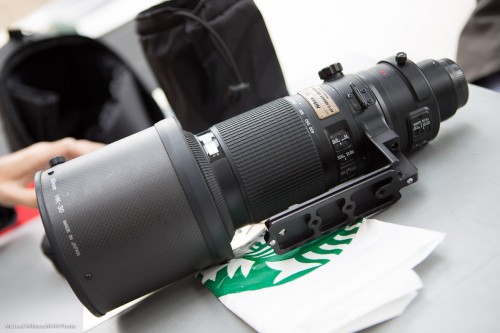
So if the 200-400m f/4 lens a friend was buying does not fit and I can neither zoom out or step back, then I turn my camera diagonally – and now it fits.

Simple, and a very valid reason to turn and tilt. And often, a more dynamic and artistic photo results – and that is added bonus,.

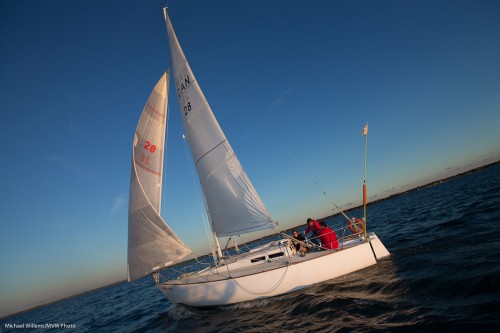
And yes, the sail boat too was a case of deliberate tilt.


Fear nothing but fear itself.

Certainly, on new pro cameras (and soon on all), do not fear ISO.

Here’s a shot at 51,200 ISO (with a little Lightroom noise cancellation applied):

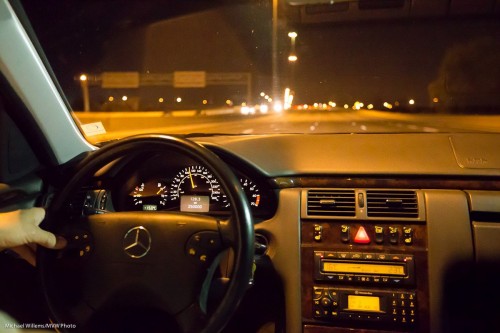
So now we can shoot handheld on the freeway as a car gets to exactly 250,000 km… no worries, just go to high ISO, find a brighht spot to focus on (or use manual focus), and away you go. (Be sure to expose well: pushing the exposure will result in more noise; pulling it will reduce noise).


Photography is drawing with….

…light!

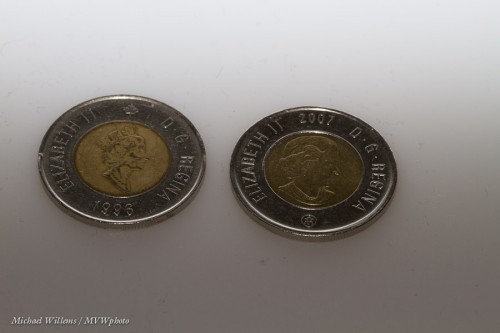
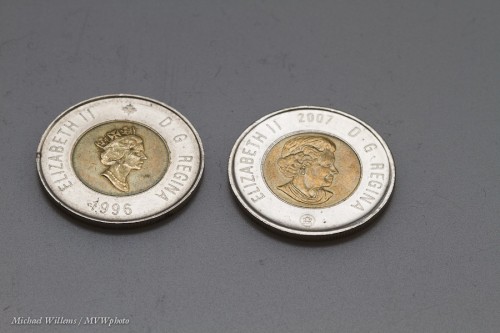
And to once again explain how important this is, let me show you a few images of two toonies ($2 coins). All I changed between them was the direction of the light.

Neutral:

Aimed behind:

Backlit:

Dull:

As you see, a small change in the nature or direction of the light makes a huge difference.

And the same is true in any photo ytou make. So always ask yourself: where is the light coming from? How is it hitting my subject? How contrasty is it? What colour is it? And so on.

I bet that just asking that question will make your photos better.


Tardy Tuesday

A late post today – but since I have no boss, late is OK.

A quick tip for beginners: always make sure your lens is set to allow autofocus! (Set the switch on the side of the lens to “AF”, or “A/M”. If you set it to “M” or “MF”, you are disabling the autofocus system. A very common beginner’s mistake… and all your images are blurry. So, every time you change lenses, ensure you are set to autofocus. And if the camera refuses to focus, check the switch. And on some Nikon cameras, also ensure that the switch on the side of the camera is set to AF-S (usually) or AF-C (action).