Black is black….

….except when it isn’t.

When doing post-production, make sure that the areas of your image that should be totally black are in fact totally black.

Take this image.

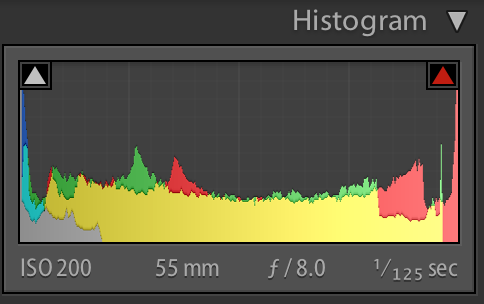
The photographer is black. But is he?As you know, a RAW image has much colour space, so are you sure? Go to the histogram in Lightroom’s Develop module, and click on (or hover over) the little arrow on the top left.

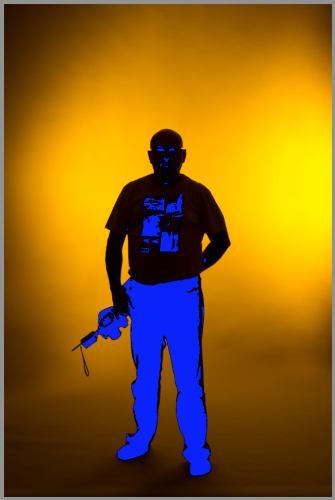
Now you see what is really dark:

Blue areas are lacking detail, i.e. pure black. And not all of the person is blue.. so uh oh, there’s still detail lurking in the image.

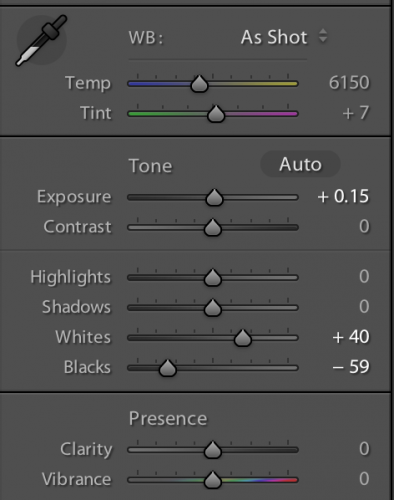
Well, then drag “Blacks” to the left in the BASIC pane:

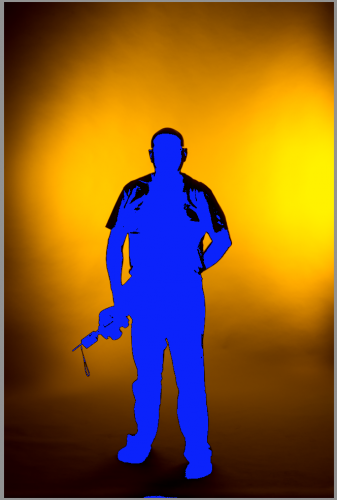
…until you see something like this:

And now finally the blacks are black, and no amount of increasing exposure will bring back detail. (OK – this is not really true: Lightroom is very conservative and preserves some detail even when blue shows. But to all intents and purposes, you’re good, and that detail will not be seen.)

___

Allow me to once again point out these few additional learning opportunities:

All workshops will be announced via email and press release shortly, but you, my readers here, still have first option!


Simplify…

More about simplifying to make pictures better. A recurrent theme here on speedlighter.

Consider this image, of Jane Dayus Hinch the other day:

It started like this:

I would argue that the above crop and the straightening (“disciplining”) of the verticals makes this a much better image.

Straightforward (forgive the pun) simplifying changes can have major effects. Every time you have an image, ask yourself:

  1. Does everything in it belong in it?
  2. Can I remove anything? Anything at all?

Do that, and you get more professional photos.


Work to be done.

As you know, I believe that as a photographer, you should, as much as possible, make your photos in the camera, not in post-production (like Photoshop or Lightroom).

But there is always some work to be done in post. This is one reason that photographers cost money – time is money.

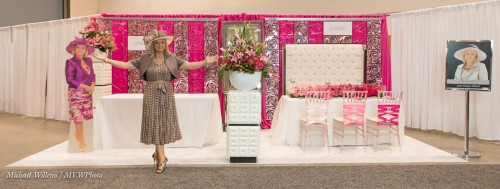
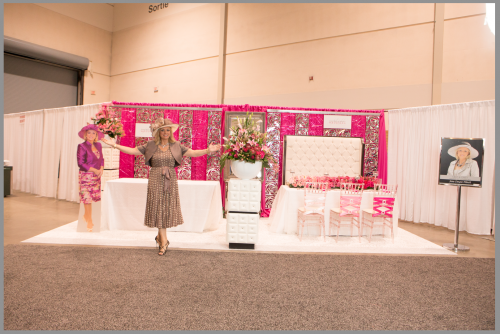
Yesterday, I shot celebrity wedding planner Jane Dayus-Hinch of “Wedding SOS”, at the National Bridal Show in Toronto:

But at an event, circumstances are never ideal and as the photographer, I try to be quick. That means there is work.

Take this shot, of Jane in front of her booth:

Fine, but this was at a busy show. So we had to clear space and shoot with what we had (a Canon 1Dx and an off-camera flash in an umbrella). That gave me this:

So what kind of “Post” work did that need?

  • Cropping, probably the most important step.
  • Rotating, to make horizons horizontal.
  • Perspective correction – parallel lines should be parallel, not converging.
  • Lens corrections to remove barrel or pincushion distortion, common with zoom lenses.
  • White balance and exposure fine tuning
  • Removal of “stuff”, like exit signs and columns in the background.

Only after these steps is it a professional photo. And those steps take time. And there’s 100 photos to be looked at this way.

So when you hire a pro, or when you are the pro, count on a lot of extra work to finish the product. Fortunately, Lightroom (and Aperture of you are so inclined) are lifesavers – they have cut 80% off my previous “post-time”.


Inverse Square

You have heard, perhaps, of the Inverse Square Law. I hope you have. Because it is rather important in photography.

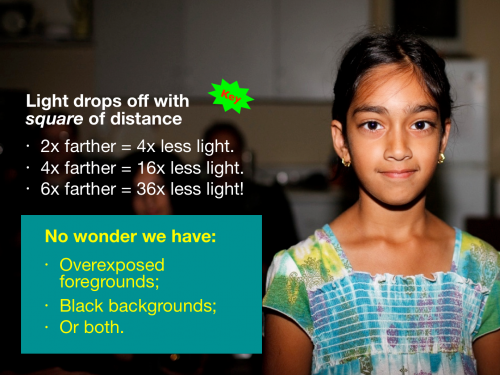
The Inverse Square Law says that the intensity of light shining on an object from a light source decreases with the square of the distance of the light source to that object.

You can see what this means for us in practice: dark backgrounds if we aim a light forward from where we are (say, a pop-up flash). If the background is ten times farther away than your subject, it gets 100 times less light. Solution: do not have the light where your camera is. Or bounce. Or use several flashes. Or use ambient light also (“dragging the shutter”).

Important note: It is important to realize that this applies to the distance between light emitter and subject. Not the distance between you and the subject!  (If you find this hard to visualize, consider this: when you back away while looking at a Caucasian, he or she becomes a smaller Caucasian to you, not an African-American).

Other than dark backgrounds, what else does the inverse square law mean to you in practice? This, for instance:

  • If you move a studio light twice as far from a subject, you lose two stops of light (2 squared = 4, and two stops equals a factor of four).
  • If you move it 41% farther, you lose just one stop, since 1.41 is the square root of 2.
  • To get one stop more light, move the light closer by 30%, to 70% of its previous distance, since 0.707 is the square root of 0.5).

So knowing a little math, geometry and physics comes in handy. I speak not as an engineer, but as a photographer. I can move a studio light into the right position to get a  stop more, or a stop less, light without metering.

And now, so can you. You are welcome.


Tip Of The Day

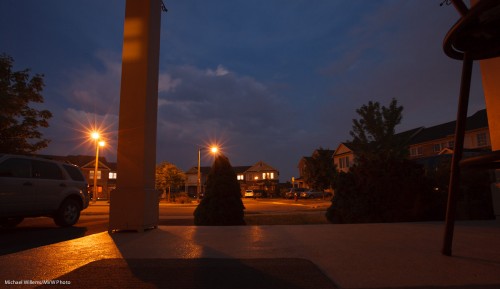
Do you like starburst patterns, like around the lights in the shot below?

They are easy to get. The secret? Use a small aperture. I shot the shot below at f/11 – that was enough. The image took 15 seconds to shoot at low ISO.

Q: Why low ISO? Surely you should shoot with high ISO at night?

A: Only if you are attempting handheld shots. For quality, use low ISO and a tripod!


Handy gadgets

Gadget Recommendation Time here at speedlighter.ca!

I often use “studio type” flash. This, by my definition, is flash…

  1. Whose power is set manually, and…
  2. Which is fired with a simple “fire now” command, rather than through TTL (“Through The Lens”) metering.

Strobes are all like that. Speedlights can optionally also be used this way.

Outdoors, I use Pocketwizard II Plus radio triggers to fire studio-type flashes. They use radio to convey that simple “fire” command: one on the camera, working as a sender, and one on each flash, working as a receiver. Click, and all flashes go off. Simple.

In indoor studio situations like the one pictured below, if I have strobes, I use Pocketwizards combined with “cell” sensors. Studio lights have light sensitive cells that detect a flash, and that fire when they see such a flash. So one studio light has a Pocketwizard; the others use their light sensitive cell.

The catch: Studio lights have that “cell” ability, but Canon speedlites do not. (Some Nikon speedlights do have it: with the usual Japanese ability to use obscure terms, they call it “SU-4” functionality).
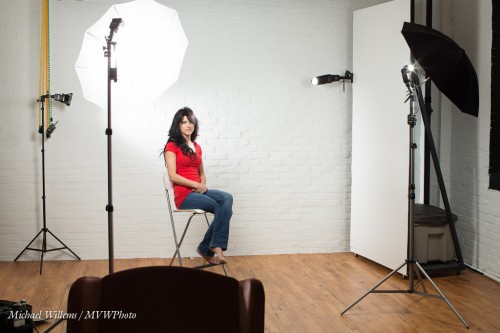
So if I want to use four Canon speedlights, as above, I need five Pocketwizards. Each of which cost a couple of hundred dollars; and then I need a special cable to connect the Pocketwizard to the speedlight.

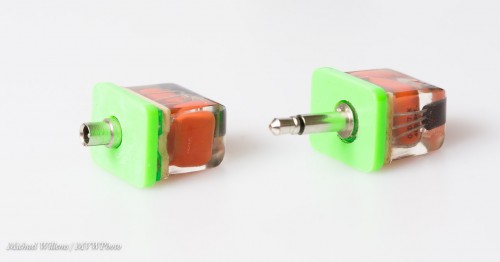
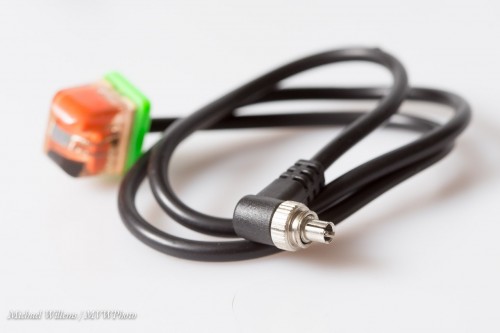
Enter the new Flashzebra.com Optical Slaves. These are small and very affordable sensors with a light cell, that connect to your Canon flash. They need no external power: all you do is plug them in, set the flash to manual mode at your selected power level, and you have a slave flash!

These slave cells come in various versions. One has a standard 3.5 mm jack:
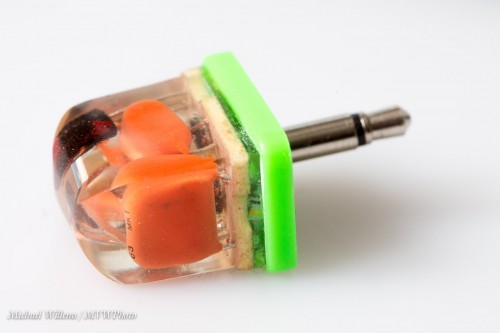
You would use this for any Canon flash, by means of a female-female converter and a special Canon hotshoe cable, some of which I already own:
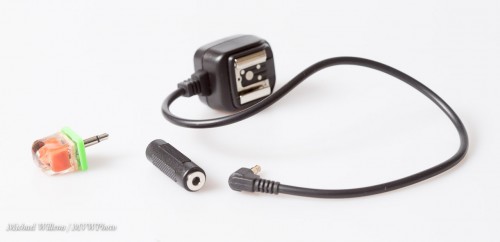
There are also options that plug directly into the flash if it has a PC-type flash connector (the one with the concentric rings; such as a 580EX II). See on the left:
Also, the same, but with a cable:
There are many other variants, as you can see here:

http://www.flashzebra.com/opticalslaves/index.shtml

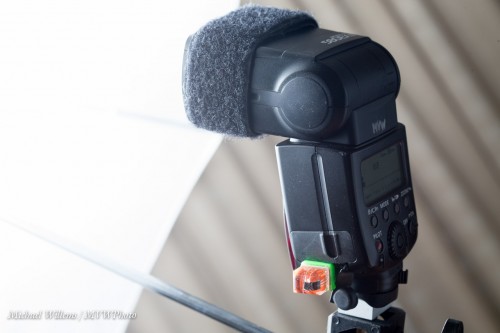
I just used one of them to make all these pictures, by the way. Here you can see it, plugged straight into the PC connector of my 580EX II:
So, why am I happy with these optical slave devices?

  • First, they are simple and do not require a whole lot of cables, brackets, and so on.
  • There are Canon-specific versions available.
  • I do not need to worry about their batteries running out.
  • I save significant money, since now I do not need as many Pocketwizards.

When do I not use optical slaves?

  • When I am outdoors, certainly on a bright day. Unless I have very reliable line of sight, optical slaves are not great outdoors.
  • When the range is too great. Pocketwizards can cover hundreds of metres.
  • When I am using any sort of TTL. TTL (“Automatic flash”) uses a pre-flash, as my readers here know well; this pre-flash would set off the slave flashes, so that a few milliseconds later, when the shutter opens and the “real” flash goes, the speedlight is not yet ready.

So now I am ready to roll with even more small, light and affordable options. And I like small, light, and affordable.

How well are these optical slaves made? They are cheap (made in India!), but that does not mean they will break. They seem solid enough. I shall do a long duration test, but for $16, I am not too bothered if any of them ever break: I’ll get more. More important is that they do not damage my flashes, as such devices can; I am happy to report that everything is fine.

I have been buying from Flashzebra for years, and recommend them wholeheartedly, and I am not being paid to say this: I love their range of affordable cables, brackets, and other flash gadgets, and I am always very happy with their service, should I need it.

Flashzebra.com for flash gadgets and Honlphoto.com for small flash modifiers: these are my goto places for flash needs. And yes, Dave Honl is a friend but no, he is not paying me to say this either!

___

Allow me to point out these few additional learning opportunities:

All workshops will be announced via email and press release next week, but you, my readers here, get first option!

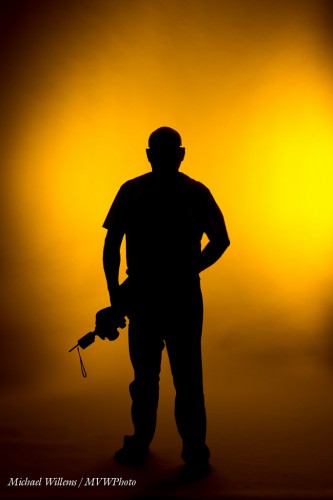
 

©, ™, ® – and more

Do you need to copyright your photos, and announce that copyright with a logo? I am not a lawyer, so check with a local legal source. But I do know a little about marketing. And about how images are often, um, “borrowed”. See the post of a couple of days ago about Google Image Search.

I usually do this:

I.e. a small logo on the image, often (but not always) with  © sign.

And about those signs:

  • The © sign on your photos makes it look a little amateurish, but in some environments (on Tumblr, for example) or categories (like photos of celebrities) I find it necessary for extra clarity. My photos are copyrighted even without the © sign, but it does stress the point.
  • The ™ (Trade Mark) logo is something you can and should add to your marketing names. As in “The Willems 400-40-4 rule™”.
  • The registered trade mark sign ® may only be added if you actually registered the trade mark with the appropriate authorities.
  • Do embed your copyright information (“all Rights Reserved” and author name in the image’s EXIF data.

Make sense?

Photography is a business and it pays to treat it as such.


Snap versus photograph

Let me give newcomers here a quick “go-to” recipe for a dramatic portrait.

First, the snapshot. If I put my client outside and snap, I get this:

I exposed well; I used the Rule of Thirds; but it is still a snapshot that, well, lacks something.

So here’s what I do:

  1. I underexpose the background by two stops (I make the meter point to -2 instead of zero)
  2. When doing this, I make sure my shutter speed does not exceed my flash sync speed; say, 1/200th second. So I use low ISO, shutter up to 1/200th second, and aperture as needed. (On a sunny day this will mean an aperture such as f/8 or even f/11).
  3. Now I add my flash. Off-camera flash, preferably. I used a softbox on our right.
  4. I set the flash to the aperture I just decided on (so if I need f/8 for a dark enough background, I adjust the flash power and fire a test flash, using my flash meter to measure, and I repeat this until the flash meter says f/8.

The resulting shot:

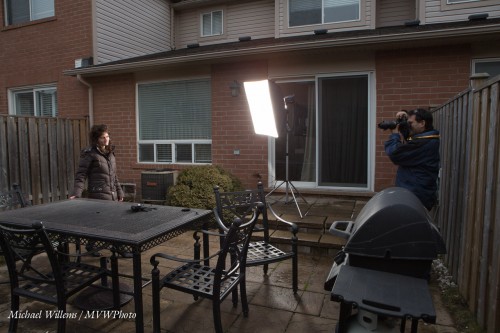
The setup:

This is a simple technique which needs little equipment. I encourage you to try it!

___

Note: several flash workshops coming up, including one in Hamilton on Feb 17, 2-6pm. Keep that day open – and stay tuned!


Firmware Note

If you have not done so yet, you may find it useful to check for updates to your camera’s firmware regularly.

I have a Canon 1Dx, a Canon 7D, and a Fuji X100 (the latter pictured here, in a close-up shot from a class on Friday):

All these cameras have had their firmware (the built-in software that makes it work) updated in the last year; several repeatedly. I just noticed last night that the 1Dx had another update waiting; one that introduced some important new functionality. I am now up to date again!

How do you update?

  1. Search for “<Camera name> firmware update” on Google.
  2. Then check your firmware against what options are available, if any.  These are usually (in all cases I have seen, certainly) free updates.
  3. If an update is available, first ensure that you have a cleanly formatted memory card and a full battery.
  4. Then download the file, and install, following instructions.

It’s simple, and it’s worth it. If a camera has available updates, they will include new functionality and often bugfixes as well. In some cases, like the 7D update and the X100, it’s almost like getting a new camera.

___

NOTE:

As you may know, my “52 photographic recipes” eBook is available now from http://www.speedlighter.ca/photography-cookbook/.

Also, learn to shoot nudes from me on March 2 in an all-day (10AM-5pm) workshop in a great Hamilton, ON Studio: See more, and book, on http://www.cameratraining.ca/Nudes.html