Tender Loving Care… sometimes your photos need some. Meaning, some post-production editing.
I try to keep that to a minimum, for several reasons. First, I am a photographer, not a graphic artist. Second, it’s work, and I like to minimize work. Third, I like my previews “on the back of the camera” to look great, not “needs some work”.
On that subject. The camera usually has a pretty vivid preview, and people (including me) like that. But when you import the RAW image into Lightroom, you lose that: suddenly, your image looks more dull.
This has two reasons. One: turn off in-camera “image improvement” settings. Those only for on JPG files. If you are going to edit, do it under full control in Lightroom, not in the camera under its control.
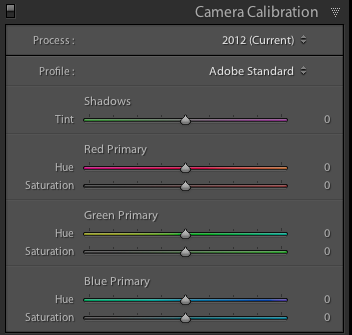
But there is another reason. By default, Lightroom converts the RAW into a preview using Adobe’s preference. In the DEVELOP module, scroll down to the last pane, “Camera Calibration:
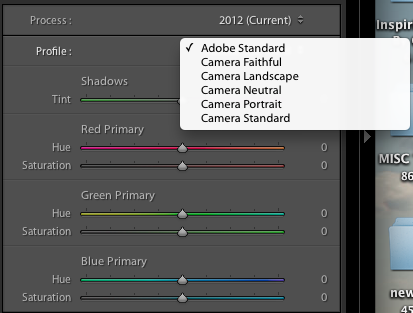
When you click on the “Adobe Standard” default, you see other options:
I usually select Camera Standard. You can make that your default. Result: images that look more like your camera preview.
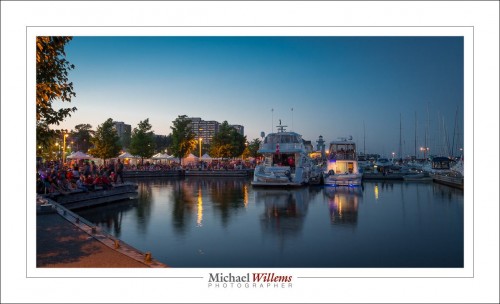
Now you can do any further editing. In the image above I did four things: (1) I slightly darkened the blue sky using the HSL/Luminance blue slider; and (2) I slightly increased the saturation using the BASIC section saturation slider. Finally, (3) I added a very slight vignette after(4) cropping off the top inch. Since the original image was good and exposed well, minimal changes were needed. But they were still changes. Sometimes, a little TLC can have big results.
Learn all about Lightroom, the only game in town: come to me for a private workshop during which you learn how best to set up and use Lightroom. You will be amazed at how good your images really are.


