You can do a lot…

…in spite of conventional wisdom. Conventional wisdom has it that the Canon 7D is not the best for high ISO shots. And that you need twice the lens length, so 50mm on a crop camera needs 1/160th second..

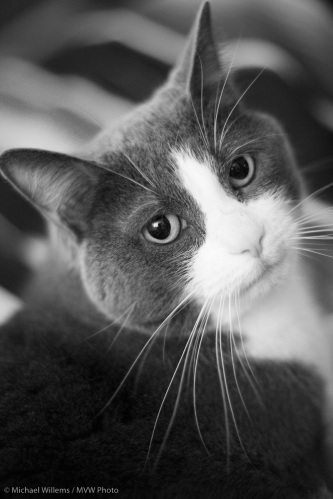
So you could not possibly do a shot like this at

  • 3200 ISO
  • in available tungsten light
  • with a 50mm f/1.4 lens
  • set to f/2 at 1/40th sec0nd,
  • hand-held:

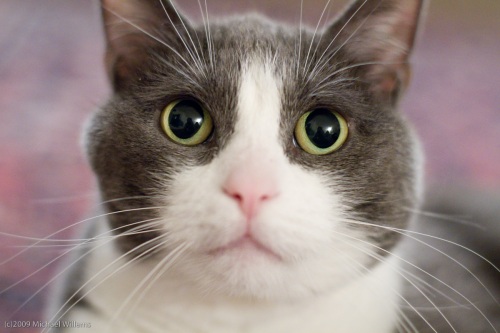
Cat, 3200 ISO, f/2, 1/40th sec, Canon 7D, 50mm

Yes you can. Hand held, slight noise reduction applied in Lightroom.

7D popup residual glow…

Look at this, from yesterday’s pic:

The Canon 7D can direct other flashes with its popup – unique for Canon, and that is what I was doing in this portrait (the main flash is a 430EX with a Honl reflector).

But when you do this, even when you turn the popup flash off (it only commands the other flashes), there’s a tiny residual glow! Every time. That is the little white dot.

Tip: cover it with your hand when shooting (or use Photoshop).

Portrait using two flashes

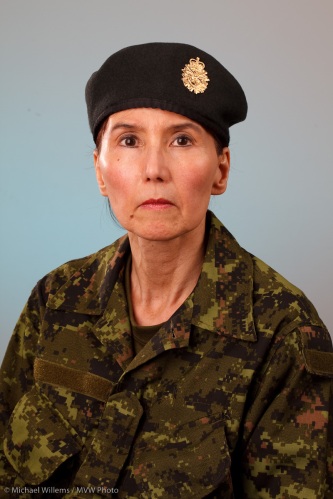
Here’s an impromptu portrait I took on Tuesday, of a lovely student who kindly volunteered to be the subject, in the Flash for Pros course:

And here’s how I did this:

  • Camera: The camera was a Canon 7D
  • Lens: I used a 50mm f/1.4 lens. (50mm on a crop camera, even the very cheap f/1.8 version, makes a great portrait lens).
  • Settings: The settings were Manual mode at 1/30th second, f/5.6, 400 ISO
  • Flashes: I used two 430 EX flashes on light stands, fired from the pop-up flash (like most Nikon cameras, the 7D allows this). Other than that, the pop-up flash was disabled. (I could also have used a 580EX on the camera as master.)

And how I used those flashes:

  • I used e-TTL, so I did not have to meter and set the flashes manually.
  • The main flash (“A”) was on camera left: a 430EX fired into a Honl gold/silver (half CTO) reflector. It was about a foot away from her.
  • The second flash was also a 430EX; this one fired straight at her from 45 degrees behind, through a Honl 1/4″ grid. This flash was also about a foot away from her.
  • I set an A:B Ratio of 4:1, so the main light was two stops brighter than the hair light.

Another student that night wrote a blog post, here, where you can see a few pics with some of the modifiers I used.

So it’s actually quite simple: now you go try. It is amazing what you can do in just a few seconds with just a couple of flashes (speedlites) and some small, light, convenient modifiers.

Camera Needs?

I shot a school Sunday: “Photo Day” portraits at a music school.

My colleague Anita and I used strobes, backdrops, and Canon cameras: 40D, a 7D and a 1D Mark IV. A few interesting observations:

  • The 7D produced the same crisp wonderful images as the 1D Mark IV. The 40D was not far behind. Sharp… amazing. Of course we were using all “L” lenses.
  • We both loved the 7D’s feel, ergonomics, even shutter sound.
  • I left the 1Ds MarkIII in the bag. With the 16/17 Megapixels of the 1D and 7D, who needs more?
  • The sharp display on the back of the 7D/1D4 really helps. And that is important: some images were slightly soft (ever so slightly – not that you would see even in a 8×10 print). Almost certainly due to me moving: I was using the cameras handheld.
  • The 1D4’s metering is a bit “enthusiastic”, as dpreview calls it. But on manual, with all  JPG adjustments turned off, this did not matter.
  • Excellent colour out of the box (shooting RAW, importing into Lightroom, WB set to “Flash” on camera to give LR a good starting point).

The 1D is the pro workhorse, of course, and it performed great (redundant memory card included!), but I must say, the 7D was a real pleasure to use. Especially at low ISO (100-400, say), I see no reason not to use it for pro studio work.

Click. Shhhh!

A few tips for those of you who shoot ceremonies.

Ceremonies are important to people. Whether this is a graduation, a wedding, a signing of some sort: there will often be a hushed silence.

A silence you do not want to disturb. So today’s tips are about blending in and behaving appropriately at such venues.

  • First, dress in a non-conspicuous way. You do not want to be the centre of attention.
  • Ask the person in charge what you can do. Can you walk around? Use flash? Click away?
  • Ask if flash is allowed
  • If it is, bounce that flash rather than use direct light.
  • If it is not, you may still be allowed to use the focus assist on your camera’s flash. That’s the little red line pattern your flash can cast to help focus, and you can use this even when the actual flash function is disabled.
  • Turn off your camera’s focus beep.
  • If you have a Nikon SB-900 flash, turn off the “overheating” beep.
  • If you use off-camera flash, ditto: disable the beeps (notably on Nikon flashes)
  • Use a camera with a quiet shutter. I will grab my 7D if I want a quieter shutter sound. Some people even wrap their cameras. If you have a pro body such as a Canon 1D or 1ds, select the “Silent” shutter mode.
  • Use a longer lens and shoot from farther away.

By using these common-sense precautions, you can give yourself and all other photographers a good name.

That look over the shoulder

One common sexy model look is the “look over the shoulder”.

Like here, in this shot of Nemo, a somewhat Rubenesque but nevertheless pretty model:

In an “over the shoulder” pose women can look over either shoulder, but for men, if the shoulders are angled, avoid them looking over the higher shoulder. This is a feminine look.

As so often with available light portraits, in the shot above I used my Canon 7D with:

  • a 50mm lens, which on the 7D crop camera is really equivalent to 80mm
  • 2000 ISO (on auto ISO)
  • 1/60th at f/1.4

Yes, you can take pictures on a 7D at 2000 ISO and have them look just fine.

Bright pixels are sharp pixels, but also, bright pixels are noise-free pixels.

(And you know to focus accurately, using one focus point, aimed at the closest eye, right?)

Misc

Backgrounds and sharpness and white balance: oh my!

I thought I would chat about some of the things that go through my mind when doing a portrait, like this one last night:

Questions like:

  • What camera and lens? In this case, the Canon 7D and a 50mm f/1.4 lens.
  • What settings? Well, manual at 100 ISO, 1/125th second, f/5.6 is my standard start point, as it was here.
  • What lighting setup? In this case, a standard two main lights (softbox main light on camera left, umbrella fill light on camera right) with a snooted hair light behind left, and a gridded gelled background light. Note that while the main lights were monolights, the background light was a small speedlite fired by a pocketwizard through a Flashzebra hotshoe cable.
  • What lighting ratio? In this case pretty flat, but usually more like a 3:1 key:fill ratio.
  • What body position? Usually angled, in this case toward the softbox.
  • What head position? In this case, straight on since the subject wanted it that way.
  • What colour background? In this case I used a blue-green gel from the new Honl Photo “Autumn” colour gel set.
  • What viewpoint? I carefully choose this by moving myself left and right, up and down, until the person looks best to me for the portrait wanted. If in doubt, I take multiple views and choose later.
  • What white balance? I set it to “Flash”, even when shooting RAW, just so I get OK views on the back of the camera.

That’s all there is to a quick snap like this, which took a few minutes – if that.

Red Green

Here is my Canon 7D with a few of my speedlights (pro speak for “flashes”), pocketwizards, and cables:

Sometimes I use them for standard lighting. Sometimes I use effects -more often than not colour. Here’s four of them firing at once, with some of those excellent (try them) Honl gels:

I try to add a splash of colour every now and then. Like here in this outtake from a recent shoot (see the slight green on the subject’s left, our right?)

And I recommend that you try this, also. Recommended.

This season, think “red ” and “green”. Seasonal family pictures, but add some splashes of green and red light to the fun.

For this, I would use manual and pocketwizards. But here’s the key: I would still use TTL for the main (bounced-off-the-ceiling-behind-me) flash. So the normal flash is on the camera (or with the 7D, off the camera), while the “effect” flashes are fired with PW’s from the x-synch socket, and set manually to, say, 1/4 – 1/16th power.

That’s what is happening th that “four flashes side by side” shot above: the two left flashes are fired by the 7D’s popup flash using e-TTL, while the right two are fired by Pocketwizards that are driven by the sender PW on the camera’s x-synch contact. Yes, that works fine!

Aircraft image

How to shoot an aircraft?

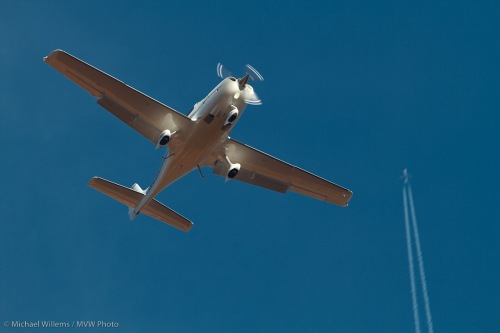
If you are a terrorist, use whatever guided weapon you have. If, however (as I assume since you are here) you are a photographer, you want to do something like this:

There are four key points:

  1. I am using a long enough lens. In this case a 70-200mm f/2.8L lens set to 200mm. Which on the Canon 7D I used is equivalent to 320mm.
  2. I am using the lens’s image stabilizer (IS), but in “mode 2”. That means I can pan – that is what mode 2 is for. If my lens does not have a mode 1/2 setting I would turn IS off, unless I intend to hold the lens still.
  3. I have shown the prop turning. Just a bit. In this case, by using 1/25oth second. This meant I needed f/5.6 at 160 ISO.
  4. I have not underexpose the sky too much. A bit of underexposure is good here, because it shows the blue. If the sky had not been blue, I would have wanted to expose more, in order to show aircraft detail. So the need is to first show aircraft detail, then if possible to expose to show a nice shy if the sky is blue.

I hope that helps and am looking forward to seeing your pictures, if you happen to live near an airport (and not be male and bearded like me).

Oh and the fifth key point? I am showing the big aircraft’s trail in the background, creating a bit of a huxtaposition.