Who does the work?

First question I always ask myself when taking a flash picture is: “who does the work?”.

What I mean is: is the light in the image just from the flash? Or just from ambient? Or from both?

Clearly :

  • When it is just from flash, the ambient needs to be dark (so I set my exposure for that).
  • When it is mixed, I set the ambient so that is is the right level compared to the flash.
  • In a mixed environment, sometimes I want to turn ambient UP (as in a party indoors), and sometimes DOWN (as in a dramatic portrait).  The principle, however, is always the same: worry about what you need from ambient (from all-dark to bright), then worry about the flash.

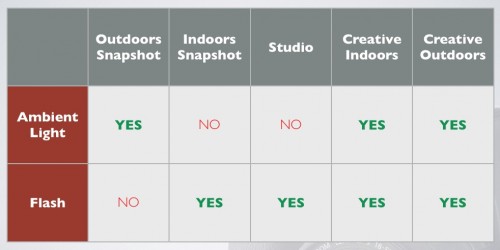
And mixing is essential. This is how I look at most of my images:

WHICH LIGHT DOES THE WORK:

As you see, in most creative work, I like to mix the two light sources.

If you do not think of this, you will get unpredictable results.

So before hitting that flash, always ask first:

In this picture, do I want to mix light, and if so, what should the ambient light look like?


Simpler then.

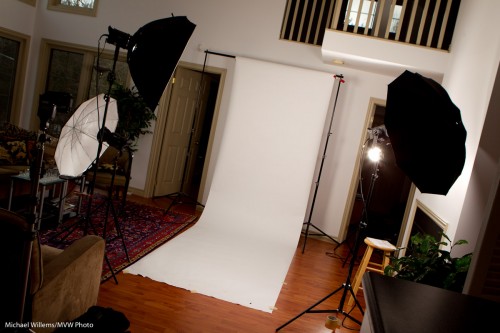
You may recall yesterday I asked whether you could do professional lighting with simpler means than this:

Mono Studio (Photo Michael Willems)

And indeed, you can.

The secret is to think about

  1. The background. If not simple, then make an environmental portrait and use the environment.
  2. The number of lights. In the studio above, my lights are doing it all. So I need many lights. So how about using ambient light as one source?

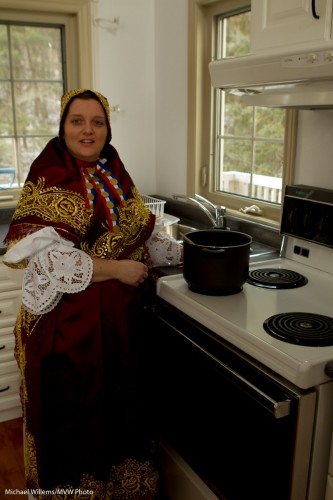
Here’s ambient light in an environmental subject (environment is relevant here – you’d have to know the story):

Ambient light

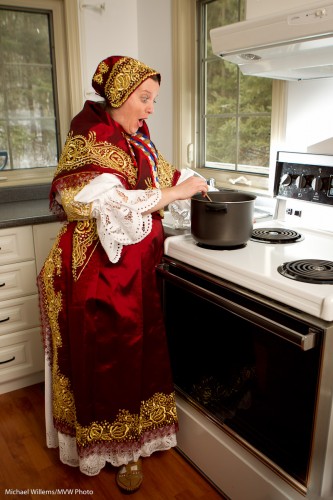
That’s good for ambient, but how about the subject? So, add one flash in a softbox. This gives you a finished shot. Just one light!

Kitchen Surprise (Ambient and softbox)

The recipe here is simple.

  1. Meter for outside light.
  2. Check what aperture that gives you – set sped to between 1/100th and 1/200th second on manual and aim for, say, f/8
  3. Now use your light meter to adjust the flash to that aperture (use your light meter).

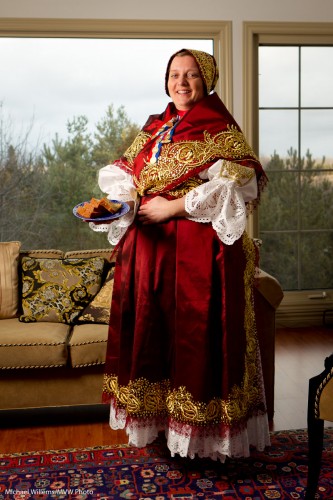
Another light lit with the same technique (and again using just one softbox):

Dress in room

So while all the equipment is nice, by combining ambient and flash, you can do a lot with just one light. Keep that in mind over the holiday period.

If this all sounds complicated, at first glance it is, but once you know how to do it, it is simple. This is the kind of technique I teach at my advanced flash workshops, and at the advanced lighting courses Joseph Marranca and I teach together. The new schedule will be posted soon!

The art of the dramatic portrait

So how did I use the softbox I showed myself holding yesterday? Or rather, what picture did I get in the end?

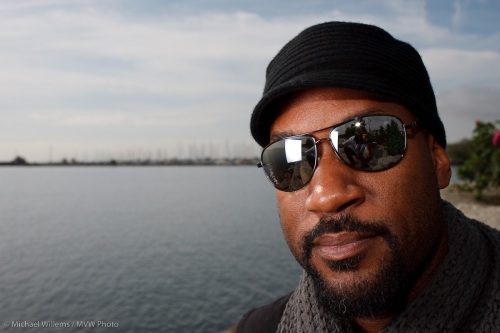
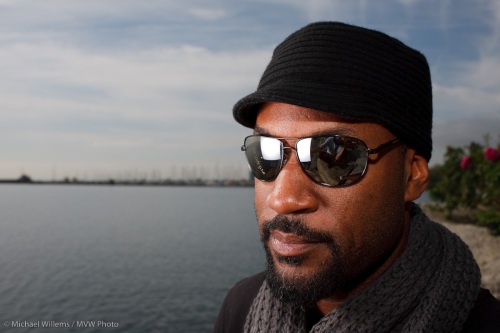
As a reminder, I was using a Canon 1Ds MkIII with a 580 EXII flash on the camera in TTL master-slave mode in group “A”, and a 430EX II flash in my left hand as slave in group “B”. The “B”-flash had a Honl speedstrap and a Lumiquest Softbox III on it. The E-TTL A:B ratio was set as 4:1, so the handheld second flash fired two stops brighter than the on-camera flash.

I was in Aperture Priority mode (Av), and to darken the ambient light and the sky I used an Exposure Compensation setting of -2 stops.

Because my friend has dark skin and was wearing dark clothes, I also used flash compensation (“FEC”) of -1 stop. Otherwise he would have been overexposed (the camera would have tried to make him “18% grey”).

The result:

MVWS9175

(I left the softbox and my reflection in his glasses deliberately, of course, since I was showing him the use of this softbox. Else I would have moved his head to camera left and down a bit).

Finally: his face is a tiny bit distorted because of the 35mm wide angle lens. I could have used the 50mm lens instead, or even the 24-70: but I think this look flatters him. h

One more sample:

MVWS9176

Balance light

You know the problem. You shoot a living room with large windows and what do you get?

OK outside. A bit light but OK. But dark furniture. Like, silhouettes.

Ah no – you went to a photo course, so you know about “exposure compensation” – the “+/- button”. So you turn that up to, oh, plus two stop (to make it brighter) – and yes, now the furniture looks light. Nice.

But uh oh – the window is now all white. Nothing visible. Like a gateway to heaven in “heaven can wait”.

Fortunately, you have also done a “mastering flash” course. So you know to:

  1. Turn exposure compensation down to make the sky nice and blue
  2. Then turn on the flash (and turn it around so it lights up the wall behind you)
  3. Then take a test shot
  4. Then decide whether to use “flash exposure compensation” – the “plus minus with flash next to it”. This turns the flash power up or down. You decide you need some more light on the furniture so you turn this to plus one stop.

Now here’s your picture:

MVWS0145-2

Nicer, no? Try this technique if you haven’t yet. And you can compete with the best interior photographers.