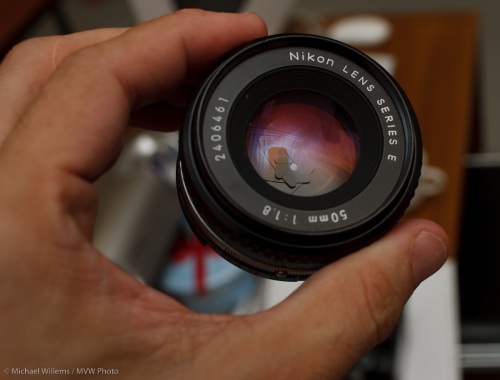
Those funny aperture values – why?

Your lens’s aperture comes in those funny numeric values. You all know them:

1.4,  2.0,  2.8,  4,  5,6,  8,  11,  16,  22,  32…

Okay, actually it is f1.4, f2.0, and so on. With an “f”.

Actually it isn’t. Not quite. In fact it is “f/1.4”, “f/2.0”, and so on. The aperture number is a fraction: F divided by that number. That is why a larger F-number means a smaller aperture: when you divide something by a bigger number the result gets smaller.

So why the funny numbers? When I was learning photography I wondered why they did not just choose f/1, f/2, f/3, f/4… and so on.

Here’s why. I know you want to know.

First of all, the f-number indicates:

The f-number, or aperture number, indicates the diameter of the lens opening, expressed as a fraction of the focal length of the lens.

A 100mm lens set to f/4 would have an opening of 25mm (100/4). An 80mm lens set to f/8 would have a diameter of 80/8, or 10 mm.  And so on.

So why the funny numbers? Because those numbers are chosen to halve the light entering the lens with every larger number (or to double it with every smaller number).

To halve the quantity of light entering a circle, you would not divide the diameter of that circle by 2. That would give you a quarter of the light (area = pi x r squared). Instead, you would divide the diameter by the square root of 2.

And that is therefore the ratio between the successive numbers. The square root of 2. (approximately 1.4). Check the numbers: take 1.4 and multiply it with 1.4 and you get 2, which happens to be the next whole aperture stop number. 1.4 times that gives you 2.8. And 1.4 times that gives you 4. And so on.

So now you know why larger f-numbers give you smaller lens opening and hence less light, and you know what’s with the funny numbers. Aren’t you glad you asked?

Blurring backgrounds

A quick tip, today, for new or inexperienced photographers. But one that some experienced photographers forget sometimes, too.

In a good photo, you draw attention to your subject. You can do that by framing, by using converging lines, by making the subject large, by surrounding it by negative space… or by blurring the background.

If like me you like blurry backgrounds, how do you achieve them? Using a camera with the largest possible sensor size, use any of these methods:

  1. Use aperture mode (A/Av) and select a large aperture (i.e. a small F-number, like 2.8). This is why lenses with those low F-numbers are so good, and so desirable, and worth paying for.
  2. Use a longer lens (zoom in).
  3. Get closer.

Or do several of these at a time, like in this snap I took during a tweet-up the other day:

iPad in hand, by Michael Willems

iPad in hand, by Michael Willems

The blurry background shows just enough to make the viewer work, to understand what is happening; but it also accentuates the iPad very nicely.

I used the Panasonic GF1 with its 20mm f/1.7 prime lens set to f/1.7 (yes, a very low F-number).

What mode should I use?

The most common question I hear is “what lens should I buy?”.

Boy, that is a tough one – a bit like asking “what car should I drive”. The answer: “It depends”!

Almost as often, I hear “what exposure mode should I be on?”. That one is much easier.

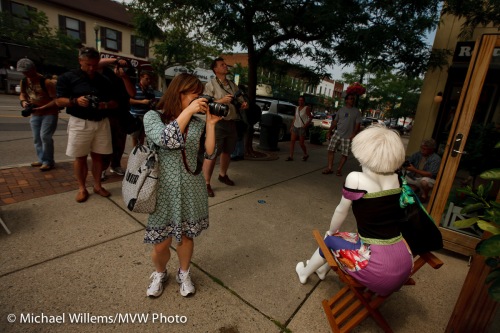
Photographers taking photos in Oakville, photo by Michael Willems

WHAT MODE? Photographers taking photos in Oakville

I should start by saying that here too, of course the answer is “it depends”. So instead of giving you a canned answer, I am going to explain a bit about what modes I use in my daily photography practice.

And these are:

  • The green “Auto” mode: never – but I could use it if anyone asked “let me take your picture with your camera”. The green auto mode turns your expensive SLR into a point-and-shoot.
  • Scene modes (portrait, landscape, sports, etc): never. None of my cameras have these, but even if  they did, I would not use them. They are useful learning tools, and good for people with little experience, but they take a lot of power away from you, and you should learn how to do it yourself. Use them while learning, but as soon as possible, free yourself from these “canned” modes.
  • Program mode (P): occasionally, when I am in a hurry. Like when shooting while driving a car, or when covering a rapidly unfolding even where “get the shot” is the essence. P mode means the camera sets aperture and shutter, but you can override it in this and in many other aspects, like white balance and flash use.
  • Aperture Mode (A/Av): Almost always in many situations. When I am in an environment with changing light, I will likely use aperture mode. Because of what I shoot, I am in this mode maybe 70% of the time. Aperture is very important to me.
  • Shutter Speed Priority (S/Tv): when covering some sports. When I want to freeze or blur motion. Sure, those are obvious. But also when shooting flash outdoors and I want to be sure I do not exceed the flash sync speed. In those cases I often set my shutter to 1/250th second (the fastest flash sync speed, depending on which camera I am using) and I know that I will not be needing “Fast/Auto FP” flash, which reduces my power by at least half.
  • Manual (M): Always in studios. Always when shooting indoors flash. And usually when in a controlled environment. Manual (often combined with spot meter, incident light meter, and grey card) is my second most common mode.
  • Bulb: when shooting fireworks, or other events that take a long time and cannot be metered or timed.

So that means typically I might do this – a few examples:

  • Outdoor event: A/Av mode
  • Outdoor event with flash: S/Tv mode
  • Indoor event with flash: M
  • Studio: M
  • Outdoors rugby game: S
  • Indoors hockey game: M
  • Family snaps: A/Av
  • Product: M
  • Panning shots: S/Tv

Try them all, and learn how each mode works. Especially, do not underestimate Manual, where you get full control. You need to know what you are doing, but it pays to learn.

It's all a blur

Well, not all. But in many good photos, the background is blurred. Because one way – a very good way – to draw attention to your subject is to blur the background. You do this by using aperture or manual modes and selecting a large aperture (a small “f-number”, like 2.8 or 2.0 or even 1.4 if your lens can do this).

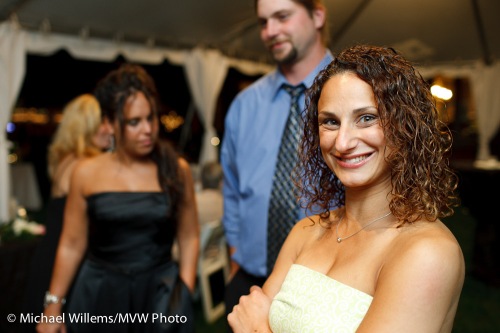
That is why I love the 35mm f/1.4 lens and several f/2.8 lenses I use also: because they allow me to dramatically blur backgrounds. Like in a few of last night’s guests:

Wedding guests, photographed by Michael Willems

Wedding guests

The other interesting thing is that these pictures make you guess; make you piece together the story, as in my post the other day.

Tip: Normally, you do not want the blurred background person to vie for attention by looking into the camera. Except if they are the only person, as in this image:

A wedding cake, photographed by Michael Willems

A wedding cake

Your eye goes first to the cake. Then to the gentleman in the background. Then you try to make out what is happening.

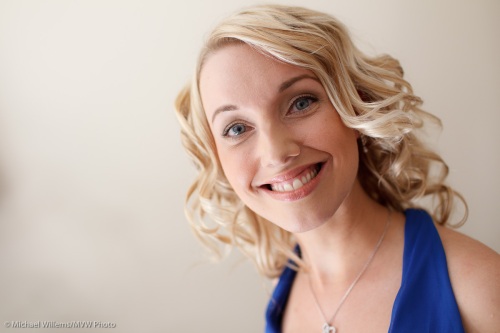
And sometimes selective focus is all about drawing attention to the eyes:

Wedding guest, photographed by Michael Willems

Wedding guest

The good news: there are many affordable fast lenses available, like the 50mm f/1.8 that many camera makers sell, and the 35mm f/1.8 that some sell.

If you are not yet shooting with fast lenses, probably prime lenses, my advice is to try it soon.

Open wide:

How do I know that this picture (taken at a recent magazine shoot) was taken at f/2.8?

Given the lens (a 16-35mm f/2.8 lens), I look at the shape of the out-of-focus lights in the background. If the aperture was stopped down, they would be hexagonal or octagonal. Round out-of-focus spots means the lens was wide open: f/2.8, therefore.

Again, why "fast" lenses?

A tip for newcomers to SLR photography.

I often hear: “Why do I need so-called “fast” lenses – like the 50mm f/1.8 lens Michael keeps talking about? Surely my 18-55 lens also covers 50mm?”

Well yes it does. But:

  1. Less sharply. A “prime” (i.e. non-zoom) lens is sharper.
  2. A prime lens is also smaller and lighter.
  3. And especially: the prime lens has a lower minimum “F-number” – i.e. a larger aperture. The lower the “F”-number, the better. Your kit lens is f/3.5-5.6 (meaning zoomed out it can go as low as 3.5; zoomed in it can go only as low as 5.6. The 50mm f/1.8 can go as low as 1.8).

Why is this important?

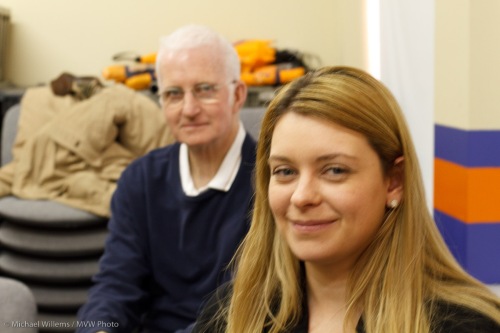
So in today’s class I took two shots of a student in available room light. One at f/5.6, and that is what you would get with your standard “kit”-lens. It looks like this:

Two things happen:

  1. Because of the small aperture (high “F-number”), the camera has to keep the lens open for a long time. This means that unless I use a tripod and tell the subject not to move, in indoors light I will get camera shake (the shot needed 1/10th of a second). And sure , do.
  2. The lower the “F” number, the shallower the depth of field, i.e. the blurrier the background. The higher the F-number, the sharper the background.F/5.6 gives a background that is somewhat blury.

Now look what happens when I use an aperture of f/1.8 (for which you need a lens that can do that, like the 50mm f/1.8 lens):

Much better – a pretty dramatic difference on both counts!

So the best way to immediately get great portrait shots is to:

  1. Get yourself a 50mm lens. On most cameras this is simple; do note that on a Nikon D40/D60/D3000/D5000 you need to manually focus this lens (that is why I recommend Canon cameras at the entry level).
  2. Learn Aperture Priority mode (A/Av) and use a low “F-number”.
  3. Turn the camera sideways and get close!

Have fun.

(Wow, three numbered lists in one blog post!)

Eye

Portraits? Then use a 50mm f/1.8 lens (affordable, fast, sharp) and shoot in Aperture (A/Av) mode with it wide open (preferably by window light).

Look at this recent available-light shot of a student:

MVWS0799

This gets you the dual advantages of low-light ability (no flash needed!) and blurry backgrounds. As long as you make sure the closest eye is the sharpest.

So, set your camera to the widest aperture (the smallest F-number), use high enough ISO (indoors this might be 400-800 ISO), and use one focus spot, and aim that spot at the closest eye. Click!

f/1.8 lens, stopped down, shot with f/1.4 lens, open

I have many times recommended 50mm f/1.8 lenses, and I’ll try to inspire you once more to go out and get one right now. Most manufacturers have a cheap lens like this:

MVWS0127

As you will have heard me say many times, this lens is cheap, small, light, fast and sharp.

Ideal for portraits or for low-light subjects or images where you want to dramatically blur the background. If this lens is not in your kit yet, I recommend you add it immediately.

As you will have seen in the previous post, I shot Prof Dawkins yesterday with just sich a lens (my 50mm f/1.4).