Light.. action!

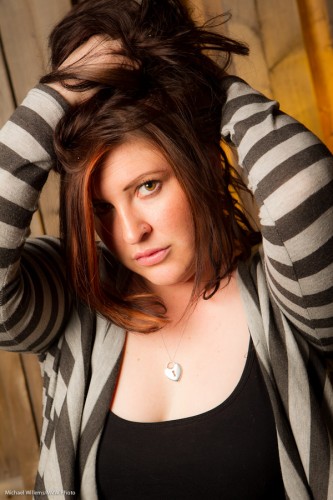
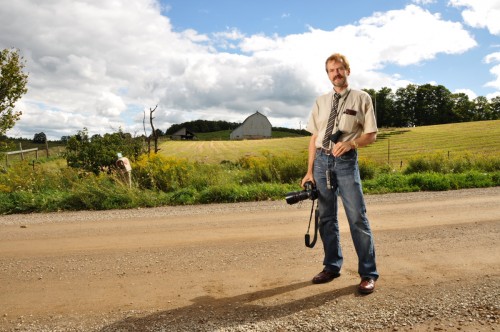
I shot a few shots of Kelly, the hair stylist for a shoot the other night.

Here she is:

Nice. So how did I light that?

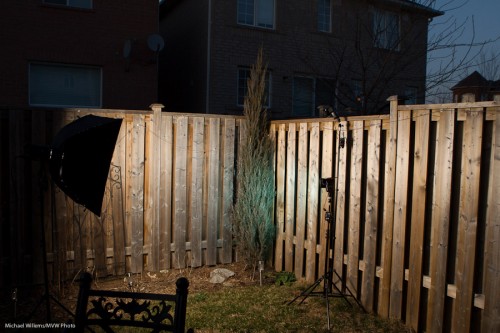
Here’s how.

I used my 1D Mk4 camera in manual mode, equipped with a Pocketwizard to drive the following flashes:

  • A 400 Ws Bowens light with a Bowens softbox. Powered by a battery (the Travel Kit); driven by a Pocketwizard.
  • A 430EX flash with a Honl Photo 1/4″ grid and a Honl Photo gel (green in the pullback shot above; egg yolk yellow in the real shot) to light up the background. This was also fired by a Pocketwizard, connected via a Flashzebra cable.

The other flash was a spare and I did not use it. I set y exposure for a dark background, then metered the flashes with a light meter. I used the speedlight to light up the background to provide hair separation, since I could not get it in the back aiming forward to light the hair, which I would otherwise have done.

A fairly simple setup for a nice shot, no?


Add flash to darken your photo.

Yes, you read that right: add flash to darken your photo.

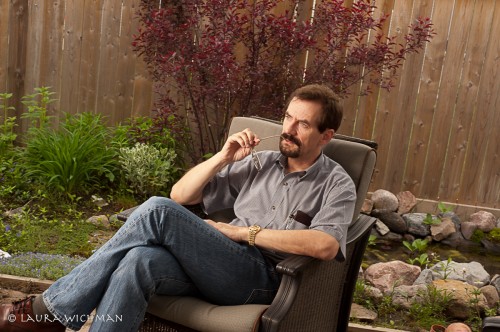
Take this image, shot as a demo for me by photographer Laura Wichman the other day:

Well exposed, well lit, all good.

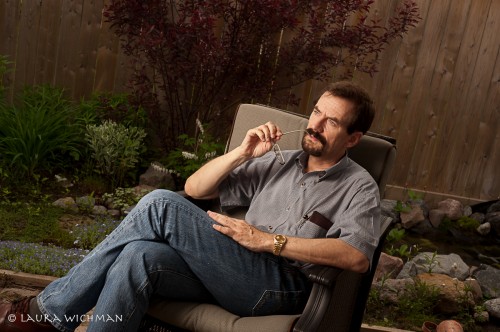
But you have heard me say many times: “bright pixels are sharp pixels”. So how about if we make this more dramatic?

The use of flash allows us to decrease the ambient exposure (first try faster shutter speed; when you get to your sync speed, e.g. 1/200th second, then carry on and use a lower ISO setting, and finally go to a a higher “f-number”). The background now gets darker:

But because a powerful flash (Bowens, with Travel Pak battery pack, equipped with a softbox) lights me, my exposure does not need to be affected. I can remain as bright, by turning up the flash (needed only if ISO or aperture are changed).

So now we have made the background darker and hence made me the “bright pixels). Using flash to darken most of your picture, in other words.

News Flash: Photo Life Magazine June/July issue is out: in it, you will see my article “Flash: 10 Problems, 20 Solutions”. Go get your copy today, particularly if you shoot flash at events.


(Home) Studio

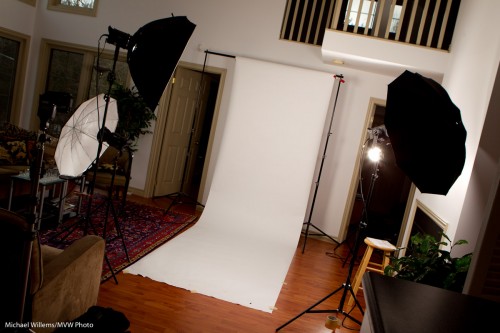
Sometimes I use big lights, not speedlights. Here’s my studio for a shoot Friday:

Mono Studio (Photo Michael Willems)

That is a tad complex:

  • Three and a bit lights. I use Bowens lights – love them.
  • A way to fire them (cable or pocket wizards – I use the latter).
  • Modifiers (softbox for the main light, and umbrella, perhaps also a snoot)
  • A backdrop stand.
  • Paper roll. White, grey or black, depending.
  • Tape to hold the roll down.
  • Clamps to stop the roll from rolling down.
  • A light meter.
  • A tripod.
  • A camera with a lens of the right range (50-150mm)

It takes up to an hour to set that up, and a good half hour to take it down (ask why photography costs money).

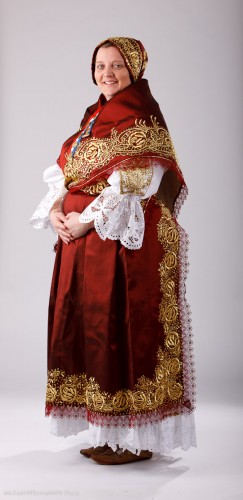
And all this results in pictures like this:

Traditional Dress

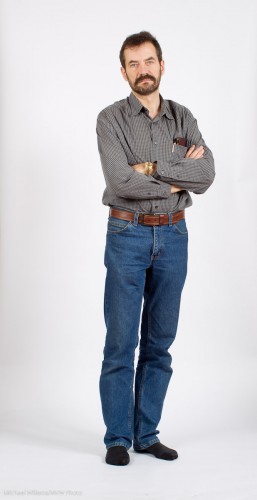
For a studio like this you need, above all, lots of space. Especially when using powerful studio lights and long lenses like my favourite 70-200. Vertical space (ceiling height) as well as lots and lots of horizontal space. In this case, also space to move the subject away from the backdrop, in order to make it darker. Otherwise, if the subject is close to a white backdrop, the backdrop turns very white:

Michael Willems, self portrait

Michael Willems, self portrait

I like that look a lot, but the dress in the shot above had white, so we needed to create separation between it and the backdrop. Meaning we needed a darker backdrop.

So an important question: can you do anything with less?

Sure you can. Tomorrow I’ll show you some examples from the same shoot.

Learning light

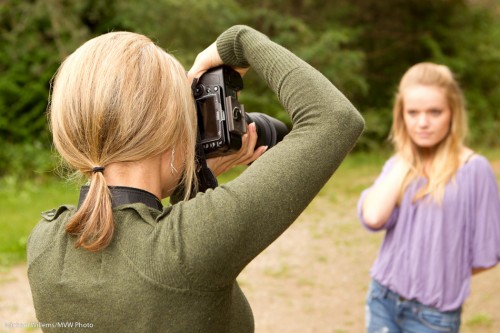
In an intensive half-day custom course, I taught my student Melony some glamour photography techniques a few days ago. From flash techniques to colour to modifiers to using a light meter to posing.

She brought her daughter as her subject, and both did excellent work.

Student shooting model

Student shooting model

(By the way, did I ever tell you to make the viewer work in interpreting an image? Yes I did. And the blurred out daughter in the background is an excellent way to do that. Don’t tell the whole story, let the viewer figure it out.)

But anyway. Student Melony also kindly photographed me:

Michael Willems, by Melony McB.

Michael Willems, by Melony McB.

That is a great portrait.

And I can say that because it is the photographer who makes the portrait, in this case, more than the subject.

So how did we do this? Why does it work?

This works because:

    1. The light is good. First, Melony exposed the background properly (i.e. she did not overexpose it: exposing less is good, so that the subject, not the background, becomes the “bright pixels”). Willems’s Dictum: “Bright Pixels are Sharp Pixels”. Also known as “blurriness hides in the shadows”.
    2. Then, I am lit by the sun from the right (aided by a speedlight, but as the sun came out just at the right moment, this was no longer necessary). That gives us the nice shadow.
    3. But then, in a twist, and that twist is what does it, I am lit by a strobe with a softbox on the (camera) left – that gives the “ultra-realistic” look. Light from the back -and yet I am bright in the front.
    4. This image also show good use of appropriate props – I am holding the camera, which for a photographer is part of the story.

      Pocketwizards and a battery-powered Bowens light, as well as a speedlight, were used here.

      And kudos to those of you who spotted the other essentials, around my neck: a Hood Loupe by Hoodman, and a flash meter.

      Light makes a photo. Creative light makes it better. And it is simple. Once you know it.

      This is the sort of stuff I teach at my workshops, and Joseph Marranca and I are doing several more in October: check the schedule on www.cameratraining.ca !

      And yes, I wear a tie almost every day.

      Size matters.

      …the size of your umbrella, anyway.

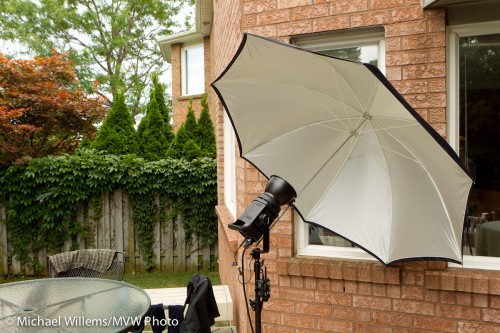
      I am using a big Photoflex umbrella today. How big? Here’s how big:

      Big Photoflex Umbrella

      Big Photoflex Umbrella

      This umbrella, which can be used to shoot into, as I am doing here, or to shoot through, is huge. Which makes the light softer.

      It is also very reflective, more than most. And that helps: I was able to overpower daylight on an overcast day with the single Bowens 400 Ws light set to 3 (out of 5), somewhat close to the subject. With my regular, smaller and less reflective umbrellas, I would have used a setting of 4 to 5 for that shot.

      So, all this amounts to:

      • Softer light (since the source is larger),
      • Greater distance I can bridge,
      • Less spillover behind the umbrella (which in a studio is important)
      • A lot more shots out of my battery pack,
      • Faster recharge time between shots.

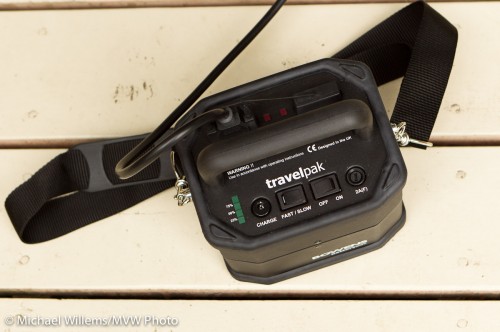
      Here is that battery pack:

      Bowens battery pack

      Bowens battery pack

      At full power, I get 150 shots out of a small battery (attached at the bottom); at power level 3, it is closer to 300 shots.

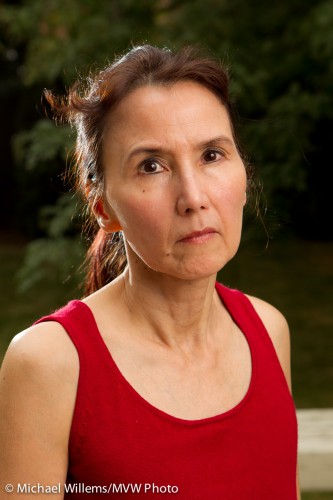
      So by using a nice umbrella, metering to minus two stops ambient (minus three if metering off the dark garden), then setting the flash to the aperture thus achieved, which was f/5.6), I get this shot:

      Nancy, photo by Michael Willems

      In the back yard, lit by flash

      As you can probably see, I am also using a speedlite on the camera left, to separate the hair from the background and to give some edge lighting interest. That speedlite is fitted with a Honl Photo 1/4″ grid to avoid the lens flare I would otherwise get.

      Time for this snap: couple of minutes.

      If all that is confusing, as it will be to beginners, then just take one of the flash courses and learn how to do this. It is fun, and well within reach of amateurs – not just for pros!

      Michael’s Quick Judgment:

      • Photoflex large reflective umbrella: recommended.
      • Bowens Travelpak power pack: recommended.

      One more "Studio" post

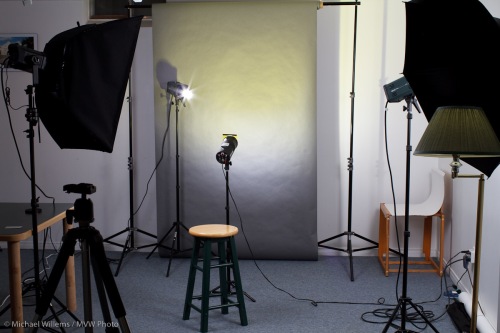
      I thought I would add one more picture of the small studio, and how it works.

      This consists of:

      • A grey background
      • A main (“key”) light: a Bowens 400 Ws monolight, fired into a Bowens 60×80 softbox.
      • This light is activated through a PocketWizard; all other lights have a photocell that follows this light.
      • A fill light, 250 Ws fired into an umbrella
      • A 100 Ws background light with a yellow gel
      • A 250 Ws hair light with a snoot
      • A stool for the victim to sit on

      The camera is set to manual exposure and has a Pocketwizard on it which drives the flashes. Don’t forget to set your camera to manual low ISO, and to check that your exposure time is under the synch speed (e.g. 1/125th second). Then meter for the right light (meter key and fill lights individually).

      And this very vanilla setup leads to:

      Photographers will know: the biggest challenge is to focus on yourself. That is why we are always hassling people to model for us.

      New strobes

      I have bought a few new strobes: 400 Ws Bowens “Gemini” strobes.

      They come with two light stands and silver/white reflective/shoot through umbrellas, which is good. And these strobes work wonderfully.

      These replace my older strobes, most of which died. That brand shall remain nameless while the maker has a chance to get back to me: I emailed twice and await a response. Fully 75% of the eight lights from that brand that I have owned died or started acting strange (like flashing by themselves, or refusing to flash at lower power settings). We’ll see if there is any response – only fair to give them that chance before I comment further.

      Bowens, meanwhile, are good.