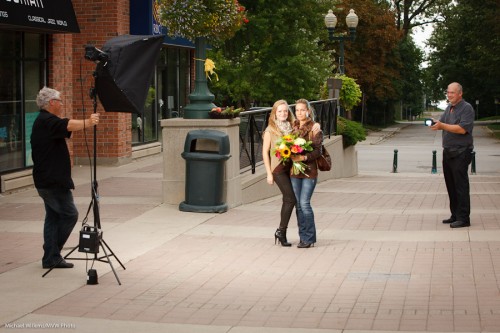
Softening Recipe

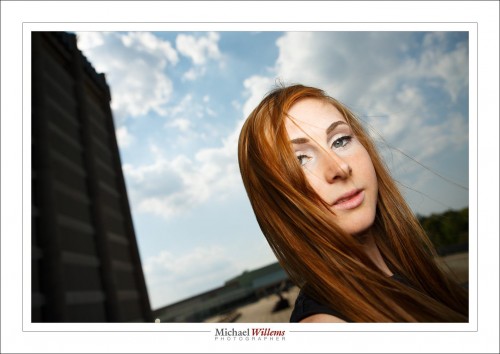
Here’s a simple recipe for a dramatic flash shot outside. Like this:

Look s”photoshopped”, yeah? Well, it isn’t. It was shot like that. And for that, you need:

  1. An external flash on top of the camera
  2. A sunny day
  3. You in very close proximity to the subject
  4. The possibility to set flash (Canon system) or camera (Nikon system) to High-Speed Flash (Canon) or “Auto FP Flash” (Nikon)

On a sunny day, you now shoot as follows:

  1. Camera on manual mode
  2. Flash on TTL mode
  3. Camera set to 100 ISO, f/4, and 1/2000th second
  4. Honl or similar softbox on the flash
  5. You very close to the subject’s face (otherwise, there’s not enough power).

“High speed flash/FP flash” allows you to go to a shutter speed of 1/2000th, which normally you cannot do (normally, you are limited to around 1/200th second).

As a result, you now get dramatic light with nevertheless a blurred background.

Why do you have to be very close? Because high speed/FP flash diminishes the power of your flash very dramatically, more the faster you go.  And the softbox diminishes it even more. Hence – be as close as around 10 inches from your subject, or the flash will not show.  But when you get it right, it is a very cool look.

___

There. Another secret free to you from The Speedlighter. Want more? Come see me do my Flash workshop at Vistek in Toronto tomorrow, Saturday Oct 5. And get the flash e-book!

The Flash Power Challenge

So from my posts, you have seen that in using flash outdoors, the big challenge is:

To make the background darker without also affecting the flash power to the point that it is no longer sufficient.

To make an outdoors background darker, other than actually making it darker (sometimes the simplest option is the obvious one: wait for a solar eclipse, shoot later in the day, or use scrims), you can do four things:

  1. Use ND filters
  2. Decrease aperture (use a higher “F-number”)
  3. Decrease ISO
  4. Increase the shutter speed

Unfortunately, the first three of those also affect the flash: every use of those will negatively affect your flashes’ available range too. So you want to avoid them if possible.

And what about the shutter speed?

That does not affect your flash range. So it is the obvious one to use to make the background darker. But… only up to your camera’s synch speed (depending on your camera, this is normally around 1/250th sec). Beyond that, you cannot use flash.

“Yes you can, Michael, you can use Hi-Speed (Auto FP) flash”, I hear you say.  That is true – but that too negatively affects your flash range. Catch-22! So no, it does not help with your flash power. (Then why do we have it? Ah.. to allow outdoors shots with the blurry backgrounds that only large apertures will give you.. apertures that need fast shutter speeds!)

So. Again, as said yesterday, a nicely balanced outdoors flash picture (i.e one in which the background is darker), needs you to first of all use method 4 above, up to your flash sync speed.

After that, you must do one or more of of the folowing to still have enough flash power:

  1. Bring the flash closer.
  2. Forego the use of modifiers and use direct flash.
  3. Add more flashes.
  4. Use more powerful flashes (strobes instead of speedlights).
  5. Zoom in your flashes to concentrate the light (giving you more intensity over a smaller area).

Work though the logic of this post very carefully. Step by step – the logic is important, and it is important that you thoroughly understand it. This is not esoteric theory: this directs you in every day shooting, every single day!

Outdoor flash

Summer is still here, so I think it might be a good time to repeat a couple of flash tips for the summer. Especially as I plan to disappear into the sun for a week, Friday.

Outdoors you often need flash. Sunlight is harsh: so you need to fill in the shadows.

Outdoors you need max power. So keep your speed below the synch speed – 1/250th second on my 1Ds camera. Else you need to use high-speed flash, which loses power. Which you can ill afford on those sunny days.

Outdoors you can use direct flash, aimed at your subject. It is better to have studios and umbrellas and such – but outdoors you do not have that luxury, and you do not want to lose light.

So use a direct flash, and really, it can look very good. Especially if you take the flash intensity down a little (that’s what we call “fill flash” – 1-2 stops below ambient).

For a recent example of fill flash, see this image I shot at Minister Takhar’s Golf Open the other day.

Golfers (Photo: Michael Willems)

Not high art – but you can see the faces, and they are not half black. And often, that is all we want from a picture.


How did I do this?

This was taken in bright daylight:

Otherworldly leaves

Otherworldly leaves

This looks otherworldly because:

  • I underexposed the background by two stops
  • I used a wide open aperture of f/4
  • I used a flash

How can I do that on a sunny day? 100 ISO and f/4 gives me 1/2000th second. (If you know the “sunny sixteen rule”, you will see that this is basically just another version of that: after all, f/16 at 1/100 means f/11 at 1/200th and hence f/8 at 1/400th, f/5.6 at 1/800th and f/4 at 1/1600th).

So that is what I set. 100 ISO, f/4 and 1/2000th second.

How, when I was using the flash? You know there is a flash sync speed limit of 1/200th second, depending on your camera’s shutter, right? So how was I able to get to 1/2000th?

Here’s how: I used fast flash. High speed flash/FP flash fires a series of pulses, so the light becomes continuous. Turn it on and you will see you can go to any shutter speed (if the subject is close, since with this technique you do lose power).

High-speed flash is among the many subjects I teach at my Advanced workshops, like the David Honl Special Guest “Advanced Flash” special on Saturday in Toronto, for which I believe there are just a couple of spots left.

Fast Flash!

To exceed your camera’s maximum flash sync speed (which is something around 1/200th – 1/250th second), you need high speed flash (Auto FP flash, in Nikon terminology) where the flash pulses at ca. 40kHz instead of firing all at once.

You need an external flash for this, like an SB900 or a 580 EX.

  • When you need it: when you need to exceed your flash sync speed, e.g. when taking an outdoors picture of close object with blurry background. That means low F-number, which means even at 100 ISO you’ll need fast shutter speeds.
  • Advantage: in theory, you can you can go to any fast shutter speed and still use flash.
  • Drawback: you lose much power, so that Fast Flash is usually only suitable for close-by subjects.

The Shot: Shoot a close object or person with blurry background. To achieve this, set your camera to A/Av mode, and select a wide open aperture (f/2.8,say). (If your lens cannot go down to f/2.8 or it is a very dull day, you may need to go to 400 ISO).

You should now be exceeding your flash synch speed-if you set your flash to Fast Flash. Else you get an overexposed picture (your camera will refuse to go faster).

Note, your object has to be close, especially if you get to speeds of 1/1000th o rfaster. Else, your flash will not have enough power.

And now you can get this – the following image was lit by flash at 1/1600th second, at f.2.8!