Fun with Colours: flashes, gels, mirrors.

The things some people do in their bedrooms in private! In preparation for tomorrow’s hands-on flash course I outfitted some flashes with coloured gels tonight. 

I used Honlphoto gels, seen bottom right here in a double wrap:

20161015-mw5d1420-1024

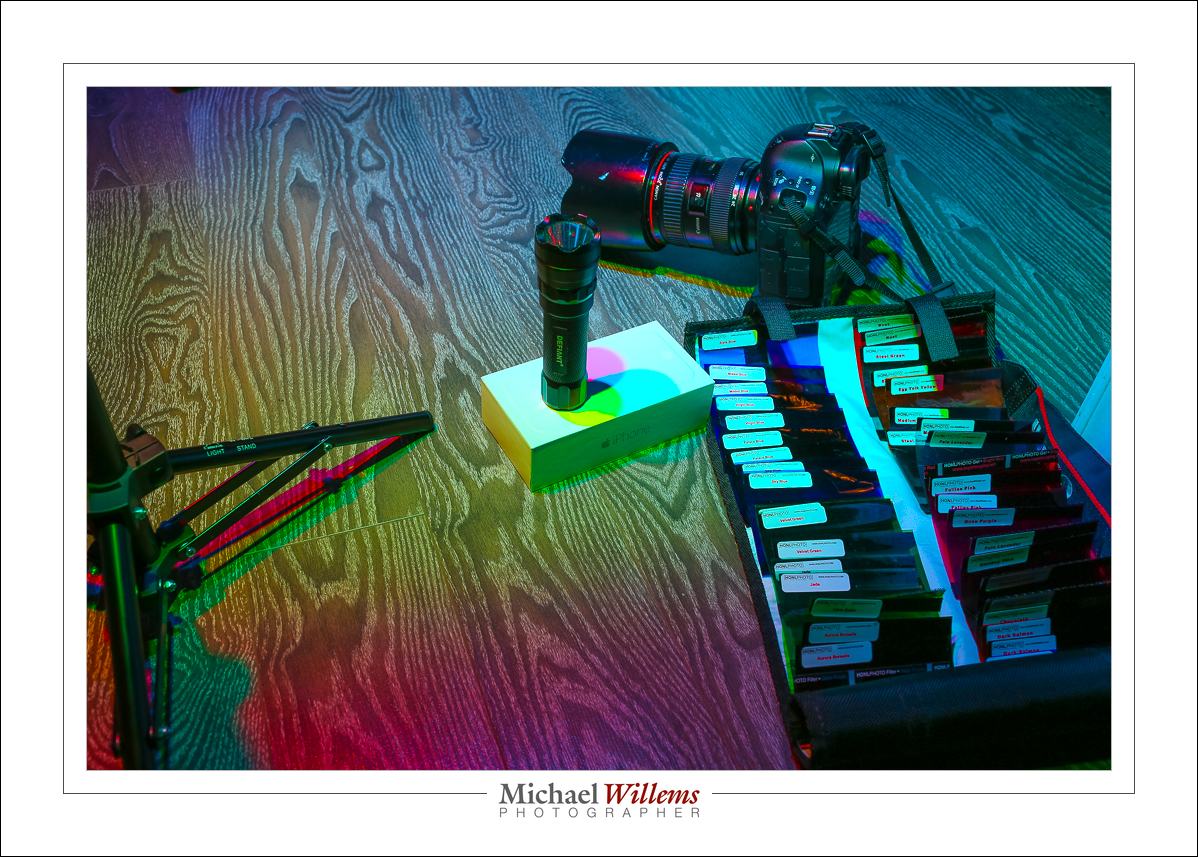
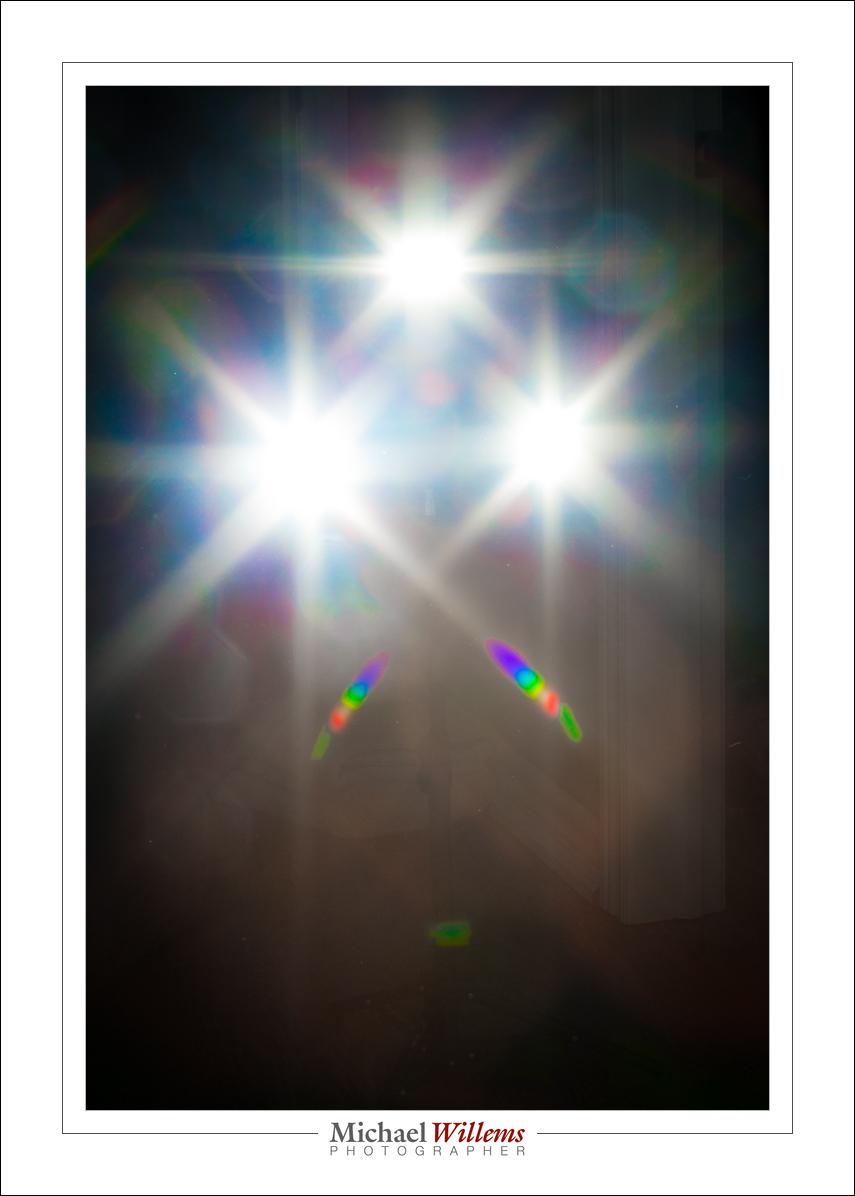
I had three flashes mounted on a stand that uses one radio trigger (like a Pocketwizard) to fire all three flashes (thus saving two radio triggers). I have discussed this three-way mount here before. I also used grids (also Honlphoto) to get three separate light circles.

As said, where all three flashes mix, you get white. After you get the ratios right, that is: the gels take light (also discussed here in a recent post) and you may need to turn one or two of them up to compensate.

Once you are done, you get white. You see it here in the centre:
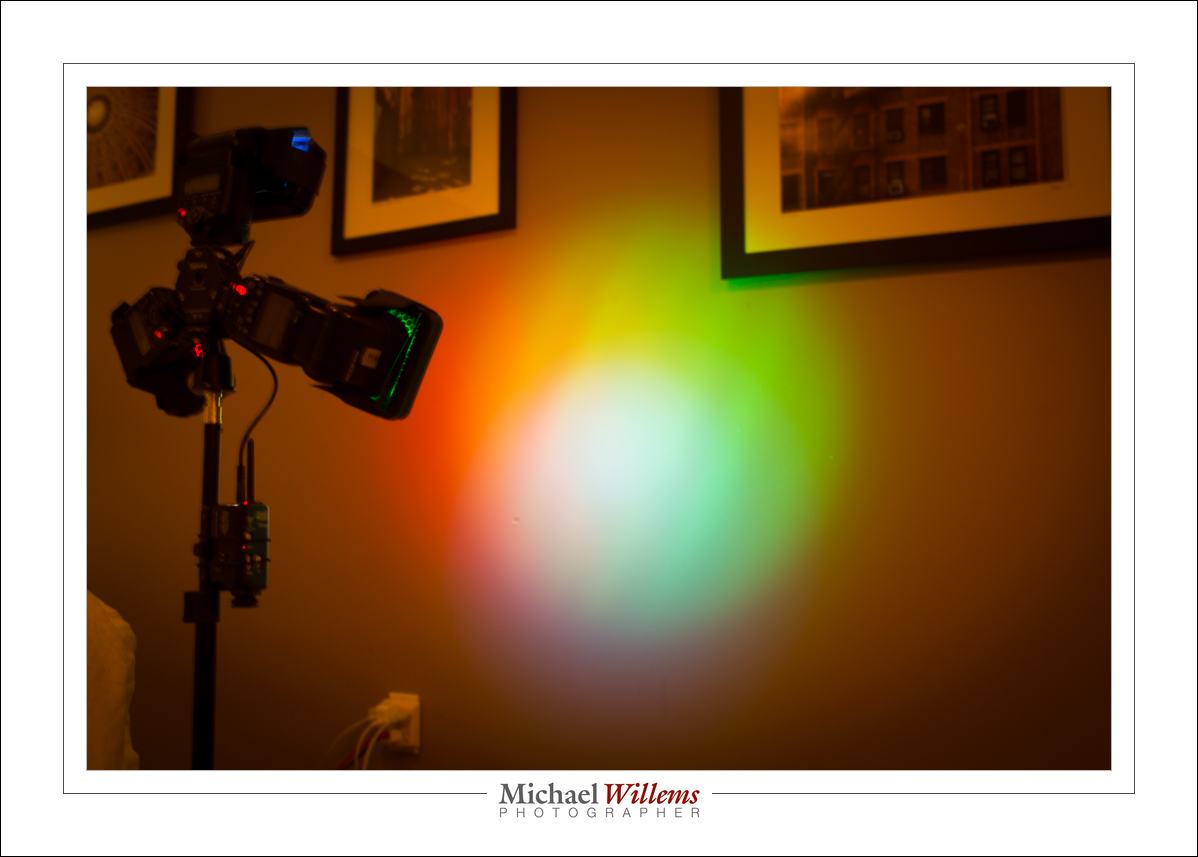
20161015-mw5d1444-1024

And here:

20161015-mw5d1449-1024

TIP: To get the ratio right, you look at the RGB histogram. The peaks for red, blue and green need to be at the same distance from the edges.

Looking at the flashes you see the three colours I chose:

20161015-mw5d1450-1024

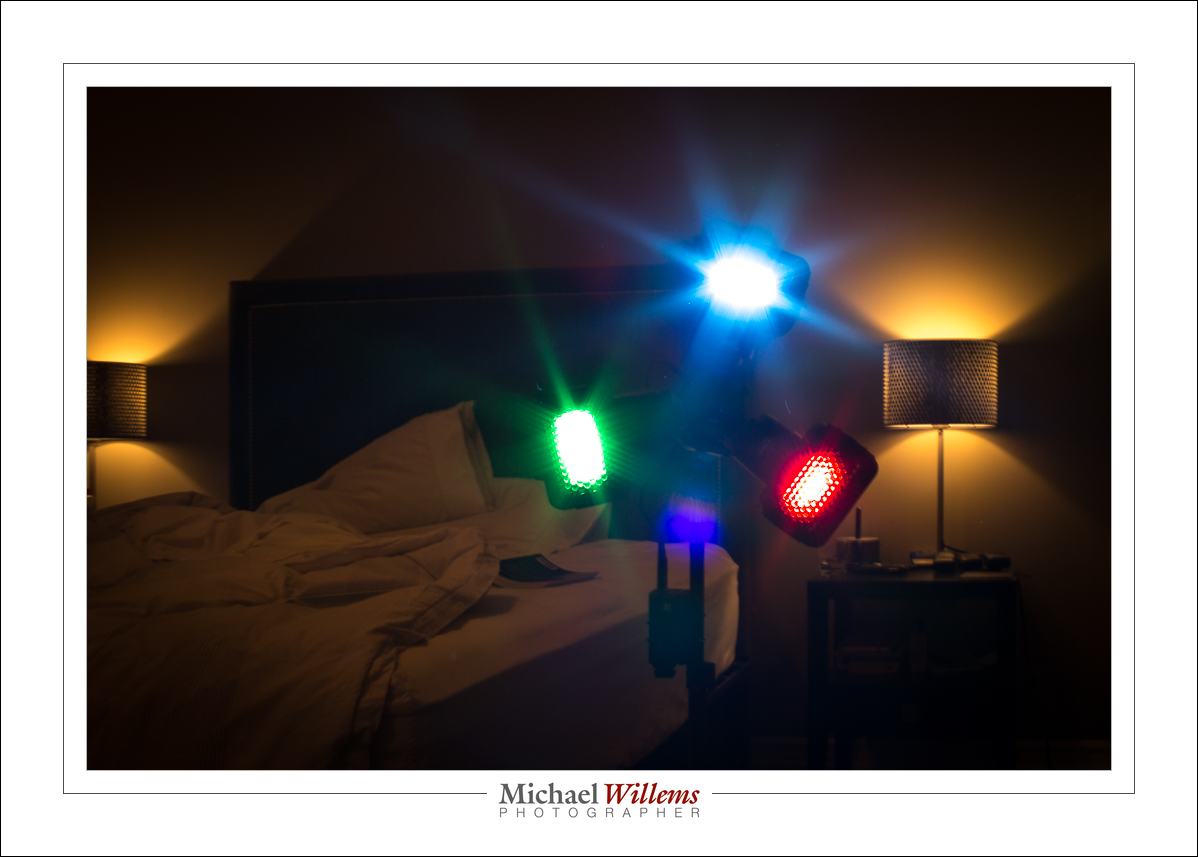
Red, Green and Blue. Surprise, surprise!

You see, when these colours mix, that once you get the ratios right, you get white overall. But when only two of them mix you get “in between” colours, which include cyan, yellow, and magenta:

20161015-mw5d1421-1024

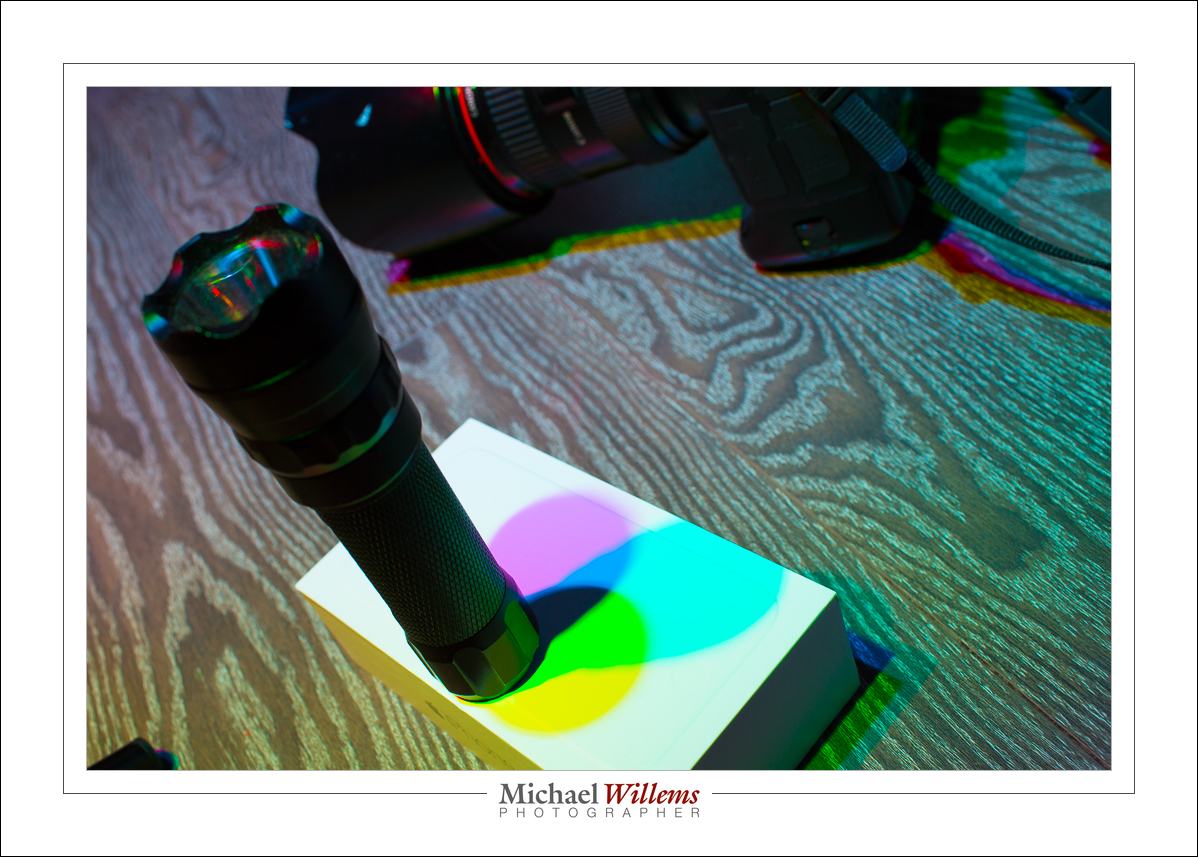
So now you know why you see RGB and CYMK (where “K” means “Black”) as two alternate ways to mix several basic colours!

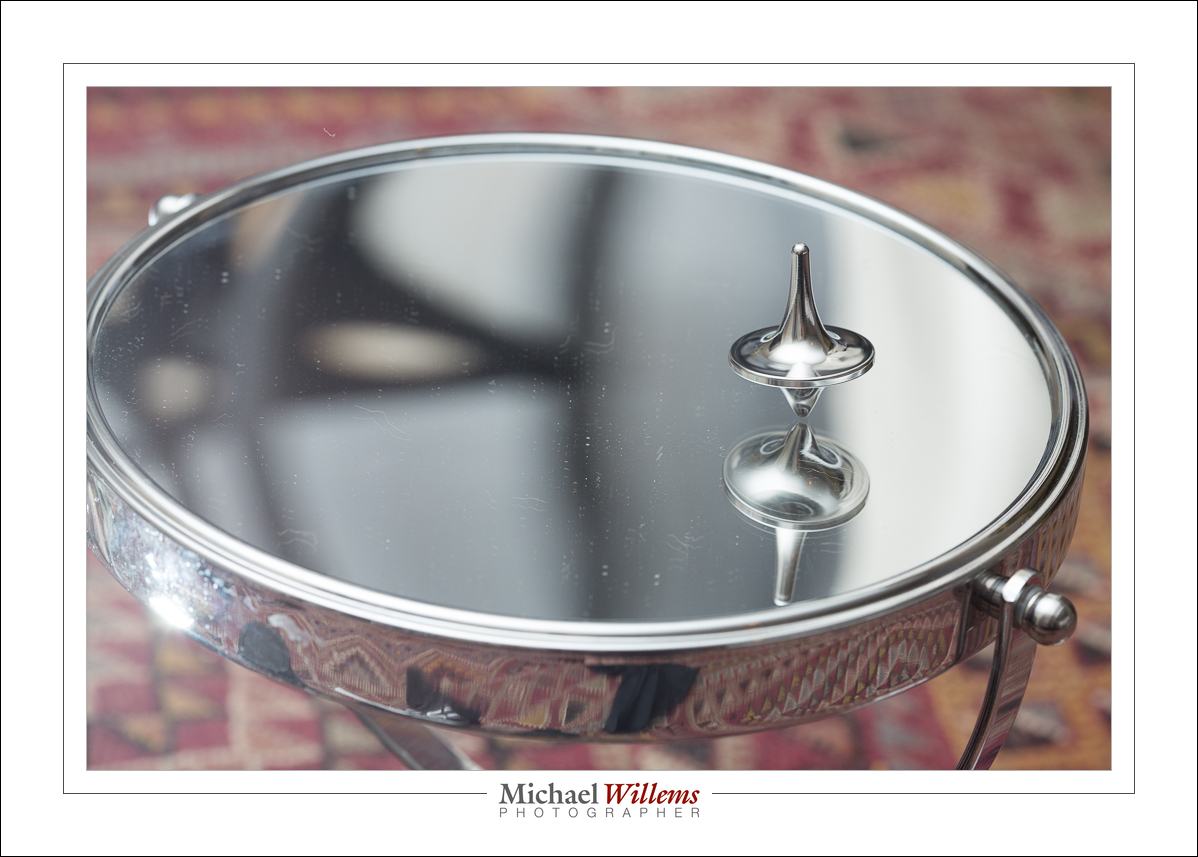
I also had unrelated flash fun, of course. f/32:

20161015-mw5d1408-1024

And my spinning top:

20161015-mw5d1389-1024

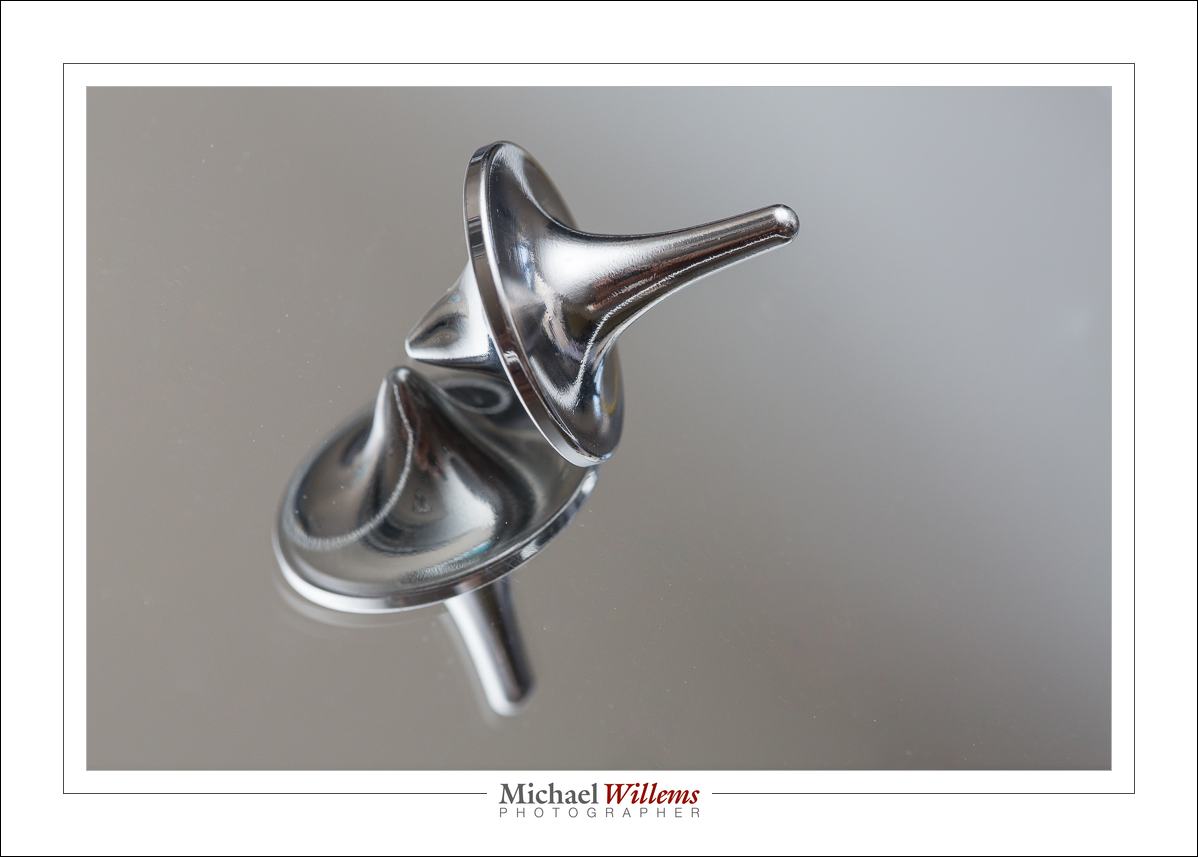
On a concave mirror, that is:

20161015-mw5d1400-1024

The moral of this post?

You should have fun with your photography, and explore, and try out different things. How many of you have gels, and how many of you have used these to mix light in different ways? That’s how you learn about light. So for those of you not coming to tomorrow’s course: go have fun, And sign up for the one after the next one: tomorrow and next week are full up, but 6 November still has a few spots open.

Any way you do it: learn about light, and have fun.


PS for Honl modifiers, which I strongly recommend, go to this link and use discount code “Willems” at checkout to get an additional 10% off.


A simple chiaroscuro portrait or two

In the last few days I took two people’s portraits using just one off camera flash. Here’s Michelle and Adnan, respectively:

How did I take those?

First, I set the camera so that the ambient light looks dark. The room was not dark – it just looked dark to the camera, because I had set the camera up specifically to achieve that. 100 ISO, f/5.6, 1/200th second. You could use any combination of ISO-Apertyure-Shutter that gives the same brightness, but keep in mind:

  • High aperture or low ISOs mean the flash has to work harder, and it may not have enough light
  • The shutter speed cannot achieve 1/200th second; your camera’s fl;ash sync speed.

Then I added the flash. I used an off-camera speedlight on our right. I could have used TTL remote control or pocketwizards: I used TTL in Michelle’s portrait and Pocketwizards in Adnan’s. Light is light! Note that I put a Honlphoto Grid on the fl;ash, else the light would have lit up the background too. The flash (fitted with the grid) was aimed directly at the subject. To get the right exposure, I metered the Pocketwizard-driven flash, and I “flash exposure compensated” the TTL-driven flash.

Then I positioned the subject properly. I wanted the light to hit them just about from their front, with their face turned to get short lighting. I also wanted to see both eyes, even if one is only just visible.

And that was all. A one minute portrait, and a pretty cool one, no?


Since you asked…

Since some of you asked: a few more things about that type of flash portrait I talked about yesterday (and that David Honl and I showed some of you during Saturday’s workshop):

Photographer Michael Willems

Photographer Michael Willems, Self-portrait

Here’s how this shot was made:

  • It is lit with two speedlights with a grid (left and right)
  • …as well as a speedlight above and slightly off-centre in front, equipped with a Traveller 8 softbox.
  • I fired all three flashes with Pocketwizards.
  • The camera was set to my standard studio settings of 100 ISO, 1/125th sec, f/8.
  • Side lights have a grid fitted, and are overexposed by about a stop.
  • The fill light is underexposed by about a stop.
  • To achieve this, side lights were set to 1/16nd power.
  • And the front light to 1/32nd power. Why? They are all about the same distance away – why so high? Surely that should be lower, like 1/128th power? Ah – no. The softbox loses you a stop or more, so you need to increase power to compensate for that.
  • TIP: the flash in the softbox should have its “wide” adapter out.

This is done in my case by trial and error and experience, but you can of course meter the lights to get really accurate settings.

How did I manage to focus on myself? I focused on a light stand, then set focus to manual and used the 10 second self timer and while it was counting down, moved myself where the stand was.

Finally: in “post”, I used the HSL “saturation” setting to decrease orange saturation somewhat. That makes this into a “desat” portrait.

And now I am already preparing for the next few workshops: “The Art of Photographing Nudes” with Joseph Marranca on April 2, “Shooting Events” on April 3, and the last Mono workshop, “Advanced Creative Lighting”, also with Joseph, in Mono on April 23. Booking is open for all three, and they are all strictly limited in numbers.


It’s all about…

….what you do not light.

Here is a shot of impromptu model George, who was on the course:

David Honl and I lit George from the side with a single 430EX flash using a Traveller 8 softbox, during the”Advanced Flash” workshop Dave helped me teach Saturday in Toronto.

This shot illustrates the “it’s more important to think about what you do not light” principle you often hear me mention.

The following shot illustrates another principle: “light from the sides, fill from the front”. Here, we are lighting George with two 430EX speedlights, each with a 1/4″ grid, from the side. Another gridded speedlight is aiming at the background, and a final speedlight, in a Traveller 8 softbox, is aimed at his face.

We used manual flash for all these shots, and the flashes were connected to pocketwizards via Flashzebra cables.

Since we are using only flash (ambient plays no role), the settings are the standard 100 ISO, f/8, 1/125th second.

All these shots can be set up in just a couple of minutes, as Dave is explaining here to some of the students in this packed workshop:

If you were one of those students, I hope you’ll add some comments here about what you found most useful or most fun. I know many of you read this blog daily!

No tie

As reader Robert G pointed out, the other day I posted apicture of me without a tie.

Yes, sometimes I catch myself unawares. I am my own frequent model, and today’s image is myself, again without a tie, to demonstrate an illustration of a different lighting technique from the onein the recent posts.

This time I am using two speedlights from the side. Both speedlights are fitted with a Honl Photo Speed Strap and 1/4″ grid to soften the light and to avoid it spilling onto the white wall. This gives you a dramatic light which can be very good when shooting males:

Michael Willems (by Michael Willems)

Yup. No tie.

See what this edge lighting technique provides?

  • Shape (muscles)
  • Texture (you want this for males, not so much for females)
  • Dark backgrounds
  • The ability to make other areas dark.

This latter ability is often useful. Rememer: lighting is not so much about what you light – it is at least as much about what you do not light.