Your light meter is not perfect

Your camera’s light meter is a reflected light meter.

Here’s how it works. And you need to simply accept and remember the following:

The in-camera light meter is designed to give a good reading when aimed at a mid-gray (“18% grey”) subject.

By implication, this means that when you aim at a non-midtone subject (like a dark subject or a light subject) the image will be incorrectly exposed.

In other words, because the camera “thinks” that it is looking at mid-grey it will try to render the subject as mid-grey.

One solution is to set your exposure manually while looking at a grey card; then using that exposure for your subsequent pictures taken in that light. That way I get pictures that are right regardless of the subject’s brightness.

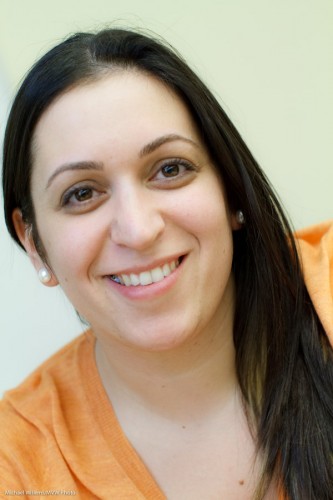
Like these two taken at yesterday’s Sheridan College class, of two of my students:

[1] Darker subject, coat, camera:

[2] NBow a lighter subject, dress, wall:

Both were correct at the metered settings of 1/125th second, f/2.8, at 800 ISO. Which I measured off a gray card!

 

Sunny Sixteen

Why do you need to be able to operate a camera manually? Because it gives you an idea of what values might fit a situation. The same way you need to know arithmetic even if we have calculators.

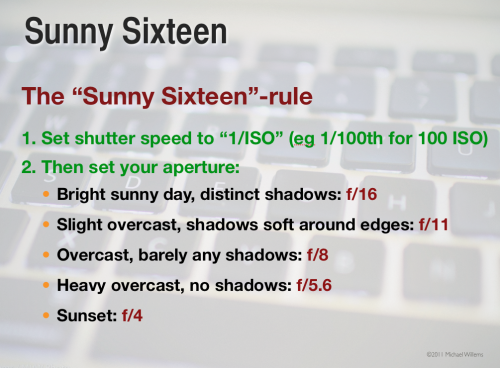
So here’s a rule all photographers need to know. A rule of thumb – that’s all it is of course – but a useful one. Namely, the “sunny sixteen rule” for exposures at mid-day:

Selecting these values will give you a “good standard exposure”. Of course you adjust when it is not mid-day, or you are a very high latitudes, and so on.

If you do not yet know it, learn this “rule” today. It’s great to be able to shoot without a light meter sometimes.


Manual exposure

Why do we use manual exposure mode?

We use manual exposure mode (“M” on the dial on top) when it is more convenient to do so than to use an automatic or semi-automatic mode – i.e. when the drawbacks are outweighed by the advantages.

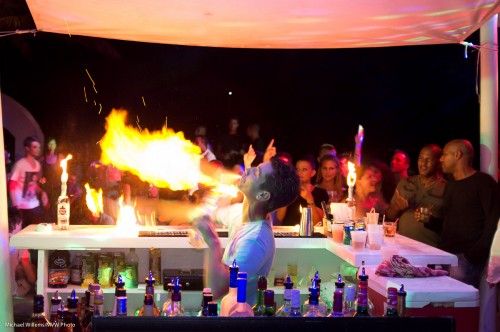
Grand Case, Sain Martin (Photo: Michael Willems)

Aug 2011: Grand Case, Sain Martin - 1600 ISO, 1/30th sec, f/2.0

Automatic modes (camera sets both aperture and shutter) and semi-automatic modes (camera sets one after you set the other) are convenient and quick, but are also error-prone. In particular, they do not handle the following well:

  • Backlight
  • Dark or light subjects
  • Varying subjects
  • Varying light across a scene

In those situations it is often better to use manual, assuming you have a moment to work out the best setting – and then to stick to these settings. So “indoors” is often like that, as is “night scenes”. As you get more experienced, you will use manual more often.

(One more note for beginners” manual exposure mode is not the same as manual focus, or manual focus spot selection, or manual white balance setting – etc. Unrelated!)


Manual focus? Six reasons.

Should you ever focus manually? When?

Well, yes. Indeed there are circumstances where manual focus (setting lens or camera switch to manual focus, and turning the focus ring yourself) is the way to go.

And here’s a few of those circumstances. I can think of six right away:

  1. Macro. When shooting macro, for instance when shooting flowers, bugs, food or jewelry, use live view and zoom in electronically if you can, then use manual focus.
  2. You are using a Nikon D40/60/3000/5000 and a fast 50mm lens. Those lenses do not autofocus on those low-end Nikon cameras, so you have to do it by hand.
  3. It is night. Your camera cannot focus well in the dark.
  4. When shooting through glass, like on an airplane.
  5. The subject has low contrast. Ditto – you may have to do it by hand.
  6. When the subject is unpredictable in time but not in space – like fireworks. Or sports, when you know where the action will be. Pre-focus there manually!

Tip: Do not confuse manual focus with “using one focus point”. When using autofocus, you should always (or virtually always) use one focus point. When the camera chooses it will choose what you do not want to see sharp.

Homework: go take ten pictures right now where you focus manually. You;ll see how easy it is, and how consistent once you get it right.

What mode should I use?

The most common question I hear is “what lens should I buy?”.

Boy, that is a tough one – a bit like asking “what car should I drive”. The answer: “It depends”!

Almost as often, I hear “what exposure mode should I be on?”. That one is much easier.

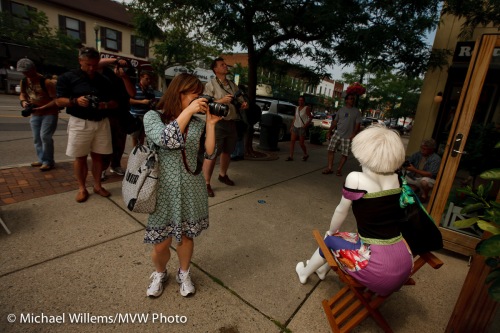
Photographers taking photos in Oakville, photo by Michael Willems

WHAT MODE? Photographers taking photos in Oakville

I should start by saying that here too, of course the answer is “it depends”. So instead of giving you a canned answer, I am going to explain a bit about what modes I use in my daily photography practice.

And these are:

  • The green “Auto” mode: never – but I could use it if anyone asked “let me take your picture with your camera”. The green auto mode turns your expensive SLR into a point-and-shoot.
  • Scene modes (portrait, landscape, sports, etc): never. None of my cameras have these, but even if  they did, I would not use them. They are useful learning tools, and good for people with little experience, but they take a lot of power away from you, and you should learn how to do it yourself. Use them while learning, but as soon as possible, free yourself from these “canned” modes.
  • Program mode (P): occasionally, when I am in a hurry. Like when shooting while driving a car, or when covering a rapidly unfolding even where “get the shot” is the essence. P mode means the camera sets aperture and shutter, but you can override it in this and in many other aspects, like white balance and flash use.
  • Aperture Mode (A/Av): Almost always in many situations. When I am in an environment with changing light, I will likely use aperture mode. Because of what I shoot, I am in this mode maybe 70% of the time. Aperture is very important to me.
  • Shutter Speed Priority (S/Tv): when covering some sports. When I want to freeze or blur motion. Sure, those are obvious. But also when shooting flash outdoors and I want to be sure I do not exceed the flash sync speed. In those cases I often set my shutter to 1/250th second (the fastest flash sync speed, depending on which camera I am using) and I know that I will not be needing “Fast/Auto FP” flash, which reduces my power by at least half.
  • Manual (M): Always in studios. Always when shooting indoors flash. And usually when in a controlled environment. Manual (often combined with spot meter, incident light meter, and grey card) is my second most common mode.
  • Bulb: when shooting fireworks, or other events that take a long time and cannot be metered or timed.

So that means typically I might do this – a few examples:

  • Outdoor event: A/Av mode
  • Outdoor event with flash: S/Tv mode
  • Indoor event with flash: M
  • Studio: M
  • Outdoors rugby game: S
  • Indoors hockey game: M
  • Family snaps: A/Av
  • Product: M
  • Panning shots: S/Tv

Try them all, and learn how each mode works. Especially, do not underestimate Manual, where you get full control. You need to know what you are doing, but it pays to learn.

It's too bright outside. Quick! Hand me a flash!

We do not use flash “because it is too dark” – at least not just.  We very often use flash because it is too bright outside.

By using a bright flash, we can:

  1. Decrease the exposure of the background, thus making it less bright
  2. Then use the flash to increase the exposure of the foreground, to avoid darkening it as a result of step 1 (becasue this would otherwise happen).

Step 1 also

  • Increases the colour saturation.
  • Allows you to make your subject stand out against the background.

Step 2 also allows you:

  • To accent parts of your shot,
  • To “model” shapes,
  • To throw light where you want it.

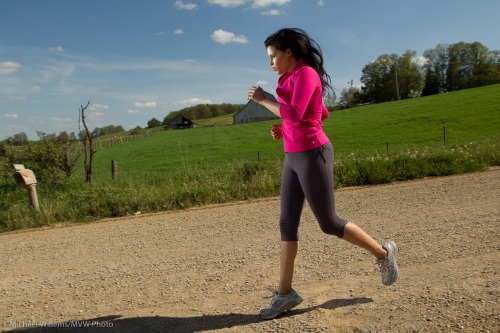
At yesterday’s all day Country Creative Lighting Workshop in Mono, Joseph Marranca and I used technique to do exactly that. So you turn a simple snap into this, instead:

A female runner

Female runner on a country road

For this, we used technique. Technique that included (apart from a talented model):

  • The use of two speedlites, set to manual, fired by Pocketwizards
  • A Honl Photo Traveller 8 portable softbox on one
  • Manual camera exposure settings

Two simple off-camera speedlites can create a shot like that? Yes they can. 430 EX speedlites can overpower the sun? Yes they can. Try it!