Post

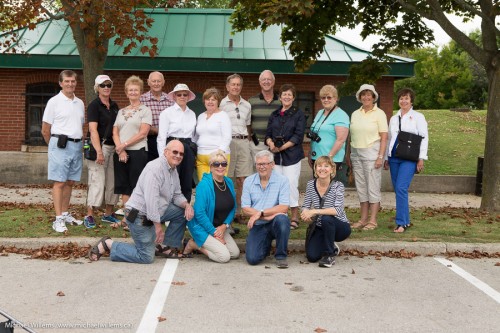
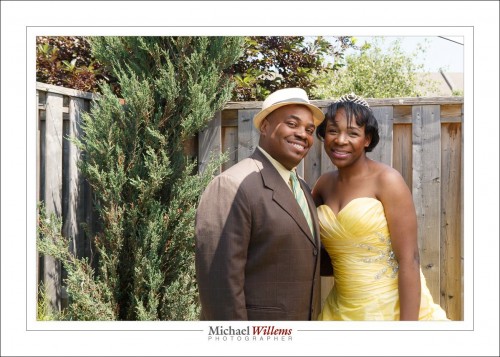
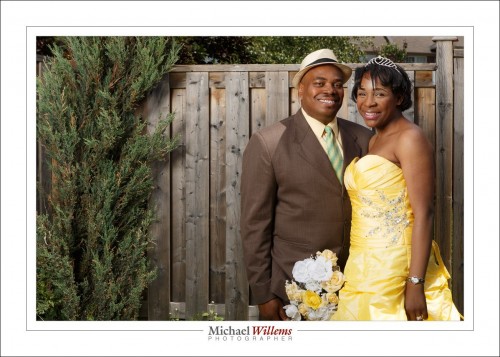
I did a photo walk yesterday, in Mississauga. And after that, a group shot of the people I did the walk for. Arrange the group nicely and I get:

Not bad, and it’s what a competent photographer might well do.

But wait. There’s more. I want modelling; less flatness. Saturated background light. And I want my subjects to be the bright pixels. So that they stand out.

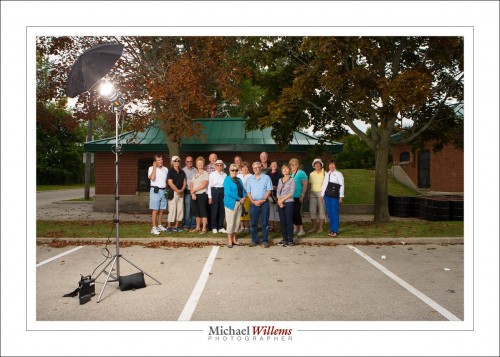
Meaning I need light and control over that light. Meaning:

  • A flash for key light. I used one studio flash (a Bowens 400 Ws flash)
  • For power, a Bowens battery pack).
  • A modifier (umbrella, here).
  • A sand bag to stop the light from falling.
  • Camera settings that make my background go darker (ideally, –1 to –2 stops below ambient).
  • And do not forget,  shutter speed less than my camera’s fastest flash sync speed (1/250 sec for me).

All that looks like this:

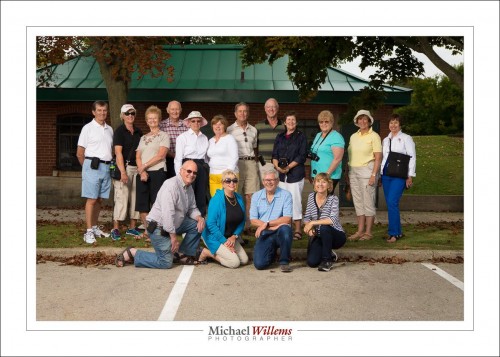
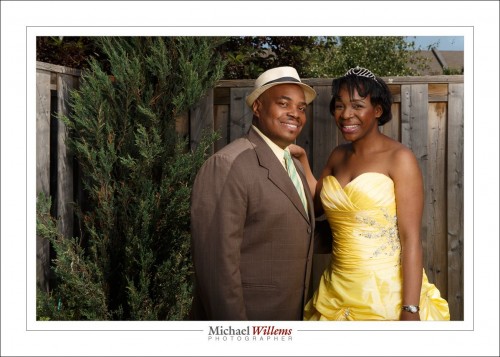
So the resulting picture is:

(Canon 1Dx, 24-70 lens, 1/125 sec at f/6,3, 100 ISO)

Compare that final shot with the one at the very top and see if you can see, and appreciate, the differences. Then, you are on your way to lighting professionally.


Cast of thousands

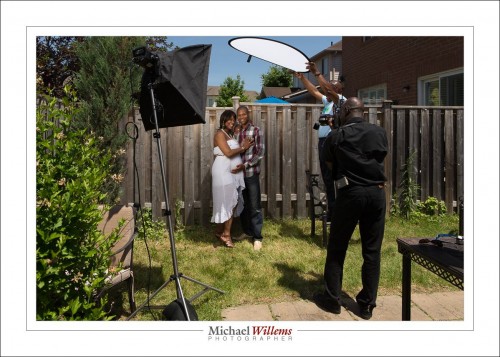
OK… cast of three. Three photographers, namely my friend Howard, his friend and fellow photographer, and myself, is what it takes to quickly do portraits in the sun. As we did today.

Here’s the setup:

Camera Settings—The camera is set to Manual mode, as follows:

  • ISO 100. Always use this value, in bright sunlight.
  • 1/250 sec. Always use this value, in bright sunlight. (Or whatever fastest shutter speed your camera can handle when using flash)
  • And the adjustable value is the aperture… to get the right saturated (i.e. darker) sky etc I set it to f/10.

The flash is a studio strobe with a battery kit; fitted with a softbox. It is 45 degrees above the subject, off to one side. It is fired via Pocketwizards and adjusted manually to match the f/10 value. A sandbag stops it from toppling over, which otherwise it would, in the slightest breeze.

Using A Scrim—A scrim (a reflector without the cover, making it a translucent area that lets through light but softens it) is used to stop direct light falling onto the subject. Look at these two: first without scrim, then with.

Look at the face and neck, and now look at face and neck in the “with scrim” sample:

Need I say more?

Why I Used Flash—if I had not used a flash, I would have needed three stops more light, and the picture would have looked washed out—the snapshot aesthetic:

It’s not bad, but it’s not great. My style is very different:

With a few minor adjustments to the flash direction:

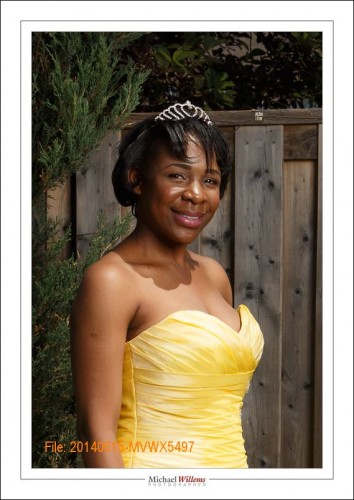
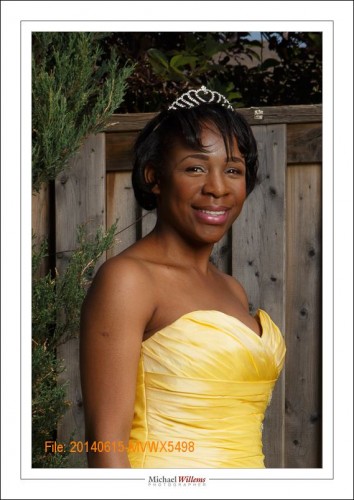
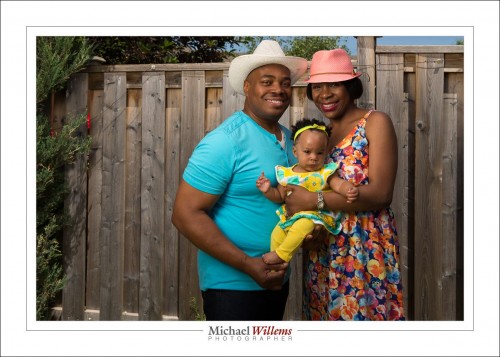
And there you have it. Straight out of camera, a nice portrait. And one more for good measure:

Mission accomplished: nice portraits made, portraits that reflect the subjects’ great, happy personality and as an extra, their excellent dress– and colour–sense. And portraits that elicit a “wow”, and that do not look like Uncle Fred’s work. And it’s all done in camera, not in Photoshop/Lightroom.

__________

You can learn this stuff too—see www.learning.photography and contact me to set up a training date.


Simple setup for budding pros.

You saw my picture the other day. That was shot quickly, and I’ll explain how.

Here’s a very simple studio (or portable studio) setup for such quick portraits:

  • Two lights aimed either at a white wall behind you or into (or through) umbrellas. Both of these 45 degrees above, on either side. (45 degree high and 45 degrees left or right).
  • The main light (which is usually two stops above the other, fill, light) preferably through an umbrella; the fill light can reflect off an umbrella.
  • One light behind the subject aimed at the wall behind him or her, perhaps through a grid.
  • Optionally a hair light, perhaps using a snoot.
  • As a starting point, set your camera to manual mode, 1/125th second, f/5.6, at 100 ISO.
  • No flash on the camera, of course.
  • Check the histogram. Adjust aperture or light power accordingly.

For the shot here, we aimed both lights at the wall/ceiling: quicker than an umbrella and since here we did not need accurate pointing and shaping, it did fine.

When the histogram looks good, finally remember to get your subject to smile, as my colleague photographer Dani Valiquette did today, when I asked her to take a portrait for me. I don;t smile, except she made me.

And hey presto, one minute later you have a simple portrait.

You need to click and then view at original size to see exactly how sharp this is. Bright flashed pixes are sharp pixels.

Personally, I prefer the serious one, but I am told by many that I look less handsome when grumpy. Surely not?

This will be a common occurrence for you as a photographer: you like one shot, and the subject likes another – often the one you think is the inferior one. Get used to it and shoot both. Without giving up your artistic integrity, you can give the customer what they want.

Nick

OK, so I spent the day photographing St Nicholas, i.e. Santa Claus, in the mall. The real one (pull his beard, it’s the genuine thing).

So how do you do this? See yesterday for the tethering article, but I thought it might be useful for you to see how this is done in other equipment terms.

I used, and with the help of my assistant Daniel set up, the following in this order:

  • Lights:
  1. Two 400 Ws strobes (Bowen) on light stands, firing into umbrellas.
  2. A pocket wizard on each light to fire it.
  3. Power set to 4/5 as a starting point
  • Camera:
  1. Canon 1Ds MkIII, with power supplied by mains adapter.
  2. A tripod
  3. Wire release for the camera.
  4. 50mm f/1.4 lens (any lens would have done)
  5. Pocket wizard (to fire the other two)
  • USB cable to the computer.
  • Computer, tethered as per yesterday’s article

First, I set my camera to manual exposure, 100 ISO, 1/125th second, f/8. Then I set the lights to that, using a light meter.

Then I tried a test shot without  flash:

This is very important. I wanted the ambient light in the mall, which varied due to a large skylight, to not affect exposure. So that picture above should look dark. Else variance in the sunlight will affect my pictures. One lovely thing about studio lighting is that it is consistent.

Then I did a custom white balance (I had to shoot JPG for the printing company, so this was very important). So I shot a grey card on Santa’s seat, and set my custom WB to that exposure.

Then I set the camera “style” settings to extra saturation by one click. (I am shooting JPG and we have bright Santa- and kid-colours).

And then I was ready. Here’s me:

Having tuned a bit (set my aperture to f/9 instead of f/8 to reduce exposure a bit), I am now ready for shots. And for Santa!

And the great thing is that I was able to stay at these settings all day. And every picture was sharp as a tack, exposed perfectly, and the right neutral colour. This is what I love about studio light. Even in a mall, with a portable studio. Of course it is important to check every now and then that you are still set right – JPG, 1/125th sec, 100 ISO, f/9. But if you make no mistakes, you get the same great light all day.

And Jolly Old Nick will be happy, as will the kids – and more importantly, their parents.

New strobes

I have bought a few new strobes: 400 Ws Bowens “Gemini” strobes.

They come with two light stands and silver/white reflective/shoot through umbrellas, which is good. And these strobes work wonderfully.

These replace my older strobes, most of which died. That brand shall remain nameless while the maker has a chance to get back to me: I emailed twice and await a response. Fully 75% of the eight lights from that brand that I have owned died or started acting strange (like flashing by themselves, or refusing to flash at lower power settings). We’ll see if there is any response – only fair to give them that chance before I comment further.

Bowens, meanwhile, are good.