Repeat – focusing a tilt-shift

Once again, military technology is at the basis of what we do with technology. It is incredible what humans will do in order to more efficiently fight other humans.

In the early 20th century an Austrian army captain named Scheimpflug worked out how to handle perspective in aerial photographs (this would come in handy in WWI, no doubt). Hauptmann Scheimpflug is famous for explaining what we know as the Scheimpflug principle. If you like math, look it up on Wikipedia. I warn you, it took me a while to get my head around all those formulas.

What do they do for us? They tell us how to use tilt-shift lenses (or view cameras) to change the plane of focus.

And I will give you a simplified version of its implications here today (yes, it’s simplified: no need to start pointing that out). I am talking about tilting here today, not about shifting. But even simplified, this is an advanced article that assumes you already know at least the basics of what tilt-shift lenses do.

I wrote this because I usually see people with tilt-shift lenses just wildly change every adjustment randomly: and that is not at all a way to guarantee results. Knowing stuff is always better.

WHAT TILT-SHIFT LENSES CAN DO

A tilt-shift lens (its tilting, specifically) allows you to shift the plane of focus so that you can make sharp not “stuff parallel to the sensor” (like the wall in front of you), but “stuff at an angle to the sensor” (like the floor below you).

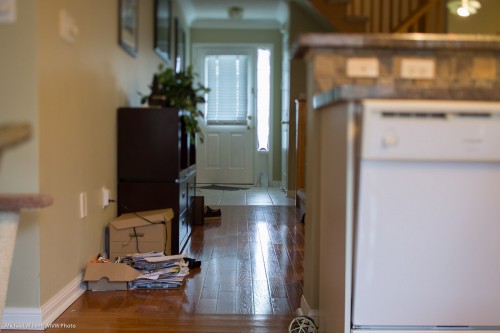
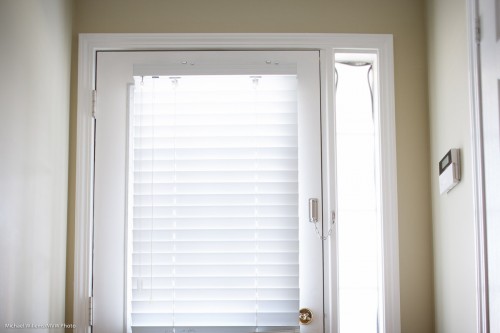
Consider this, the normal situation. With my 45mm lens set to f/2.8, I focus on the door, so it is in focus (but the stuff close to me is not):

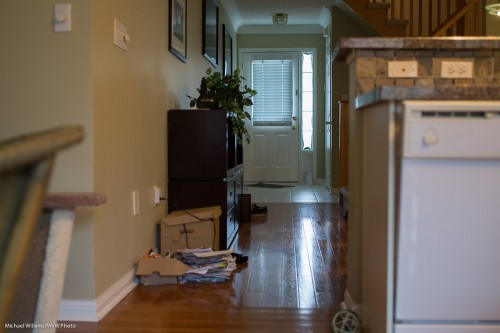
Or I focus on the stuff closest to me, so it is sharp (but the door is not):

And if I want both in focus, well, I would have to go to a very small aperture (maybe f/16 or even smaller) to get them both sharp. Or to a wider angle lens, or I would have to move way back. None of which may be practical, or even possible.

Enter the tilt-shift lens. If I…

  • tilt the lens down by the the right angle; and
  • hold my camera at the right angle; and
  • am at the right distance from the floor; and
  • focus at the right distance…

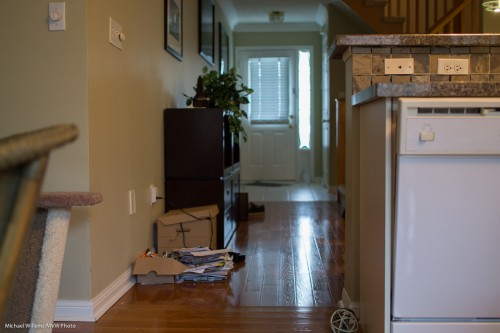
(I told you this was complex), then I can do anything I like. Like this:

The floor is in focus, from close to far. And yet I am still just at f/2.8!

So far, so good. The question is: once you have a tilt-shift lens, how do you focus it where you want? With the number of variables I just mentioned, there’s just about infinite possibilities, and very few of those actually work for you.

LET’S SIMPLIFY!

I like simplifying. So let’s start with taking variables out. Let’s hold the camera parallel to the floor (i.e. aiming straight ahead, not up or down) and set the focus to infinity. Then the focal plane (“where it’s sharp”) will be perpendicular to the sensor, and since we are holding the camera straight, that means it will be the floor – provided we get the height of the camera above the floor and the angle of tilt down right. Just two things!

And the relationship between them is given by a simple relationship:

J = f/sin θ

Where:

  • J is the distance to the focal plane (“the floor”)
  • f is the focal length of the lens (45mm in my case)
  • θ (theta) is the angle at which you tilt the lens down (down, because the floor is below you).

My 45mm lens can shift down up to 8 degrees.  So the relationship between angle and “how high you have to be above the floor if you want the floor to be in focus” is:

45mm T/S LENS

TILT ANGLE (deg) – DISTANCE (mm)

  • 1°   2,578   (=2.57m)
  • 2°   1,289   (=1.29m)
  • 3°   860   (=86cm)
  • 4°   645   (=65cm)
  • 5°   516   (=52cm)
  • 6°   431   (=43cm)
  • 7°   369   (=37cm)
  • 8°   323  (=32cm)

Remember, this is with the camera pointed straight ahead, and the focus set to infinity. (Why this is so is easily derived from the formulas in the Wikipedia articles and basic knowledge, but I will spare you the math, except to mention that that the tangent of 90 degrees is infinity).

So in my last image, I was about 85cm above the floor, with the lens angled down by 3 degrees. Bingo.

(A tilt-shift pens is hard to adjust very finely: the adjustments are very precise. Patience is needed.)

An alternate way to use this simple rule is to start with what you want. I.e. “if I am x distance away from the floor (and pointing straight ahead with my focus set to infinity), what should my angle be?)

The formula is simply the same as above, so it becomes:

θ = sin-1 (f/J)

So if I want my camera to be, say, 1.7m above the ground, I would have to angle down by sin-1 (a.k.a. arcsin) (45/1700), which my calculator says is 1.52 degrees. Yes, a scientific calculator is handy. Or you could work these out once and carry a little table with you, like this:

45mm T/S lens

DISTANCE (m) – TILT ANGLE (deg)

  • 5m   0.5°
  • 4m   0.7°
  • 3m   0.9°
  • 2m   1.3°
  • 1.5m   1.7°
  • 1m   2.6°
  • 0.5m   5.2°

NOW WE GET A LITTLE MORE COMPLEX

Now let’s let go of the assumptions, namely that you focus on infinity and point straight ahead.

When you alter the focus setting of your lens (i.e. you do not focus on infinity), the focal plane swings up and down. It still starts below your camera at a distance given by the formula at the top, but now it is not parallel to the horizon. As you focus closer, it swings up (or you swing the camera down, whichever you prefer):

Scheimpflug Intersection (Source: Wikimedia)

By how much? I.e. what focus setting will give you what angle?

Aha, glad you asked. Another formula!

From Wikipedia:

ψ = tan-1 ( (u’/f) sin θ)

Where:

  • ψ (psi) = the angle that the focal plane angles up by;
  • u’ = the distance along the line of sight from the centre of the lens to the PoF (i.e. the distance to the focal plane; i.e. the focus setting, since you will be focusing on your plane of focus);
  • f = your lens’s focal length;
  • θ = the angle you have tilted the lens down by.

So that means that while at infinity focus the plane is perpendicular to the sensor, as you focus closer, the plane tilts up.

IN PRACTICE

So now.. knowing all this, in practice, this is what you would do if you want a particular focal plane to be sharp:

  1. Determine how far away from the intended focal plane you will be. E.g. if the intended focal plane is the ground, say in a landscape shot, then you may say “the sensor will be 1 metre above the ground”.
  2. Put the camera on a tripod at that distance from the ground.
  3. Aim it straight ahead (the sensor is vertical).
  4. Set the focus to infinity.
  5. Now, using the tilt-shift mechanism, tilt the lens toward the intended focal plane (e.g. down, in this example) by the angle given by θ = sin-1 (f/J) above, so in our example, with a 45mm lens and 1m distance above the floor, that means angle down by 2.6 degrees.

Alternately:

  1. Aim the camera straight ahead (the sensor is vertical).
  2. Set the focus to infinity.
  3. Now, using the tilt-shift mechanism, tilt the lens toward the intended focal plane until you see it sharp.

Both these ways to get to the same result give you a sharp ground (if that is what you are intending). The first method is less error-prone, of course; calculating angles rather than trial and error is always recommended if you can.

Not perpendicular?

And if the focal plane should not be perpendicular to your sensor, e.g. because the landscape slopes up, or because you wish to aim down at an angle, then start as in the first method above; then (after aiming down if need be*) and simply adjust focus closer than infinity until the plane tilts up to where you want it.

(*) If you aim the camera down, of course the actual distance between it and the intended focal plane increases, so you will have to lessen the tilt angle.

Did I mention this was a little complicated?


Disclaimers: Any errors here are mine. And as said, of course I am simplifying a little here. If we were to be totally accurate, we would take into account the different distances between lens and focal plane on the one hand (hinge rule) and sensor and focal plane on the other hand (Scheimpflug rule); and the fact that a T/S lens on an SLR does not rotate around its axis, but instead, rotates up or down in its entirety; and the fact that a lens is not a simple single-element idealized lens (lens plane versus lens front focal plane). But what I discuss in this article will do entirely well enough in practice.

___

American friends: why am I using metric instead of feet etc, you may ask? Read what The Oatmeal says, and no more words necessary.

 

A Specialty Lens, Again

A good friend today bought a tilt-shift lens. Reason for me to talk about them again here, if briefly.

Like a traditional View Camera, a tilt-shift lens can:

  • Correct perspective distortion by shifting instead of aiming up/down.
  • Give you “dollhouse” selective focus effects.
  • Tilt the focal plane to get focus with wide apertures.

More often than not, the latter is the effect I am after, since the former two can be done in post-processing too, to a large extent. But the shifting cannot.

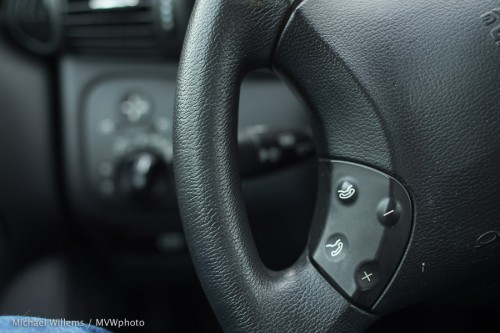
These were all taken at f/2.8. First, I focus on the nearby buttons:

Then I focus on the far buttons:

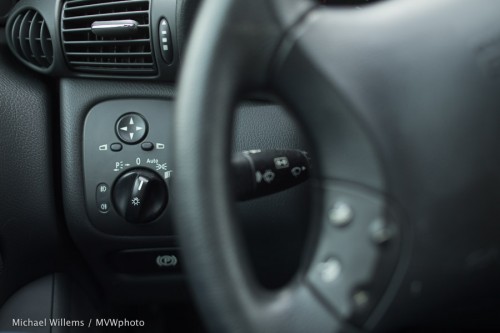
Yeah, that’s f/2.8. Selective DOPF. But only the tilt-shift allows me to focus on both buttons without going to f/11. Still at f/2.8, but I tilt the lens a few degrees and the DOF is still selective, but it rotates:

And that is why I use a tilt-shift, even if I need to expose and focus manually.

How far to tilt? I strongly recommend you read my article here. It’s full of math but even if you don’t get the math, the instructions are going to be useful: if you own a tilt-shift lens, you should be better than users who just guess ad do things by trial and error.

I’ll close by giving you three more examples, all taken at f/2.8 – the last one has both front and back objects sharp, which is impossible without a tilt-shift.

If you are a serious photographer, you might consider getting a tilt-shift – or at least renting one to see if you like it.


Military Technology

Once again, military technology is at the basis of what we do with technology. It is incredible what humans will do in order to more efficiently fight other humans.

In the early 20th century an Austrian army captain named Scheimpflug worked out how to handle perspective in aerial photographs (this would come in handy in WWI, no doubt). Hauptmann Scheimpflug is famous for explaining what we know as the Scheimpflug principle. If you like math, look it up on Wikipedia. I warn you, it took me a while to get my head around all those formulas.

What do they do for us? They tell us how to use tilt-shift lenses (or view cameras) to change the plane of focus.

And I will give you a simplified version of its implications here today (yes, it’s simplified: no need to start pointing that out). I am talking about tilting here today, not about shifting. But even simplified, this is an advanced article that assumes you already know at least the basics of what tilt-shift lenses do.

I wrote this because I usually see people with tilt-shift lenses just wildly change every adjustment randomly: and that is not at all a way to guarantee results. Knowing stuff is always better.

WHAT TILT-SHIFT LENSES CAN DO

A tilt-shift lens (its tilting, specifically) allows you to shift the plane of focus so that you can make sharp not “stuff parallel to the sensor” (like the wall in front of you), but “stuff at an angle to the sensor” (like the floor below you).

Consider this, the normal situation. With my 45mm lens set to f/2.8, I focus on the door, so it is in focus (but the stuff close to me is not):

Or I focus on the stuff closest to me, so it is sharp (but the door is not):

And if I want both in focus, well, I would have to go to a very small aperture (maybe f/16 or even smaller) to get them both sharp. Or to a wider angle lens, or I would have to move way back. None of which may be practical, or even possible.

Enter the tilt-shift lens. If I…

  • tilt the lens down by the the right angle; and
  • hold my camera at the right angle; and
  • am at the right distance from the floor; and
  • focus at the right distance…

(I told you this was complex), then I can do anything I like. Like this:

The floor is in focus, from close to far. And yet I am still just at f/2.8!

So far, so good. The question is: once you have a tilt-shift lens, how do you focus it where you want? With the number of variables I just mentioned, there’s just about infinite possibilities, and very few of those actually work for you.

LET’S SIMPLIFY!

I like simplifying. So let’s start with taking variables out. Let’s hold the camera parallel to the floor (i.e. aiming straight ahead, not up or down) and set the focus to infinity. Then the focal plane (“where it’s sharp”) will be perpendicular to the sensor, and since we are holding the camera straight, that means it will be the floor – provided we get the height of the camera above the floor and the angle of tilt down right. Just two things!

And the relationship between them is given by a simple relationship:

J = f/sin θ

Where:

  • J is the distance to the focal plane (“the floor”)
  • f is the focal length of the lens (45mm in my case)
  • θ (theta) is the angle at which you tilt the lens down (down, because the floor is below you).

My 45mm lens can shift down up to 8 degrees.  So the relationship between angle and “how high you have to be above the floor if you want the floor to be in focus” is:

45mm T/S LENS

TILT ANGLE (deg) – DISTANCE (mm)

  • 1°   2,578   (=2.57m)
  • 2°   1,289   (=1.29m)
  • 3°   860   (=86cm)
  • 4°   645   (=65cm)
  • 5°   516   (=52cm)
  • 6°   431   (=43cm)
  • 7°   369   (=37cm)
  • 8°   323  (=32cm)

Remember, this is with the camera pointed straight ahead, and the focus set to infinity. (Why this is so is easily derived from the formulas in the Wikipedia articles and basic knowledge, but I will spare you the math, except to mention that that the tangent of 90 degrees is infinity).

So in my last image, I was about 85cm above the floor, with the lens angled down by 3 degrees. Bingo.

(A tilt-shift pens is hard to adjust very finely: the adjustments are very precise. Patience is needed.)

An alternate way to use this simple rule is to start with what you want. I.e. “if I am x distance away from the floor (and pointing straight ahead with my focus set to infinity), what should my angle be?)

The formula is simply the same as above, so it becomes:

θ = sin-1 (f/J)

So if I want my camera to be, say, 1.7m above the ground, I would have to angle down by sin-1 (a.k.a. arcsin) (45/1700), which my calculator says is 1.52 degrees. Yes, a scientific calculator is handy. Or you could work these out once and carry a little table with you, like this:

45mm T/S lens

DISTANCE (m) – TILT ANGLE (deg)

  • 5m   0.5°
  • 4m   0.7°
  • 3m   0.9°
  • 2m   1.3°
  • 1.5m   1.7°
  • 1m   2.6°
  • 0.5m   5.2°

NOW WE GET A LITTLE MORE COMPLEX

Now let’s let go of the assumptions, namely that you focus on infinity and point straight ahead.

When you alter the focus setting of your lens (i.e. you do not focus on infinity), the focal plane swings up and down. It still starts below your camera at a distance given by the formula at the top, but now it is not parallel to the horizon. As you focus closer, it swings up (or you swing the camera down, whichever you prefer):

Scheimpflug Intersection (Source: Wikimedia)

By how much? I.e. what focus setting will give you what angle?

Aha, glad you asked. Another formula!

From Wikipedia:

ψ = tan-1 ( (u’/f) sin θ)

Where:

  • ψ (psi) = the angle that the focal plane angles up by;
  • u’ = the distance along the line of sight from the centre of the lens to the PoF (i.e. the distance to the focal plane; i.e. the focus setting, since you will be focusing on your plane of focus);
  • f = your lens’s focal length;
  • θ = the angle you have tilted the lens down by.

So that means that while at infinity focus the plane is perpendicular to the sensor, as you focus closer, the plane tilts up.

IN PRACTICE

So now.. knowing all this, in practice, this is what you would do if you want a particular focal plane to be sharp:

  1. Determine how far away from the intended focal plane you will be. E.g. if the intended focal plane is the ground, say in a landscape shot, then you may say “the sensor will be 1 metre above the ground”.
  2. Put the camera on a tripod at that distance from the ground.
  3. Aim it straight ahead (the sensor is vertical).
  4. Set the focus to infinity.
  5. Now, using the tilt-shift mechanism, tilt the lens toward the intended focal plane (e.g. down, in this example) by the angle given by θ = sin-1 (f/J) above, so in our example, with a 45mm lens and 1m distance above the floor, that means angle down by 2.6 degrees.

Alternately:

  1. Aim the camera straight ahead (the sensor is vertical).
  2. Set the focus to infinity.
  3. Now, using the tilt-shift mechanism, tilt the lens toward the intended focal plane until you see it sharp.

Both these ways to get to the same result give you a sharp ground (if that is what you are intending). The first method is less error-prone, of course; calculating angles rather than trial and error is always recommended if you can.

Not perpendicular?

And if the focal plane should not be perpendicular to your sensor, e.g. because the landscape slopes up, or because you wish to aim down at an angle, then start as in the first method above; then (after aiming down if need be*) and simply adjust focus closer than infinity until the plane tilts up to where you want it.

(*) If you aim the camera down, of course the actual distance between it and the intended focal plane increases, so you will have to lessen the tilt angle.

Did I mention this was a little complicated?


Disclaimers: Any errors here are mine. And as said, of course I am simplifying a little here. If we were to be totally accurate, we would take into account the different distances between lens and focal plane on the one hand (hinge rule) and sensor and focal plane on the other hand (Scheimpflug rule); and the fact that a T/S lens on an SLR does not rotate around its axis, but instead, rotates up or down in its entirety; and the fact that a lens is not a simple single-element idealized lens (lens plane versus lens front focal plane). But what I discuss in this article will do entirely well enough in practice.

___

American friends: why am I using metric instead of feet etc, you may ask? Read what The Oatmeal says, and no more words necessary.
 

A specialty lens worth playing with

A repeat for those new to this blog: one of the coolest lenses you can try is the tilt-shift lens. It basically turns your camera into a view camera, where the lens element can tilt and shift with respect to the film, or in our case, sensor.

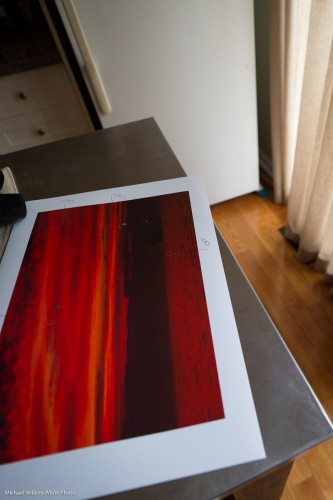
This picture, at f/3.5, shows only the back of the print in focus:

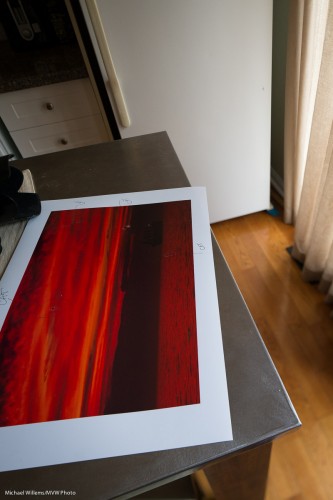
To get the entire picture into focus I guess I could stop down the lens, or move back. But with a tilt-shift I can avoid this: I can just tilt (=angle) the lens down, and I get:

Now the front of the print is sharp, but so are the drawers and fridge in the background; while the curtain is still blurred. I tilted the focal plane to where I wanted it; not just perpendicular to the lens direction (and parallel to the sensor).

Shifting (up-down) allows me to correct for perspective. When I shoot this, aiming the camera up, I get things converging at the top:

Keep the camera parallel to the ground, and shift the lens up, and I get this, straight out of camera, no Lightrooming needed):

(Those were done with the Canon 24mm TS-E f/3.5L lens I have for a few days from GTAlensrentals.com. I own the 45mm TS-E f/2.8 lens, but the wider one is nice for architecture).

Of course you need to expose manually and focus manually with a tilt-shift lens. But that is easy, and a small price to pay, so I have a tilt-shift on my camera rather often. Like the other day in Toronto’s historic Distillery District, above. Here’s Gregory Talas, owner of The Kodiak Gallery in The Distillery, which held several of my exhibits, and still has a few of my pieces on display.
There’s a lot of specialty lenses, like Macro lenses, fish-eyes, and so on, but the tilt-shift is a special specialty lens worth playing with, especially if you have never operated a tilt-shift camera.


Tilt. Shift.

Why do I use my 45mm tilt-shift lens so often? Because I can. Because I like focusing manually. Because it is sharp. And because I can do shots like this even at a wide aperture:

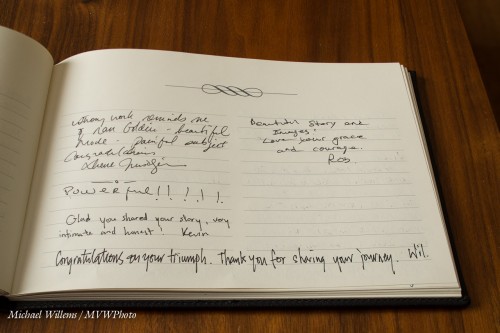
I just shot some pages of one of my exhibit guestbooks. I did this for the upcoming Photosensitive “Picture change” Project, which I am very much honoured to be a part of.

To make pictures of a book like this from behind it, I would normally need to be at, perhaps, f/16. Which would mean no hand-holding, but a tripod and a long exposure. But by tilting the lens down, just as if I were using a view camera, I can shift the plane of focus so that the entire book is in focus even at a wide aperture like f/4. Simple and quick.

I used my tilt-shift yesterday as well, to do some nudes, as training material for the upcoming “art nudes” course. You can see them on my Tumblr feed. Not an obvious lens choice, perhaps (I would normally want a lens in the 35mm range, in a small room), but a good choice under the circumstances, where I am pointing up and down (which is where the shift comes in).

___

(By the way: there is still space on the course, just two spots left; and there are more courses planned too: see http://www.cameratraining.ca/Schedule.html)


Tilt-Shift question

I have talked here before about tilt-shift lenses (search in the search field on the right). I love my 45mm TS-E tilt-shift lens, and I mentioned it in my talk to the Brampton Photo Club.

David H asks:

On Thursday at the BPG meeting you mentioned using tilt-shift lenses for architectural photography. But people have told me that given the price of the lenses, you are better off using photoshop or lightroom for correcting perspective. Now, I realize that tilt-shift lenses have other uses such as their control of focus, but for architectural photography are there other advantages of using them that you can get from using Photoshop or Lightroom?

Good question, David.

And yes, there are benefits to using one of these lenses.

First, the tilt-shift lens has other benefits than architecture. Moving the field of focus (tilting) is often important, rather than perspective correction (shifting).

Second, a Tilt-Shift lens is a prime lens, meaning it is sharp and has a large aperture – f/2.8 typically.

But even for perspective correction there are benefits to doing it in lightroom. Sure, Lightroom makes it easy to correct the convergence at the top you get with vertical lines when you aim a camera upward – a couple of clicks and you are done.

But this is at the cost of

  • Pixels. You draw out the center pixels, meaning that is an image is, say, 4,000 pixels wide, when you are done correcting the top may be only 3,000 pixels wide – meaning less resolution in the finished image. The tilt-shift uses your whole sensor – al 4,000 pixels in this example.
  • Space. By cutting, you are losing bits of your picture.

All these benefits of this type of lens means you may well consider renting one to see what they are all about. Read the articles I wrote here about them and then decide. Remember, you have to both expose and focus manually when using one of these – but that too can be a benefit. Humans know more than chips!


More on tilt-shift lenses

I have been asked to write more about a special lens I mentioned a little while ago: the tilt-shift lens.

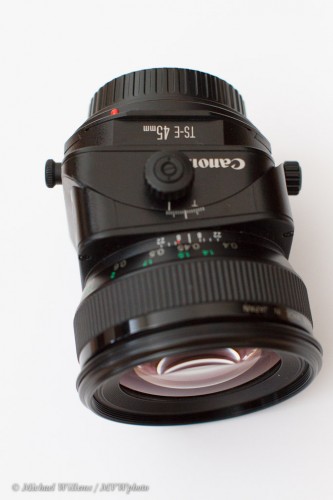
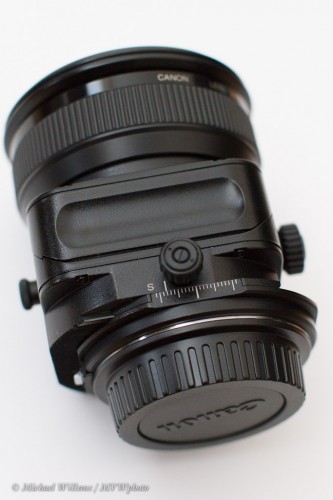
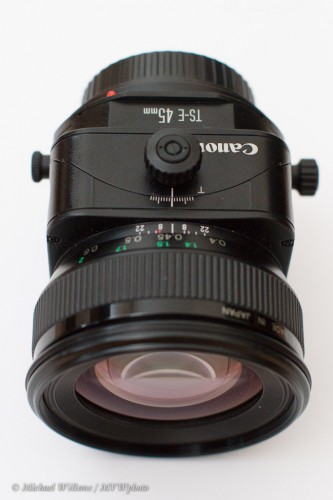
This, as you recall from that prior post, is a manual-focus, prime, special lens that allows you to tilt the lens (change its angle so it does not point straight forward) and shift the lens (so that it points straight forward, but not inline with the camera’s viewpoint). Rather like a view camera. Mine is the Canon TS-E 45:

Shifting with TS-E 45

Tilting with TS-E 45

The question is: but when do you actually use it? Can you show examples?

Sure, here’s a few more examples.

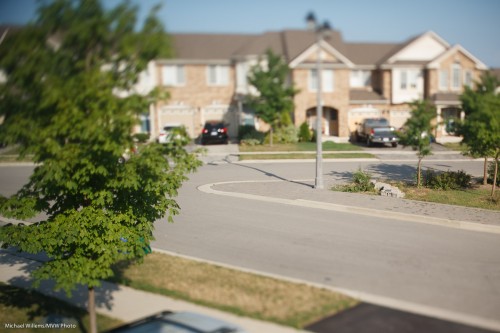
You use this type of lens when you want to introduce “dollhouse”-type distortion:

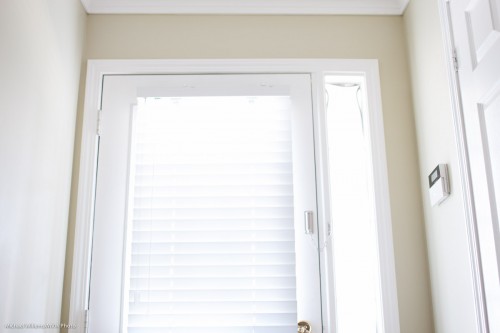
Or when you want to fix perspectival line convergence or divergence in architectural photos, say, like when pointing the camera UP or DOWN.

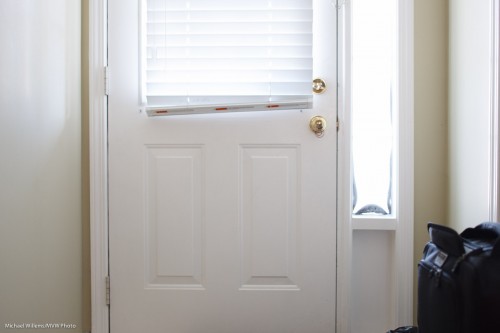
My Door

Top of my door, when I point the camera UP

Top of my door, when instead of pointing up, I shift my lens up

Now those effects of a tilt-shift lens can be mimicked in Photoshop (or Lightroom, in the case of the perspective distortion) quite well.

The third is different: focal plane shifting.

Say I shoot my shoes. I am at f/2.8 because I need light. Unfortunately, that also gets me too-narrow depth of field.

Sometimes I want that, but sometimes I want to see the shoes back to front. With a tilt-shift lens that is easy:

  • Rotate the lens so the tilting goes up-down.
  • Tilt down (towards the closest object that needs to be in focus).
  • Try to focus. If you have not achieved focus in the plane you want, repeat the process with different shift angles until you are happy. Remember, you do not always need the ful tilt angle: sometimes a degree or two will do it.

Now you will get what you want:

The same applies to any object close to you:

No Tilt-Shift lens used, focus on back

No Tilt-Shift lens used, focus on front

Tilt-Shift lens used: focus everywhere

Another example:

f/2.8: No Tilt-Shift lens used: Blurred background

f/2.8: Tilt-Shift lens used: Background also in focus

And one more example:

f/2.8; No Tilt-Shift lens used; focus on back

f/2.8; No Tilt-Shift lens used; focus on front

f/2.8; Tilt-Shift lens used; focus shifted

Notes to observe when using a tilt-shift lens:

  • Small changes in angle/position of camera can have huge changes in focus. Make small changes and use a tripod.
  • Use manual exposure: first meter when you are not shifting or tilting, then lock in that setting. Auto exposure does not work reliably when the lens is shifted or tilted.
  • The focus plane is wedge-shaped and rather critical: take your time to achieve perfect focus.

So when would I (do I) use one?

First, whenever I run into any of the above. Typically, product and architectural photography are two areas that come to mind instantly. The 45 is not a wide-angle lens, so it is suited to “natural looking” images.

But also whenever I feel like shooting things at an angle. And in creative portraits. And when the environment is not great so I need other ways to make portraits and other pictures look interesting. Do not discount a tilt-shift lens for portraits, or anything else. Here’s me a moment ago, with 5 degrees down tilt:

See that nice selective focus effect?

I also use a T/S lens when I want extra narrow DOF. This is what a normal f/2.8 gives me:

And this is what f/2.8 with the lens tilted away from the chair gives me:

See? A T/S lens is for much more than just products and buildings. Don’t discount this type of lens by thinking it is just for those disciplines: a wedding photographer or a portrait pro can use one too! In many of these types of photography, manual focus is a mere inconvenience – or maybe not even an inconvenience: it’s kind of cool to do it yourself.

PRO TIP: if you are interested in this type of lens, rent one. Play for a few days, plan some product, some architecture, some landscape, and some portraits, and have a blast for a day or two. Then you will know what this lens does for you and whether it is worth the money. Only you can decide!


DOF in product photography

I was asked several times in the last few days about a previously made point (yes, since you ask: I repeat things quite frequently, since repeating is the way we learn – especially if, as I do, you explain in a slightly different way each time).

In product photography, you often want great depth of field (“DOF”) – i.e. everything is sharp from front to back. Like in this picture of one of the best calculators ever made, and shame on HP for stopping production: this is still the best calculator I have ever owned:

Oh, but we cannot see the calculator at the back. DOF is insufficient. Well, I suppose we could shoot at f/45 if our lens allowed it, but that would lead to slow shutter, fuzzy pictures, and might still not be enough even then.

So? The tilt-shift lens to the rescue. Resulting in this, at the same settings, including an aperture setting of f/3,5!

This is that lens:

It is a manual focus only lens that allows tilting, which moves the focus plane, like for the shot above:

And it allows shifting, for occasions where you point up or down or left and right, like in architecture, and you do not want verticals to converge.

It also allows turning by 90 degrees, so your tilting and shifting can be along any axis, horizontal or vertical or diagonal.

The last adjustment is interesting: unlike the DOF, this you could usually also do in Lightroom (or PS if you feel so inclined), but why bother if you can do it while shooting?

Tilt-Shift: A specialized lens, but invaluable (meaning valuable – the English language is illogical) for product shots. Real product photographers should own one, so if you need product shot and you do not own this type of lens… call me!


Tilt-Shift

You may have heard of “tilt-shift-lenses”. These are lenses that.. well, tilt and shift. You can tilt the lens to the right or left (or up and down), and you can shift the entire lens up or down (or left and right).

Today, I am using the Canon TS-E 45mm f/2.8, a lens I borrowed from my friend Kristof, a very talented photographer. You can see that lens reviewed here, on The Digital Photographer: I shall not bother to add to that.

What I will briefly explain is this. A tilt-shift lens is not just used to bring converging verticals back to vertical. Yes, that too: but as many people point out, you can do that in Lightroom or Photoshop too. Same, I suppose, with the crazy weird “dollhouse” focus effects a Tilt-Shift lens can give you.

What you can not do in Lightroom or Photoshop is this: focus in a plane that is not perpendicular to your camera.

I mean this. Let’s look at a picture of some of the spices and condiments I use when cooking:

They are lined up front to back… the back is farther away from me. So at f/2.8, the back is way out of focus (click to see large: you will see by how much). Even at very small apertures like f/11 or worse, I would still see this effect (because I am so close); plus, I would lose the blurred background I want.

So here is where Tilt-Shift comes to the rescue! When I tilt the lens to the left (so it is more perpendicular to the desired plane of focus), I can shoot with everything sharp. In this case, a shift to the left of just 2.5 degrees did it:

Problem solved – all sharp where I want it to be, even at f/2.8.

So why not use Tilt-Shift lenses all the time? Well, for one, they are expensive (partly because the larger image circle needed means more glass). Also, they are manual focus lenses: no autofocus. And you need to take the time to get the effects right, and to focus accurately. You will want to use a tripod, and you will want to take your time.

But for many shots there is no substitute – like portraits where you want both eyes sharp, but the background blurry; architecture; and many types of studio product shot – even the shifting comes in handy there since you can shoot up or down without converging/diverging verticals.