Fill the frame

Another “fill the frame”-shot here for your edification.

Shot while I was having dinner at a wedding – I was one of the two photographers but we were fed, at a very nice table in a good position. And even there I was shooting. Like the arrangement at the centre of the table.

MVW_0165

You can get good pictures anywhere you try. The closer you get, the easier it is. I used my 70-200mm lens for this. So whenever you think “what do I shoot now”, you can always pick some interesting item, zoom all the way in on it, and shoot.

Let there be light

..and let it be managed.

I have talked about this many times before, and I will do it again. When you add light, and manage it, massage it, and work with i, you get drama, cheerfulness, whatever you like. So when you make the light, you make the mood.

Case in point. In the model shoot I did Monday on Toronto Island, here’s the light the way it might look to a casual observer, and the way it might appear in a properly exposed photo:

MVW_2600

Fine. Nice. Pretty young lady (Miss Halton, incidentally) on the beach.

Now let’s work with that. That background is a bit bland to my taste, so let’s darken it. The colours on the model are OK but I’d like them to stand out more.I want drama, and I want the model to stand out, not to be just a thing on a beach.

So first I turn down the ambient exposure. Two stops.That will make light blue into dark dramatic blue. Then I add a flash, on a light stand – shot through an umbrella to get soft light.  I fire that from my on-camera flash using E-TTL II IR technology. I turn the flash up or down as needed.

I now get the result I had in mind.

MVW_2601

That’s better.

And more importantly: that’s entirely different. And that is the photographer’s task, to make things the way he or she wants them. You can say you like, or you don’t like – but you can’t say it isn’t different!

How I rate photos in Lightroom

It occurs to me that it may be helpful to share my “rating”-workflow in Lightroom. I go through the following sequence:

  1. Import everything as 2 stars
  2. Go to grid view and step through them, and reject any that are technically bad (e.g. out of focus or badly exposed, or the subject is blinking). They get an “X” marking. I exclude X from my view.
  3. Go through them again and rate any that “could possibly be used” as 3.
  4. Go through the threes again and rate any that are “great in this shoot” as 4.
  5. Go through the fours again and give any that are “great and can be used even outside this shoot as portfolio shots” a five rating.
  6. Then I select just the 4 and 5 stars rate them all as PICK.
  7. Then I step through the 3 stars and decide with of them I want to use; I rate those as PICK also.
  8. Then I check for doubles and unpick those.
  9. Then I do any post on my picks.

Done.

Here’s a couple of (unedited)  4-star images from yesterday’s Toronto Island model shoot:

MVW_2386-2

MVW_2360

(70-200 f/2.8 IS lens on 1D MkIII, manual exposure -2 stops from ambient and key flash though umbrella, fill flash on camera.)

What time is it?

When photographing a watch or clock, it is always nine minutes and 31-and-a-half seconds after ten. As in my watch the other day:

MVWS0101

That way, watches look most appealing. Look for it. Almost every watch is photographed at this “rule of time” position.

yet another one of the ten thousand tips that make a photographer!

And can you see that I used a 35mm f/1.4 lens in available light?

Context

One trick when you take a picture – no, make a picture – is to tell a bit of a story. One way to do that is to provide both a subject and context. And to separate them. By position, or by distance, or by size, or, as in this picture, which I took for The Oakville Beaver in April, by blurring out the background – which then becomes the context.

Studio wide

In fact as you see I used size as well: the ultra-wide lens (16mm) makes the distance look far away, because I am so close to the foreground object.

For a shot like this I use my 16-35mm f/2.8 lens on my Canon 1Ds MkIII camera. That great lens gives me the ability to get close, go wide, and yet to blur out backgrounds, which at wide angles is not easy unless you have that kind of wide aperture. Of course “getting close to your subject” is a way to enhance the “blurry background” effect.

Assignment "snap"

Here’s an interesting assignment for pros, emerging pros and enthusiasts: Shoot in Program mode for a day.

That way, for once you are not thinking about Aperture, DOF, drag, motion blur, and such. For one day, you will be thinking about your subjects, instead of about technology. And this makes some sense; One famous wedding pro even shoots in “P”mode, I am told.

MVWS1292

You might try this assignment in the city, for some street photography. Or at some event. Either way, it’ll likely reset some of your thinking. And perhaps even open your eyes a bit more in familiar environments.

MVWS0962

Have fun!

Not Neye-kon.

The following press release tells me several things:

September 9, 2009

Nikon Corporation (Michio Kariya, President) is pleased to announce that as of August 2009 total production of NIKKOR lenses, interchangeable lenses for Nikon SLR cameras, reached fifty million. Total production of NIKKOR lenses reached forty-five million in August 2008 with production of an additional five million over the past year.

Nikon (then Nippon Kogaku K.K.) released its first NIKKOR lens for Nikon SLR cameras, the NIKKOR-S Auto 5cm f/2, in 1959 along with its first SLR camera, the Nikon F. In the fifty years since then, NIKKOR lenses have been extremely well received by a great number of photo enthusiasts and professional photographers.

The current lineup of more than sixty NIKKOR lenses for Nikon SLR cameras offers a wide variety of lenses, including fisheye lenses, super wide-angle to super telephoto lenses and micro lenses.

The NIKKOR brand

As the brand name for Nikon lenses, NIKKOR has become synonymous with high-performance, high-quality SLR lenses. The NIKKOR name comes from adding “R”—a common practice in the naming of photographic lenses at that time—to “Nikko”, the Romanized abbreviation for Nippon Kogaku K.K. In 1933, the large-format lens for aerial photography was released with the name Aero-Nikkor, making last year the 75th anniversary of the NIKKOR brand.

First, a trivial one. Americans (and Canadians, who seem to follow Americans all too often) say “Neye-kon”. Elsewhere we say “Nikkon”, i.e. with the “i” pronounced as in “women”. And since the derivation is from Nippon (Japan), I can now finally see that that latter pronounciation is correct. (If you do not know Nippon, it is the official name for Japan, as my father learned during WW2 when he and his family were a guest of the emperor). So anyway: Nikon as in “Nikkon”, “i” as in women”.

Second, a more important one, 5 million lenses since Nikon was born in the same year I was born in, and 10% of them made in the last year. A recession year, to wit. That is huge, and shows how amazingly popular photography is becoming with digital technology.

Good times ahead for the makers, and good times for all the people who will have more pictures of their families than I have of mine. Take pictures while you can. Or one day it’ll be too late and you will wonder “why do I have so few pictures of my kids growing up, or of my parents or friends”.

Charge!!

Nope.. not the command of the Light Brigade commander to his men.

Well, that too. But in my case, advice.

Unlike the old “memory effect” NiCad or NiMH batteries, modern Lithium Ion (LiIon) batteries like to be charged every day. Like your car battery. They do not suffer from being topped up all day every day – rather the reverse. They like it.

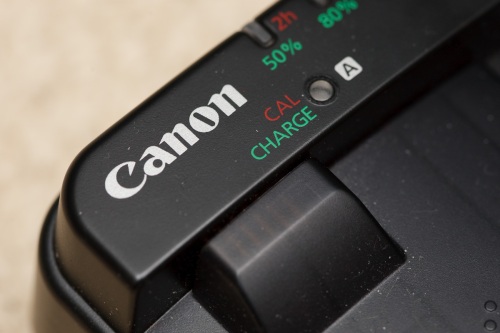
Charger

And your modern camera battery is the same. Which is great news. It means you never have to leave home without a fresh, 100% full battery.

So here is my advice: charge your battery daily. Yes, every day. Every time i get home, my battery gets a topup. That is good for LiIon batteries, and no they do not suffer as a result. The charger will stop when they’re done. And doing this daily is good for LiIonbatteries.

Sometimes, technology gets better. Actually, often it does. It is rare that it gets worse. Concorde is one of the very rare examples of the opposite.

Real Estate

When I was in Montreal a few weeks ago to bring my son back to school, my eye was caught by this closed-off street.

block

And then I realized what it was.

You see that missing concrete block three floors from the top, on the left? That is what killed the poor woman who was having an anniversary dinner with her husband in the sushi bar at the bottom. Bet you read about that in the newspapers. Terrible tragedy.

And a reminder not to have dinner under a building in Montreal, where bridges and buildings do have a tendency to keep doing this.

And a reminder -as if I needed that – to always carry my camera. My wide angle lens (20mm on my full-frame camera) allowed me to capture it all, from the missing block to the “sushi” sign below.

Another reason I was glad to have the camera: so I could photograph the mold on the ceiling of Jason’s new apartment’s bathroom. Mold that that landlord says does not exist, and he resent my implications and thinks I have ulterior motives and so on. Yeah right: bathroom ceilings and walls are supposed to look like this:

mold

Feel free to zoom in. We’ll see about your protestations, M. Fattal!

Balance light

You know the problem. You shoot a living room with large windows and what do you get?

OK outside. A bit light but OK. But dark furniture. Like, silhouettes.

Ah no – you went to a photo course, so you know about “exposure compensation” – the “+/- button”. So you turn that up to, oh, plus two stop (to make it brighter) – and yes, now the furniture looks light. Nice.

But uh oh – the window is now all white. Nothing visible. Like a gateway to heaven in “heaven can wait”.

Fortunately, you have also done a “mastering flash” course. So you know to:

  1. Turn exposure compensation down to make the sky nice and blue
  2. Then turn on the flash (and turn it around so it lights up the wall behind you)
  3. Then take a test shot
  4. Then decide whether to use “flash exposure compensation” – the “plus minus with flash next to it”. This turns the flash power up or down. You decide you need some more light on the furniture so you turn this to plus one stop.

Now here’s your picture:

MVWS0145-2

Nicer, no? Try this technique if you haven’t yet. And you can compete with the best interior photographers.