Christmas gifts – there is still time…

… to buy your significant other a custom training course.

A three-hour individual one-on-one course with me is not only affordable and fun: it is also useful, because you will see your photographic skills visibly improve, and get sooo much more out of your camera. So if you are stuck wondering what to buy last minute: a certificate for a course, usable any time, may be just the ticket. If so, plenty of time to act – contact me today.

Or if you are like me, you do this Christmas eve at 4pm. That is when I shall be doing my shopping.

Mode tip

And today, another tip for my readers:

When shooting a subject in consistent light, use manual mode.

  • When you use aperture mode, the reflectivity of the subject, if it changes, will change your exposure time for every shot.
  • If, on the other hand, you spot meter and set a manual exposure, while the light remains the same, you exposures will all be good.

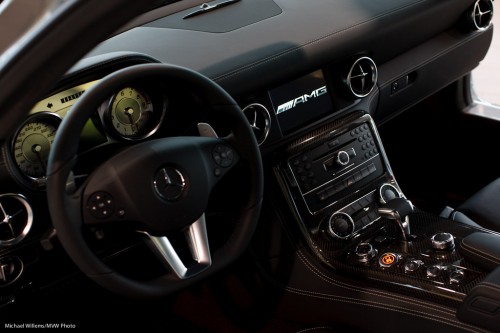
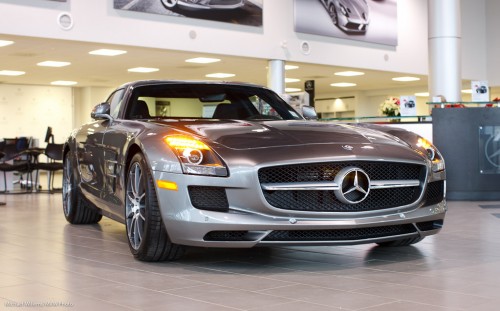
So when I was taking a few snaps of a car the other day at my local car dealership, I used manual mode (“M”). So I was able to shoot this:

Mercedes Benz

And this:

Cockpit

Without changing exposures. Since the light remained the same, the first exposure values could be used for all further shots: if it’s good once, it’ll remain good until the light changes.

By the way, in both shots the moment was chosen judiciously: the indicator light in shot one, and the “AMG” logo on the display in photo 2. The right moment!

And when you have taken exposure out of the equation, you can concentrate on composition and moment. That is why manual is often a good choice.

And may all your…

….festive seasons be white!

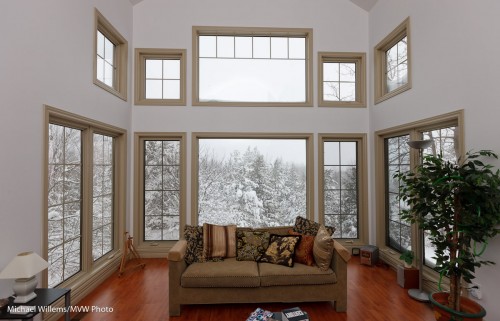
A quick reminder therefore of some basic flash technique.  Look at this shot of my living room the other day:

Snow outside

To shoot that you take the following steps:

  1. Expose for the background (use your camera’s spot meter and point at a tree, or use smart metering with +1 to +2 stops exposure compensation).
  2. Add a flash you your camera. Turn the flash head above and behind you.
  3. In a white room such as this, also use flash compensation, say +1 stops for a start.

And there you go, a well exposed picture. Have fun!

Screen tip

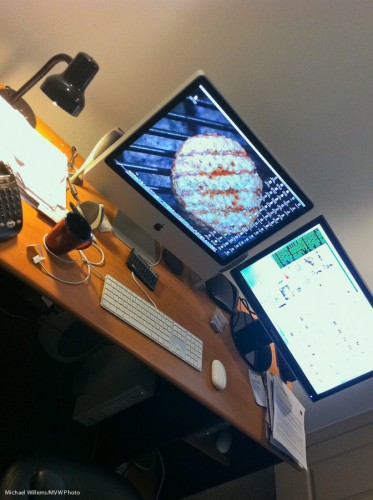
I have two screens connected to my computer. Or rather, since the Mac is integrated with one screen, I have an extra screen connected, see the right side:

You can connect an extra screen to most computers, Macs as well as PCs.

Why? Here’s why.

  • More real estate (space, in English) is always good. Make things bigger.
  • I can open a browser and drag it to screen two, while sending an email about what I see on screen one.
  • I can have my calendar open on screen two while I write an invoice on screen one.
  • I can open Photoshop on the left while I use a command line on the right
  • I can always use Twitter, Facebook, etc on the right screen while I work on the left screen.
  • And importantly, when using Lightroom, I can use it in two-screen mode. That makes it possible for me to have a grid open on the right while I edit in detail on the left.

There is no limit to what you can do – and your productivity goes up.

And yes. My desktop background this month is a barbecue hamburger.

A very Canadian endeavour

Since it is winter, I thought it might be a good idea to give you a quick recipe for a winter sport a lot of you (and not only the Canadians!) play, or shoot when your kids play.

That is, of course, hockey. (“Ice hockey”, for my European readers).
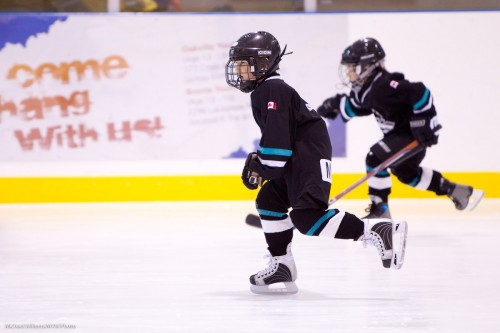
A hockey arena is quite bright.

Perhaps. But in your images, you need it to be really white, which means longer exposures. While to stop motion, you need shutter speeds to be fast. Which pulls you the other way.

So the solution, if you can afford it, is a fast lens (like an f/2.8 70-200 lens, which  lot of pros use). For that lens, a typical starting “settings-recipe” might be:

  • Camera on manual mode (“M”).
  • 1600 ISO.
  • Aperture f/2.8.
  • Shutter 1/400th second.
  • Continuous shutter drive.
  • AF-C/AI Servo focus.
  • White balance on “Fluorescent” .
  • Lens IS/VR off, or mode 2 (or ON if you keep the lens steady).
  • Shoot through the glass at right angles, if you can.

For a standard f/3.5-5.6 “kit” lens, the settings are:

  • Camera on manual mode (“M”).
  • 1600 ISO.
  • Aperture f/5.6.
  • Shutter 1/100th second.
  • Continuous shutter drive.
  • AF-C/AI Servo focus.
  • White balance on “Fluorescent”.
  • Lens IS/VR off, or mode 2 (or ON if you keep the lens steady).
  • Shoot through the glass at right angles, if you can.

In the latter case, you will have to work harder to get enough sharp images.

In both cases, of course, these are starting points. You may well find that your particular arena is darker, or even lighter. Look at the histogram to ascertain which it is – the ice should show as a large peak on the very right side of the histogram, just shy of the right edge.

And have fun!

POSTSCRIPT: an anonymous user said, and I paraphrase: “White balance should be according to the temperature of the light which varies from arena to arena. Custom white balance off of the ice or better yet the referee’s jersey. Also; 1/100? They better skate super slow… Even 1/400 is a bit on the slow side. Crank up your ASA: Your mark-IV can go higher than 1600. Finally; try and get the puck in the picture.”

Read carefully, please: those are starting points, anonymous user. Of course you can accurately white balance off the ice, as I have pointed out here repeatedly in the past, and of course when you shoot, you shoot action, puck, wipeouts, emotion, and so on. But fluorescent WB is usually very close, and for parents, a picture of their child is better than a picture of someone else’s kid who has  the puck.

And finally, yes, my 1D can go to very high ISO – but I do not need to: I have an f/2.8 lens. Parents with an f/5.6 consumer lens, however, will often have a consumer camera, hence will be stuck at 1600 maximum. This therefore will mean something not unlike 1/100th of a second. Not ideal, and it will take many shots to get a few good ones. Compare the two situations: I am making a didactic point, which was perhaps lost on you.

But then – we pay nothing for those extra shots, and if it is all you have, it is what you will have to use. And fortunately, small hockey kids do not skate fast!

Shameless

A shameless promo (but only as the second post of the day, never worry).

You see, I do photography for a living – shooting and teaching. And a few recent shoots have reminded me how few people have proper headshots done. So I aim to change that.

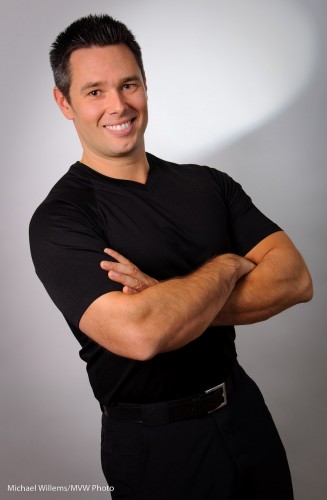
My offer: I will do your executive headshot (like the example below, of my assistant in yesterday’s shot) for the special price when you see when you click on the “Special Winter Pricing” ad on the right. This “turn-key” deal includes shooting on location, the large, print sized photographer choice files (at least four) with an unlimited license to use them, and post-production on these.

But for readers of this blog who live near Toronto I do two additional things.

  1. I take an additional 10% off if you quote this blog post.
  2. While I do your headshot, I explain exactly what I am doing and how I am doing it, so it becomes a lesson as well as a professional picture for your blog, resume, web site, or wall.

If you are interested, email me (michael@mvwphoto.com) and let’s plan the date real soon.

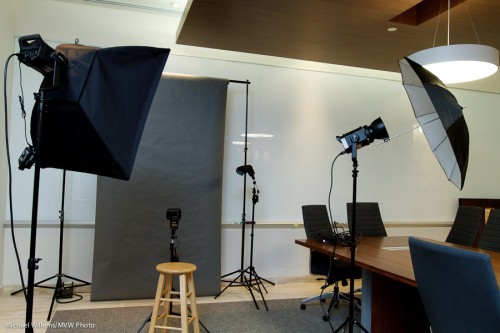
Oh, and to give you some idea of what is involved: apart from the top quality equipment and, well, me, there’s also the setup, a car full of it:

Portable four-light studio

I cannot (much as I would like to!) promise an able assistant with a master’s degree in Economics for every shoot, but I can pretty much guarantee all the rest!

Finishing

Today’s post is about finishing faces. It has no illustrative photo, for a reason.

You see, when you shoot a portrait, with today’s multi megapixel cameras and great lenses, you can zoom in to pore-level. And when you do that, even Angelina Jolie is human rather than angelic.

So it behooves us to be a little easy on the skin. To go easy on imperfections. But in a subtle manner.

Here are a few things to make things look better after the fact:

  1. Use a softening filter. We rarely do this anymore in the Photoshop age.
  2. Select a soft image setting in our cameras. This too is unnecessary.
  3. Use the “Clarity” setting in Lightroom, and set it to, say, -15. This is mathematical magic worth trying.
  4. Use Lightroom’s (or Photoshop’s)  healing brush to permanently remove temporary blemishes – such as pimples, bruises, etc.
  5. Use Photoshop’s Healing Brush to move wayward hairs into place.
  6. Use the same Lightroom Healing brush to make slight facial adjustments (I have been known to ever so slightly move an eye).
  7. Minimize permanent features – Healing brush set to an opacity of 33%, say.
  8. Use the HSL tool to increase the luminance of orange – this is kind to skin.
  9. Optimize the exposure of skin – the brighter, the smoother.
  10. Slightly vignette the image.

And with some simple tools like the ones above, carried out in seconds, we can subtly impriove faces until the subject loves the image without knowing quite why.

And that is why I am not illustrating this with an image. I would rather keep everyone guessing.

Portrait tip

A quick tip or two – a few things to keep in mind when shooting studio portraits.

Like this one of my assistant Matt at this morning’s location shoot (where Matt kindly stood in for the subjects prior to their arrival, while we measured and adjusted the lights):

When shooting a studio portrait like this, there are a few things to keep in mind. These include:

  • Be sure you get a catch light in the eyes (usually from your main light)
  • If your subject wears glasses, do not turn their head too much.
  • Also, make sure the glasses do not reflect light. If they do, move your light source or ask the subject to aim their head very slightly down.
  • Ask your subject to move their head a little each time, and thus take various shots. I usually try to get at last four images – even the same look when shot seconds apart will lead to a different picture each time.
  • Ensure the ties, collars, etc, are well adjusted. You cannot do it over when you look at the pictures at home.

That was the quick tip of the day. Quick five tips, really.

Storytime

When you shoot an event, say a party, remember to tell a story. That means you also shoot, in addition to the “grip and grin” happy faces, the following background shots:

Where? – an “establishing shot”

What? Is it a happy occasion?

Why? What is the occasion?

Who?

And finally, How?

These shots, which you intersperse with the happy snaps, make your shooting so much more valuable.

Most event photographers forget this. If you don’t your shots will be better.

On another note: I need an assistant, maybe an ex student, for a two-hour corporate headshot shoot, tomorrow morning (Friday morning) in north Toronto by the 401, at 8am. If interested, email! (UPDATE: this position has been filled)

Light as a creative tool

A quick tip today. Look at this portrait of a personal trainer which I helped a student take earlier today:

Portrait of Travis

Standard key light (a small strobe), fill light (in an umbrella) against a white background. But instead of onto the head, which is already separated from the background by its colour, I turned the hairlight onto the background.

And because it has a snoot on it (a Honl Photo snoot, attached to a speed strap), I get this nice parabola-shaped beam of light behind the subject’s head. A technique worth using occasionally. Avoid getting stuck in the “same old light” category!

(The parabola reminds me of a satellite, somehow. Probaby because have an engineering degree?)