A quick product recipe

Here again is a quick product flash recipe using small flashes, since many of you have asked me.

Step by step, then:

ONE. Find a neutral background.

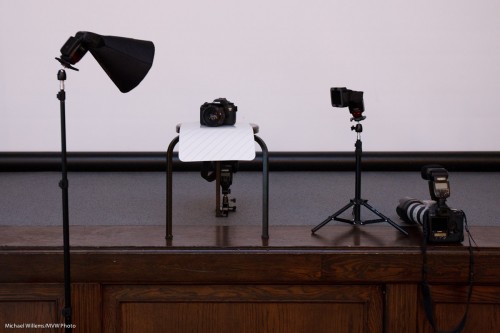
TWO. Now find a stool, plus a surface for the product, preferably a sloping one. Put the product on the surface, with the background behind (far enough – the farther the better, usually), and do a sanity check. Look ok?

THREE. Add a main light. For this, use a flash with a modifier. I used a Honl Photo softbox in yesterday’s Three Minute Shot. Put this on a light stand, close to the product (close means larger, hence softer; it also means less light falls onto the background. This is important if you want to color it or leave it dark.)

FOUR. Add a fill light or edge light. I use a speedlight with a grid. Aim this at the product’s other side. In my case, slightly from behind.

FIVE. Add a background light. Again, I use a speedlight with a grid. Aim this at the background. I added a gel to the light: steel green seemed a nice colour.

Simple, no? This looked like this, in yesterday’s Three Minute Shot setup:

%2</p

—-

POST: Oh I hate this. I wrote a LONG blog post here, with TEN points, and then some more. And it seems to have vanished. And at midnight, I am not going to rewrite it.

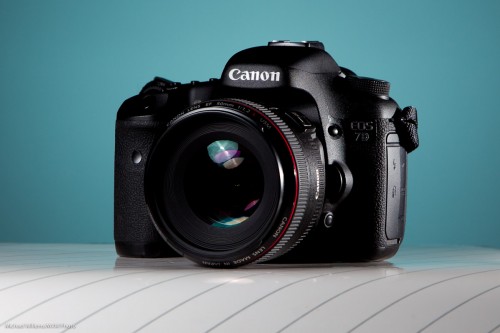
But at least let me share the resulting shot:

Sigh!

Turkey shooting season

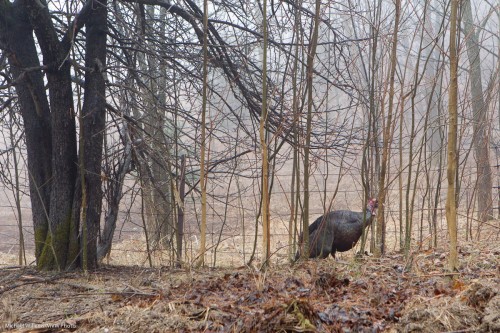
Man, the turkeys are wild out here in Mono. So I encountered this guy the other day, on my way home (I am informed he is a tom):

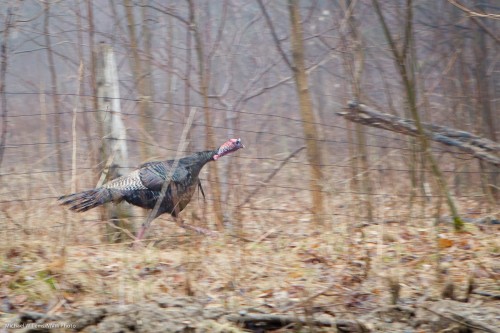
He is trying to get away from my car, but the fence prevents this. He runs and runs but the fence never ends. Brains are not the strongest suit for these birds, apparently. His girlfriends, incidentally, did run the right way, and they got away much more easily.

So I pan – in other words, I follow him with my camera as I shoot. That results in a blurred background and a fairly sharp bird:

In the original of image two, I had fairly low contrast: it was a very foggy day. Plus I was moving. Plus the bird was moving, too. I therefore did a little post work in Lightroom – a few seconds worth:

  • Exposure up half a stop;
  • “Blacks” to +25;
  • Slight white balance tweak to bring it to what I saw.

That was all I need to make a low-contrast image into an acceptable shot.

Sometimes you cannot capture what you want in the camera, and in those cases, as long as it not a news image, a little post work is, I think, allowed. (Click and view original size to see the real image, as always.)

Last Tango in Mono

A reminder for those of you who live in the Toronto area and who want to learn all about flash and creative light: the last ever Mono workshop is on Saturday, 23 April, and there are just two spots left.

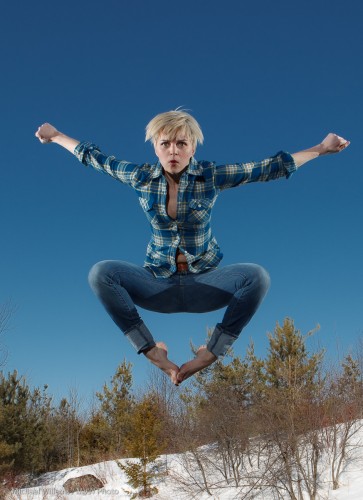
This workshop, in the country home I am leaving at the end of this month, teaches you first the technical points, and then Joseph Marranca and I help you put those into practice. So you will learn – plus you go back with actual portfolio shots that you have made – like these, from previous workshops:

Angry Jump

Angry Jump

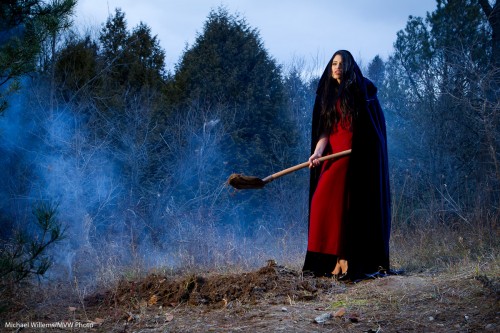
All of these were shot “as is”, and minimal processing has been done. The shots were made in the camera, not in post. The one thing they have in common is that they use creative light.

Burying a dead lover

Burying a dead lover

Smoke machine, gels, white balance: all doable once you know how.

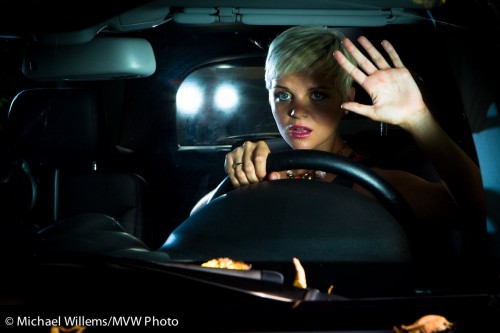
Hitchcock! - Shot by Joseph Marranca and Michael Willems, Mono, Ontario, 2010

Hitchcock!

That was a “broad daylight” shot, above.  Shot with just speedlights. Yup, that is what creative light can do.

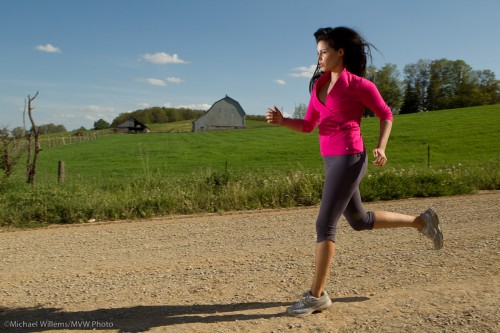
Lit Runner - Shot by Joseph Marranca and Michael Willems, Mono, Ontario, 2010

Lit Runner

Cross lighting – wonderful, no?

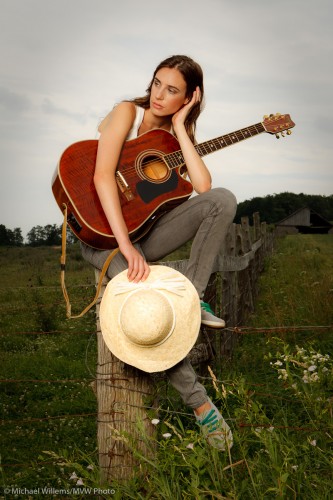
Pensive Girl - Shot by Joseph Marranca and Michael Willems, Mono, Ontario, 2010

Pensive Girl

Looks photoshopped? Nope. Just exposed well and lit well. Simple once you know, and that is what these workshops are all about.

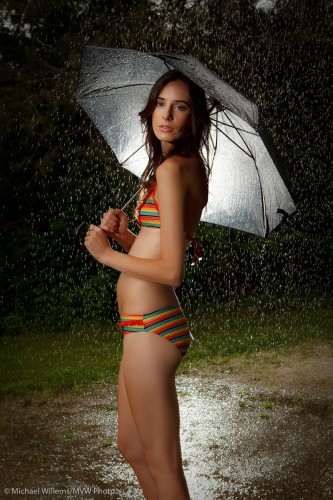
Umbrella Girl - Shot by Joseph Marranca and Michael Willems, Mono, Ontario, 2010

Umbrella Girl

The shot above was another daylight shot, nice day, no rain – but as it happens, we had a garden hose.

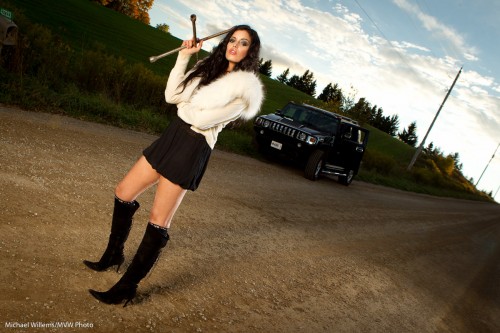
Hummer threat - Shot by Joseph Marranca and Michael Willems, Mono, Ontario, 2010

Hummer threat

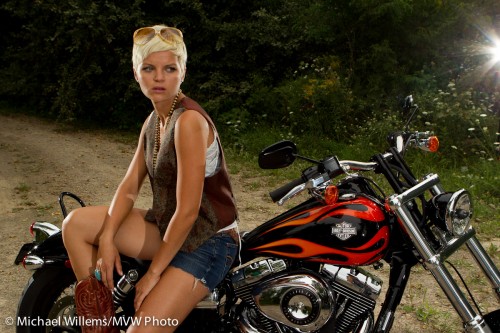
We have shot Hummers, Horses, and indeed also a Harley:

Harley Chick - Shot by Michael Willems and Joseph Marranca, Mono, 2010

Harley Chick

Those are just a few of the shots we did in past workshops – and Saturday’s will be a very special one. Think “wakeboarder” and “green screen”.

If you have always wanted to learn flash and then learn how to apply it both practically and creatively, book now and come to Mono.

Of course we will do more workshops going forward, but they will no longer be in Mono – one of the most amazing settings you will ever shoot in. Two spots left, and we will not allow more in, since the student-teacher ratio is very important to us. This is not a “20 people, one instructor” workshop (rather, it is “no more than 10 students, and two pro instructors”).

See you Saturday – and others, you will see a few shots here later.


Let there be…

..light. Because when it is dark, it may not be.

Let me explain.

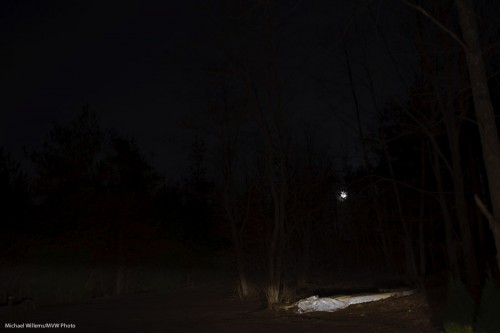
I am home and as I just parked my car I thought “let’s take a snap of the driveway as I am seeing it”. This is what I was seeing. Not much.

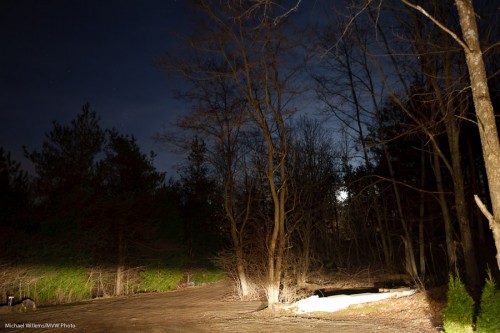
Then I did it again but now four stops brighter. I simply used aperture mode, set my ISO a tad higher since I had no tripod (I was simply holding my camera on the steering wheel, and the foreground light was my dim parking light):

The point: it is as bright, or as dark, as you want it to be.

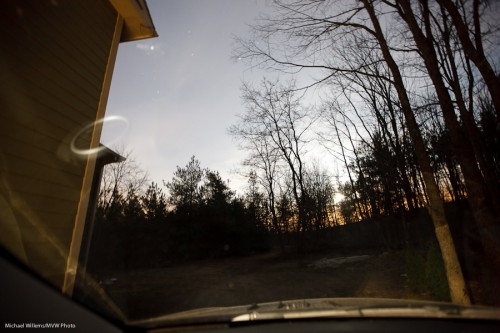
Hey, even when I turn off all the lights: simply expose for 30 seconds and I get this (and here I should have used a tripod since I was shivering – it is freezing, April 18 and it is below freezing. God, bring on Global Warming please).

Night into day. So the message is this. While we cannot be God and turn Canada into Bermuda (if only), what we can do is “let there be light”.

Light is like spray paint. The longer it keeps coming for, the more you get. “Dark” does not mean “dark”, necessarily, and “light” does not always mean “light”. Your camera is a light-shifting device, and if you never use this aspect, you are missing out big time.

Let there be light.

When you shoot a studio portrait, you can use big studio lights – or small speedlights.

Because they are smaller and lighter, I tend to use small speedlights whenever I can.

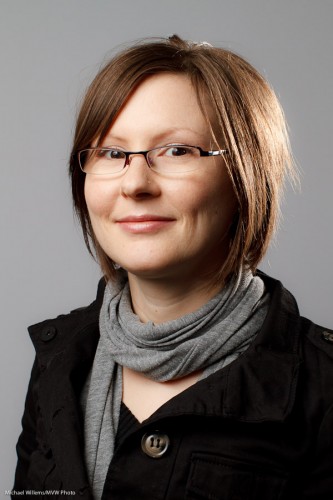
And that does not mean compromising quality. Take this example. I took this shot of a very nice model and student during a course the other day, using TTL speedlights:

How is this done?

  • One flash on a light stand into an umbrella (the “A”-flash), on our left. High enough to give us nice catch lights in the eyes, but no reflections in the glasses.
  • The hairlight is one snooted speedlight (the “B”-flash) on the right (using a Honl photo snoot). I made sure this hairlight only lit of the hair, not the cheeks. That is what the snoot is for.
  • I used a Canon 7D with a 50mm lens.
  • I set the camera to manual, f/8, 1/200th second, 200 ISO. Normal settings for studio light. I made sure auto ISO was disabled.
  • The flash was set to its normal TTL mode.
  • I used flash compensation of, if I recall right, +1/3 stop.
  • The “A:B ratio” was set to 3:1, meaning A was three times stronger than B.

I could have metered and used Pocketwizards and the flashes set to manual, and if I had done many portraits, I would have. But for a quick shot like this, I think TTL is a better way, since it is very quick. Indoors, wireless TTL is a no brainer, and it works:  the on-camera flash, which is only used to direct the slave flashes, can be seen by any flash in the room. On a Nikon, or a Canon 7D or 60D, I need only the camera and its pop-up flash. On any other Canon, I would also need a 580EX flash on the camera, to direct the slaves.

But the portrait above is missing something, no? The background is a bit, well, bland.

So we add one more light, using a grid. And a gel. For the gel, I choose a complimentary colour: complimentary to the hair colour. So for brownish-reddish hair I use a beautiful blue-ish gel.

Now we get:

Better, no? Nice portrait, and it took only one light stand, one umbrella, three flashes, one grid, one gel, one 5″ snoot.  All this is affordable, small, light.Professional portraits are now within reach of everyone.

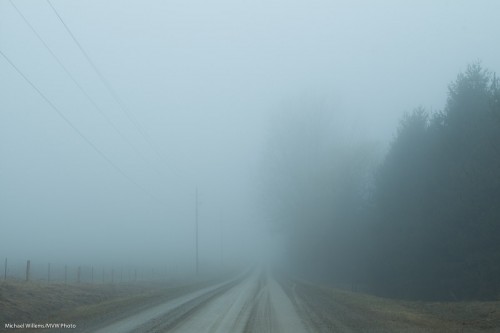
On my drive home, almost there last night, I was struck by how beautiful fog is.

25th Sideroad, Mono, in fog (Photo: Michael Willems)

25th Sideroad, Mono, in fog

For the technically minded: 38mm lens on a 1.3 crop camera, meaning “standard 50mm”, the “nifty fifty” look. 100 ISO, f/5.6, 1/50th second.

Reader lens question

Richard, a frequent reader, asks:

I have been researching the Canon L series lens’ 16-35 F/2.8 vs 24-70 F/2.8. I have my daughter’s graduation in May, which combines an indoor ceremony with an outside function. I expect I will be further away for most shots, but want sharpness, quality and a fast lens in either case. I also have my Canon 50mm F/1.4 for the real nice inside close-ups, where speed/blur is important. I am leaning towards the 24-70 F/2.8 as I think I will get more long-term use for the various kids events, sport shots, family gatherings etc.

And I agree, Richard.

First: an f/2.8 lens is going to be much better than a f/5.6 “consumer grade” lens – two stops more light, and two stops more blurred background, whenever you like them. Get fast lenses and you will never regret it. Nothing beats low f-numbers.

I actually own both those lenses, so I can tell you about them – they are great lenses both. Both those “luxury” lenses (that is what “L” stands for in Canon-speak) are very sharp, focus quickly, and have good build quality.

What do you use them for?

  • If you own a full frame camera, 16-35 is very wide, and 24-70 is a “wide to almost longish” general purpose lens.
  • If on the other hand you own a crop camera, 16-35 is “wide to standard” and 24-70 is “a bit wide to a somewhat long”.

Wide is great for landscapes, architecture, parties, perspective. The 24-70 range, on the other hand, is a general purpose workhorse lens. Some pros only own this one lens. Yes, 16-35 is fantastic, but not general purpose: 24-70, on the other hand, is general purpose, from weddings to parties to portraits.

So on the whole, I would say 24-70 first, and 16-35 later. For a graduation, 70mm may not be long enough if you cannot get close to the stage, but you can, in that case, always rent a 70-200mm lens for a day. Renting is good!

Another of Richard’s questions concerned extenders – I shall address this at a later point.

Finding Nemo

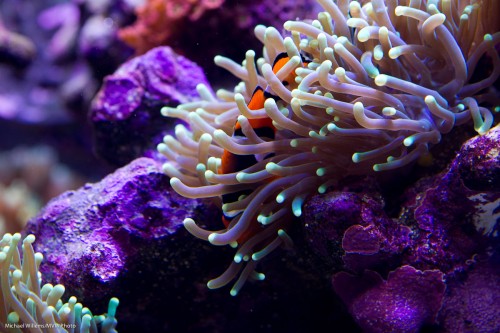
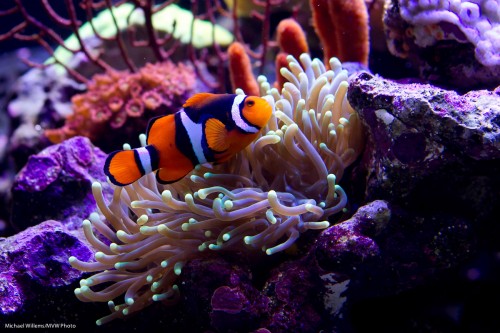
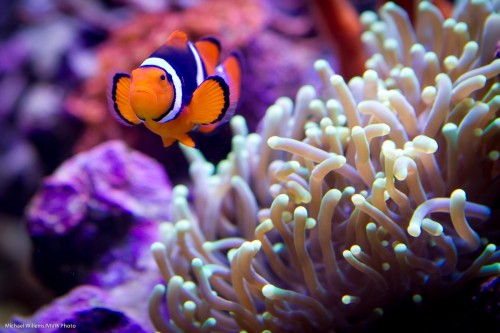
Found him:

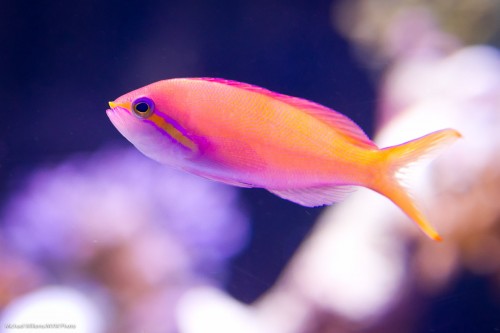
He was hiding in these coral polyps. Which is, I understand, exactly what these fish do.

Today, in other words, some more aquarium shooting, and a few more tips on the same.

This time, on the camera settings:

  • Lens: I used a 24-70mm lens set to 70mm for most shots. On a 1.3 crop camera this gave me 90mm effective length. A 100mm macro lens would have done nicely, too.
  • Exposure mode: The mode to use is manual (although you could use program or aperture mode, since an aquarium probably does not vary all that much).
  • ISO: I shot at 800 ISO, which was a nice compromise between quality and speed.
  • Shutter speed and aperture: I used a shutter speed around 1/200th second and an aperture of f/5.6. At the chosen ISO of 800, this gave me a meter reading slightly below zero, and hence, well exposed pictures. An aquarium can be fairly bright, which is a good thing. The setting of f/5.6 (or f/4 in some images) gives me some depth of field, and 1/200th second gives me the ability to somewhat freeze motion.
  • Focus area: I set the focus area to one focus spot, and pointed that point at the main interest point in the picture – the fish’s eye.
  • Focus mode: I set the focus mode to AI Servo (AF-C for Nikon users). That way you can shoot moving objects.
  • Drive mode: I set the drive mode to continuous.
  • White balance: I used “Daylight”, since this aquarium was lit by sunlight-type light. Failing that, use “Auto” white balance.

Now that we are all set up, we shoot. A lot.

A few more tips:

  • We try to get as close to the glass as we can. This minimizes the imperfections of the glass.
  • The glass, of course, is clean.
  • Room light is dimmed as much as possible.
  • We may want to stabilize the camera e.g. with a monopod.
  • Avoid picturing too many artificial things (equipment) if you can.
  • Shooting perpendicular to the glass (see previous post on aquariums), since this preserves quality and minimizes the need to do any post-processing.

Remember that when using AI-Servo (AF-C) to shoot moving objects (or fish), you will be lucky if one third of your pictures are razor sharp even when you are experienced and have everything going for you. If you get one in ten extremely sharp, be happy.

At the same time – do not be too critical. If you print at 5×7 or even 8×10, you will not notice a slight blurriness.

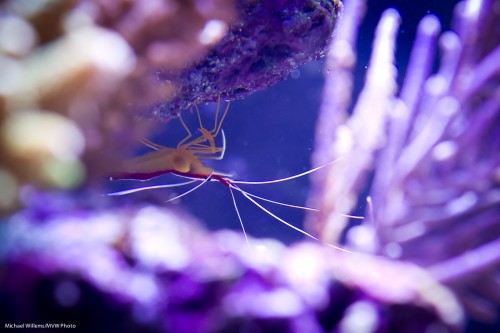
Nemo’s friend:

Prawn pregnancy:

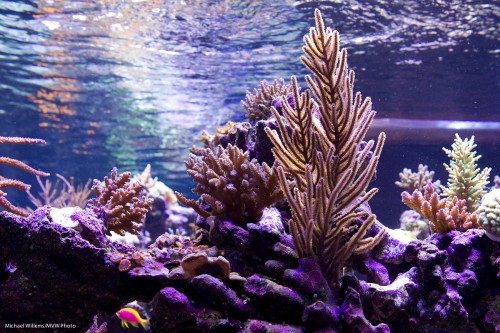
Nice reflections on top:

And finally, one more shot of our friend little Nemo:

Next week, a few more tips on photographing aquariums. In the mean time, if you have access to an aquarium, be prepared to spend a lot of time coming up with great shots. It’s worth it – an aquarium is a truly fascinating place, where nothing is ever the same.

Quick tip

Just a very quick tip tonight. Late night, 24 past midnight and getting up at 7am.

But enough time to point out that…

  • Your camera does not need to be switched off between shots. Leave it on, let it time out; then “wake it up” when needed by lightly touching the shutter.
  • You need no camera bag. Cameras want to be free, not locked up in a bag.
  • You can leave the filters in the bag. You need them when it is raining, sandy, snowing, etc – but not all the time.
  • You do not need a lens cap. Lens caps are picture preventers!

Things you DO need:

  • You DO need a lens hood.
  • You DO need a spare battery.
  • You DO need a strap.
  • You DO need spare memory cards.

There – doesn’t that liberate?

Michael

“One step at a time” lighting technique

You have heard me say it many times: “bright pixels are sharp pixels”.

Let’s say you want a picture of a lady. Just let’s say that.

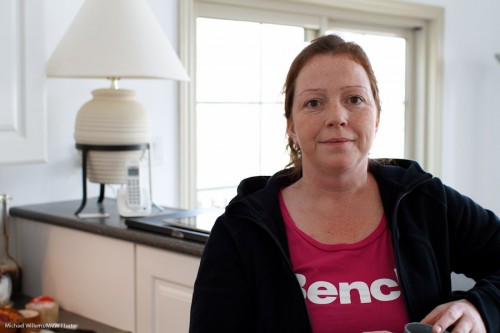
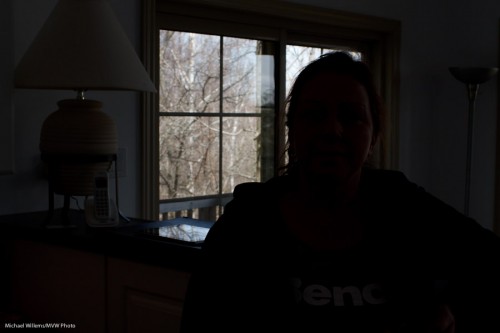
So then you put a lady by the counter. Because there’s a bright background behind her, and you know your camera, you use Exposure Compensation to avoid her turning into a silhouette. I used a Canon 7D with a 35mm prime lens. And hey presto, here’s the snap – and that is all it is, a snap:

The background is now too bright, and the person is “dark pixels”, meaning the picture misses that crisp sharpness you were after.

So now let’s take it in steps.

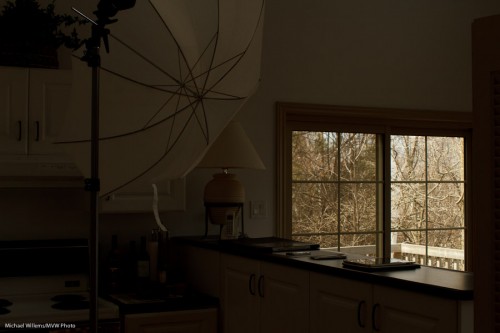
First, decrease the exposure to get the background right. Use manual, or use exposure compensation (minus!). In my case, it was manual exposure mode, 200 ISO, and 1/200th second at f/8, which gave me this (and that should not be a surprise to those of you who know the “sunny sixteen rule”):

Better – for the background. Now we have a nice dark background, and we can see the trees, and so on.

Now the next step: to light up the foreground!

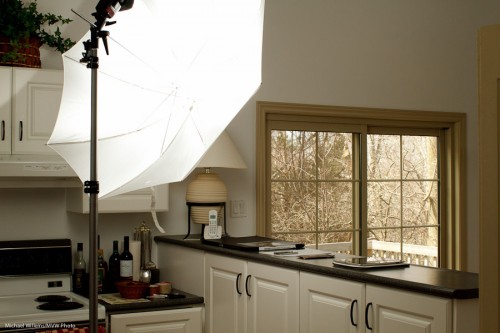
Flash is evidently called for. So I used a light stand with a flash-and-umbrella mount on top, with a simple 430EX flash on it, shooting through an umbrella:

Now I do the following:

  1. I set the flash to “slave” mode (“remote” on Nikon”)
  2. If I have a 7D, or a 60D, or a Nikon, I use the popup flash to fire that remote flash in TTL mode. If I have another Canon, I use a 580EX on my camera to fire the remote flash.
  3. In both cases, I ensure that the on-camera flash (popup or 580) is disabled, other than sending commands.
  4. Since the background is white, and I am using TTL rather than manual flash, I use flash compensation, +2/3 stops.
  5. I set my White Balance to “flash”.

And now when I fire, the umbrella lights up:

Which, finally, once we ask the lady to stand by the counter again, leads to this shot:

(Thanks for being the patient model, Lita!)

I have now achieved what I wanted: Lita is “bright pixels”, and the background is nice and colourful. Other than explaining, this all took just a few seconds, of course.

The technique above is just one of the many things students learn on my Flash courses. The last Mono, Ontario course ever is “Creative Lighting” with Joseph Marranca, on April 23rd – and there are only a few places left. Just saying!