When I do outdoor portraits, I often use big flashes, softboxes, light stands, and umbrellas. But sometimes, like today when I was shooting baseball kid portraits all day, I use just a camera, a lens and a simple on-camera flash.
Unmodified, on-camera flash? Surely that is anathema to what a pro does?
Nope – not necessarily. When conditions are right, you can do this, and get well-lit portraits.
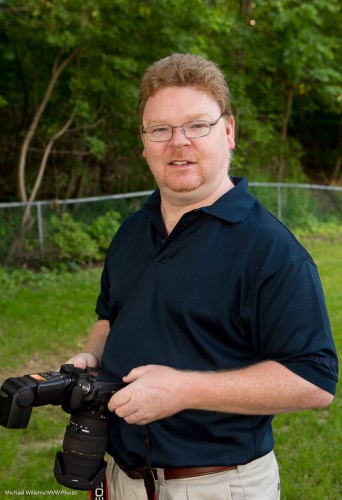
The following example, which shows this, has a less-than-ideal background, but I was just testing my light. Here’s photographer Ray:
To shoot a portrait like this (or rather, to shoot 500-odd of them, as I did today), I do the following if the light is changeable.
First, equipment and setting:
- If at all possible, find a spot where your subject is out of direct sunlight. Direct sunlight is harsh and horrible. If sunlight is unavoidable, at least turn your subject away from it.
- Find a dark, green background (i.e. like above, but without the fence – which you can be assured I did for today’s real shots!).
- Use a camera with a lens in the range of 50-150mm.
- Use an on-camera external flash, aimed straight at the subject. Since I am mixing with available light, this is allowed.
- Make sure I shoot from the subject’s head’s level (I avoid shooting down or up too much).
- I try to ensure the flash light the subject’s face. I avoid shadows (from, say, baseball bats, or from hats). I watch carefully for glasses causing reflections.
Now to the camera settings. I now usually:
- Set my white balance to “flash”.
- Set my ISO to 200 (as a starting point).
- Set my camera to shutter-speed priority mode.
- Select 1/200th second
- Set my exposure compensation to -1 stop, as a starting point.
- Now I aim and focus. I check the aperture chosen by the camera. I want something around f/5.0-f/6.3. If I get too small a number, say below f/4.0, then I lower the shutter speed – all the way to 1/60th second if I have to – and if that is not enough, I increase the ISO. If I get too large a number, say above f/7.0, I increase the shutter to the maximum sync speed (1/200th-1/250th second on most cameras) and then decrease the ISO if I can.
Now take a test shot and see. Adjust as needed. I regularly keep checking my aperture. And if the background gets too bright or dark: well, exposure compensation will adjust the background’s brightness.
Notes:
- On a Nikon camera, be careful: exposure compensation will also alter your flash brightness (for some odd reason only known to Nikon engineers), so unless you want this, you may need to apply opposite flash compensation (e.g. when using -1 exposure compensation to lower the background’s brightness, you may want+1 flash compensation to keep the flash the same).
- On a Nikon, also ensure you know whether you have “TTL” or “TTL-BL” selected on the back of your flash.
- On any camera, since you are using TTL, i.e. the auto flash mode, use flash compensation as needed. Darker subject: you may need to go down. Lighter subject: go up. See yesterday’s post!
Why Shutter-Speed priority (S/Tv)?
Because outdoors light can change drastically from moment to moment. Indeed, I prefer to use manual, if light is consistent. In that case instead of exposure compensation. I use the meter and set my ISO, shutter and aperture such that the meter indicates -1 stop, then test and adjust as needed.
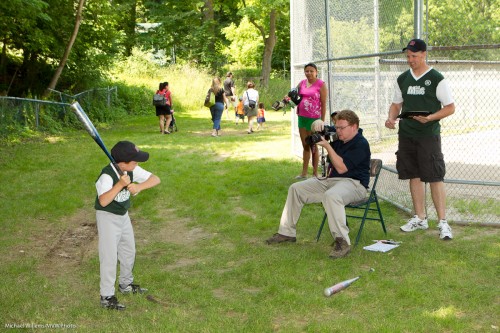
Here’s Ray doing what I am talking about here:
So that’s a lot of stuff to watch!
Yes, it’s a lot of work, and it requires a good understanding of exposure and what regulates it (I know some good courses – just sayin’).
And I see a lot of parents take their children’s snaps. Invariably, they fail to use their flash, which leads to poorly lit photos. Even before you do formal training, you now know better – now go practice.


when you give these recipes I notice that you never state the metering mode that you use. do you have a favorite?
Sure thing. Evaluative (“3D colour matrix”, as Nikon calls it. I.e. “smart metering”. Because it’s quicker to use that and then exposure compensation than to set my meter to spot, aim, meter, lock, recompose, focus, recompose, shoot. Matter of preference.. I feel a blog post coming up some time soon!