Lighting a garage shoot

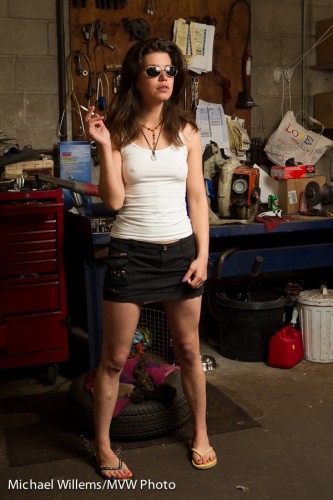
I did a garage shoot yesterday. Grimy garage with girl: a well known (and always good) theme.

But this depends on lighting it properly. And as usual for the Speedlighter, I did it simply:

  • One camera, set to manual
  • Aperture, exposure and ISO set to work well for a darker background: 400 ISO, 1/125th, f/5.6.
  • TTL off-camera flash.
  • One off-camera flash into an umbrella. The main flash is doing nothing.

This gives me shots like this:

Simple and effective!


How you shoot Black and White

Shoot Black and white often… but shoot it in RAW. Why? How?

  1. Shoot in RAW
  2. Set your image style to B&W so the preview you see approximates what you will get.
  3. Then in Lightroom, you can change the weighing of the colours.

What do I mean by point three?

Made into B/W, that gets you:

But now you can play with “filters”. Like by turning down red:

Or by turning UP red and turning down the background slightly:

…and so on.

That is why you must shoot RAW: if you shoot JPG, the conversion is done in camera and you cannot change it.

B&W is a very powerful way to shoot. With RAW conversion, it becomes an amazing tool. Go try!


Grids for chiaroscuro

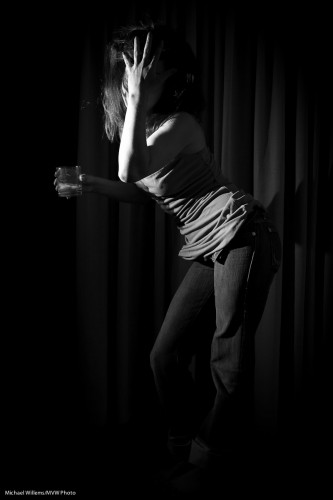
You use a grid on a flash (such as the Honlphoto 1/4″ grid I use) to restrict the light a flash throws. Like in this chiaroscuro picture with a flash on our left that I just took:

Without a flash, the curtain would have been brightly lit, destroying the image’s effect.


Available Light

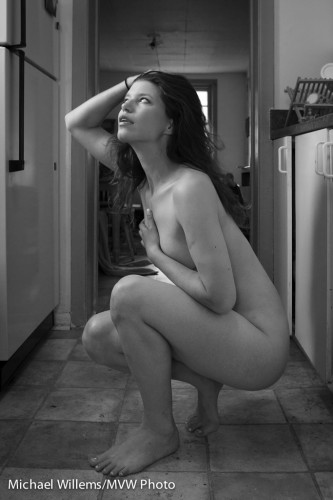
I am The Speedlighter – but I also of course use available light sometimes. Like in this shot, from my Tumblr feed:

That is an available light shot that works because:

  • There is a window with reflected light – not direct sunlight. This means a north-facing window, for instance; or in this case, an east-facing window in the afternoon when the sun is in the west.
  • I have placed the model in the “cone of light” that descends from this window, so the light hits “the face first, then down from there”.
  • I have exposed well.
  • I have positioned the model to take advantage of that light in the way it lights up her face.
  • The background is fairly simple (I cropped very carefully while taking this picture).
  • The opposite side is light enough (sometimes you need a reflector to achieve this).

Shots like this can really work. And they are easy – all you need is a window as described; a suitable lens; and away you go. remember tho use a high enough ISO so your picture is not shaky.

Of course you can mimic this effect with flash – and I often do – but do try to also use available windo light sometimes!


Bouncing and long lenses

When shooting an event, you would usually use a somewhat wider lens (a 35mm, say, or a 24-70) and bounce the flash behind you, upward – you have read this here many times.

But when you take candid shots with a longer lens, behind you does not always work: to get the righ angle of attach of the light to your subject, you have to bounce forward. I have mentioned this here too, but let me illustrate with an example.

Straight on is not good: hard shadows and “deer in the headlight” eyes. Even when combined with lots of ambient light to minimize this effect, it’s still not great:

But sometimes, bouncing behind is just too far. When you are far away, 45 degrees up but forward is better – but the problem is that some of the light goes straight to the subject:

See the hard shadow under the chin, in the picture above? Especially if there is a wall behind the subject this will be unacceptable.

So then you block the direct path with a bit of a flag (your hand right in front, or a reflector with the black side used to eat up the forward light – so it sticks jus a little above the flash head. You now get this:

So.. when you take flash pictures, just as in yesterday’s lesson: remember where the light goes!


Portable Studio

Your on-camera flash is a portable light studio – provided you use it right. That means:

  1. Finding the right balance between that flash and ambient light. In many cases I want the ambient light to be the fill light, so I set it to -2 stops. My flash will be the key light.
  2. Bouncing the flash.
  3. While bouncing, aiming the flash to get the effect you need.

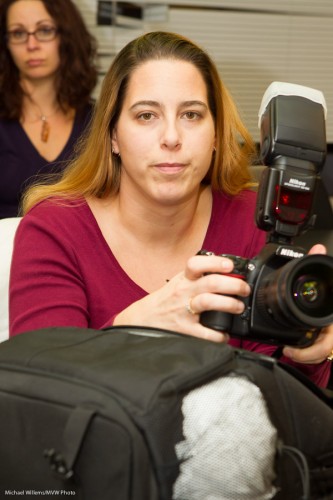
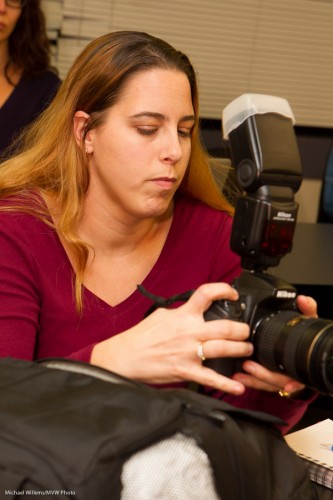
That third step is essential. To see why, look at the two examples below, of a kind volunteer in yesterday’s Sheridan College class.

Picture one – I am aiming the flash behind me. That’s just like having a large umbrella behind me: butterfly lighting:

And in picture two I swing my flash to the left, still behind me. Now that is like having an umbrella on my left, behind me. This results in broad lighting, which gives the face some modeling, some dimensions, some roundness: in other words it is now a three-dimensional face, not a flat face:

See what I mean? Beginners often fail to think about where they aim their flash, while this is one of the most important steps. Try!


Technical differences

Photographers are often confused by their camera’s behaviour, and this is not surprising since cameras are designed by engineers (I am an engineer, so I can criticize them).

Like how your allowed shutter speeds differ between brands.

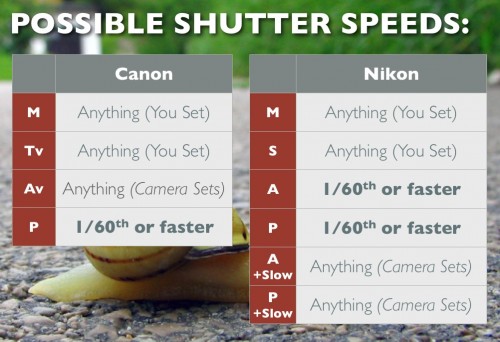
When you select a certain exposure mode, the camera may restrict the shutter speed to keep it above a minumum. Here’s how Cannon and Nikon do that differently:

Canon has decided that in Av mode, any shutter speed will be allowed to make the background bright – even a second or more. Nikon has decided that in both program and aperture mode, there is a restriction to “above 1/60th second) (which you can alter on some cameras), unless you enable “slow flash” (which means “lift that restriction”).

These, remember, are just engineering differences. Nothing fundamental. But when you are shooting with a camera, you’d better know its behaviour.

And from the above, it is clear that flash pictures in dark environment should be taken in one mode: manual. Otherwise you will get dark backgrounds or blurred pictures.


Software merits

Chris, a student at Sheridan College, asked me to

“discuss/blog or whatever re: the relative merits/disadvantages of Lightroom, FastStone, GIMP, and Digital Photo Professional”.

Great question. Software is a huge part of the equation, and there is so much to choose from!

First of all, there is the distinction between image manipulation software and asset management software.  Photoshop, its free clone GIMP, and others are examples of the former. Great at moving a head from one person to another if you have the time. But not at organizing/ranking/rating/keywording, or at being fast. That’s what Lightroom and Aperture are for.

Then there is pro software versus basic software. Again, Aperture and Lightroom are examples of the former;  DPP and other free products like Google’s free Picasa or, I suppose, Apple’s iPhoto, are example of the latter.

So. If you want free software:

  • Canon DPP is great for basic RAW editing.
  • GIMP is great as a free Photoshop clone.
  • Picasa is free and does basic everything.

When you need real pro software:

  • If you need deep image manipulation, get Photoshop (and learn for a year), or GIMP.
  • If you need organizing as well as spee, Lightroom (for Apple or PC) or Aperture (for Apple only) are your great choices.

Today, if you ask me… Lightroom at $150 is a must have. Three days of learning (not three years), and all the editing a photographer usually needs. And if you are an image editor, get Photoshop or GIMP as well.

 

Another tip or three.

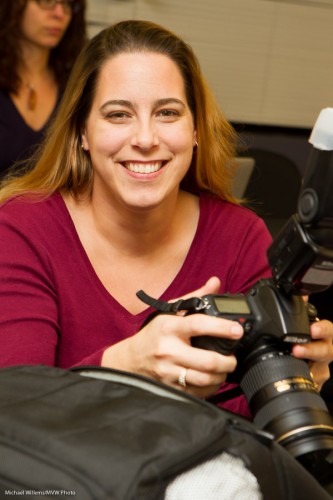
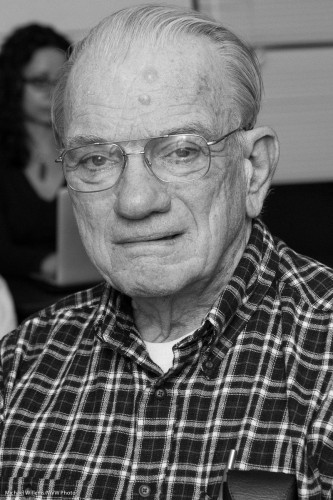
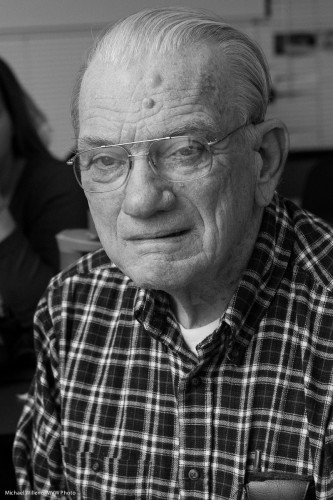
Yesterday’s post: did you see those three images? Then let me add something about them. I shall debunk a few pretty common misconceptions.

  • Aperture must be low? They were all taken at f/5.6. So if anyone says “you can never get blurry backgrounds with an f/5.6 consumer lens” – wrong. Just get close.
  • ISO must be low? They were taken at … wait for it: 3200 ISO. So if anyone says “you can never get acceptable pictures at 1600 ISO or higher”-  not so, with a good camera.
  • There’s only one good setting? I was using an f/1.2 lens. So I could have gone to f/4 and 1600 ISO. Or f/2.8 and 800 ISO. Or f/2.0 and 400 ISO. Or f/1.4 and 200 ISO. Or f/1.2 and 160 ISO. Or instead of lowering ISO I could have gone to faster shutter speeds. But I chose not to for this demo. If I had,, I would have gotten very selective depth of field in the last image in particular.

So when you think something is a given – sometimes it is, but remember that “it ain’t necessarily so”.


Constituent parts

When learning photography, remember to treat each problem separately.  I.e. take away variables, just like in high school math. Don’t say “yes I see that aperture does this or that, but why is the colour wrong?” – different problem.

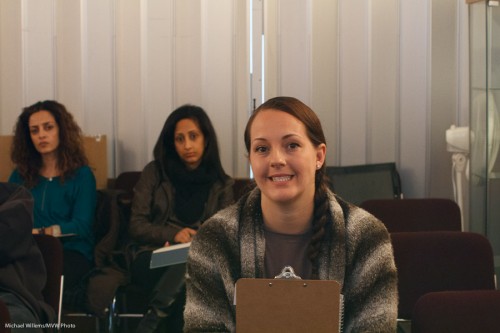
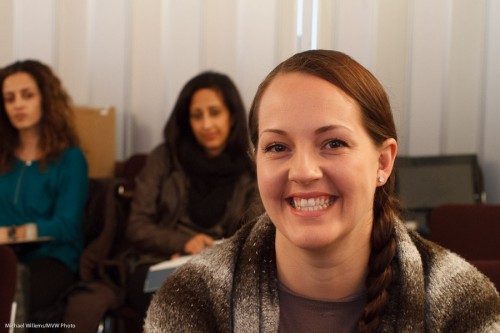
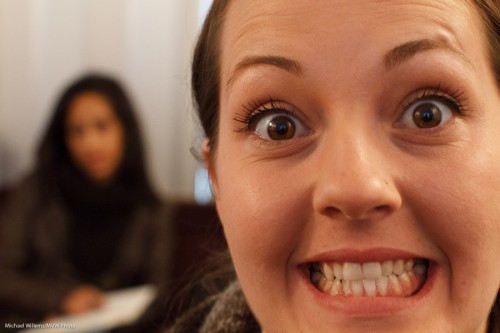
So aperture gives you narrow depth of field. Lower F-numbers give you blurrier backgrounds. Tue. But so does getting closer. The following images -of a kind student volunteer- were all taken with the same lens focal length and the same aperture and shutter. All I changed is to get closer.

See how the background gets blurrier?

(The reason: in percentage terms it is getting farther away, i.e. related to the foreground, as a ratio).

So the lesson? When learning, change only one thing at a time and see what that does. (That is why a prime lens is better than a zoom lens).