At the risk of being repetitive, let me deepen your understanding of dramatic portraits a little.
A dramatic portrait, in my world, is one where:
- I emphasize the subject.
- I darken the background.
- I make the subject the “bright pixels”.
- I carefully shape the light.
- I carefully direct the light.
You have heard me say this many times, but as said, let me deepen your understanding.
To show you want I mean, look at a few samples from a recent shoot the other day. These are outtakes, but they serve well to see what I mean (for actual shots, come see the Never Not Naked: Natural Nudes exhibit – an exhibit with a twist, June 22-July 8).
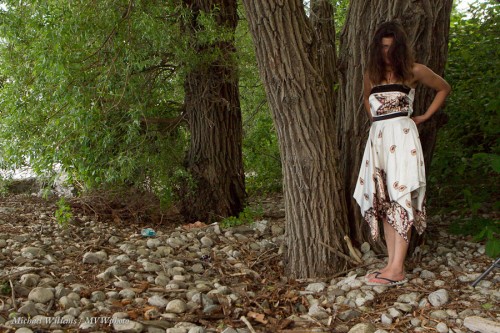
Let us start with a typical snapshot. 100 ISO, f/5.6, and this would be around 1/30th second. This is what available light and “Auto” or “Program mode” would give you:
Fine, but there are several things that can be improved.
- The subject’s face is lit uneventfully and insufficiently.
- The subject is “dark pixels”, not sharp “bright pixels”.
- The subject competes for attention with pretty much everything else.
- The tree bark’s texture does not really come out very well.
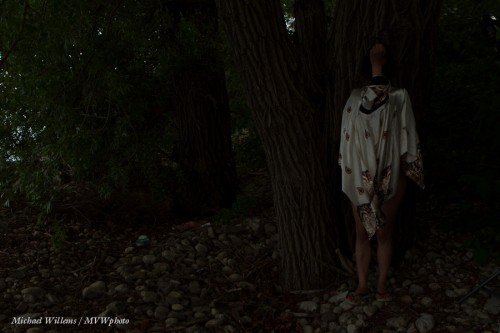
So now let’s do it properly. When I say properly, I mean “Michael Dramatic”. And “Michael Dramatic” for me means three stops below ambient. So I move the shutter to 1/250th second. Three stops darker than a “normal” exposure, in other words. (1/30 to 1/60 is one stop; 1/60 to 1/125 another; 1/125 to 1/250 the third stop).
Three stops is my dramatic portrait. Often, of course, you use less than three stops darkening. Like when you want less drama. Or when your flash is not powerful enough to provide three stops above ambient light.
Anyway, three stops below gives us this:
That’s dark. Um yeah, that is what I had in mind.
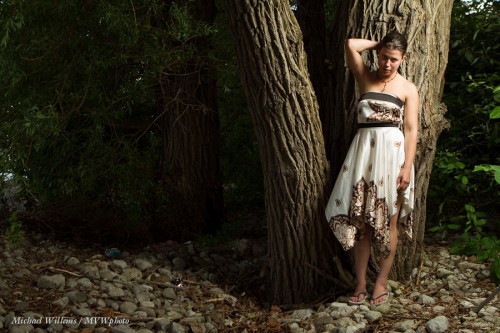
Because now, finally, we add a flash. And we get what we came here for:
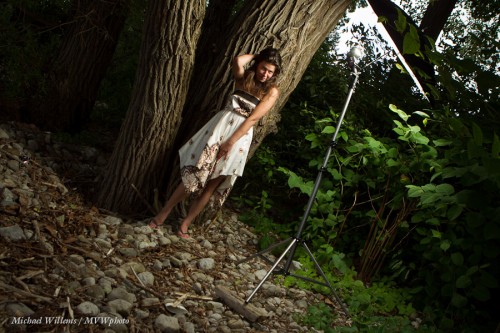
That was done with a single off-camera 430EX speedlight close by, fired into an umbrella. Like this:
You see there are several aspects to this, right?
- The darkening of the non-flash lit part of the image (the “background”).
- Properly lighting the subject.
- Softening the light for the human.
- But also the shaping and directing of the light. When I see a tree, I think “texture”, and side lighting brings out that texture.
- Good composition.
- The Inverse Square Law: light drops off away from teh flash.
Yes, all this needs to come together for a good shot. Go try a photo like this, and tell me how you did!
___
Note: You really can learn this, and in not many hours. My June Special is stil on: $75 per hour plus tax for private coaching, for June only (normal price is $95 per hour).


Hi Michael,
Thoughtful post. How far, in general, should the speedlight be from the base of the umbrella? I have a sense of distance from your image but I was looking for confirmation.
Thanks!
Generlally, enough so that the umbrella is lit by the flash, no more (spilling) and no less (small circle in large umbrella).
Michael, don’t worry about being repetitive, I for one need it. Thanks for sharing your knowledge with us. I try and practice your tips whenever I can. I happen across a homeless family the other day and they were gracious enough to let me photograph them. I had to work fast and got some good shot but wished I’d darken the background more.