Miscellany Monday

Miscellany Monday, here on speedlighter.ca!

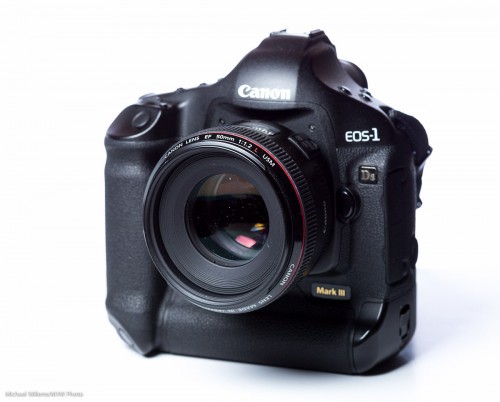
First: I am selling my Canon 1Ds Mk3. See the ad here: http://toronto.en.craigslist.ca/oak/pho/3277248183.html – if you are interested, contact me!

Second: The next few weeks, I am teaching my workshops at Vistek Mississauga – there are spots open, so take them right now!  Book here now.

  • Sep 22: DSLR Basics plus DSLR Advanced
  • Sep 29: Exposure and Composition, plus Basic Lighting for portrait and table-top photography
  • Oct 13: On-Location Mississauga Walk

Third: helping a student with his T3i Rebel the other day, I realized I need to point out something. Namely, metering, and in particular flash metering for shots where you use a flash as well as ambient light.

  • On a Canon 1-series body, evaluative metering is biased heavily toward the focus point. So if I compose a shot with the subject on the side, and I use a single focus point on the right to achieve that, metering will be biased towards the subject.
  • But on lower-end Canon cameras, evaluative metering is often biased toward the centre. So the camera in the shot above would try to light the centre, and would overexpose the subject.

If you see this phenomenon, you have several options.

  • You can set metering to average (centre-weighted) – this may just help.
  • Or you can put the subject in the middle and press the * button (flash lock), then recompose and shoot.
  • Or you can use flash compensation.

The thing is not to necessarily attempt to memorize what each camera does. The important lesson here is to realise that metering can make or break a shot, and that you have several options to solve issues that arise from this. As long as you know the fundamentals, you can solve any issue.


Scenes

Sometimes you tell a story by not making things clear.

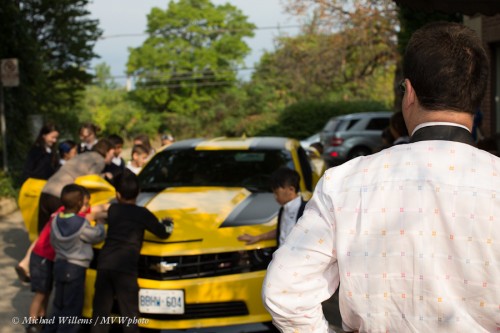
Like here, from yesterday morning, and what is happening:

Transformer Bumblebee visited Mississauga for three days, courtesy of GM and Dan Bodanis of the Dan Bodanis Band.

The kids lovingly admiring the car are emphasized not by them being sharp, but by the onlooker (that’s Dan) being large and sharp. Your eye goes where his are looking. Then you see the story.

I used a 50mm prime lens on the 1Dx – my 24-70 is in for repair (the moving lens element is loose). Manual mode, 200 ISO, 1/500th second at f/5.6, meaning I used high-speed flash for the fill flash.

Here’s Bumblebee again, still using the 50mm lens:

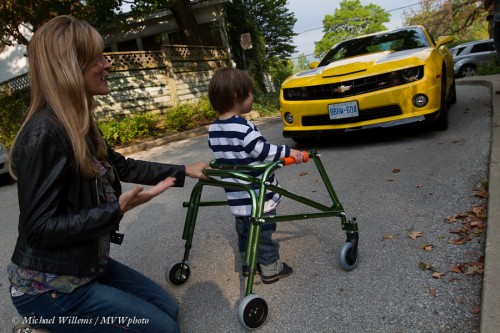
Wide angles give much more depth of field: f/5.6 again, showing Dan’s wife and son, and using the same storytelling technique:

So today’s lesson: ask what story you are telling, then decide how to tell that using foreground subject and background, and the interaction between them.


Golden

The Golden Hour: when the light turns a beautiful golden colour.

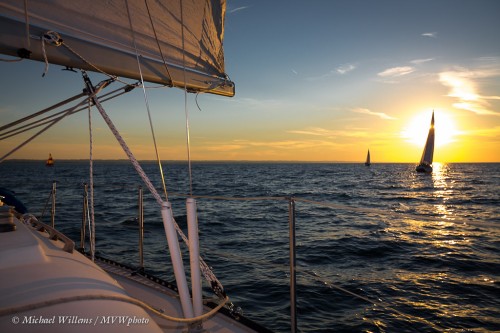
Like Wednesday night on Lake Ontario, while sailing:

Apart from the fact that I used the right lens (35mm on a full frame camera) and the right time of day (the “golden hour” is around sunset), you may want to notice a few things here.

  • First, the composition. Rule of thirds left-right, but symmetrical up-down, because of the reflection in the water, and the boat on the left.
  • Second, I used fill flash, or the boat I was on would have been black.
  • Third, as explained in yesterday’s post, I underexposed the background – or rather, I exposed it correctly to get the correct saturated colours.
  • Fourth, and very importantly: I waited for exactly the right moment. The Decisive Moment, in Cartier-Bresson’s words. The sail is exactly in the middle of the setting sun.

A photo turns from a snapshot into a photograph when you apply a little thought.


Open Wide…

…I mean the lens angle – wide is good.

I have gone sailing the last couple of Wednesdays, and here is an image from last week:

How did I take this dramatic image?

  • I used a wide angle lens: 16mm on a full frame camera, i.e. like using a 10mm lens on a crop camera. On a 33ft boat this is essential to get it all in, but also to create depth.
  • I underexposed the background by a stop or two. Manual mode, 1/80 sec at f/5.6, ISO 100. That’s where I start, with the background. I underexposed it in order to get drama, to get my subjects to be the “bright pixels” once I light them up with flash, and to get deep, saturated colours.
  • Since 1/80th second is well below the maximum flash sync speed, I did not need to use high speed flash, and the flash has its full power output available.
  • And I used the wide angle adapter on the (on camera) flash, to ensure the light goes as wide as the lens is looking.
  • I compose to avoid unwanted shadows.
  • I also aimed up, and I tilted the lens. The latter for three reasons: for “rule of thirds” composition; to get everything in; and to get rid of stuff that does not belong in the image. Simplify, simplify, simplify!

That’s how. You too can produce dramatic images with simple equipment (you do not need a 1Dx!) once you learn how. Keep reading!

(And once you really want to put it all together, come to one of my courses, e.g. at Vistek; but also, consider some one-on-one training. Give me a call to learn how easy that is – you owe it to your photography).


Macro fun

Winter is approaching here in Canada. Yes, soon.

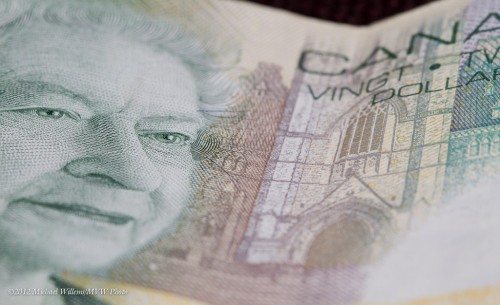
So this winter, take some macro shots. Macro (or close-up) photography is fun because you can engage in it all winter. In your own home. Even a $20 note can look interesting.

To do macro shots you need either a point-and-shoot with a mini tripod, or better, an SLR with a macro lens (a “micro” lens, says Nikon), a tripod, and perhaps wire release. Use manual focus, perhaps in Live View. Avoid wind – that is why inside is good. You may need to shoot at f/16 to f/22 or even beyond if you want depth of field.

And then see what you can come up with. Any object takes on a life of its own when viewed close-up: worlds we never normally see!

(And yes, you can use macro “filters” on top of normal lenses – much cheaper than a lens, but interior quality.)


Tip of the day…

You know how I say it is advantageous to set your white balance right when shooting? If you are shooting RAW (as I hope you are) it makes no difference-  all colour is captured and you can do it later, by clicking on a neutral white/grey in an image. But on the other hand… if you get it right while shooting, it’s less post work.

So one tip is to, when you have time, use Live View to set white balance. That gives you a pretty good view of what the colour will look like. Set it so you are happy, then after you do that, you can go back to normal shooting.


Sell your stuff?

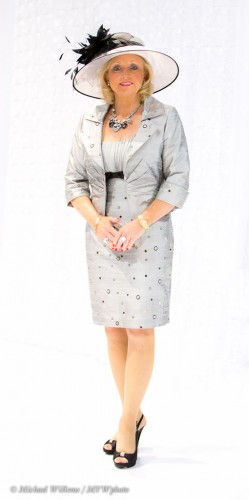
Yesterday, I visited the wedding show at Toronto’s International Centre, to take pictures of celebrity (and world-class expert!) wedding organizer Jane Dayus-Hinch of, among others, “Wedding SOS” fame. Here’s Jane, who, as always, did herself proud with this great hat:

While shooting, I learned a thing or two (or three) about weddings from her: worth it for that reason alone. How should bridesmaids hold bouquets? Things like that make all the difference, and Jane is a master of such details.

But I also looked around at the show.

Bit of background: I teach a course at Sheridan College, “Running a small photography business”. So with that in mind, what did I see? Many photographers selling their stuff, with great booths.

But.

Here’s the problem. All of these photographers had great booths showing off their, generally excellent, work. But not one helped a bride choose. Yeah, they make great photos. That’s ten out of ten. Now what, if I am the bride?

Start with the company names. They all had “me me me” names. And meaningless names, like “In Focus Photography” (you better bloody well hope so!), “Luminous Light” (D’oh. Is there any other type?”) and so on. How about a name that is about the client? (I venture to say that our own “To Live, To Love” is better in tune with brides!).

And as far as I saw, not one mentioned why the bride should go with them. As said, imagine yourself a bride. Now what? Ten equally competent photographers. Who do I go with? No idea, so I go by my friends’ reference and ignore the booths.

If I had walked up to these photographers to ask in person “why are you so special?”, I presumably would have gotten some answers. They can be anything: “unique selling points”, or USPs, in marketing speak. Like “we are cheaper”, or “we shoot edgy modern candids only”, or ‘we’re like Vogue”, or “we do traditional photos your grandparents will like”, or “we have the best leather albums”, or “we have more experience”, or “we use better lenses”, or “we also shoot celebrities”, or “we are great at making people look thinner and taller”, or “we work harder than any other photographer”, or “we are rated higher than anyone else by both brides and mothers-in-law”, or “only we deliver our pictures within one week”, or.. the list goes on. And whatever the reasons are, those are what I would expect to see writ large in the booths. Not just “we make great photos are our name is X”.

And then you put these in the client’s reference frame. Not just “we do X”, but “You will have a better wedding day because of X”.

The life of a photographer is all about marketing, and I was sad to see that none of the photographers at the show had great ideas of how to go about it.

Or as someone with a stake in the business, maybe I should be happy to see this? (That calls for a smiley: 🙂

In any case: sell based on “you you you”, not on “me me me”. Find USPs, then put these in clients’ terms., then make that your message. Not the stuff everyone else does too (like well exposed, sharp images).


Portrait lesson

A quick portrait lesson today.

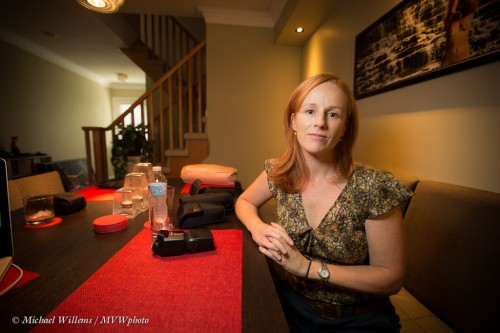
Here’s student and photographer Emma, in a coaching session on Friday:

For this photo I used a 16-35mm lens, set to 16mm. On my full-frame Canon 1Dx camera, that is a proper wide angle lens – like a 10mm lens on your 5D, 60D, Rebel, D90, or similar.

So first, let’s put paid to the adage that “you cannot make portraits with a wide angle lens”. Yes you can: environmental portraits, where you do not fill the frame with the subject. Distance between subject and photographer is the only important thing, not lens angle. A wide lens gives you that wonderful “wrap around” effect that we love in this type of portrait – the subject in, and as part of, her environment, rather than as a standalone object.

So that out of the way, what about camera settings?

I used the Willems 400-40-4 rule for indoors flash. Since our indoors environments are often roughly the same brightness, a manual setting of 400 ISO, 1/40th second, f/4 will give you a starting point that is ambient minus two stops.

Which is what I want if I want to see the background, but not too brightly: just like Rembrandt, I want to make my subject the “bright pixels”. Because as a reader here you also know Willems’s Dictum: “Bright Pixels Are Sharp Pixels”.  So that means a slightly darker background.

OK,  so that is the background  taken care of: -2 stops, give or take. How about Emma?

I used an off-camera 600EX speedlight, driven by an on-camera 600EX that was set to only command the other flash (using the new radio interface). I equipped the flash with a Honl  photo Traveller 8 softbox for that wonderful light – and that wonderful circular catchlight in Emma’s eyes:

Good, so we are set.

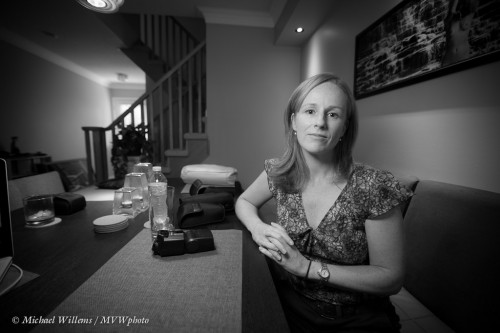
But what about the idea of making it a monochrome image, to stop the red distracting us? In Lightroom, simply select “B/W: in the Develop module:

You may or may not prefer that to the colour image. If you do, then consider dragging the red to the left a little in the B/W module. That means red light will be used less in the conversion, i.e. it will be less bright in the black and white image:

Now we have gotten rid of the red place mat almost entirely, allowing us to concentrate on Emma. That is often a good reason to go to black and white: you get very extensive creative options.

Mission accomplished, in a very simple-to-do shot that is miles beyond a snapshot.

Yes, simple – once you know how (this is what I do, and it is also what I teach).  Invest some time and effort in learning these techniques – you will love what your new photography allow you to do creatively.


Power Tip

Power tip for your cameras:

Turn off the function for “Auto LCD Brightness” if your camera has it. Instead, set the picture review LCD to manual brightness, in the middle, and leave it there.

Auto LCD brightness often leads to you misinterpreting your images. An image can look waaay too dark on the LCD, leading you to do it again and expose brighter – only to find out later that the original image was fine.  This can be quite a dramatic effect: be careful.

Of course you can also use the histogram to interpret the light. But I would start with getting a consistent LCD display.