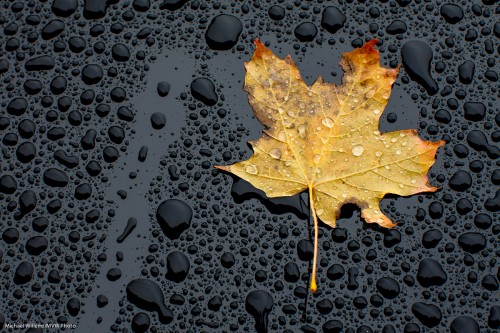
So how do you expose a shot like this (yesterday, on my car):
You will remember that your built-in light meter gives you an exposure based on an “18% gray scene” – the same reflectivity a gray card gives you. This scene, however, is “bright plus dark”, but not “18% gray”. A challenging shot, then – for which you have the following options (roughly in order of expected exposure accuracy):
- Use an external meter – an incident light meter. Hold it above the leaf aiming up, then meter. Set those values in your camera.
- Spot meter off something gray – i.e. hold a gray card in the same light and set your camera’s exposure scale to zero while pointing your (spot-) meter at that.
- Use normal evaluative metering and adjust later in post-production.
- Spot meter off the leaf and set the scale not to zero (grey subject), but to +1 (lighter than grey subject).
- Using manual exposure, set your meter to a value you think might be overall right, then take a test shot and adjust to taste – using the histogram.
I did the latter – I always use manual mode when the light is steady, as it was here. Once set, it is set, and all future exposures will be right. And with a little experience, you can get very quick at this.
I used 1/50th second, 400 ISO, f/7.1. (On a side note, the “sunny sixteen rule” failed miserably here – just to try, I used 125 ISO at 1/125th second at f/4 – that should work, but it was at least two or three stops too dark. Such rules are guidelines!)
And finally: 1/50th of a second using a non-stabilized lens pointed half way down is a challenge in itself. Why? Motion blur. The best way to handle this? A tripod. But failing that, do what I did: take the shot five times. One or two will be razor sharp.

