Shopping Recommendations

A few Shopping Recommendations here for you today. Read on, because some of them can be advantageous to you.

First: someone asked me for a good framer in the region. I forget who it was who asked, but here you go: Don Corby, of Corby Framing in Freelton (www.corbyframing.ca, 905-689-1976). Tell him I sent you. He does a great job with custom frames and affordably. Please print and frame your photos. Please!

Then, printing. As I have said many times here: please, please, please print your work. You will avoid losing it. It will look better, and you will feel much better about your skills and your art. Made into wall art your work will be much more valuable. For prints up to 13×19″ use a Canon Picma Pro or 9500 Mark II. For larger prints, use Fotobox in Etobicoke. These guys and what they do are amazing. Al my large metallic prints are theirs. Top work for a very affordable price. Again, tell them I sent you.

Then, shopping! I recommend you buy here: Henry’s in Oakville (ask for Rob, manager) or Vistek, in Mississauga or Toronto. Go to these guys every time over the big box stores, and tell them I sent you. They will take care of you with great selections, the latest stuff, and excellent product and market knowledge. They will sell you only what you need, not what gives them most commission. They’re like me: they want customers, not sales.

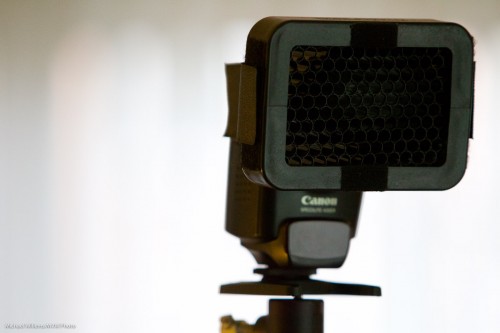
Finally, flash modifiers. Honl, honl, and Honl again. I have waxed lyrical over these small flash modifiers forever: not because David Honl is a friend of mine, but because his modifiers are small, light, sturdy and affordable, and that is an unbeatable combination for a photojournalist and for anyone else except masochists who like to carry more and pay more. Dave has joined me in teaching flash in Phoenix, Las Vegas, and Toronto, and he has agreed to put together special kits and to give you a 10% discount on any order if you, as a reader of speedlighter.ca and/or one of my students, order direct from him by using this link (click here) (or simply click on the Honl Photo ad on this page), and use discount code willems. 10% off on gear that is already affordable and that is the key to unlocking small flash success: what’s not to like? I strongly recommend this. There’s the grid, pictured here; the gels; the unique gell rollups; the speed snoot, the reflectors, the small softboxes: with these tools, small flashes effortlessly and quickly become flexible creative tools. I have a carrying case full of them, and you’ve seen my work: need I say more? Even in my studio I often use small flashes now, rather than strobes. The hair light is always a small flash with a speed snoot, for instance.
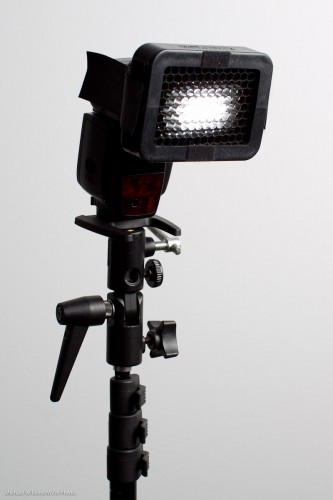
End note: I only make recommendations I strongly believe in; “for these, I would put my hand into the fire”, as the Dutch would say. The vendors and tools I recommend will help you become a better photographer, or will help you get more out of your work. Promise.

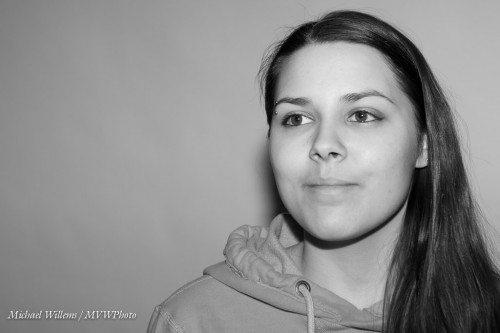
 

Trixie

I shall now repeat a flash trick I have mentioned here before years ago. Time for a refresher.

You all know how important it is to avoid, at least when the flash is on your camera, direct flash light reaching your subject. Both in order to avoid “flat” light, and especially to avoid those nasty drop shadows, like this (don’t do this at home, kids):

But you have also heard me talk (and those who come to my upcoming flash courses will learn hands-on) that you should “look for the virtual umbrella”. For most lighting, this means 45 degrees above, and in front of, the subject.

So when you are close to that subject, you aim your flash behind you to get to that point. Good.

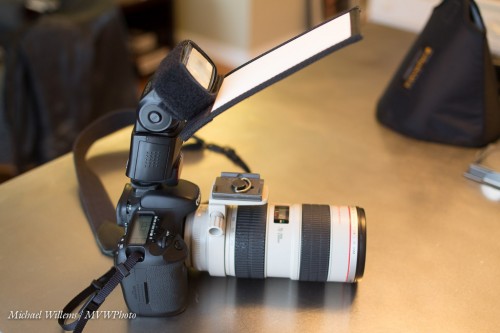
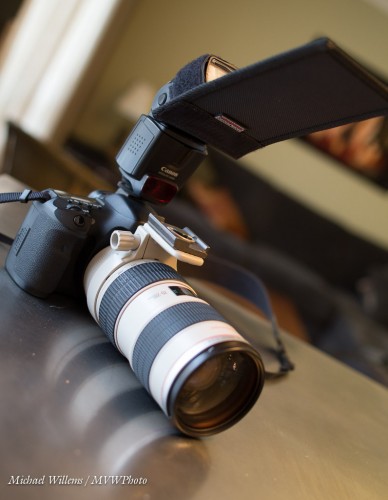
But what when you are far, as when using a telephoto lens? Then the “virtual umbrella” may be in front of you. And aiming your flash forward is a no-no, since the subject will be lit in part by direct light.

A-ha. Unless you block the direct part of that light!

Like this:

As you see, I use a Honl Photo bounce card/gobo to block the direct light. Simple, affordable, and very effective. I use either the white bounce side, or the black flag side, depending on the ceiling and position.

Simple, effective – done!

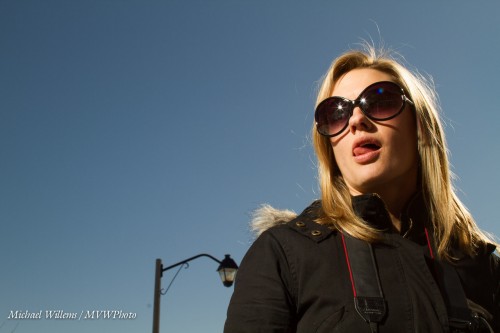
And one more thing. Direct flash is not bad per sé. Not at all. As long as it is not coming from where your lens is, it can be very effective, like in this “funny face” shot of a recent student (you know who you are):

Lit by a direct, unmodified flash. And the hairlight, the shampooy goodness? Yeah. The sun. Just saying.

(And yes, that too is something I will teach those of you who sign up for one of my upcoming flash courses.)


Portrait lesson

A quick portrait lesson today.

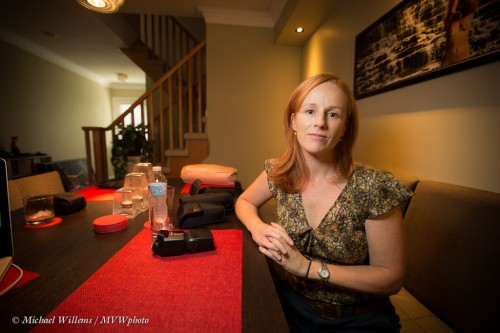
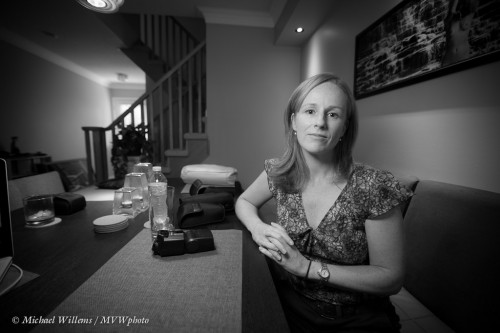
Here’s student and photographer Emma, in a coaching session on Friday:

For this photo I used a 16-35mm lens, set to 16mm. On my full-frame Canon 1Dx camera, that is a proper wide angle lens – like a 10mm lens on your 5D, 60D, Rebel, D90, or similar.

So first, let’s put paid to the adage that “you cannot make portraits with a wide angle lens”. Yes you can: environmental portraits, where you do not fill the frame with the subject. Distance between subject and photographer is the only important thing, not lens angle. A wide lens gives you that wonderful “wrap around” effect that we love in this type of portrait – the subject in, and as part of, her environment, rather than as a standalone object.

So that out of the way, what about camera settings?

I used the Willems 400-40-4 rule for indoors flash. Since our indoors environments are often roughly the same brightness, a manual setting of 400 ISO, 1/40th second, f/4 will give you a starting point that is ambient minus two stops.

Which is what I want if I want to see the background, but not too brightly: just like Rembrandt, I want to make my subject the “bright pixels”. Because as a reader here you also know Willems’s Dictum: “Bright Pixels Are Sharp Pixels”.  So that means a slightly darker background.

OK,  so that is the background  taken care of: -2 stops, give or take. How about Emma?

I used an off-camera 600EX speedlight, driven by an on-camera 600EX that was set to only command the other flash (using the new radio interface). I equipped the flash with a Honl  photo Traveller 8 softbox for that wonderful light – and that wonderful circular catchlight in Emma’s eyes:

Good, so we are set.

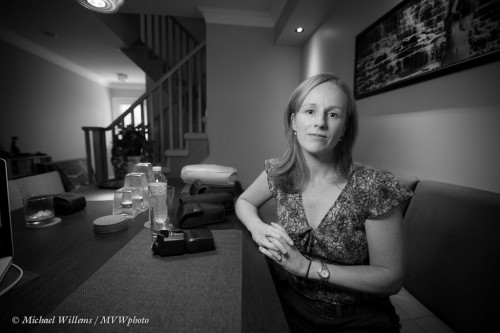
But what about the idea of making it a monochrome image, to stop the red distracting us? In Lightroom, simply select “B/W: in the Develop module:

You may or may not prefer that to the colour image. If you do, then consider dragging the red to the left a little in the B/W module. That means red light will be used less in the conversion, i.e. it will be less bright in the black and white image:

Now we have gotten rid of the red place mat almost entirely, allowing us to concentrate on Emma. That is often a good reason to go to black and white: you get very extensive creative options.

Mission accomplished, in a very simple-to-do shot that is miles beyond a snapshot.

Yes, simple – once you know how (this is what I do, and it is also what I teach).  Invest some time and effort in learning these techniques – you will love what your new photography allow you to do creatively.


Light.. action!

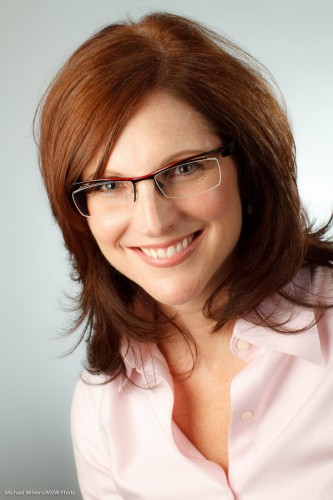
I shot a few shots of Kelly, the hair stylist for a shoot the other night.

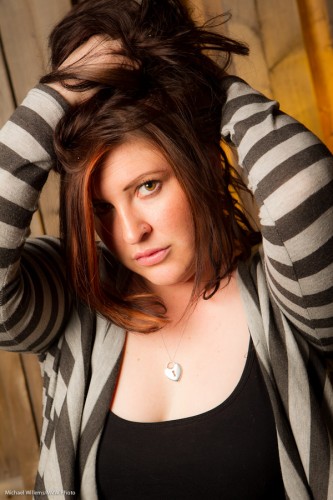
Here she is:

Nice. So how did I light that?

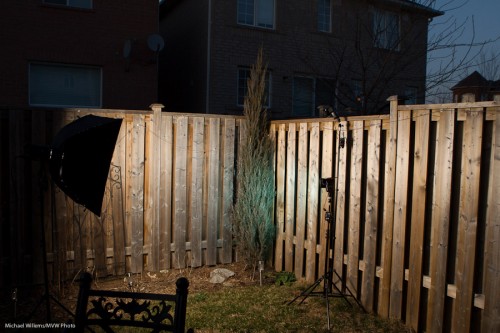
Here’s how.

I used my 1D Mk4 camera in manual mode, equipped with a Pocketwizard to drive the following flashes:

  • A 400 Ws Bowens light with a Bowens softbox. Powered by a battery (the Travel Kit); driven by a Pocketwizard.
  • A 430EX flash with a Honl Photo 1/4″ grid and a Honl Photo gel (green in the pullback shot above; egg yolk yellow in the real shot) to light up the background. This was also fired by a Pocketwizard, connected via a Flashzebra cable.

The other flash was a spare and I did not use it. I set y exposure for a dark background, then metered the flashes with a light meter. I used the speedlight to light up the background to provide hair separation, since I could not get it in the back aiming forward to light the hair, which I would otherwise have done.

A fairly simple setup for a nice shot, no?


Cool colour

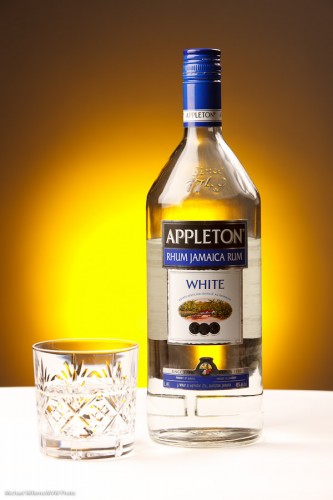
I shot some demo product shots with my student Merav today, and I thought I would share them here to underline the importance of colour.

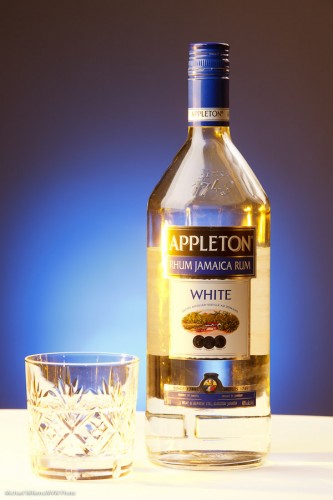
Here’s one, a simple one. Lit by a softbox on the leeft, an umbrella on the right, and against a grey backdrop. That gives us this:

Bit boring? Yes it is. So I add a gridded, “egg-yolk yellow” gelled speedlight aiming at the background. (I use the excellent Honl Photo grids, gels, and other small flash modifiers):

Product Shot (Photo: Michael Willems)

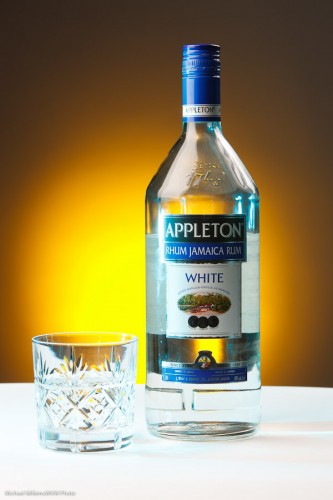
Much better. Then we added another light – a green-blue gelled speedlight shining in from the left:

Product Shot (Photo: Michael Willems)

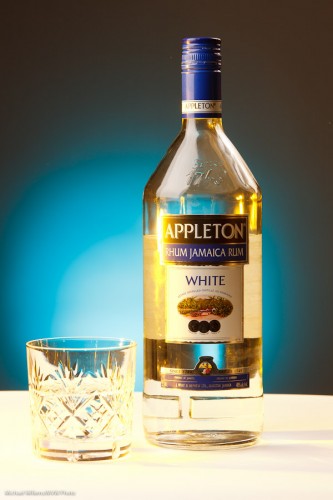
Then we reversed the gel colours:

Product Shot (Photo: Michael Willems)

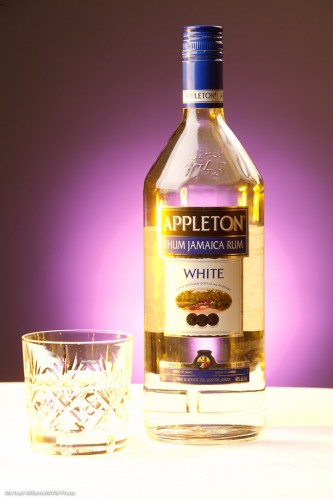
Then, tried another background colour, rose purple:

Product Shot (Photo: Michael Willems)

And finally got to a background coloured Just Blue, which had been Merav’s idea all along:

Product Shot (Photo: Michael Willems)

Which one did you prefer? Can you see how different they all are?

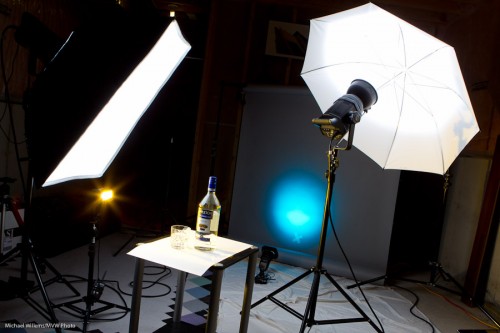
To shoot this I used this setup:

Product Shot Setup (Photo: Michael Willems)

This works as follows:

  1. Put the bottle on a table, with white paper underneath
  2. Put up a grey backdrop, far from the bottle so it does not get any light
  3. Get the main lights right – use a light meter to set them to your desired values (I used f/9 and 1/125th second at 200 ISO). Main strobe is fired with Pocketwizard; secondary strobe by its cell.
  4. Add a background light: a small flash also fired by a Pocketwizard, through a Flashzebra cable. Set to 1.4 power. Equipped with a 1/4″ Honl grid and a gel.
  5. Add a side light: a small flash also fired by a Pocketwizard, through a Flashzebra cable. Set to 1/4 power. Equipped with a gel.

Simple. Once you know!

Why the rum? It was the only bottle I had in the house. Amazingly, for the first time I can remember, I had not a single bottle of beer or wine or anything else available in the house. Time to hit the liqor store!


A simple lighting setup?

What one person finds complicated, another finds simple.

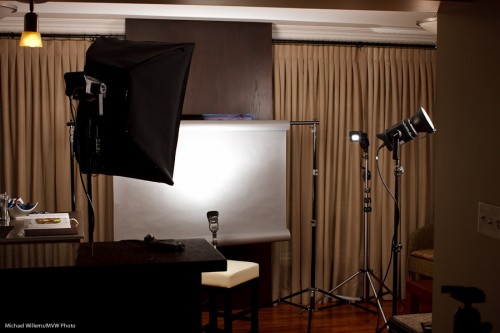
And vice versa. A friend who visited the other night reminded me of this, when I talked about the simple four-flash light setup I was using for a headshot:

And as he said that, I realized that perhaps it’s not simple.

But if you want to take portraits, then it should be. In other words, without knowing how to do a “traditional” portrait setup, it is hard to do creative portraits. No, that does not mean you need to make all portraits traditional – you can do great stuff with one off-camera speedlight and a grid.

But you need to know how a traditional portrait is made. Which is with:

  1. A backdrop (paper roll, here).
  2. A main, or “key” light, in this case a Bowens strobe with a softbox.
  3. A fill light (Bowens strobe with umbrella, in this case).
  4. A hair light (speedlight with Honl Photo grid and egg yolk yellow gel).
  5. A background light (speedlight with Honl Photo blue-green gel).
  6. A way to drive them: Here, I used one strobe and two speedlights fired by pocketwizards; one strobe by the light-sensitive cell.
  7. Metering: I used light meter to arrive at f/9.0 at 100 ISO and 1/200th second.
  8. Ratios: I set the fill two stops darker than the key. And the hair and background light by trial and error (I got them right first time – done it before).

A note about those gels: colour makes a difference. I love the blue-green gel on the background, to contrast with the red hair – contrast is good. That’s why the butcher uses green plastic between the red meat – to make it look redder. (Oh wait – butcher? We buy meat at the supermarket now, in neat little packages. Dumb me.)

Anyhow – parsing makes things simpler. If you are faced with a complex situation, parse it, i.e. take it apart, one thing at a time. Analyse each layer until you understand it, then go on to the next layer. And before you know it, you will be saying “that’s simple”.

That’s what you learn when I teach you: how to make complex situations simple by understanding the elements, then building on those. Deductive learning, if you will.

And what does the setup above produce? Portraits like this:

Headshot (Photo: Michael Willems)

(Canon 7D at f/9.0, 1/200th sec, 100 ISO)

A plug, if I may: if you, too, need an updated headshot, and live in the Greater Toronto Area, do call me. For Facebook, your resume, LinkedIn, or your web site: a good headshot helps, and Headshots Specials are on during the month of September!


Fashion flashin’

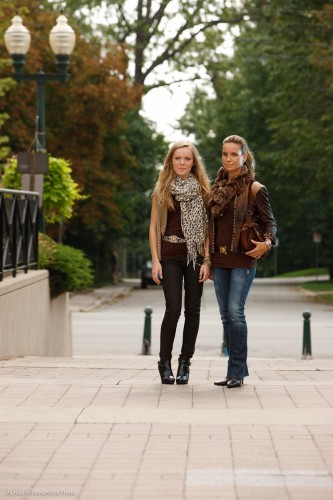
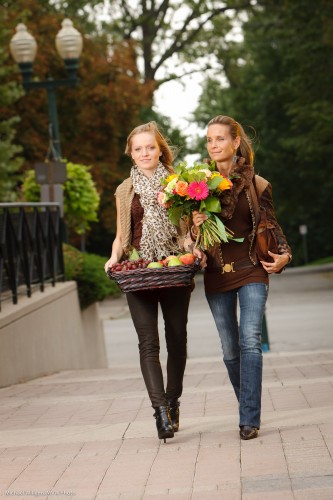
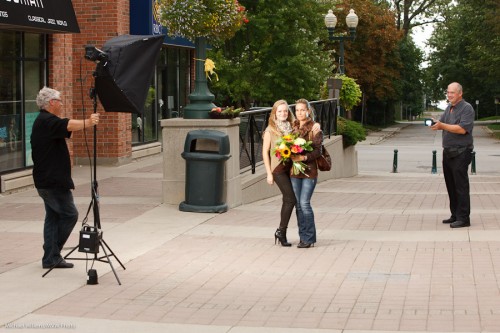
Sunday morning, around mid-day, in downtown Oakville I shot a fashion shot for a magazine front cover.

Outdoors fashion is, as always, a matter of many things coming together at once. One of those is light. Without light, even on a wonderful overcast day (wonderful in photo terms), the image lacks something. The mother and daughter models lack a certain je-ne-sais-quoi.

Actually I do know – they lack light:

Models in Oakville (Photo: Michael Willems)

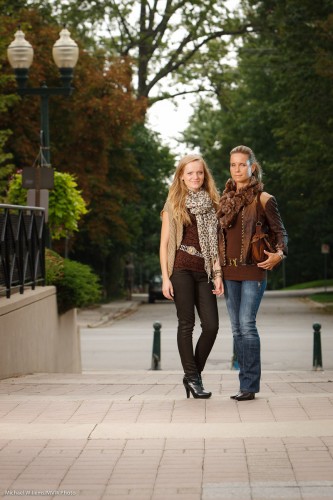
So we add a flash. I used a Bowens 400 Ws strobe, although I could have used speedlights. The sequence is as follows:

  1. I set my camera to manual.
  2. I select 1/200th second and 100 ISO.
  3. That gave me, on this particular day, an aperture of f/5.6 for a nice saturated background. (To arrive at this, I can use my in-camera meter or my light meter set to ambient.)
  4. I now add the strobe, set it to 80% power about 6ft away, and test this with the meter (now set to flash mode). Well have you ever:  the meter immediately indicates f/5.6! (This is just experience. If you are less experienced, no worries – just turn the light up and down until you do read f/5.6).

That gives me:

Models in Oakville (Photo: Michael Willems)

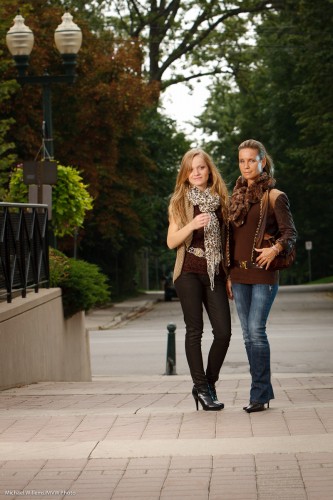
If I want the background a little darker I change the speed to 1/250th (still in my flash sync range):

Models in Oakville (Photo: Michael Willems)

Okay, we are set. If the sun comes out a little more,  I go to 1/250th, and if it gets a tad darker I go to 1/160th.

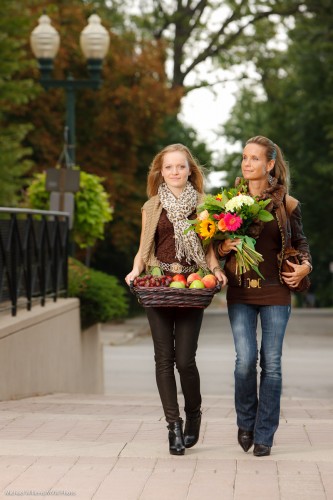
The idea of this shot is autumn – so we now bring out the props. Autumn flowers and fruits and vegetables now gives us this:

Models in Oakville (Photo: Michael Willems)

Notice the speedlight with a blue-green gel as accent/hair light on our right? The speedlight was held by Kurt, who assisted on this shoot, and was set to 1/4 power (again – experience tells me that setting will probably work – and it did).

The final step is to make that an egg-yolk yellow gel instead of a blue-green gel – yellow accentuates the late day setting sun feeling that is synonymous with autumn. (I use Honl Photo gels).

Models in Oakville (Photo: Michael Willems)

And there we have the image. (In fact this is not quite the image – that one went to the client, and I do not like to publish images in this open forum before the customer has used them!). Also – note that these are shot a little wide since this is for a magazine front page, so there needs to be space for text.

Notes:

  • Umbrellas and softboxes outdoors will be blown away, so hold on tight.
  • If the models move, use AF-C/AI Servo focus mode.
  • With two models, be very aware of the danger of blinking – one of them will blink in very many images, so check, and take many images.

The setup was as follows:

Fun shoot.

(And perhaps also, a shoot that explains why photography costs money: A car full of equipment, props that get used just once, two sets of clothing, and five people taking several hours. All this costs money!)


A little known fact

When you shoot Nikon and use the CLS/iTTL systen, you can fire remote flashes and set them to manual instead of TTL. This is well known since you set the options through the on camera menu.

In the Canon world, this is not possible: remote flashes operated by light control must use TTL. Right?

Wrong. Canon too supports this functionality.

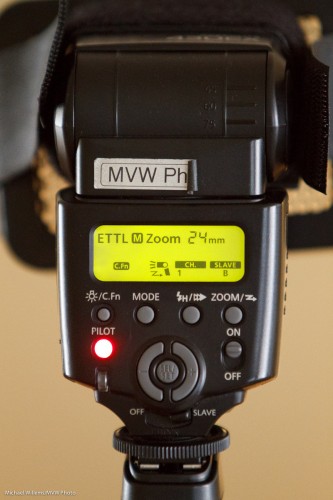
Here’s a TTL flash set to slave mode (a 430 EX in this case). The display looks like this: (And note that the “M” here refers to the flash’s zoom setting – nothing to do with flash mode):

So it’s a TTL flash set to slave mode.

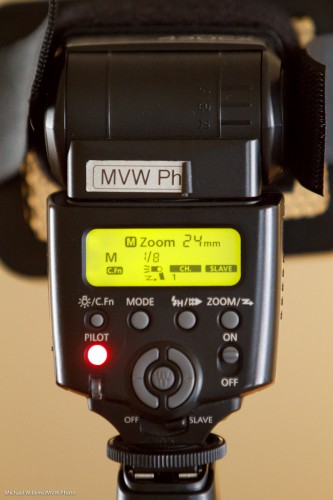
Now press and hold the MODE button. After a few seconds, you see this:

Now your cannon flash is still in slave mode, but it is now in manual power mode – TTL will not meter: the flash will just fire at whatever level you set it to (1/8th power, in this case). Note that the “M” to the left of the “1/8” now flashes, to remind you. One press and it goes back to TTL mode.

I bet there are some here who did not know this! Yes, you can use light-operated remote slaves that you set to manual, even in the Canon world.

PS: what’s that on the front of the flash? A Honl Photo speed strap plus a Honl 1/4″ grid.


Studio light note

Welcome, all, including new students and reader.

Continuing in the studio lighting technique series of posts, today, let’s look at the effect of a background light.

A simple portrait (yes, as you see, I am my most patient model):

That was lit with one strobe in a softbox on our left. Simple, nice, soft light.

But wait. Perhaps a little more light on the background would help offset the model from the background a little better. For this, we use a speedlight, with a grid (so as to avoid the light going everywhere).

Like this, using a 430EX (similar to a Nikon SB600) fired with a Pocketwizard, and fitted with a Honl grid:

And that gives us very different light.

Now we could turn that background up, or down; or change the direction.

The point is that this allows us to play with “foreground versus background” a little. Offsetting your subject from the background is always good – dark background and light subject or light subject and dark background are both good. There’s no one way – it’s more that there are a number of ways of doing things. And by controlling liught, you control those ways.


Designing a one-light self portrait

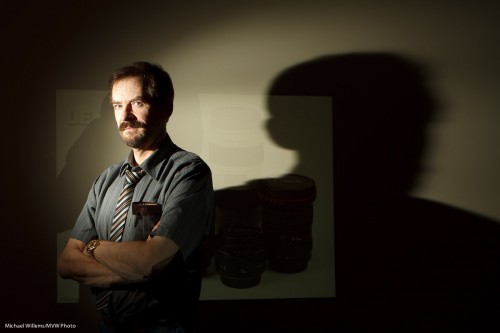
Here is a self portrait, and the process that went through my head making it. I thought that would be good to share. Here’s how to make a dramatic self-portrait in ten steps.

  1. First, I thought “let’s do a quick self portrait, indoors, lit by simple TTL flash”.
  2. I then thought “But let’s make it off-camera flash”.
  3. I went on to think “I want a dramatic image, so let’s use only flash light: available light should play no role”.
  4. To achieve that, I set my camera to manual exposure,  1/125th second, f/5.6, ISO 100. I took a test shot: black. Good, just what I wanted.
  5. Next, I aimed a single 430EX flash in slave mode at the wall diagonally from the side.
  6. Next, I attached a 1/4″ Honl Photo grid to the flash to avoid lighting up the whole wall; instead, I cast a nice parabola. That grid is my most used accessory, I think.
  7. I added a projected image of a set of lenses, only just visible.
  8. Now I put myself into that parabola: light straight into my face. Diagonal to the camera.
  9. I selected an almost-standard lens length (28mm on a Canon 7D, meaning a “real” 45mm) and off-centre composition, with a heavy shadow dramatically cast by me onto the wall.
  10. Finally, to take the shot I would have used a tripod, but since I had a student available, I asked her to shoot for me (Kayleigh, you know who you are).

And the result? Here it is.

Photographer Michael Willems

Photographer and educator Michael Willems, Oakville, 16 May 2011

(For best results, click and  view at original size)

What do you think? Me to a T, eh? This entire shot took just a few minutes to set up. You can do this too!