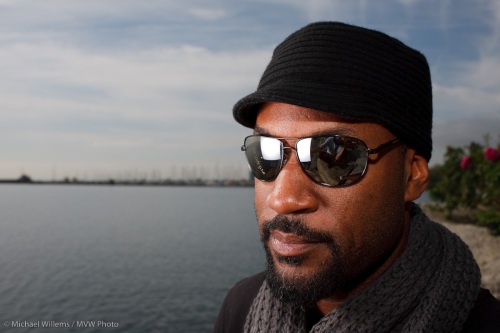
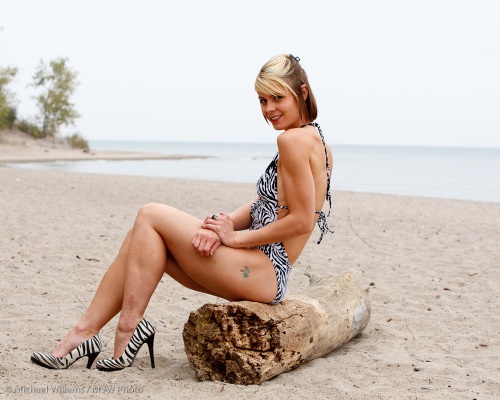
What’s in YOUR bag?

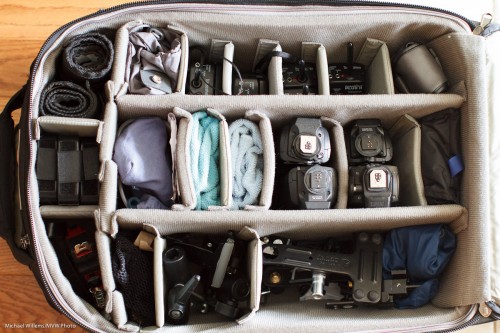
My flash/lighting bag as it is today:

It contains, from top left:

  • Two rolls of Honl Photo gels
  • Flashzebra Cables to connect Pocketwizards to speedlights
  • Six pocketwizards
  • Light meter (and spare battery)
  • Three Honl Photo grids (2×1/4″ and 1×1/8″)
  • Cables and a Fong thing
  • Speedlite feet and a microfibre cloth
  • Trays for Pocketwizards, and a microfibre cloth
  • Four speedlights
  • Rain pouch
  • Knife, tape, tape measure
  • Three Ball heads
  • Flash/umbrella attachments for light stands
  • Grips, cables, “thingies”.

In addition to this I carry another speedlight, more Honl modifiers including the large and small Traveller softbox, a tripod, a bag of light stands and umbrellas, and up to four large lights (Bowens) with a softbox.

Pretty large kit but then, I need to light some pretty unexpected situations, and with this kit I know I can.

 

Last chance

There’s still some space left on the weekend workshop Joseph Marranca and I are arranging this weekend in beautiful Mono, Ontario, an hour north of Toronto: but you need to be quick.

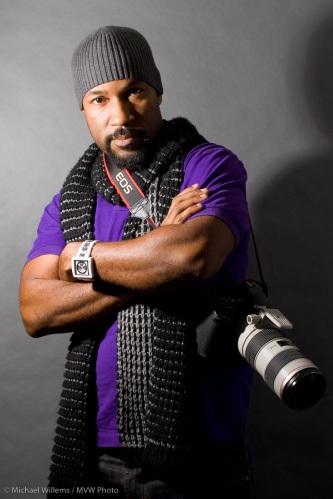
Two days of intense learning about lighting: we will teach you studio lights as well as small flashes; one as well as many; traditional portrait lighting as well as edgy lighting like this:

If interested, go here right now and sign up online while you can. You’ll go home with some portfolio pictures.

And for the rest of you, I shall post some pictures after the weeknd.

A standard portrait setup

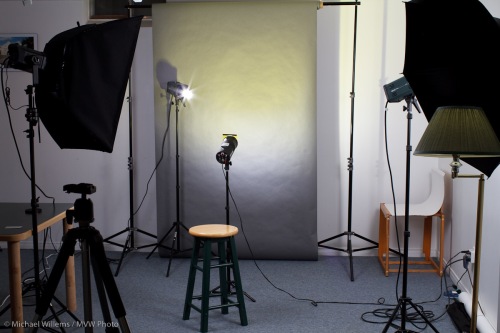
Back to the standard “small studio” setup I described earlier. This time I shall talk a bit not about how it works – I assume light sensitive slave cells and Pocketwizards and cables are all old hat to you now – but instead, I will talk about how to use it.

As a reminder, here is such a four-light setup, again:

Four lights; and after the click, more about how you use them.

Continue reading

Let there be light.

Please. Light. I dream that one day the newspaper will send me to shoot something where there is actual light.

Tonight, two shoots where no flash was allowed (or possible). I started with a recital. Church. Not possible to move – I had to stay where  I was and not in the best place. And no flash.

So that meant that to get acceptable shutter speeds (1/125th sec on a 200mm IS lens, which ias as low as you can go, really) I had to use 1600 ISO at f/2.8, which is just OK on the 1D MkIII:

Not too bad. Thank God for f/2.8 lenses. Why do I pay $2,000 for my lenses? This is why.

Then it got worse. Rush to get to the next appointment: Tennis. And indoors. And in very low light. To see the ball and to freeze action I needed 3200 ISO – and even then at f/2.8 I was only able to get to 1/320-1/400th second, never faster.

Big time noise. But…  I (and hence the newspaper) got what I went in for.

And tonight I will dream of venues with light.


Studio simple

A studio need not be expensive. Even a light or two – affordable strobes – and a few reflectors and a backdrop will do it.

This is a setup I often take on the road:

  • Two or three strobes with stands
  • A reflector with stand
  • One softbox and one umbrella
  • Two pocketwizards
  • A tripod
  • A backdrop with stands, and a roll of grey paper.

IMG_1179-medium

Easier than it seems and this results in good pictures. Even, sometimes, when you use just one light and a reflector.

IMG_1167-1-medium

And instead of the light meter, consider using the histogram.

Indoor Flash

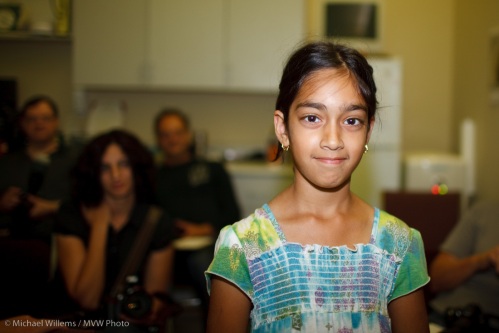
Here’s a few demo shots from a kind volunteer (a student’s daughter) at a recent camera course I taught. This bit was about “flash”.

First, pop up the flash and use “P” or “Auto” mode and you get the picture that makes people hate flash:

MVWS0106

Then enable “Slow flash” or “Night portrait mode” and you get a better picture.. yeah, it’s better. But not all that much:

MVWS0105

Then put your big flash on top of the camera (e.g. an SB-900 or 580EX II, or their slightly smaller equivalents SB-600 or 430EX II). And aim that flash behind you.

Yeah. Behind. So it bounces off ceilings and walls behind you.

Much better. Much. See:

MVWS0107

And then if you want extra “character” and “depth”, bounce off a side wall, if you can find one.

Now you get three-dimensionality, depth, character as well:

MVWS0108

I mean – how cool is that? And all this was done in “P” mode, with no special stuff, with no settings on the camera, no required knowledge of aperture, no complicated techniques.

Flash is wonderful once you learn how to play with it. And it is easier than ever.

The art of the dramatic portrait

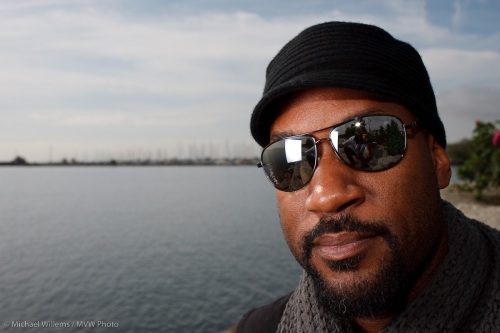
So how did I use the softbox I showed myself holding yesterday? Or rather, what picture did I get in the end?

As a reminder, I was using a Canon 1Ds MkIII with a 580 EXII flash on the camera in TTL master-slave mode in group “A”, and a 430EX II flash in my left hand as slave in group “B”. The “B”-flash had a Honl speedstrap and a Lumiquest Softbox III on it. The E-TTL A:B ratio was set as 4:1, so the handheld second flash fired two stops brighter than the on-camera flash.

I was in Aperture Priority mode (Av), and to darken the ambient light and the sky I used an Exposure Compensation setting of -2 stops.

Because my friend has dark skin and was wearing dark clothes, I also used flash compensation (“FEC”) of -1 stop. Otherwise he would have been overexposed (the camera would have tried to make him “18% grey”).

The result:

MVWS9175

(I left the softbox and my reflection in his glasses deliberately, of course, since I was showing him the use of this softbox. Else I would have moved his head to camera left and down a bit).

Finally: his face is a tiny bit distorted because of the 35mm wide angle lens. I could have used the 50mm lens instead, or even the 24-70: but I think this look flatters him. h

One more sample:

MVWS9176

Let there be light

..and let it be managed.

I have talked about this many times before, and I will do it again. When you add light, and manage it, massage it, and work with i, you get drama, cheerfulness, whatever you like. So when you make the light, you make the mood.

Case in point. In the model shoot I did Monday on Toronto Island, here’s the light the way it might look to a casual observer, and the way it might appear in a properly exposed photo:

MVW_2600

Fine. Nice. Pretty young lady (Miss Halton, incidentally) on the beach.

Now let’s work with that. That background is a bit bland to my taste, so let’s darken it. The colours on the model are OK but I’d like them to stand out more.I want drama, and I want the model to stand out, not to be just a thing on a beach.

So first I turn down the ambient exposure. Two stops.That will make light blue into dark dramatic blue. Then I add a flash, on a light stand – shot through an umbrella to get soft light.  I fire that from my on-camera flash using E-TTL II IR technology. I turn the flash up or down as needed.

I now get the result I had in mind.

MVW_2601

That’s better.

And more importantly: that’s entirely different. And that is the photographer’s task, to make things the way he or she wants them. You can say you like, or you don’t like – but you can’t say it isn’t different!

Straight light

You know about Rembrandt lighting, loop lighting, broad and short lighting, and so on? If not, you will. But today a note about simple lighting for models, women, in general anyone who wants to look their best and show youth and beauty rather than experience and character (which can be a euphemism for age).

That is straight, flat lighting. Like this:

IMG_0162

As you see, that is nice, flattering light.

Whenever I shoot anyone where the main emphasis is on this person looking young and attractive, I draw an imaginary line from their face straight up at 45 degrees, i.e. not to either the left side or the right side. Where that line straight from their face hits the wall or ceiling, that is where I aim my flash. (An external flash – please, you don’t use the on-camera popup flash, do you?)

And when I do that, pictures like the one above result – when the model is as pretty. Even when the model isn’t as pretty, this light is best if you want to minimise wrinkles.