Everyone has old photos. And these are important photos, because they often involve family.
Good news: these photos can now be professionally restored to their old glory. Whether your photo has faded, or is cracked, or is full of imperfections, or is unsharp, or whatever other deficiencies it may have: we can do a great job of restoring them.
And unlike some, we don’t just “throw them into an app”. We are editing experts, and we have a wide range of different applications and expertise, and we use whatever is necessary to give you the best result for your particular photo.
Furthermore, we can scan your photos professionally, in house so there is no risk, often while you wait; and we also produce top quality prints for you.
Here’s an example:
The finished photo (left) started as a few pieces of torn and discoloured photo (right). Need I say more?
So if you have old photos, contact me or come to the store, and we’ll help.
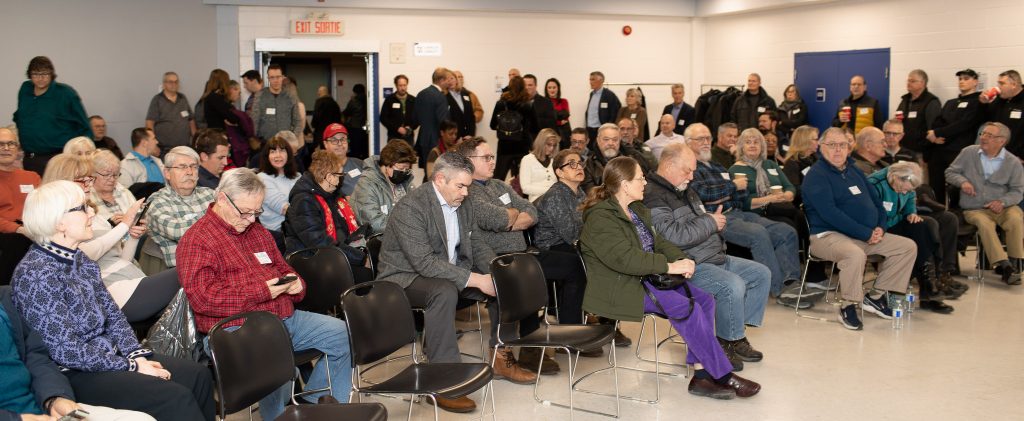
The minimum I can. Which for yesterday’s event, a political meet-and-greet in Orléans, was:
A camera (1Dx Mk2)
A prime 35mm/1.5 lens
a 70-200mm/2.8 lens
A 580EX flash
Spare batteries, spare flash
Normally a spare camera too.
So what is the reasoning?
Bounce the flash (in TTL mode) off the ceiling behind you when using the 35mm lens. This means you can light, and you can add modelling – like here:
Matt Luloff, Candidate MP, Camera Set to 1/60 sec, f/4, 200 ISO.
35mm is ideal for events. Consistent geometry, consistent photos. An wide enough to take crowd shots:
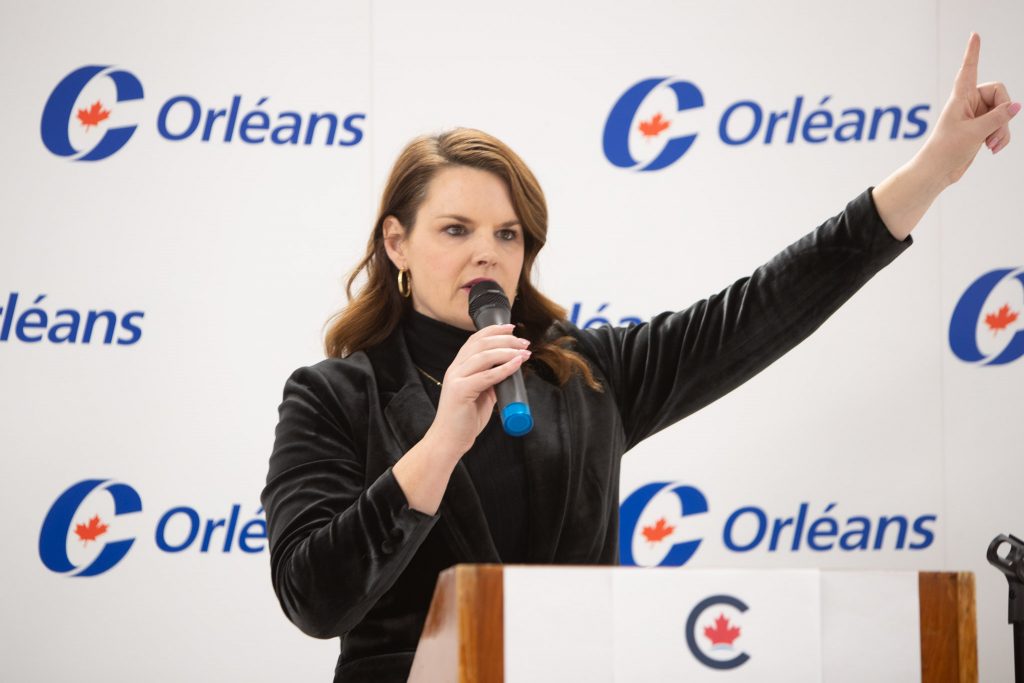
When speeches are part of the event, you use the 70-200mm lens. Without the flash this time. You can go close up:
Or a little wider:
These were taken at 1/80 sec, f/2.8, 800 ISO. Set to the lowest f-number, slightly faster shutter because of the long (stabilized) lens, and then ISO to match.
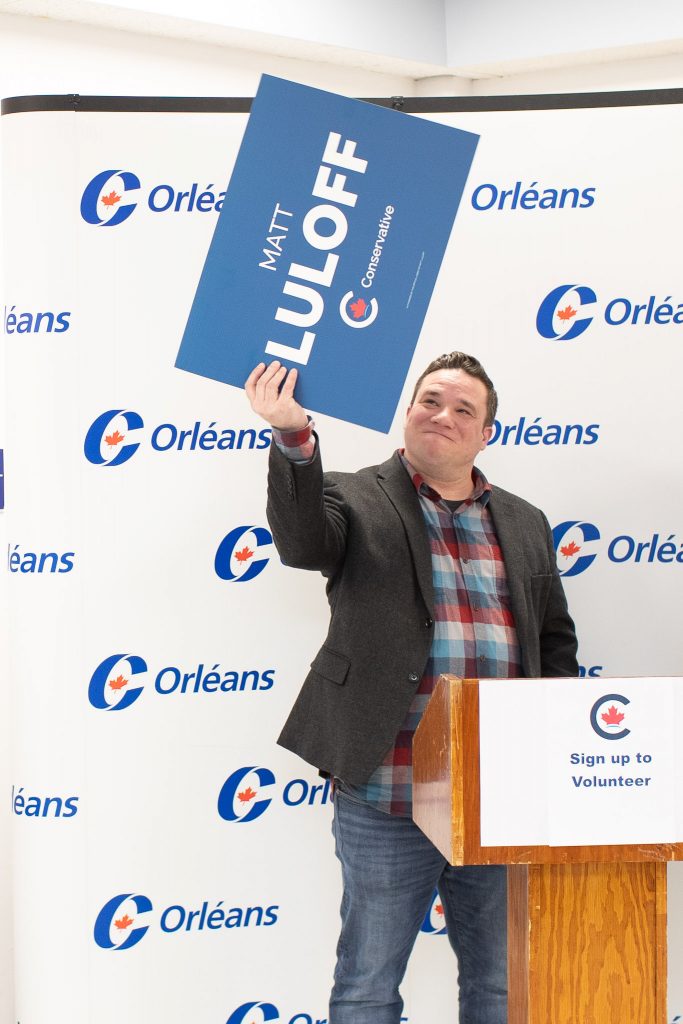
And you can get fun shots:
How many photos did I take in the hour and a half I was at the event?
75, out of which I chose 60 to share. Avoid the temptation to take 600 photos – all will be the same and it’s just extra work.
Adobe has added “Generative Fill” to Photoshop. This is a game-changing function, that uses AI to fill in areas of your photos. The future is here.
And I use Generative Fill widely and constantly, but I have some serious reservations. We should all be aware.
First, you need to stay with it: it is “AI”, not quite “I” yet. Great as it is, it usually needs some manual intervention. It still saves time, but if you think that it will do things automatically without supervision and correction, you are in for a disappointment.
The second objection is more serious. By using this and becoming dependent on it. you are allowing a US-based comp ay to censor your work. Try to remove a body modification (like a nose ring), or even worse, try to take a background object out of a photo that contains a naked woman, and you get this:
Yes, it is not the lady we are trying to edit, it is merely a background item. But just the fact that the photo contains something somewhere that this American company’s puritanical excuse for morality does not like, means I cannot edit this photo.
In other words, if I use AI (which soon will be part of every action you do), my photo needs to be approved by the American Ayatollahs. Talk about Cultural Imperialism… one more example of why America is so often disliked in the world.
And this is not about nudity. It is about the fact that your work will now increasingly be censored by American censors. Before you get too reliant on AI features, think hard.
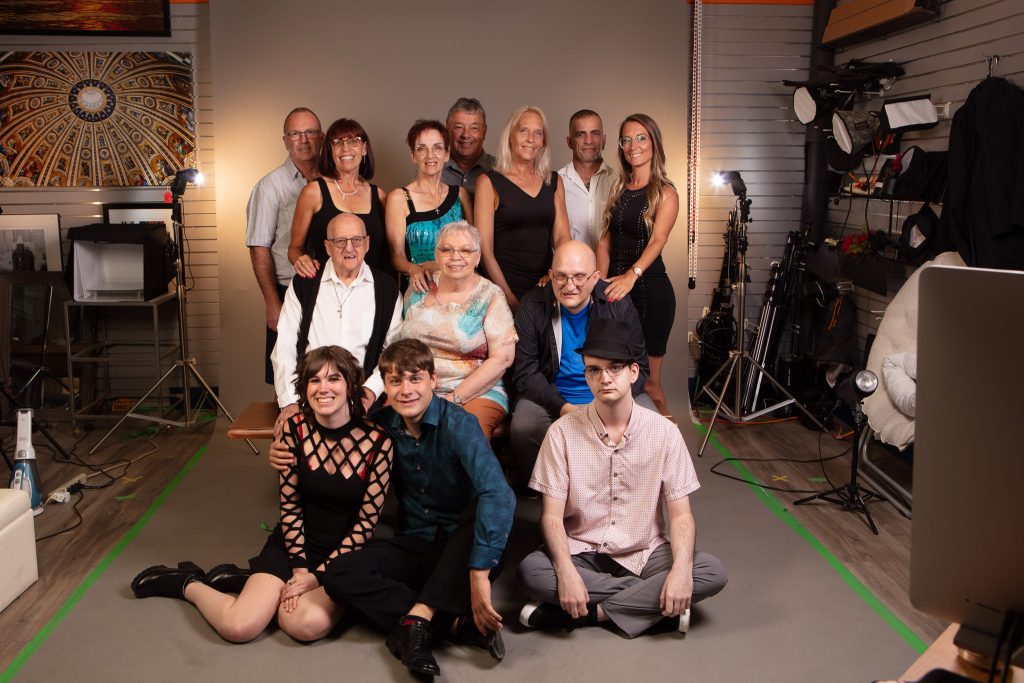
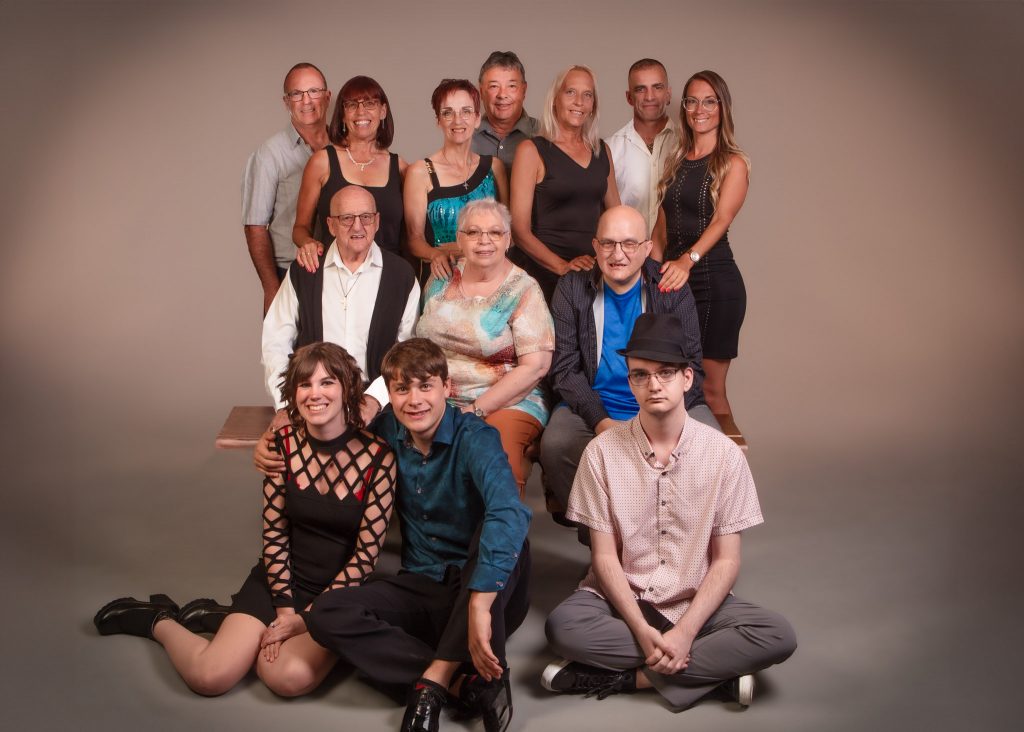
We have a studio here at Michael Willems Photo that is nice and high – but it has a nine foot wide backdrop. I would not mind a wider backdrop, but they do not exist.
So we shoot a large group like this:
And then what?
Simple – photoshop allows us to quickly and efficiently fill the background. Content aware fill was good; generative fill is even better.
To do this well, ensure that the entire group (including the bench) is in front of the backdrop. And to achieve that, shoot from as far back as you can. The further back, the wider the backdrop appears to get.
Come to our Ottawa studio any time to see for yourself.
In our never ending endeavour to provide the services a community needs, we do more than just portraits and photo printing, at the studio. In particular, I mean services like:
Media conversions. If you have old VHS cassettes, or smaller video, or Super8 film, or most other media formats, even reel to reel audio tape, we can convert it for you and put it on a USB key or similar.
3D Printing. A new service: come to us with an .STL file, and we’ll quickly and efficiently make your 3D print.
Photo restoration: we fix your old photos, however damaged they are.
35mm film developing: of course we take care of that for you (including disposable cameras).
Frames: we carry great quality frames at all common sizes, such as 5×7, 8×10, 8×12, 11×14, 12×18, and 16×20.
Help with photography-related issues, like Lightroom help.
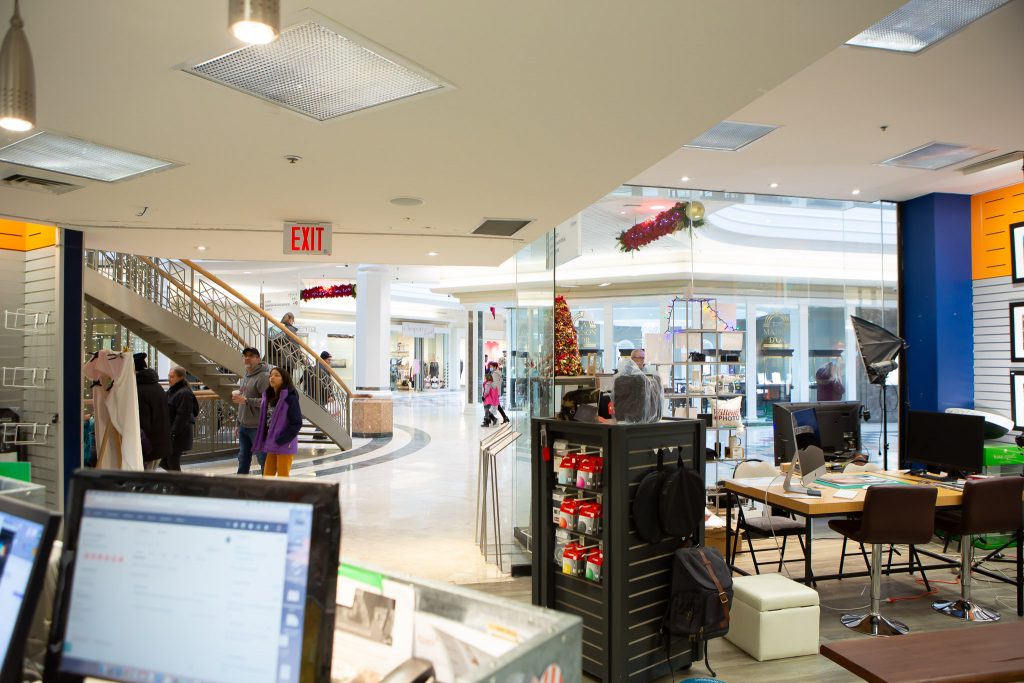
This and much more at the store at Place d’Orléans Shopping Centre – come meet me if you want to discuss.
A word about our in-house PREMIUM PRINTS at Michael Willems Photo.
First of all, they are “Giclée” prints. Giclée is a French term meaning “to spray”, referring to how an inkjet printer works and how giclee prints are usually produced. These large format inkjet printers use small spraying devices that can both match color and apply ink very precisely.
A Giclée print is a print that:
 1: Is high resolution (300 dpi or more)

 2: Uses pigment-based inks, not the more usual (and cheaper) dye-based inks. Pigment-based inks give excellent colour rendition, and pigments do not fade the way dyes do.

 3: Is always made on Professional Photo Paper.

 4: Is made by a larger model printer, that uses ten or more different colours (as opposed to the kind of printer you might have at home, which uses far fewer colour cartridges). This ensure excellent colour accuracy.
To call a print a Giclée print you must meet all four requirements above. Our PREMIUM PRINTS are Giclée prints.
But more than that, the price also includes our personal involvement. We make sure your work meets the right quality requirements; we crop if necessary; we adjust where adjustments are needed; we advise on other edits we think will make your print even better – so that you can enjoy it for many years to come as a beautiful work of art.
The advent of the digital age has transformed the way we take, store and share photographs. With social media platforms like Instagram and Facebook becoming increasingly popular, people now primarily click pictures on their smartphones and upload them online for the world to see. In such an era, the relevance of a brick-and-mortar photography shop might seem limited at first glance. However, upon closer inspection, it is clear that such shops still hold tremendous value in the digital age.
To begin with, brick-and-mortar photography shops offer a physical space where photographers can go to get their work printed and framed in high quality. While digital platforms allow for easy sharing of images and viewing them on screens, there is still something irreplaceable about holding a high-quality print in one’s hands. The physicality of a print allows us to appreciate details that may not be visible on screen, and the texture of the paper adds to the overall experience of looking at a photograph.
Training
Moreover, photography shops have evolved beyond simple photo printing services. Many shops now offer classes and workshops for people interested in learning about photography, regardless of their skill level. These classes can be invaluable for individuals who are looking to improve their photography skills, learn about different techniques and styles, or simply looking to meet like-minded individuals who share their love of photography.
Guidance
Another significant advantage of brick-and-mortar photography shops is the availability of professional guidance and advice. When someone has questions about their camera, lens or any other photography-related equipment, they can visit a store and speak with knowledgeable staff who can offer advice and recommendations. Similarly, when someone is looking to purchase new equipment, visiting a store allows them to try out different options and make an informed decision based on their needs and preferences.
Community
Finally, brick-and-mortar photography shops offer a sense of community and belonging that is hard to replicate online. Photography is, in many ways, a solitary pursuit, and it can be difficult to connect with other photographers on a personal level through digital platforms. Visiting a photography shop provides an opportunity to meet other photographers, share experiences and ideas, and forge meaningful connections with like-minded individuals.
Conclusion
In conclusion, while the digital age has undoubtedly transformed the way we consume photography, brick-and-mortar photography shops remain relevant and valuable. They offer a physical space to print and frame images, provide opportunities for learning and growth, offer professional guidance and advice, and foster a sense of community and belonging. As such, these shops will continue to play a crucial role in the world of photography for years to come.
And now the kicker: this piece was not written by me, but by ChatGPT. Literally, an AI manages to write a piece that gets it right and that summarizes the state of the industry perfectly. Welcome to the future!
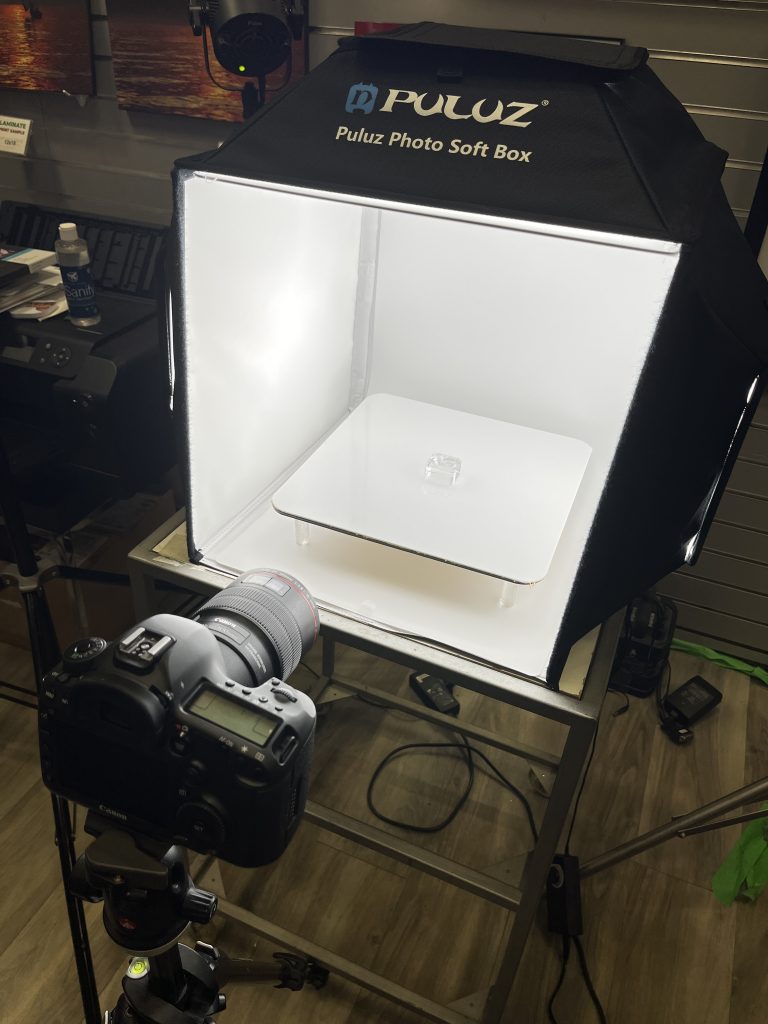
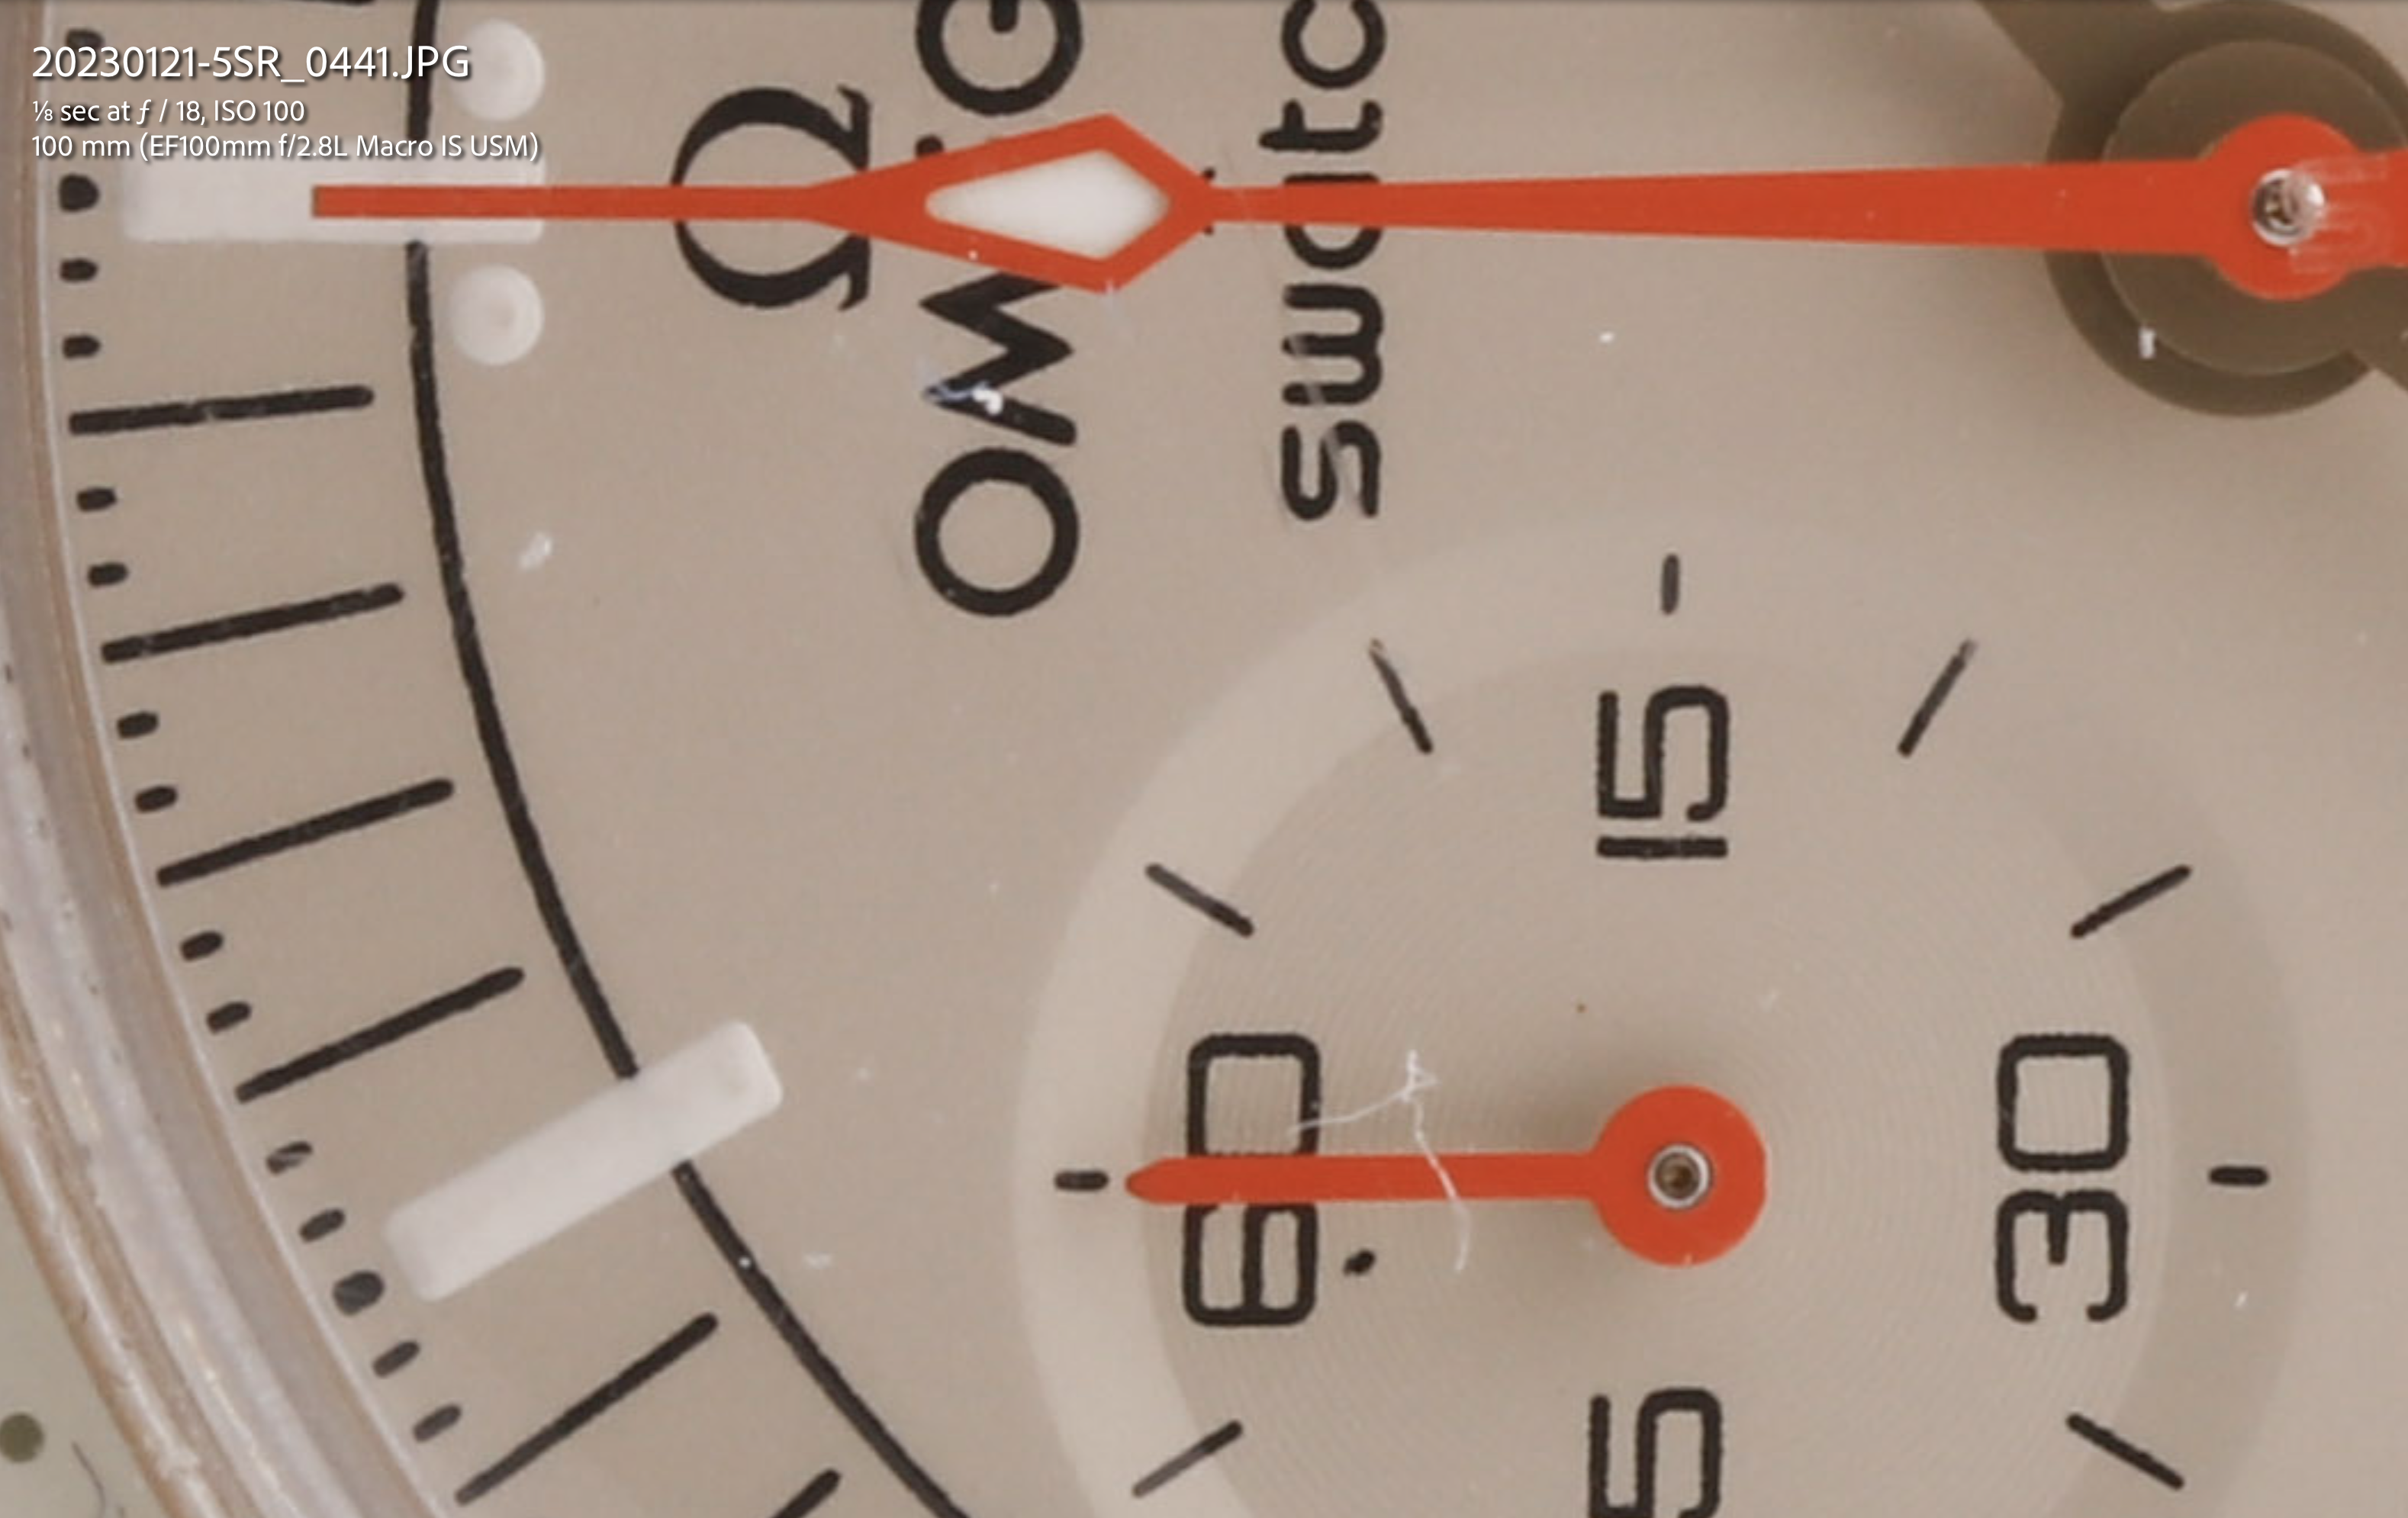
When we quote for product photography, the client often asks “why so much? It takes just a moment to take a photo, surely?”.
But as you can probably imagine, it is not as simple as that. There is more expertise and work involved than you may think. Let me show you.
First, there is the setup you require. At a minimum, this:
That is, a light setup of some sort – at a minimum, a light box and a nice reflective surface, but often extra “kicker” lights, special reflectors, and more. And a high-definition camera (that is a Canon 5D-SR, a special 50 Megapixel camera), and a 100mm f/2.8L macro lens.
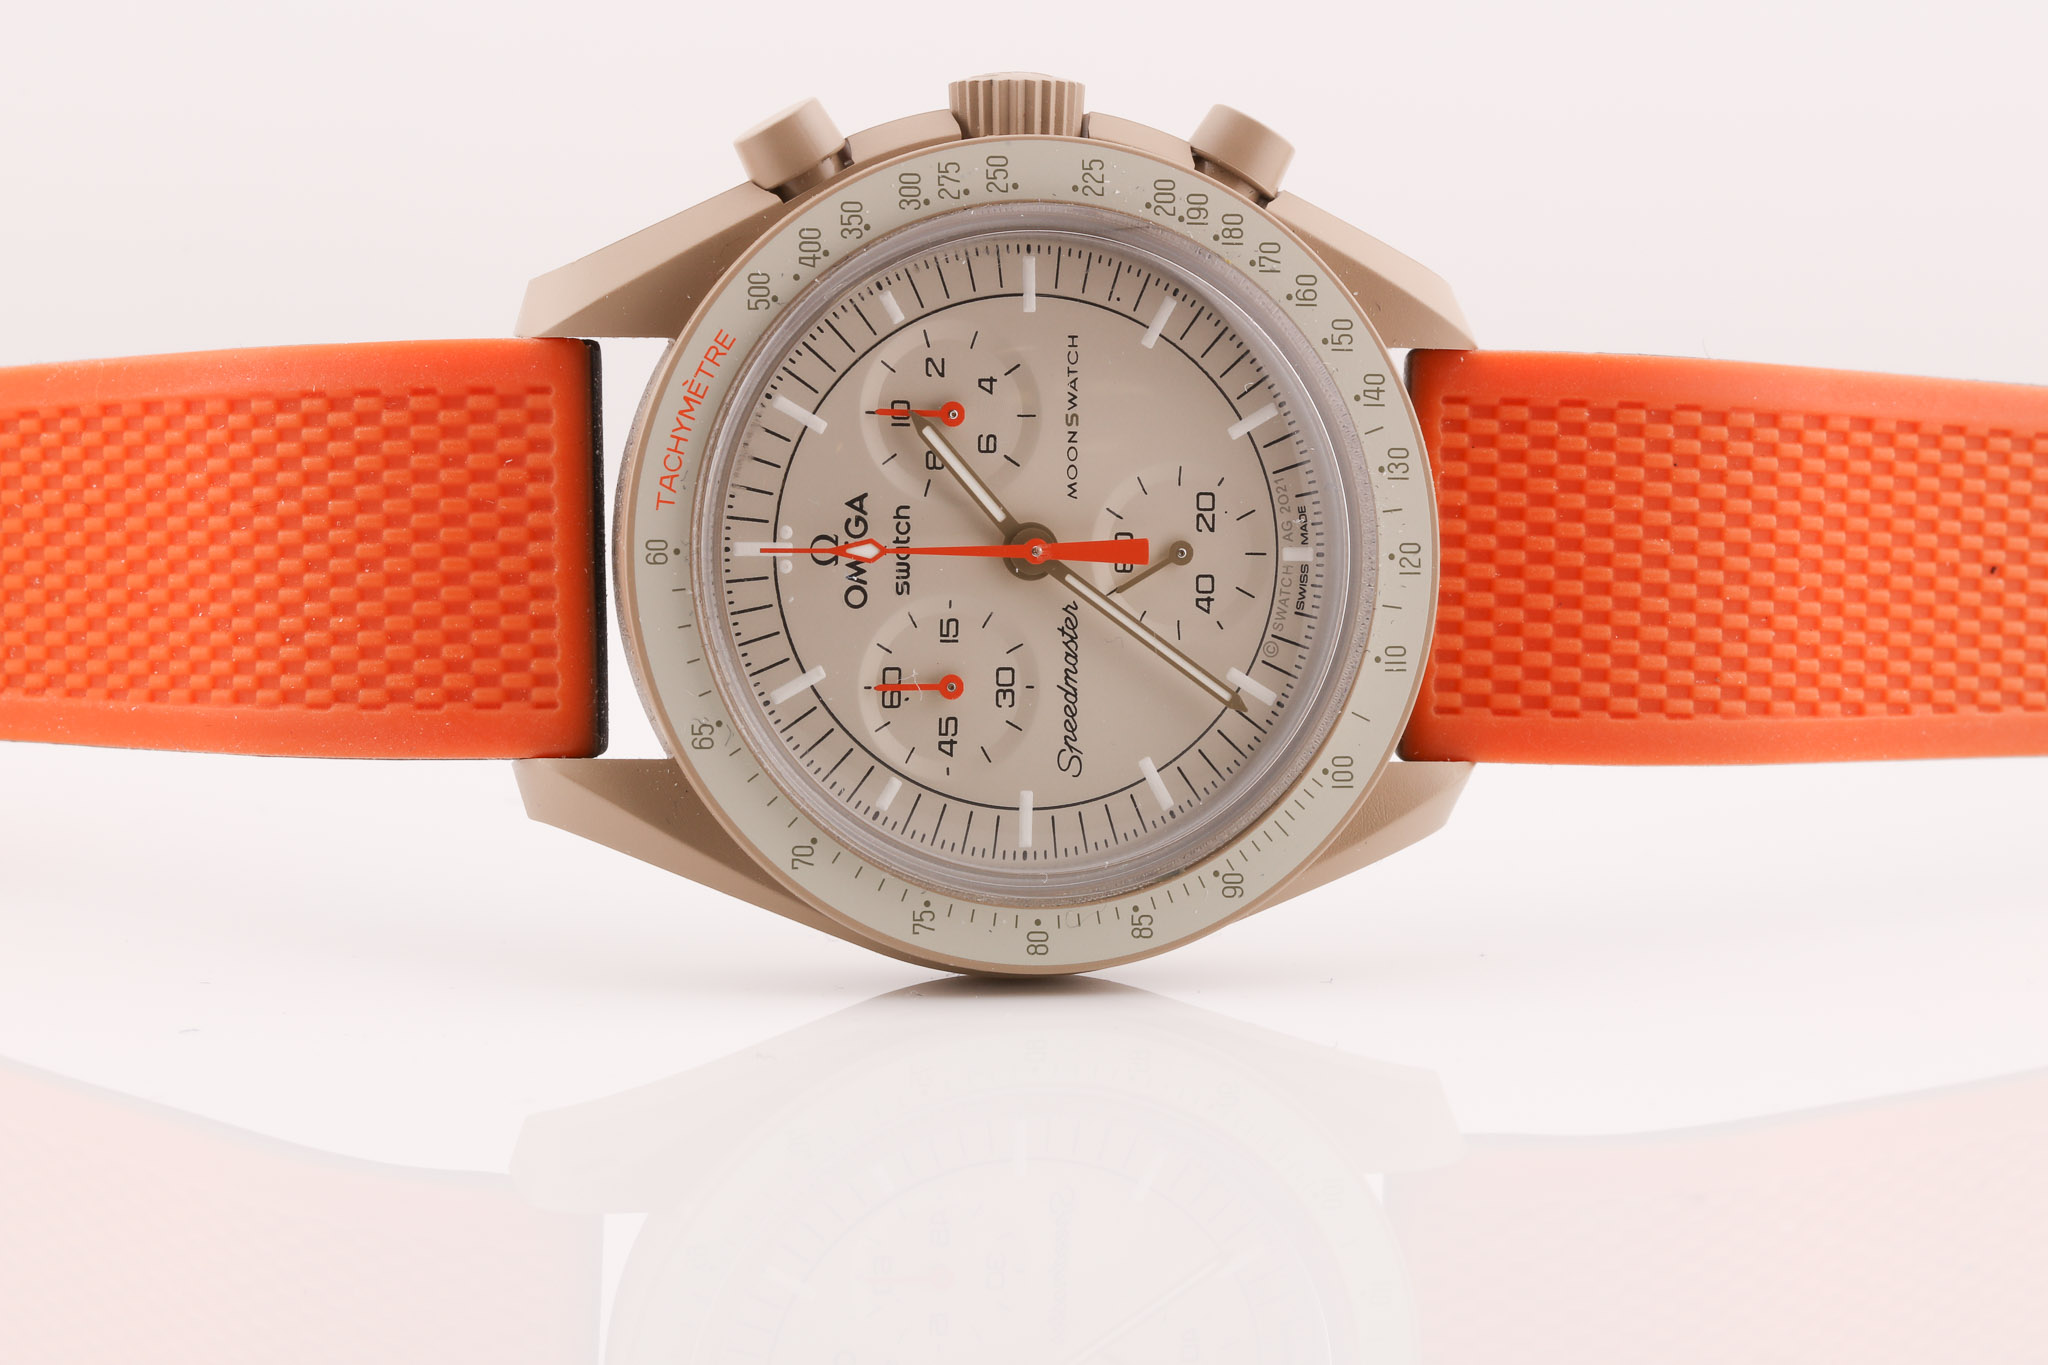
So then the photo: this involves cleaning and then positioning the subject carefully, adjusting lights, and positioning reflectors and backgrounds. This can mean a lot of work, because each type of product has its own specific needs – and challenges. For jewellery, that includes things like desired and unwanted reflections; colours; and simply how to hold the jewellery. For industrial products, the need is often more “mechanical” (show every detail) than artistic or sales-related. And so on.
Then take photos until you are happy. Done!
Eh… no, not done. Most of the work is still ahead.
Because once you put the photo into Lightroom and make basic adjustments (crop, white balance, and so on), you must then put the photo into Photoshop, and make detailed adjustments. And 99% of those detailed adjustments mean “remove dust and other imperfections”.
You see, when you get a rough photo like this:
…it looks fine, but when you zoom in…:
…which of course is unacceptable. And this occurs all over every photo, however well you have cleaned the object prior to photographing it. It is almost a law of nature: “there will be dust”.
And when you look closely enough, you will also see scratches, imperfections, perhaps unwanted shadows, signs of wear, and so on. It is not uncommon to spend four hours – or for a professional jewellery photo even more, sometimes well over a day, for one photo.
After all that has been fixed, there is still more – sharpening, using specialized sharpening software, and quite possibly also upscaling for publication.
Click on this image below to see a “pretty much finished” image: even that partial finishing took me two hours.
And that is why product photography is not cheap – but if you want it done well, spending the time is the only way to do it.
Always the contrarian, let me explain why I argue against conventional wisdom that “long lenses compress perspective”.
The reason: They don’t actually do that. They only cause blurry backgrounds.
What compresses perspective is your vantage point.
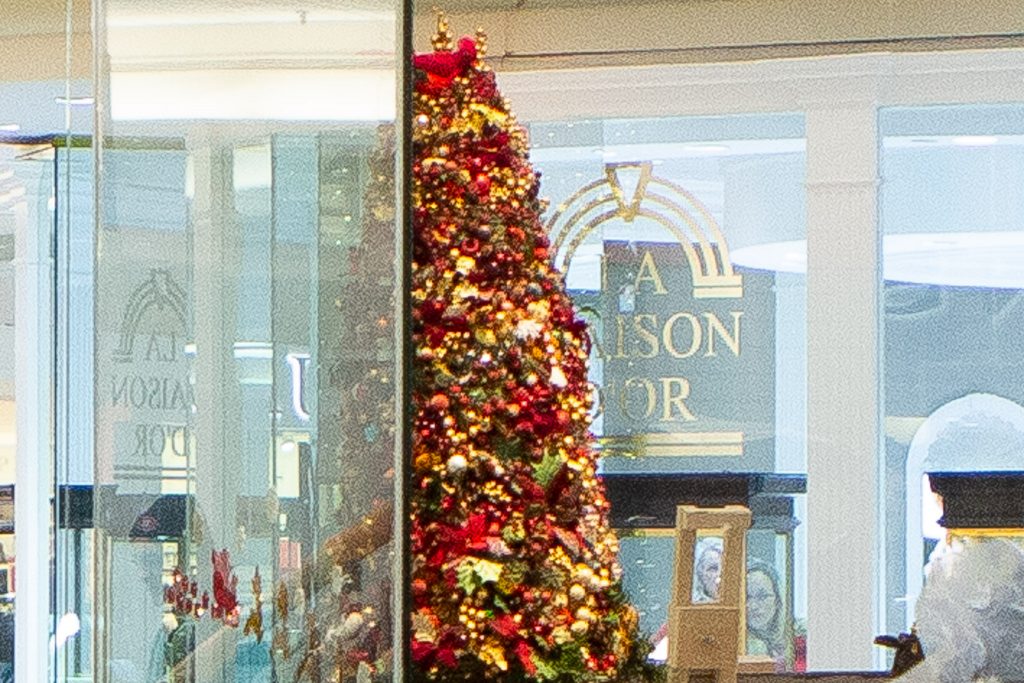
Before I explain: let me just show you. here’s two shots I took from the same position. Same position, same camera, and using 24mm and 200mm lens focal length, respectively.
Same picture: the small Christmas tree, with the jewellery store behind.
Now let’s crop the heck out of that first shot, the 24mm picture. No other changes – just a *(pretty extreme) crop:
Now compare the last two photos, and ignore the blurry background in the 200mm shot.
Other than that, the photos are identical. The background (the jewelry store window in the background) is no larger in the 200mm shot than in the 24mm shot. It is not closer. It is not a “compressed background”.
The only thing that determines the “compression of the perspective” is your position. And in particular, the ratio of the distance to the remote object to that of the close object.
If that ratio is large (say, 10:1, meaning the remote object is ten times farther away than the close object) then, well, that remote object will look smaller. If the ratio is small (say, 2:1, meaning the remote object is only twice as far as the close object), then it will look less small – i.e. it will appear to be closer.
And that ratio is only determined by where you are. Imagine I am looking at a tree, and some distance behind it, there is another tree. If I move back an infinite distance away from the first tree, then the ratio approaches 1:1, meaning the objects look the same size if they are the same size. If, on the other hand, I move infinitely close to the first tree, then that ratio approaches infinity, meaning that the second tree looks infinitely smaller.
So why do we say “long lenses compress perspective”? Because using a long lens almost always means that you will not be close to objects. So the ratio decreases. So the background appears to get closer, compared to when you use a shorter lens (or your eyes). So in practice it appears to work this way.
But in fact, it is only your position that determines compression. Simple math. So if you had a 10mm lens, you could take every single photo with it – if you had the ability to crop crazily. So those of you with a 500 Megapixel camera: all you will need is a wide angle lens (and some patience to do all that cropping.
You now know more than a lot of professional photographers.