Engineers

I have always been a good teacher because I am, at heart, very simple. I think intelligence means “making complex things simple” – not the other way around. Ask any consultant. The consultant who uses obfuscatory language (complicated words) is the wrong consultant. The one who explains complex things in simple words is the one you use.

And as an engineer, I think sometimes other engineers make things seem too complex.

So, an example. Somewhere deep in its menu, my Canon 1D MkIV camera has (among many other settings) four possible settings for how it achieves focus when you are shooting a burst of shots. Here’s how Canon explains it is an explanatory document (and remember this is meant to clarify!):

The Engineers’ Version…:

C.Fn III-3: (AI Servo 1st/2nd image priority) has had the optional [3: Release/Tracking priority] setting added. Shutter-release priority (rather than focus priority) is given to the first shot. During continuous shooting (from the second shot onward), stable focus-tracking of the subject is given priority. This new setting, which was the only option for AI Servo AF release/tracking priority with the original EOS-1D, EOS-1D Mark II and EOS-1D Mark II N, was conspicuously absent on the EOS-1D Mark III. Now, EOS-1D Mark IV users will have the best of both worlds together with the new improvements to AF hardware and software.

Now the detail:

(Michael’s note: Four options in the C.Fn III focus customization setup menu are explained here. Each one defines “First frame during continuous shooting/All subsequent frames in burst”.)

  • 0 AF priority/Tracking priority: Shutter is released once subject is in focus. There may be a delay when image is blurred./Focus is prioritized. Continuous shooting speed may slow down depending on amount of blur , contrast and brightness.
  • 1  AF priority/Drive speed priority: Shutter is released once subject is in focus. There may be a delay when image is blurred/Continuous shooting speed is prioritized. Continuous shooting may slow down. (depending on amount of blur , contrast and brightness) but is faster than for tracking priority.
  • 2 Release/Drive speed priority: Shutter is released even if subject is out of focus/Continuous shooting speed is prioritized. Subject tracking may not be active depending on amount of blur , contrast and brightness.
  • 3 Release/ Tracking priority: Shutter is released even if subject is out of focus/Focus is prioritized. Release timing may be delayed depending on amount of blur, contrast and brightness.

All clear? I did not think so: I have spent time deciphering this. So now let’s look at…

Michael’s Version:

The camera focus system has the following options for “burst shooting”:

  • It can either start shooting only when good focus is achieved, or it can start shooting as soon as possible, even if focus may not be perfect yet.
  • And that decision can be different for the first shot versus for all subsequent shots.

There are therefore four different setup possibilities:

  1. First shot: shoot only when focused. Subsequent shots: shoot only when focused.
  2. First shot: shoot only when focused. Subsequent shots: shoot as quickly as possible, even if focus may not yet be perfect.
  3. First shot: shoot as quickly as possible, even if focus may not yet be perfect. Subsequent shots: shoot as quickly as possible, even if focus may not yet be perfect.
  4. First shot: shoot as quickly as possible, even if focus may not yet be perfect. Subsequent shots: shoot only when focused.

Another, simpler way to explain this would be:

  1. First shot: shoot accurately. Subsequent shots: shoot accurately.
  2. First shot: shoot accurately. Subsequent shots: shoot quickly.
  3. First shot: shoot quickly. Subsequent shots: shoot quickly.
  4. First shot: shoot quickly. Subsequent shots: shoot accurately.

When do you use these modes? If “getting the shot” is more important, in developing news events, for instance, then you should probably shoot quickly. If quality is more important, and if events repeat, as in some sports, then you should shoot accurately.

The default is to always shoot accurately. We recommend that you leave it like that, unless you are shooting events where you simply must get the shot, even if it may not be quite as well focused.

——–

And you realize, that is just one of the many options and settings on the 1D MkIV camera. I would love to produce a plain English “how to”-guide, including a “recipe book” of all the recommended starting settings for various situations and sports (Canon, if you are interested, do let me know).

Setting sun

Look at this photo I shot of Yasmin Tajik, Sunday in Nelson, outside Las Vegas, NV:

Yasmin in Nelson, NV, photo by Michael Willems

Yasmin in Nelson, NV

Nice late afternoon light, and lit by the late afternoon sun.

Except it wasn’t. Yes, it was late afternoon, but Yasmin was not lit by sunlight. She was lit by my flash.

  • The flash was on camera, since I was traveling without light stands. I would normally take it off camera. But when you can’t, as long as you are mixing light, it is OK to shoot with the flash on camera. Outdoors, therefore, straight into your subject’s face is OK, if you have to.
  • Since both I and the subject were moving constantly, I used TTL rather than manual flash.
  • The nice late afternoon colour on Yasmin? Glad you asked. A 1/2 CTO Honl Photo gel on the flash’s Speed Strap, and the camera’s White Balance set to “Flash”.
  • I ensured that the shutter speed would stay below the camera’s sync speed of 1/300th of a second, in order to give the flash maximum range (“Fast Flash/FP Flash” would decrease available power drastically, which at this distance is not a good thing). Doable late afternoon, when the light is not as bright.

As you see, even very simple means can lead to well-lit pictures.

Site of the day

I see that this site is today’s Site of the Day at http://www.1001noisycameras.com/ – that’s great! Welcome, 1001 Noisy Camera fans.

As you will see, on this blog I teach daily – a teaching post every single day. Enjoy, and search back through the past year – many useful tips here from a working photographer and teacher to everyone who is interested!

Few posts of mine come without a snap or two, so here are a couple from yesterday’s shoot – the Hon. Minister Harinder Takhar MPP, a truly charming man:

The Honourable Minister Harinder Takhar, MPP, photographed in June 2010 by Michael Willems

The Honourable Minister Harinder Takhar, MPP

I used three lenses: one long (70-200 on the 1D Mark IV) and two wide (24-70 and later 16-35 on the 1Ds Mark III).

Wine being poured at a reception, photograph by Michael Willems

Wine being poured, photograph by Michael Willems

Manual and with a flash for fill.

Reception Buffet, photograph by Michael Willems

Reception Buffet

Cheers,

Michael

Hyper real

With today’s fast cameras, big sensors, and great noise reduction technology, like that in Lightroom 3 tha I described earlier (magic), we can see better with our cameras than we can in real life. It is fun to experiment with that.

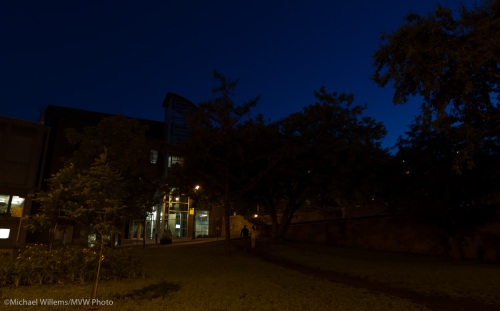
Like in Montreal the other day. Here’s a street the way it looked to me:

McGill College in the dark, photographed by Michael Willems

McGill College in the dark

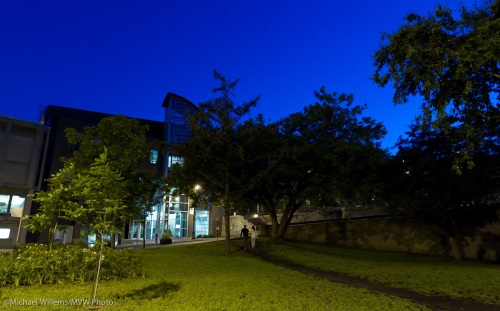
But with my camera (a Canon 1D Mark IV) set to auto ISO, and at 3,000 ISO, I got this:

McGill College in the dark, photographed by Michael Willems

McGill College in the dark, at 3000 ISO

And by white balancing this RAW imaging to correct the yellow Sodium light, we get this:

McGill College in the dark, photographed by Michael Willems

McGill College in the dark

I can actually see better with my cameras than I can see in real life.

And I suggest you all try this. Go out and use auto ISO or a very high manual ISO. Apply noise reduction (in the camera if you shoot JPG, or in Lightroom so you get more control). See what happens!

Le Chat, etc: Montréal ce soir

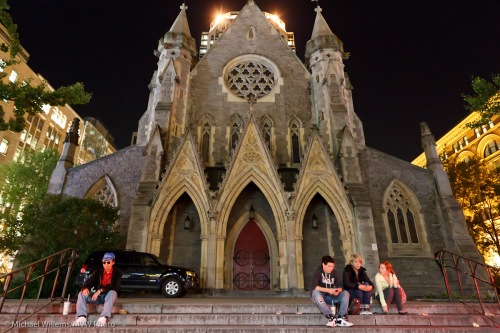
A quick walk through Montréal. 32-12800 ISO and Lightroom noise reduction.. Wow. Wow. And wow. Both Montreal and the low noise performance:

Montreal church, by Michael Willems

Montreal church, by Michael Willems

Montreal Wall, by Michael Willems

Montreal Wall, by Michael Willems

Montreal, by Michael Willems

Montreal

And my favourite:

Le Chat, photographed by Michael Willems

Le Chat (en Montréal)

All this shot handheld with a 1D Mark IV and a 16-35 f/2.8 lens. At ISOs up to 12,800, and with Lightroom 3 noise reduction applied.

1600 is the new 200

I am now using Lightroom 3, having upgraded from 2.6. Strongly recommended. Very strongly: worth every penny of the $99 upgrade fee.

If you do not yet know about Lightroom: you need it (or if you use a Mac, Aperture, the other option. For PC, Lightroom is the only option). The apps organize, keyword, rate and find your files, or rather allow you to do so; and they allow you to do 99% of the editing you’ll ever need, non-destructively and quickly. Much more quickly and conveniently than in Photoshop, which in spite of its name is aimed at illustrators.

Lighroom 3, which I will review in more depth soon, is superb. The major function is the noise reduction. 1600 ISO is the new 200. It is magic.

Look at this image of a student at the Henry’s imaging show recently (and I know you are reading this!). Shot at 1600 ISO with the Canon 1D Mark IV. Click on the image to see it larger:

An image shot with off-camera flash at 1600 ISO

An image shot at 1600 ISO

Superb quality!

But the original was more noisy, especially since I had to push it half a stop (yes, it was a dark room).

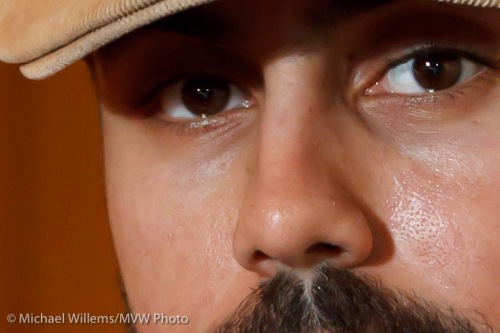
Here is a piece of that image. When you click it, you see it at its original size.

An image shot with off-camera flash at 1600 ISO, before Lightroom noise reduction

before noise reduction

Now look what happens when I apply some noise reduction:

An image shot with off-camera flash at 1600 ISO, after Lightroom noise reduction

After Lightroom noise reduction

And that is just after dragging the slider,. I could play with the parameters to make it even better.

Magic, pure magic. I shall be shooting tomorrow’s Bat Mitzvah party muchly at 1600 ISO, I imagine.

Why I use 1-series cameras

They don’t do anything more than a Digital Rebel. But they do do it better sometimes, and that is important when you shoot for a living. They are more waterproof and more shockproof and shoot faster. And they have several other neat functions that can really matter.

Look at this shot here, from a commercial shoot I just did:

Entertainment Central, Oakville

Entertainment Central, Oakville

No idea what happened to the bottom right corner: bad sector on the disk, perhaps?

That is why the 1-series cameras, like my 1D Mark IV and my 1Ds Mark III, can write to two memory cards at once. I always do this. Sometimes the same format to both, sometimes large RAW to one and small RAW or even JPG to the other. That way I still have one when the other one has a problem.

If you do not have a 1-series or similar camera that can write to two cards, what do you do?

  • Change memory cards regularly
  • Format them every time you re-insert into the camera
  • of course, backup, backup, backup.

But you knew that.

Shooting Rugby

I have never shot Rugby before, so I thought I would enjoy this morning’s newspaper shoot, a high school rugby game. And I did.

Here’s a shot. Of course it is one that I did not send to the newspaper, since I only just shot this and the paper is not out yet, and it is bad practice to trump your own customers. Click for larger:

For Rugby I used the 70-200 2.8IS L lens on the Canon 1D Mark IV.

I set the camera to continuous focus (“AI Servo”) and used a custom setting to give preference to tracking, not to refocusing on objects that appear in between. I used one focus point, with expansion to surrounding point.

The camera produced many sharp shots – most of them by far, so I was more than impressed with this first sports shoot with the Mark IV.

But my main learning was about the sport itself. Here’s what I learned:

  1. The sidelines are a great place to be.
  2. The sun needs to be behind the photographer on a bright day – and pay attention to where it falls onto the subjects (face is better than back of head!)
  3. 70-200 is a great lens for this sport
  4. Get action shots. There’s not much action in a school game – in that sense it is like football or cricket: periods of boredom with the odd burst of action.
  5. Get emotion.
  6. Get colours.
  7. Use fast shutter speeds (I used 200 ISO with the camera in aperture mode and set to f/2.8 mostly – leading to 1/3000th second shutter speeds).
  8. Get the action while you can – 15 minutes times two with only occasional action is no guarantee of a shot/

Oh, and the team in the red jerseys won by a 10-0 margin, so you can see why the others were very determined to stop that ball.

Using light today.

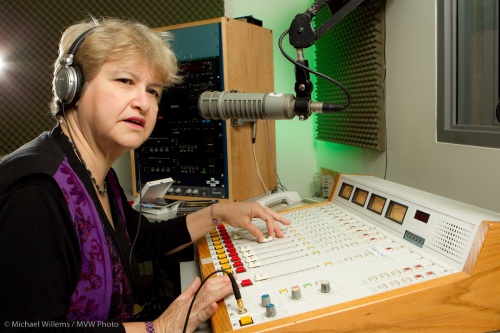
I shot Victoria Fenner today. But only, you will be glad to know, with a camera.

Let me talk you through that, shall I?

Victoria is an audio expert. She used to run the studio at McMaster University that we shot this in. We decided to shoot her doing her thing – and sound is her thing. So we shot in a studio first:

Camera: I shot her with a Canon 1D Mark IV. The camera was on manual at 100 ISO. I used a 24-70 lens set to around 24mm – meaning around 30 “real” mm.

Light: the camera was equipped with a 580 EXII flash to act as e-TTL “master” to drive three 430EX speedlites:

  1. The “A” flash through an umbrella on camera right, shining into Victoria’s face. An umbrella throws nice soft light, great for faces. (There is a certain irony in the fact that we use the word “umbrella” to name this thing that throws around this nice light. Umbra means shadow!)
  2. One “B” flash with a green Honl Photo gel in the background – I love adding a splash of colour, and green goes very well with purple.
  3. Another “B:” flash, fitted with a Honl Photo 1/4″ grid, as hair/accent light shining toward the camera. You can see it just outside the field of view.
  4. I set an A:B ratio of 4:1 to 8:1.

All this took about ten minutes to set up, and ten minutes to take down.

Then we shot some outdoors. For this, I used two flashes off camera: one into a Honl gold/silver bounce card; the other using a grid, as before. Yes, in bright sunlight you can fire these flashes using light-controlled TTL.

This was a bright day in April around noon. But it does not look like noon light, does it? I shot in Aperture mode, with -2 to -3stops exposure compensation. That darkened the background to give it colour saturation. The flashes took care of the foreground.

A portrait with three speedlites

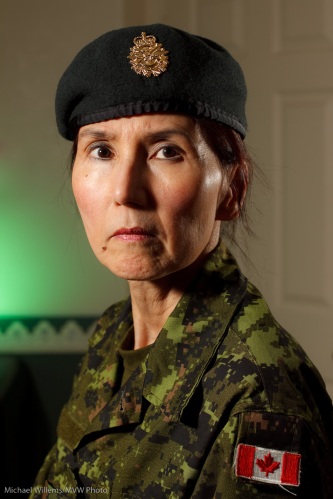
Here’s a portrait I just shot.

I used the Canon 1D Mark IV with a 580 EX II flash on the camera, used only to drive three 430 EX II flashes using remote e-TTL. This is easier than ever: with the right knowledge and tools it takes mere seconds to arrange.

So here’s how I did it.

I used a 50mm prime lens (meaning 65mm effective focal length) with the camera on manual, 100 ISO, f/5.6 at 1/125th second.

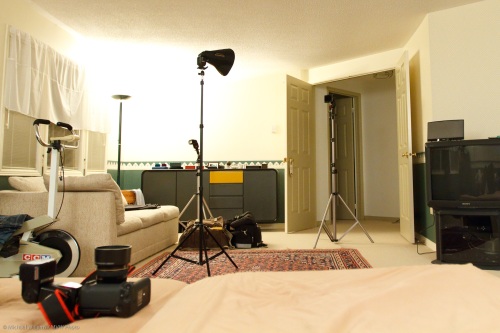
The lights were:

  • One 430 speedlite, the key light, is on camera left one foot away from the subject and is mounted on a cheap light stand. It is equipped with a new Honl Traveller 8 softbox.
  • The second, the accent light, also on a light stand, is one foot behind the subject, is aimed forward at her, and has a Honl 1/4″ grid fitted.
  • The third flash, aimed at the wall, is mounted on its little plastic light stand and has a green Honl gel fitted to its speed strap in order to add a splash of colour to the background.
  • I set an 8:1 A:B ratio to stop the accent lights from becoming too bright (the key light was A). I also used – 1/3 stop Flash Exposure Compensation, since the initial frame showed the face a bit bright.

That setup was:

Simple and effective. And if I say so myself, I think the green gelled background accent was an inspired choice.

Today, with small flashes and modifiers, using TTL, you can do professional studio work in no time.