Stars and stripes

A technical post today—after all, this is a technical learning blog.

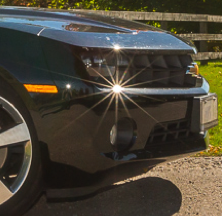
When you see a picture with details like this (from my Mac’s background picture)…
screen-shot-2016-12-27-at-10-10-24-pm
…then you know that a small aperture was used for this photo.

The only way to get the sharp star shape you see here, you see, is to use a small lens opening. Meaning a small aperture (“aperture” means “opening”). Meaning a high “f-number”. In this case, I used an aperture of f/22. The reflection is from my flash, which was aimed straight at the car.

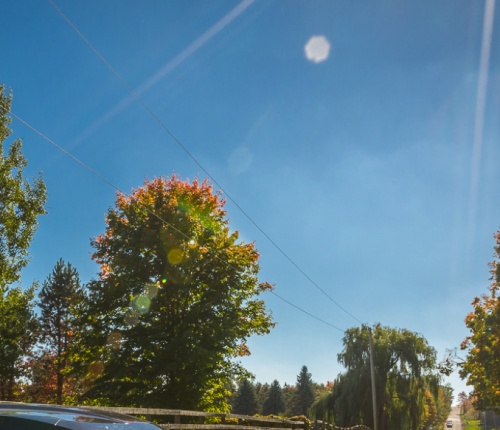
I have other clues. Other detail in the picture includes:
screen-shot-2016-12-27-at-10-10-10-pm
That is at least proof that the lens was not wide open. If it had been, the polygon at the top would have been not a polygon, but a circle.

Other notable facts: the lines (there’s your stripes) all converge where the sun is. And finally, the lens is probably an expensive one: the polygon has seven sides. Most have five or six sides. The more sides, the more the lens approaches the ideal, a circle. That ideal gives you great bokeh.

Bokeh

THE TERM BOKEH, by the way, when used correctly, is used to describe the quality of the fuzzy background. “I want bokeh” is not a correct term: when people say this, they usually just mean “I want a blurry background”.

Correct usage: A lens that has great, beautiful bokeh is a lens whose blurry background is wonderfully smooth and evenly creamy. A cheap lens, on the other hand, has bokeh (especially “fully open” bokeh) that is more like clotted cream: much less smooth, more uneven. I can tell a cheap lens from an expensive one immediately, and I bet you can, too, when you see them side by side.

And that concludes today’s lesson. For more, attend one of my many upcoming workshops: scroll down to read more.

 

Blurry Backgrounds

If I want a sharp foreground subject with a blurred background – you have heard me say it many times, there are several ways.

The reason this subject is always confusing is that it is very complicated. “Sharp focus” and “depth of field” are subjects for mathematicians (check the Wikipedia entry, if you wish). Hyperfocal distance, lens geometry, approximations, cropping, aperture, magnification, f-numbers, image format size, sensor size – all these have an effect. The main factors that affect DOF are:

  • Sensor size
  • Proximity to subject
  • Zoom
  • Aperture number
  • The ratio of subject distance to focal length
  • Cropping

Several of these factors are complicated and need not be taken into account all the time – but several can help you in practice. Chief among them: it is not just aperture that affects depth of field – it is also the distance to the subject. As Wikipedia puts it:

For a given format size, at moderate subject distances, DOF is approximately determined by the subject magnification and the lens f-number.

In practice, this means that to get less depth of field (i.e. a blurrier background), you need to either:

  1. Select a lower f-number, or…
  2. You need to magnify more. And you can magnify more by zooming in, or by getting closer.

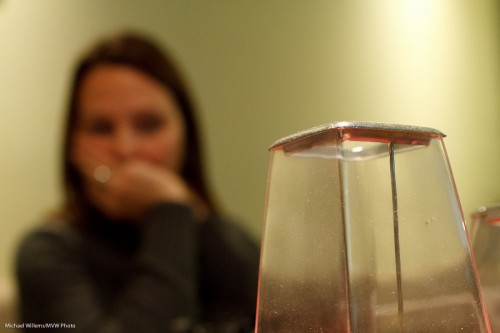
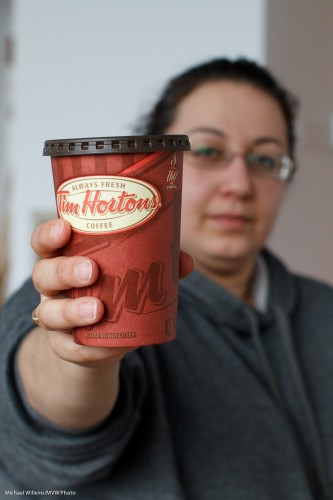
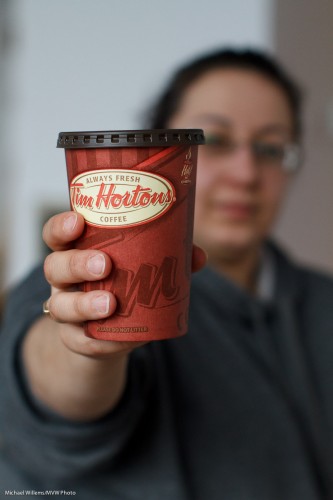
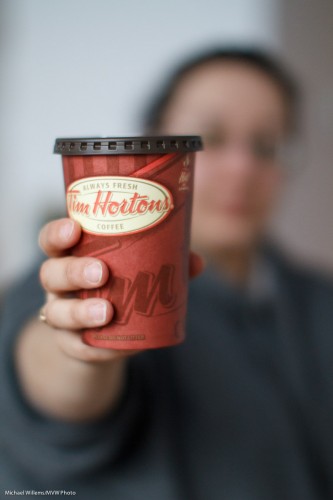
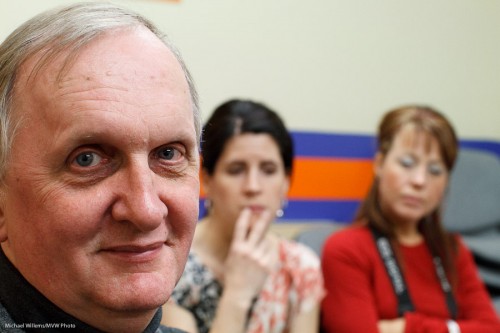
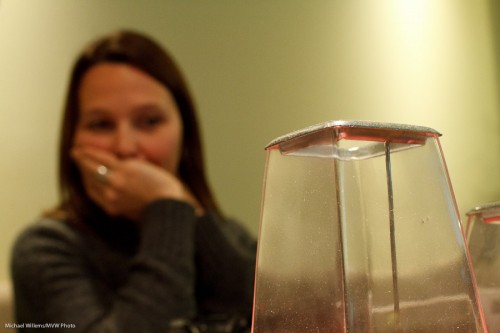
So to get an image like this, with the person behind the object blurred out, you do not necessarily need a fast lens or a full-frame camera:

In fact that was taken with a Canon 7D with a 35mm lens (equivalent to a 50mm lens) set to f/5.6. This is an aperture that every lens can achieve. But I was close to the object!

That said, of course a lower f-number in the same situation gives you more blur. Here’s f/2.8, which good zooms can achieve:

And here’s f/1.4, for which you need a prime lens:

So the lesson, I suppose, is that if you want blurred backgrounds but you cannot right now afford that full frame camera and the low f-number lenses that you should really invest in, at least get close.


Do you need fast lenses?

A recent comment on a post prompts me to remind you of what I have explained here many times before: it ain’t all aperture that makes blurry backgrounds.

Of course aperture is a main factor: the larger the aperture (i.e. the smaller the “f-number”), the blurrier the background. So an f/1.4 lens sure is handy that way.

But other factors count too!

  • Sensor: the larger the sensor, the blurrier your backgrounds can be. (Try to get blurry backgrounds with a little small-sensor point-and-shoot camera: good luck!)
  • Proximity: the closer you are, the blurrier your backgrounds can be.
  • Focal length: the more you zoom in, the blurrier your backgrounds can be.

Here, my food the other day at f/2.8: blurry background because I am close. I did not need f/1.4 (even f/4 would leave the background perfectly blurred).

Food at Julia's in Oakville (Photo: Michael Willems)

And here, the priest at St Andrews at f/2.8. This time, blur because I am zooming in, using a 200mm focal length. Again no need for f/1.4.

Fr Coughlin at St Andrews in Oakville (Photo: Michael Willems)

OK, so you do not always need an f/1.4 lens for blurred backgrounds.

In that case, why do I love my primes?

  • Light. A faster lens lets in more light, meaning you can get reasonable shutter speeds without crazy high ISO values.
  • Quality. A lens is usually best when stopped down a couple of stops from wide open. So an f/1.4 lens at f/2.8 is likely to be better than an f/2.8 lens at f/2.8.
  • And yes, sometimes you do want blurred background when you cannot get closer or use a longer lens!

I hope that clarifies things. You see, to be a competent photographer you need to fully understand this – it has to become part of your DNA, as I told my Sheridan College class the other day.


Effing!

F-numbers, that is.

A post for beginners, today. About the “F”-number and why it is important. Very important.

The most important number is the minimum f-number a lens can be set to. In other words, the maximum aperture, or lens opening that this lens can go to.

F-numbers? Yes, you know. These numbers: f/16,  f/11,  f/8,  f/5.6,  f/4,  f/2.8,  f/2.0,  f/1.4, etc.  And the lower the F-number, the larger the opening.  (The diameter of the opening, by the way, is the lens’s focal length, f, divided by this number. So a 100mm lens set to f/4 would have an aperture diameter of 100/4 = 25 mm).

So how low can we go?

  • On your consumer lens, that minimum f-number is 3.5 when you zoom out, or 5.6 when you zoom in. So on your lens it says “1:3.5-5.6”. Look at the top or at the very front of the lens.
  • On my photojournalist zoom lenses it says “1:2.8”, meaning that the lens can open to f/2.8 whether I zoom in or out.
  • On my fixed, or prime, lenses, this number says “1:1.4”: i.e. I can open to f/1.4.

This is important for two reasons.

First: lower F-numbers means more selective depth of field, i.e. the ability to blur the background. See these pictures, of a student the other day:

f5.6- 1/60th second

f2.8 - 1/250th second

f2.8 - 1/250th second

f1.4 - 1/800th second

You can see clearly that if you want those blurry backgrounds, you need the low f-numbers. No substitute will do. That’s why we pay for “fast lenses” (this just means “lenses with a low “F”-number”).

Second, the larger the opening (the smaller the f-number), the more light comes in. And hence, the faster the shutter speed can be. Look again at the above images. The “consumer lens” needs 1/60th second – barely fast enough for a sharp image. The “pro zoom” needs just 1/250th second. Nice. And  the fast prime lens needs only 1/800th second: a stunningly fast shutter speed that will freeze any motion.

The above images, and those numbers, show very clearly why I would rather shoot a party with a prime f/1.4 or f/2.0 lens than with a zoom lens. If there is one investment you might want to consider making it is that fast lens.


Aperture effect

Here’s an effect we forget sometimes. When a lens is wide open, it vignettes.

My 50mm lens at f/1.2:

And here is that same lens a stop and a third closed down, at f/2.0:

Can you see the difference? The first picture, wide open, shows significantly more vignetting.

Now I like vignetting – a lot, in portraits. But shooting portraits with a lens wide open is rather dangerous, since depth of field is very shallow and may not be sufficient. So I add vignetting in Lightroom – Post Crop Vignetting is one of the best controls in Lightroom for when you are shooting portraits.

And when you are not shooting portraits, avoid vignetting like this – so in those cases, avoid shooting with your fast lens wide open.

Ideal Aperture

The ideal aperture is like really large, yes, a small F-number?

Depends.

Well then, at least in a portrait it is, yes?

It can be. But you need to think about this carefully.

Look at this image of some students who kindly volunteered the other day:

f/5.6:

f/3.5:

f/1.8:

f/1.2:

Which one do you prefer?

I think you may agree with me that a blurrier background is better. But so is a sharp face. Often, the extremely shallow depth of field (e.g. the DOF you get at f/1.2) is too shallow for comfort. Personally, I would say that for this kind of close-up hand-held available light portrait, f/2.8 to f/4 is great.

Reader question

Today, another reader question that I think may interest others. Reader (and student in one of my workshops) Chuck asks:

I wanted to ask you a second question since my class – this time about Canon lenses:

I’m looking for a wide angle Canon EF lens, and I’m seeing two choices:  17-40MM L F. 4.0 lens and for literally twice the price, a 16-35MM F2.8 lenses.

Having heard you educate about ISO abilities & Lightroom capabilities and seeing your picture of lenses ( http://mvwphoto.files.wordpress.com/2009/10/lenses.jpg) I’m wondering why you choose the more expensive 16-35MM F 2.8. over the 17-40MM F 4.0  I read a lot of praise for the F2.8 lens and mixed praise for the F4.0 lens…. but just wanted your perspective please on these two L series lens before I make the purchase.

Thx!

Great question, Chuck.

First of all: either lens would be superb. They are both high quality “L” lenses. On a full frame camera like my 1Ds this is a very wide angle lens; on a crop camera like my 7D this is a wide-to-standard lens. All great.

So why do I go with the 16-35 f/2.8 instead of the 17-40 f/4?

Two reasons.

  1. A wide lens is easy to keep in focus all over the place, i.e.in focus from the tip of your nose to infinity. The wider, the easier this gets. But what if I do not want that? What if instead I want selective sharpness, with a really, really blurry background? Then on a wide angle lens I need very low f-numbers to achieve that. F/2.8 is better than f/4 (which is better than f/5,6, and so on). ISO will not help here.
  2. Light. A wider lens lets in more light. One more stop may not seem much, but in the low light environments I often shoot in, that extra stop can be the difference between a lost shot and a good shot. ISO can of course help, but in that case the more expensive lens can be the difference between me having to shoot at 3200 ISO and being able to do it at 1600.

That’s why I chose the 16-35. The 17-40 would also be a super l;ens, and if you do not need the extra depth-of-field control and you do not shoot very dark environments all the time, the 17-40 will be great as well. I used to own one and loved it.

Why is the 2.8 twice the price? It has literally twice the glass in it, that’s why (a larger aperture means more of that expensive optical glass). So it’s not just marketing!

Advice: go into your camera store and hold both, feel them, try them out. Then, you will know. And since either choice will be superb, you will be happy!

Michael

Guess what.

Two techniques today that I have pointed out before, and I will do it again until everyone uses them regularly.

  1. Close-Far
  2. Selective focus with supporting background elements

Like here:

Food, and food

Food, and food

And here:

Cigar and person

Cigar and person

These pictures:

  • Make the foreground subject really stand out
  • Achieve perspective (close-far: get close to your close object!) and
  • Provide environment, or context, where theuser has to put two and two together to create the story. The eye goes to close object – background – back to close object.

One more example – then go out and shoot some!

Cheers (Teen with orange juice)

Cheers (Teen with orange juice)

Instuctions, should you need them:

  1. Wide lens, often the wider the better
  2. Get close!
  3. Focus on the close object.
  4. Use the largest aperture (smallest “f-number”).

Have fun!

Wide, and wider

Wide angle lenses are good, you have heard me say this many times.

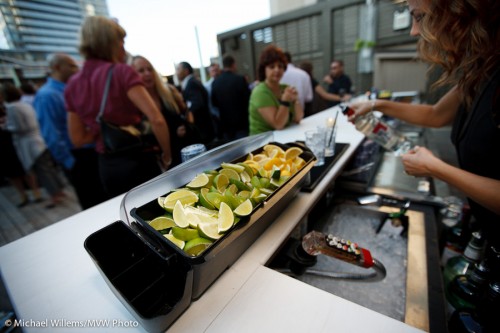
Not just for travel. Also, for instance, for “event background shots”, like this recent picture taken at a corporate event:

Bar Lemons

Bar Lemons

Or for this:

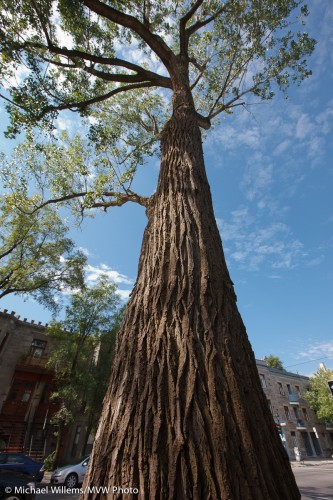
Montreal Plateau Tree

Montreal Plateau Tree

Wide angles because:

  • You get more in (d’oh).
  • They are easy to focus – if you wish, you can get it all in focus (but see the note below).
  • It is easy to avoid camera shake (a safe-ish shutter speed is “1 divided by the lens length”, after all, so shorter lenses are easier).
  • You introduce depth (“close-far” technique).
  • You can exaggerate perspective, if you wish.

So how wide is “wide”?

I would say 16-35 mm on a “full frame” camera – that means 10-20 mm for those of you who use a crop camera, like a Digital Rebel, 50D, D3000, or D90.

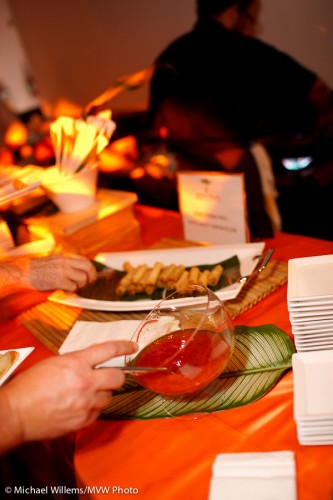
Now I promised you a footnote. Wide lenses make it easy to focus on “everything”. So what if I want selective focus, like in the bar or in the following shot? Selective focus is oh so important in photography, as it helps you tell a story:

Buffet

Buffet

Well, then I need to have a wide open aperture. Wider than on a longer lens.

And that is why I use a 16-35mm f/2.8 lens, and if I could find a faster one I would get it, too. The faster (i.e. the lower the “F”-number), the better. So when some say “a wide lens does not need to be fast”, they are wrong.

Why is my picture blurry?

Why is my picture all blurry?

I hear this all the time from both experienced and new photographers.

Well, here’s why.

Focus:

  • You have not focused properly. Solution: select ONE focus point; focus; hold it; and only then shoot.
  • You are using a shallow depth of field. At f/1.4, it is hard to focus.

Subject:

  • Your subject is moving fast. Solution: pan with the subject or increase ISO, open aperture, or shoot the subject at the apex of its jump, say.

Shutter speed:

  • You are using a slow shutter speed (slower than twice the lens length, say, so on a 100mm lens you are using a shutter speed slower than 1/200th second). Solution: open the aperture or increase the ISO).
  • You are using a long lens (say a 300mm lens). On that lens, fast enough shutter speeds are hard to obtain). Solution: Zoom out, increase ISO, open the aperture, or use a tripod.
  • You are not using a tripod when you ought to. Solution? use a tripod!
  • You are using a slow lens. An f/3.5-5.6 consumer lens will never do as well as an f/2.8 pro lens. Solution: need I say?
  • You are using a small aperture, like f/8, when you should be using f/2.8. Solution: open your aperture.

Miscellaneous technique:

  • Your subject is in the dark – where it is muddy and blurry. Solution: Light your subject well.
  • You are not using flash when you should be. Solution: need I say?
  • You are  not using IS/VR. These are great features: stabilized lenses are superb and give you several stops. Solution: get an IS/VR lens.

Equipment:

  • Your camera is faulty – this is very unlikely, but have it checked out.
  • Your lens is faulty – this is also rather very unlikely, but have it checked out.

Clear? (Pun intended). Try all these and you will see your images improve amazingly.  Yes, I know, there are a lot of them. Yes, it’s complicated. But yes… you will take brilliant images once you get all of these right.

Remember these tips:

  • Bright pixels are sharp pixels (that is Willem’s Dictum);
  • Flashed pixels are sharp pixels;
  • VR/IS works;
  • Use one focus spot;
  • Hold the camera right;
  • A tripod is a good thing.

Have fun – a crisp, razor sharp picture really is a joy.