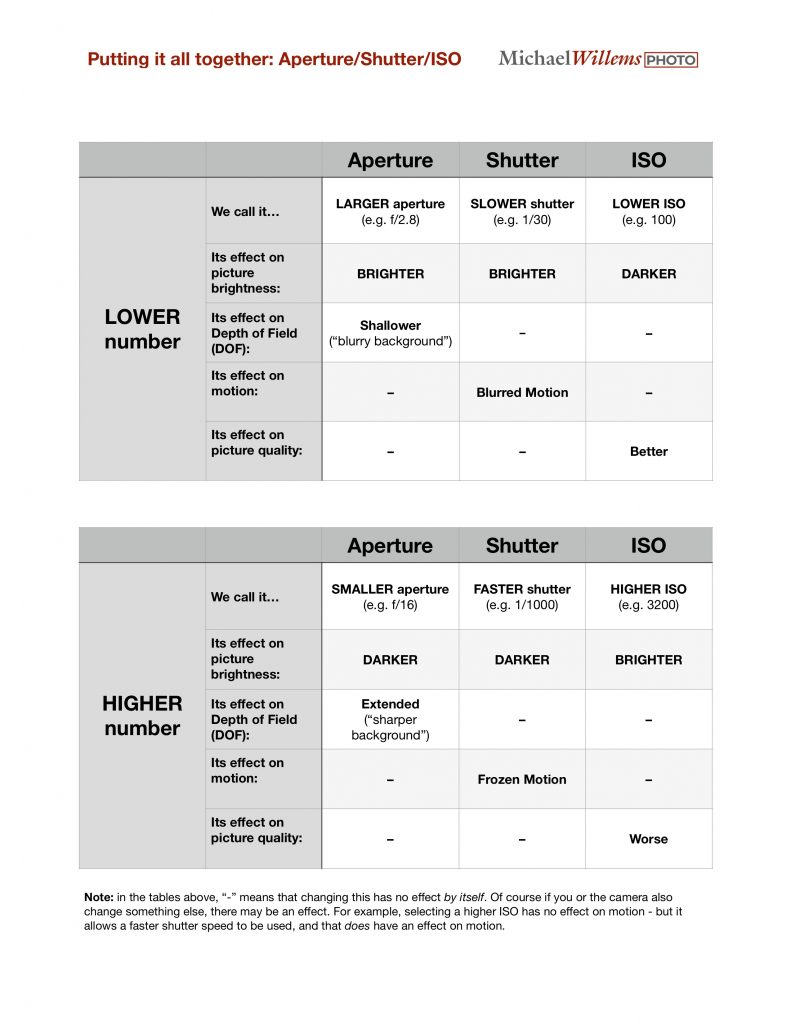
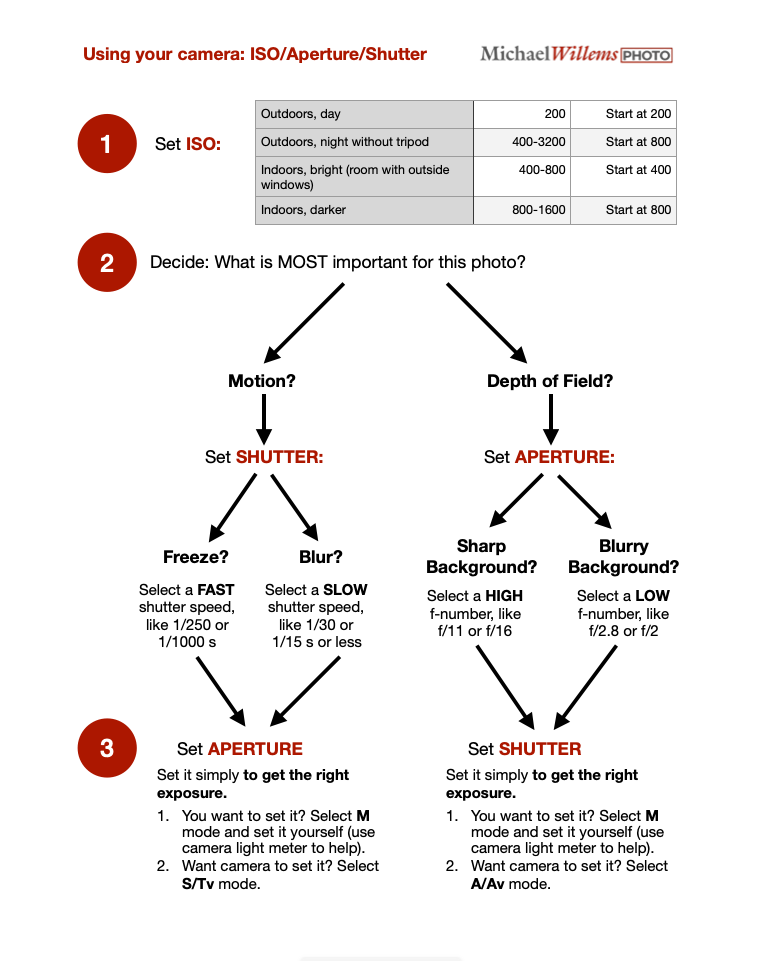
And here, with ,y compliments, is another useful learning tool for beginning photographers who want to move to Manual mode. Everything summarized in one table: Enjoy!

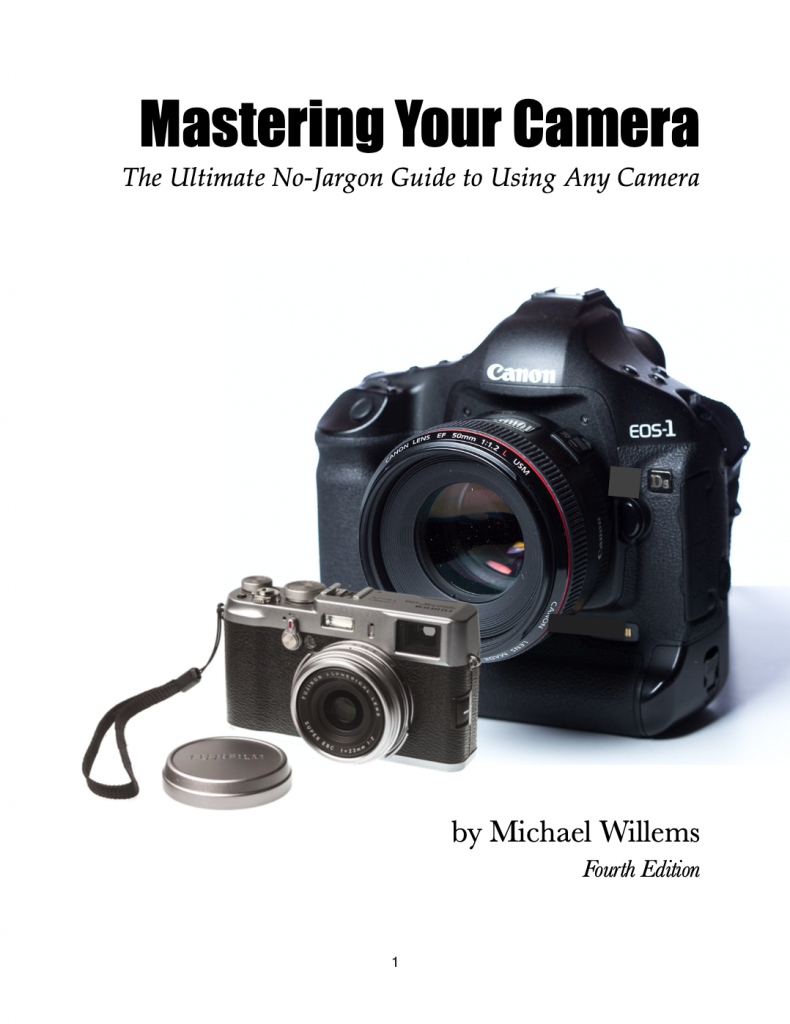
Of my seven books, the one you should read first if you are a beginner or intermediate user, is “Mastering Your Camera”. It starts from zero, and will make you a competent photographer technically, and it also starts you off in terms of composition and subject selection.
The FOURTH Edition of this e-book has just been released. It contains many corrections, some clarifications, a few new flowcharts and tables, and general updates. As before, it is a PDF that you can use on any device, and you can also print a copy for personal use. The new edition’s ISBN is 978-0-9950800-8-9.
And if you do not have it yet, I have some great news: for one week only, it is available for just C$4.95. After that week, the price will revert to the usual $19.95.
Check it out here: www.michaelwillemsphoto.com/ebooks.html
Yes, for beginners it can be confusing: ISO, aperture and shutter all need to be set. But how?
This flow chart may help. With my compliments! (And if you want to learn more, come to the studio or contact me to set up a lesson: see www.michaelwillemsphoto.com).
Another video tip for you on the YouTube channel – and please subscribe to the channel if you haven’t yet. Today’s tip is on focus points.
As you will know, I do quick tips – until the store reopens, I am passionate about helping you all get the best out of photography. So… do not forget to check out the new videos on the YouTube channel! But here, for your convenience, are the last two–and there will be more in the coming days and weeks.
I aim to produce some “Quick Tip” videos, mainly aimed at beginning photographers – though some will be advanced. Tip 1 is now on my YouTube Channel – link on the right, or direct here. Enjoy, and let me know what you think!
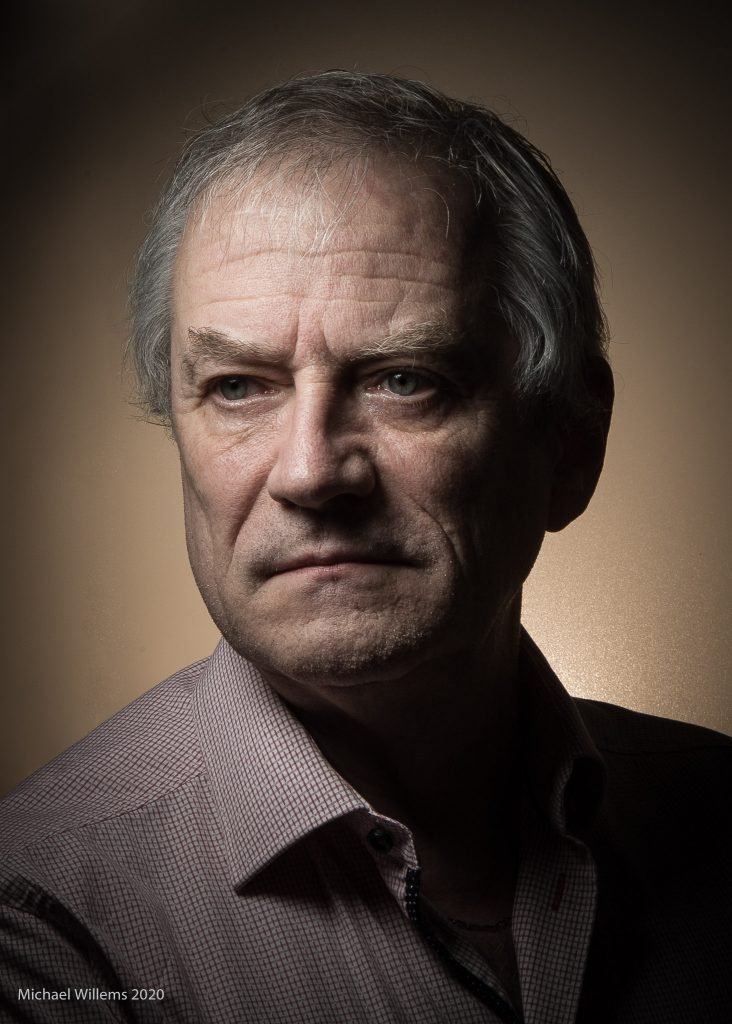
In my continuing series of interpretive self-portrait, Day 33: “Much Of The Day”. These portraits are staged, but real: they reflect both what I am doing on the day, and the mood—not just my mood, but the way I think the world’s mood is developing as we all realize that the world we know will not return for a long time, if ever.
Apart from cropping plus some desaturation and an increase in presence, I do minimal editing. Doing self-portraits is not easy, both in technical terms and in terms of subject and composition, but with some training and some equipment, it can be done.
If you are interested in honing your skills, do it now, while you are stuck at home. I now teach my courses online, live, interactively, in very small classes: just like at the store, really. Contact me if you are interested: details on http://www.michaelwillemsphoto.com.
Stay well, everyone!
And I continue to do a COVID-19 period self portrait every day. Here, for example, is yesterday’s:
Rembrandt-type light, using two small flashes. One, in front of me, with a small 8″ Honl Photo Traveler8 softbox; the other right behind me, using a “chocolate” Honl photo gel. Both in manual mode at 1/4 power; both driven by simple (manual-only) pocketwizards.
Someone recently asked me “how do I take good photos of my wristwatch?”
Good question. A lot of people have hobbies that they can practice while quarantined at home. And two of those are (a) nurturing a wristwatch collection, and (b) photography. So the combination of the two is a logical thing to engage in.
Here, for the record, is what I am wearing on my wrist today:
So how do you do it? As so often, there’s not one answer: there are a few. Here are some of my quick recommendations. I will give you technical tips for SLR as well as for cell phone cameras; a few composition tips; and a few words about post-production.
If you are using an SLR or other sophisticated camera, especially using flash, these are my technical recommendations.
An example, lit with two flashes equipped with softboxes, both 45º above the watch:
It is perfectly possible to use a hand-held cell phone, as long as you do the following:
Composing a good picture is the most important thing you can do after the technical requirements are met. Some tips:
For example;
It is very important to post-process your image. This includes cropping and exposure, but also white balance (colour temperature), definition, and sharpness. Your phone can edit photos very nicely: especially recent iPhones do a truly excellent job.
but for a “pro” photo, dust removal is also needed. For this, use Adobe Lightroom or similar. See this post for more about this essential step: https://www.speedlighter.ca/2019/11/05/product-work/
It really is not difficult to make good photos of your watches, jewellery, or other small objects. Follow the tips below and go have some fun. I am looking forward to seeing your results!
Michael is an experienced photographer and educator, who teaches photography courses that are now available live, interactively, online. Check them out and learn more about Michael, his books, and his courses at www.michaelwillemsphoto.com
Yes, math is useful sometimes. And when I say “math” I do not mean simple arithmetic. I mean math. Real math. Calculus, and things like that – such as Fourier transforms.
I learned about FFTs (Fast Fourier Transforms) as an undergrad in university. And today I discovered a use for them in my photography practice. Namely, to remove unwanted repeated patterns from scans of old photos, printed on textured paper.
But let’s start at the beginning. What is a Fourier transform? Well… think about transforming a time-domain picture to a frequency-domain picture. (or, as Wikipedia puts it, “The Fourier transform (FT) decomposes a function (often a function of the time, or a signal) into its constituent frequencies. “. A picture full of repeated lines thus become two dots, for example.
And this (detail from a) picture, full of a repeating pattern due to the original photo paper…:
Becomes this, when transformed through an FFT:
But now I can remove the dots:
..and then I can do a inverse FFT, to end up with this:
And if that isn’t magic, I am not sure what is. There you have it: Magic through math.
Incidentally, the app I use is ImageJ, a free Java-based app from the US National Institutes of Health (NIH). Your tax dollars at work, here: https://imagej.nih.gov/ij/.