Wednesday Possibilities

Today, some shots to get your imagination going – shots that show how much is possible with little effort, and quickly. Shots I took in and between classes in mere seconds, to demonstrate specific points.

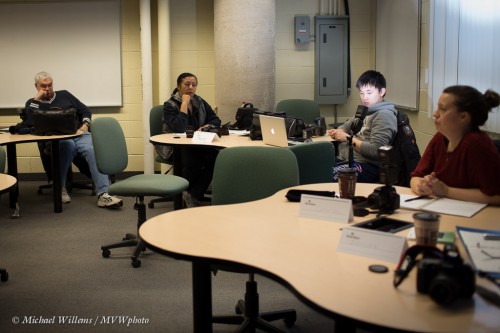
Like this quick demonstration shot showing what a great modern camera like my 1Dx can do at – wait for it – 51,200 ISO:

Meaning that with a new camera, you can now photograph pretty much in the dark, or mix a little flash with very low ambient light, or bounce off very high ceilings.

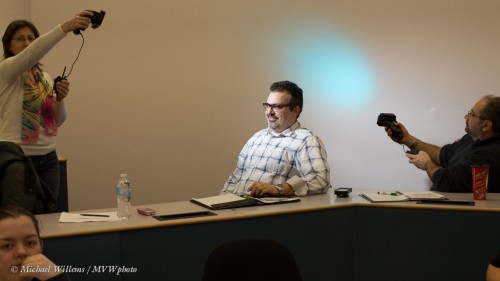
Especially when using off-camera flash, that opens up all sorts of possibilities. Here’s a demo shot showing what a little extra light can do; look carefully and you will see that I am using remote TTL flash (where my camera’s flash is the “master”), and my student at Sheridan college has set his flash to be the “slave”:

Result: he is temporarily blinded… and lit up. You can do that too, with very little extra equipment. One flash, if you have a moden camera whose popup can “command” external flashes; else, two flashes, on on the camera and one remote. Imagine what you can do when you can add a little light everywhere you like!

Then, another student lit dramatically – from below! This kind of eerie effect is easy once you can take your flash off the camera as desribed above.

Or – just turn the camera upside down and bounce flash off the table, as I did!

Off-camera handheld flash gives me this image, even when the flash is aimed direct, of Mr Jun:

Not bad, and that is direct light aimed into his face – as long as it is not near the camera, the flash can be unmodified and direct!

And when you have several flashes, you can do things like this:

Now that is a competent portrait, taken in just a few seconds, using this setup with two off-camera flashes each fitted with a Honlphoto grid, and one with a blue-green gel; using two “biological light stands”:

But finally – do you need all those flashes? No, here’s a portrait using one flash fitted with a Honlphoto 8″ softbox:

The apparent Martian in the background adds a little extra “huh?” to this photo, don’t you think? His glasses reflect the round softbox.

Anyway, these snaps demonstrate that you can achieve a lot in a very short time using simple means – you may already have every thing you need. Get creative, go outside the box, and above all, think “where is the light coming from”!


 

Fear not – use high ISO when needed

Here’s a snap of my friend and student Ray, taken Saturday night:

As you can see, he is backlit – and I used whatever light was available.

This means that to avoid the usual “silhouette”, I needed to expose very long – 1/25th sec at f/2.8, using 6400 ISO; using the 24-70 lens set to 25mm, which on a 1D is 25 x 1.3 = a “real” 33mm. (See how nice the “real” 35mm is? That’s why some cameras, like my Fuji X100, have fixed lenses of that focal length).

So – 6400 ISO? Is that doable?

Sure. Of course if we were to zoom in all the way we would see grain, but this image is pretty OK – especially after a little noise cancellation in Lightroom.

The moral: do not be afraid to go to high ISO values when needed. It’s better than not getting the shot.


Auto ISO

When you are using “auto ISO”, meaning the camera sets ISO for you, be careful.

In this mode, the camera will raise ISO and lower it – but it will get it wrong in some situations.

Low light. The camera will raise ISO to give you a handholding-suitable shutter speed. But do you want that? Or do you want quality (low ISO gives you that quality) and use a tripod? Night shots, twlight shots, fireworks, lightning: these are the obvious examples. For night shots, use low ISO and a tripod. So: low light: if you can use a tripod, use low ISO.

Motion needs. When there is enough light, the camera will lower ISO to give you good quality and shutter OK for handholding. But when you need that extra shutter speed, for sports, say, or for anything else that needs motion frozen, you need higher ISO. You may need 1600 or even 3200 ISO for hockey, but no auto ISO will give you that. So if you have motion, then raise ISO to suit.

My rules of thumb for ISO:

  • Outdoors, or low light with tripod, or studio shoots: start at 200 ISO
  • Indoors, even when using flash: 400 ISO
  • Difficult light – sports, motion, museums, churches: start at 800 ISO

In all cases, vary as able or as needed (if there is more light, use lower ISO; if you still get motion blur, use higher ISO).

Note – Auto ISO and manual will, on many cameras, give you a “aperture PLUS shutter priority” mode. This can be a cool thing to play with.


Slowlighter?

Well, you do not always have to use additional lighting, of course.

Remember that image yesterday?

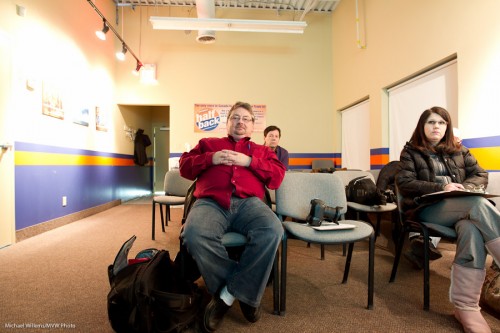
That was shot in the dark – yes, in a room where I had turned the lights down to almost zero visibility. Just to show it could be done.

If you use “auto ISO”, when using a wide angle lens that will lead to something like 12800 ISO at 1/15th second. As it did in my case. It looked like this:

Yeah, nice and stuff. And perfectly usable; do not be afraid to do this.

But when you zoom in, you see the drawback of those high ISO values (click to see real size):

See what I mean? Not bad, but not great, with all that grainy noise.

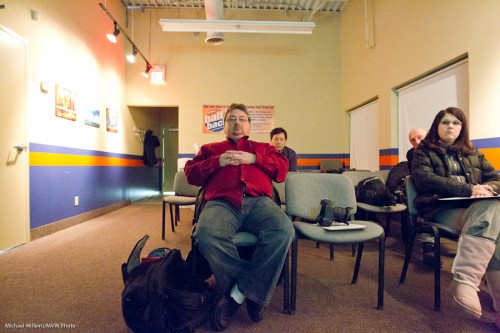
So then I turned the ISO down to just 400. This of course got me an exposure time of 5 seconds, so everyone sat still. Result:

I promised yesterday I would explain why I shot with this composition instead of aiming down a little? Simple: because I did not have a tripod, so I needed to use the desk to hold the camera still for 5 seconds.

If you feel like another exercise: here you go. Go shoot a night image that looks like day.

You will need a tripod. You will need patience. You will want to use a low ISO value to avoid noise. Cold northern hemisphere nights are best to reduce noise. Go try it yourself tonight. And do not forget to make your image a nice composition.

ISO rule of thumb

I am often asked about ISO. So here is a “rule of thumb” post on that subject.

Michael’s standard starting points:

  • Outdoors: 200 ISO
  • Indoors (even when using flash): 400 ISO
  • “Difficult Light” (eg museums, dark halls): 800 ISO

Michael’s exceptions:

  • Using a tripod: 100 ISO (as long as nothing moves)
  • Hockey, etc: 1600 ISO

In each case, go lower if you can, and go as high as you need to, when you need to.

Why is my picture blurry?

Why is my picture all blurry?

I hear this all the time from both experienced and new photographers.

Well, here’s why.

Focus:

  • You have not focused properly. Solution: select ONE focus point; focus; hold it; and only then shoot.
  • You are using a shallow depth of field. At f/1.4, it is hard to focus.

Subject:

  • Your subject is moving fast. Solution: pan with the subject or increase ISO, open aperture, or shoot the subject at the apex of its jump, say.

Shutter speed:

  • You are using a slow shutter speed (slower than twice the lens length, say, so on a 100mm lens you are using a shutter speed slower than 1/200th second). Solution: open the aperture or increase the ISO).
  • You are using a long lens (say a 300mm lens). On that lens, fast enough shutter speeds are hard to obtain). Solution: Zoom out, increase ISO, open the aperture, or use a tripod.
  • You are not using a tripod when you ought to. Solution? use a tripod!
  • You are using a slow lens. An f/3.5-5.6 consumer lens will never do as well as an f/2.8 pro lens. Solution: need I say?
  • You are using a small aperture, like f/8, when you should be using f/2.8. Solution: open your aperture.

Miscellaneous technique:

  • Your subject is in the dark – where it is muddy and blurry. Solution: Light your subject well.
  • You are not using flash when you should be. Solution: need I say?
  • You are  not using IS/VR. These are great features: stabilized lenses are superb and give you several stops. Solution: get an IS/VR lens.

Equipment:

  • Your camera is faulty – this is very unlikely, but have it checked out.
  • Your lens is faulty – this is also rather very unlikely, but have it checked out.

Clear? (Pun intended). Try all these and you will see your images improve amazingly.  Yes, I know, there are a lot of them. Yes, it’s complicated. But yes… you will take brilliant images once you get all of these right.

Remember these tips:

  • Bright pixels are sharp pixels (that is Willem’s Dictum);
  • Flashed pixels are sharp pixels;
  • VR/IS works;
  • Use one focus spot;
  • Hold the camera right;
  • A tripod is a good thing.

Have fun – a crisp, razor sharp picture really is a joy.

Hyper real

With today’s fast cameras, big sensors, and great noise reduction technology, like that in Lightroom 3 tha I described earlier (magic), we can see better with our cameras than we can in real life. It is fun to experiment with that.

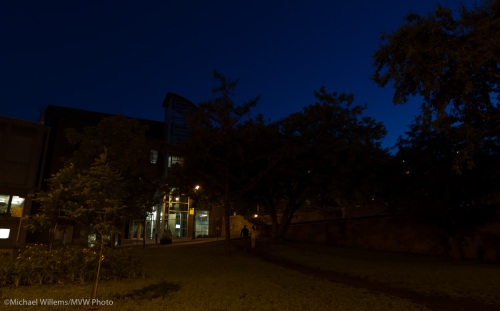
Like in Montreal the other day. Here’s a street the way it looked to me:

McGill College in the dark, photographed by Michael Willems

McGill College in the dark

But with my camera (a Canon 1D Mark IV) set to auto ISO, and at 3,000 ISO, I got this:

McGill College in the dark, photographed by Michael Willems

McGill College in the dark, at 3000 ISO

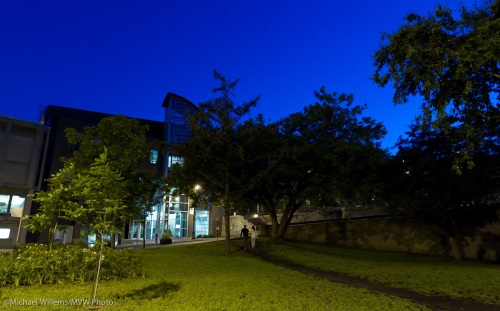
And by white balancing this RAW imaging to correct the yellow Sodium light, we get this:

McGill College in the dark, photographed by Michael Willems

McGill College in the dark

I can actually see better with my cameras than I can see in real life.

And I suggest you all try this. Go out and use auto ISO or a very high manual ISO. Apply noise reduction (in the camera if you shoot JPG, or in Lightroom so you get more control). See what happens!

1600 is the new 200

I am now using Lightroom 3, having upgraded from 2.6. Strongly recommended. Very strongly: worth every penny of the $99 upgrade fee.

If you do not yet know about Lightroom: you need it (or if you use a Mac, Aperture, the other option. For PC, Lightroom is the only option). The apps organize, keyword, rate and find your files, or rather allow you to do so; and they allow you to do 99% of the editing you’ll ever need, non-destructively and quickly. Much more quickly and conveniently than in Photoshop, which in spite of its name is aimed at illustrators.

Lighroom 3, which I will review in more depth soon, is superb. The major function is the noise reduction. 1600 ISO is the new 200. It is magic.

Look at this image of a student at the Henry’s imaging show recently (and I know you are reading this!). Shot at 1600 ISO with the Canon 1D Mark IV. Click on the image to see it larger:

An image shot with off-camera flash at 1600 ISO

An image shot at 1600 ISO

Superb quality!

But the original was more noisy, especially since I had to push it half a stop (yes, it was a dark room).

Here is a piece of that image. When you click it, you see it at its original size.

An image shot with off-camera flash at 1600 ISO, before Lightroom noise reduction

before noise reduction

Now look what happens when I apply some noise reduction:

An image shot with off-camera flash at 1600 ISO, after Lightroom noise reduction

After Lightroom noise reduction

And that is just after dragging the slider,. I could play with the parameters to make it even better.

Magic, pure magic. I shall be shooting tomorrow’s Bat Mitzvah party muchly at 1600 ISO, I imagine.

Reader Question

Reader Craig asks:

Is it possible to get auto ISO to play nice with external flash (I’m using Nikon equipment)?  I haven’t played with it in a while, but I specifically stopped using auto ISO because I was finding it would give me ISO 800 based on the camera metering when the flash had plenty of power to push it to say ISO 200.  It seems odd to me that since there’s a preflash, that that information wouldn’t be shared with the camera to set the proper ISO automatically.  Just curious if that’s your experience as well or if there’s a way around it.  There are a a few scenarios where I’d be happy to use a (functional) auto ISO limited to ISO 800 and just deal with the noise reduction in post.

Good question. And as always… the answer is “it depends”.

First: if you take my “Advanced Flash for Pros” workshop, I go into all the nitty gritty details of both Nikon CLS/iTTL and Canon E-TTL. That will answer some.

But let me give a simple answer here. Typically when I am using flash, I will not use auto ISO. I prefer to keep things simple. Setting it myself means simple.

You expose the background using Aperture and ISO and Shutter Speed.  You make it look as dark as you like – say, two stops below ambient as a great starting point. Auto ISO means the camera will likely overrule your brightness/darkness settings. Manual exposure settings become a sort of “exposure priority” setting instead.

So while auto ISO can work well when using flash (just set expsoure two stops below ambient in S/Tv mode), it is not necessarily ideal when using flash:

  • In M mode, you cannot set exposure compensation
  • In S/Tv mode, you may get funny apertures
  • In Av mode, you may get slow exposures.

In fact on a modern Canon DSLR like my new 1D Mark IV, when using flash, ISO will automatically go off auto and will set itself to 400 when the flash is detected.

The preflash helps the camera set the flash power level for the foreground, lit-by-the-flash subject. The aperture, shutter speed and ISO settings set the background brightness. And again, typically I will be in manual exposure, and will set that to -2 stops, metered average (two stops below ambient). Auto ISO negates that!

So while it depends, it does not depend that much.  When using flash, I will usually set ISO to a manual. Yes, you can set limits to auto ISO (Nikon is much better than Canon at that!), but it is still better to do your own, and to keep control.

The above applies to indoors flash shots where the light is consistent enough for you to use manual exposure settings. Outdoors it would be different – except there is so much light you do not need auto ISO.

12800

A quick snap from my Canon 1D Mark IV taken at 12800 ISO. I applied very slight noise reduction in Lightroom and upon export, reduced the size to 1200 pixels wide.

If I had not mentioned it, would you be able to tell that was taken at such high ISO?

For high ISO shots, it is imperative that you light the shot well. Remember Willems’s Law: “Bright Pixels are Sharp Pixels”.

I shot that with the 1D Mark IV, at 12800 ISO, with the 100mm EF [corrected!] Macro lens, and shot at 1/60th sec handheld at f/2.8. A slow shutter speed like that (lower than one divided by the lens length) needs a steady hand and a bit of luck – oh and shoot ten pictures to get a few very sharp ones.  Better still, use a tripod.