Lighting Ratios

When you use more than one flash, you can adjust each light individually. If you use speedlights and your camera maker’s wireless TTL functionality, you can do that in two ways:

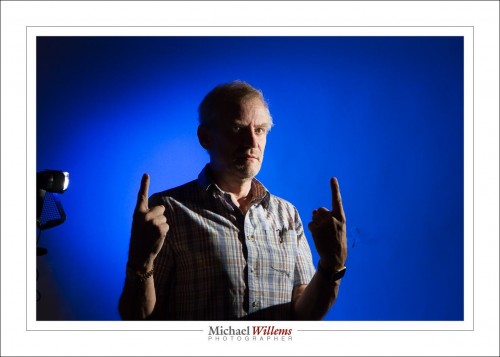
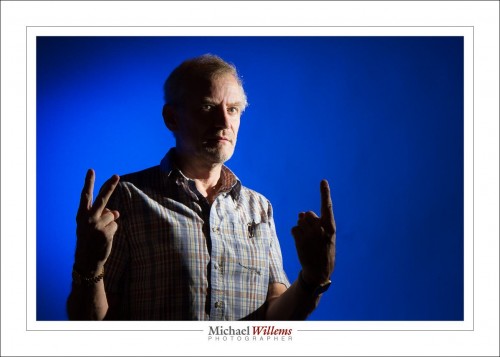
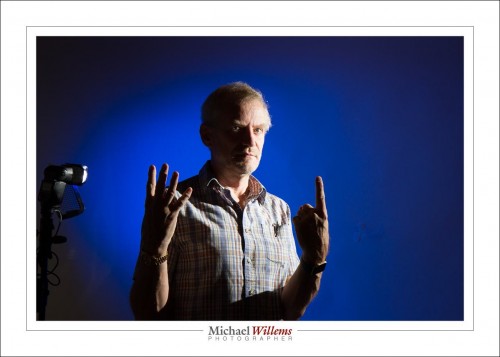
  • Canon: relative, using ratios. As in “A:B = 4:1” meaning A is 4x (two stops) lighter than B
  • Nikon: absolute, by adjusting individually. E.g. “A = No adjustment; B = -2 stops adjustment”.

An example of this using two Canon flashes.

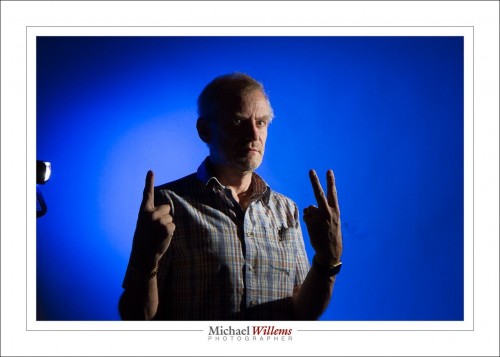
Ratio between key light (face) and background light: 1:2

1:1:

2:1 (you are getting the hand signals by now I presume):

4:1:

The preference is yours: mine is 2:1. But that is largely a matter of taste.

If you use manual flash and radio triggers, it is conceptually easier, since you set up each flash by itself, independent of other flashes. Ratios are a little bit trickier to get your head around, because it is not immediately clear which flash will get darker and which flash lighter, and to what extent. So trial and error will be required. Either way, key point is that you should think carefully about how bright each flash is, in a multi-flash setup.


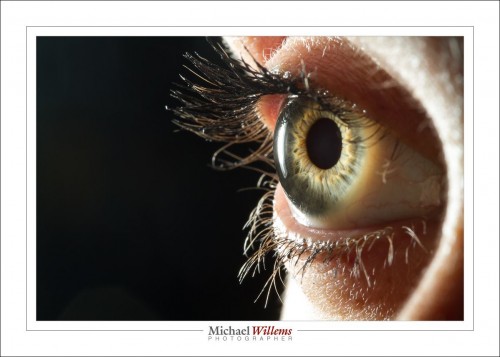
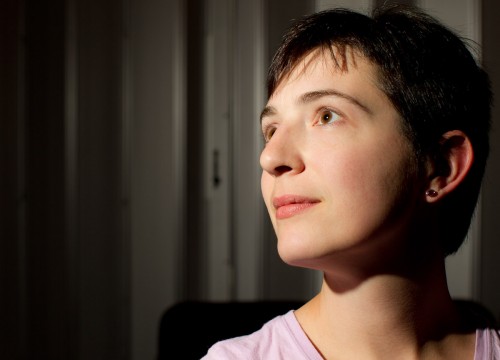
Through The Eye Of A Woman

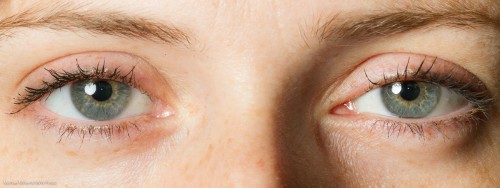
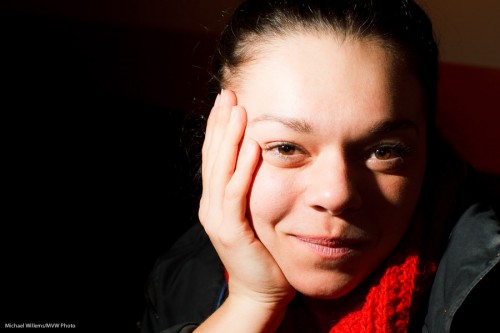
OK, maybe that title is a little silly. But it IS through the eye of a woman that I shone my flash

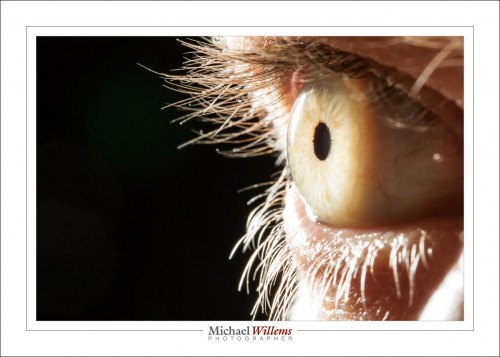
And here, lit from the back:

Macro lens, 1/80 sec, f/16, 100 ISO, hand held.

The flash was shining from the back. This can give you pretty weird effects:

My eye here looks light green, while in fact it is light blue. Back lighting can do that.

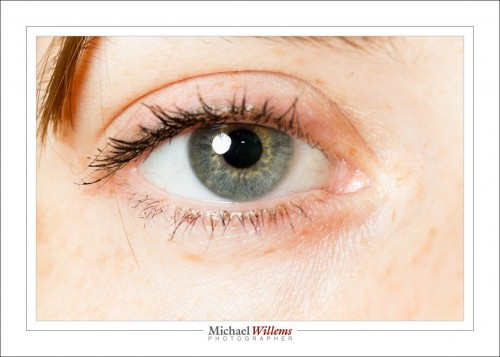
But go back to the first shot. See that? Look carefully. A little white point, in the centre of the pupil,next to the actual catch light.

This is mysterious, because I was using an off-camera flash. The on-camera flash only sends “morse code”, as it were, to the other flashes, before the shot is made.

And yet, that pin light is from the on camera flash.

Simple, actually: it is its afterglow. The flash is off, but it takes a fraction of a second to completely go out, and it is during that fraction of a second that the shot is made. Here, the proof:

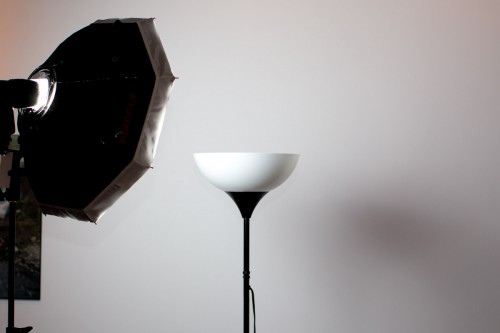
See, the main flash on our left, bounced against the wall; and me and the camera including its popup flash afterglow in the centre:

And that is why you get a little pin of extra catchlight in some wireless TTL photos, even though your on camera flash is turned off.

(Thanks to Becky for the loan of an eye!)


Friday the 13th.

..is not a bad day so far. I am shooting an event tonight; first, some more writing (the Travel Photography book: I am making good progress and I trust I will have it finished before Xmas), and some admin.

A quick note, today, about TTL flash. You can of course set up a studio setup with manual flash, and when you have time, you do that. But when you do not have time, use TTL for off camera flash. Remember:

  • Use flash exposure compensation when needed (when the camera decides to over- or under-expose the shot).
  • Avoid reflections.
  • Meter off something mid grey.
  • Disable your on camera flash (so that it sends commands, nothing more).
  • If you have two flashes, set them to “A” and “B”.

Now set ratios between groups (Canon) or adjust groups to taste one by one, by stops (Nikon).

I had two flashes here: main flash A on the left; hairlight B on the right.

A:B = 1:1 (Canon) or A and B both set to 0 FEC (Nikon):

A:B 8:1 (Canon) or B -3 stops FEC (Nikon)

A:B 1:8, or A -3 stops FEC (Nikon):

Although the way of setting them differs a little (ratios vs per-group adjustments), the end result is the same. And the benefit of using TTL for this is that it is very fast. TTL with some knowledge and some adjustments when needed, and Bob’s your uncle. Try it, if you have several flashes.


Wednesday Possibilities

Today, some shots to get your imagination going – shots that show how much is possible with little effort, and quickly. Shots I took in and between classes in mere seconds, to demonstrate specific points.

Like this quick demonstration shot showing what a great modern camera like my 1Dx can do at – wait for it – 51,200 ISO:
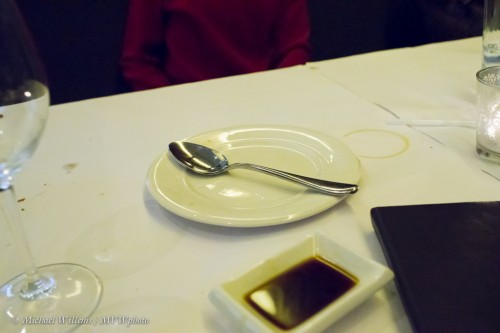
Meaning that with a new camera, you can now photograph pretty much in the dark, or mix a little flash with very low ambient light, or bounce off very high ceilings.

Especially when using off-camera flash, that opens up all sorts of possibilities. Here’s a demo shot showing what a little extra light can do; look carefully and you will see that I am using remote TTL flash (where my camera’s flash is the “master”), and my student at Sheridan college has set his flash to be the “slave”:
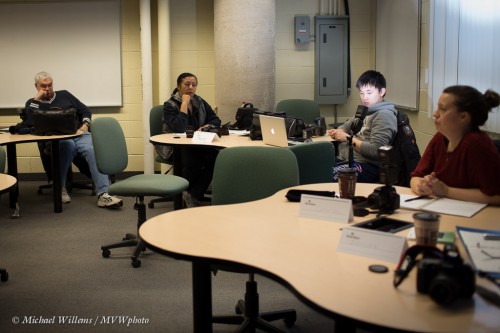
Result: he is temporarily blinded… and lit up. You can do that too, with very little extra equipment. One flash, if you have a moden camera whose popup can “command” external flashes; else, two flashes, on on the camera and one remote. Imagine what you can do when you can add a little light everywhere you like!

Then, another student lit dramatically – from below! This kind of eerie effect is easy once you can take your flash off the camera as desribed above.
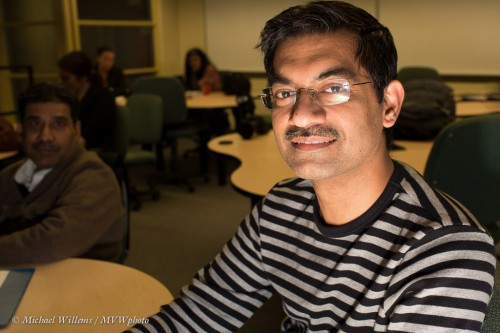
Or – just turn the camera upside down and bounce flash off the table, as I did!

Off-camera handheld flash gives me this image, even when the flash is aimed direct, of Mr Jun:

Not bad, and that is direct light aimed into his face – as long as it is not near the camera, the flash can be unmodified and direct!

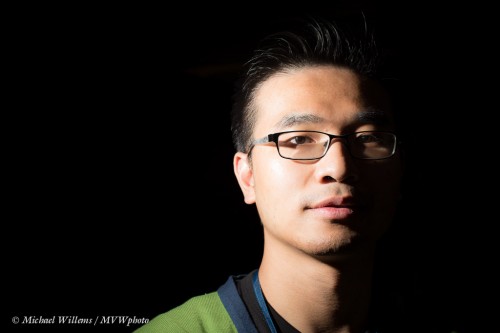
And when you have several flashes, you can do things like this:
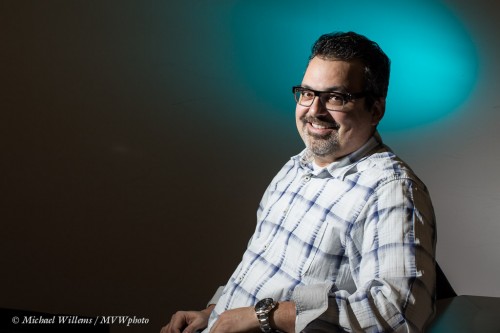
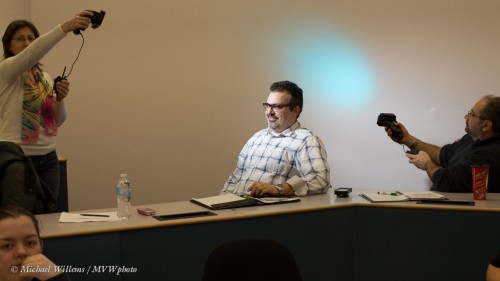
Now that is a competent portrait, taken in just a few seconds, using this setup with two off-camera flashes each fitted with a Honlphoto grid, and one with a blue-green gel; using two “biological light stands”:
But finally – do you need all those flashes? No, here’s a portrait using one flash fitted with a Honlphoto 8″ softbox:
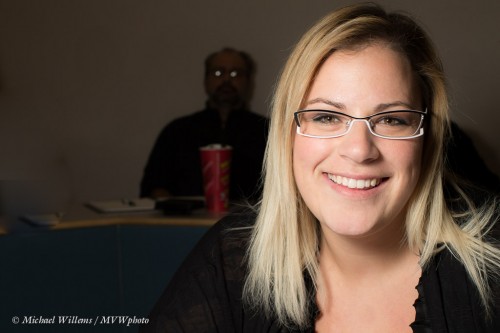
The apparent Martian in the background adds a little extra “huh?” to this photo, don’t you think? His glasses reflect the round softbox.

Anyway, these snaps demonstrate that you can achieve a lot in a very short time using simple means – you may already have every thing you need. Get creative, go outside the box, and above all, think “where is the light coming from”!

 

What you need

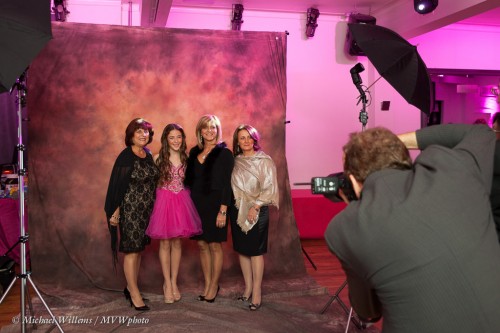
A studio setup usually uses big, wall-outlet powered lights (“strobes”) and more.

But here’s me, on a recent shoot:

As you see, I used speedlights there. They are smaller, lighter, easier.

The setup was:

  1. Camera and a backdrop.
  2. Two light stands.
  3. On each light stand, a bracket for mounting umbrella and flash.
  4. On each light stand, a Pocketwizard (as received) and a Flashzebra cable to connect pocketwizard to flash.
  5. Pocketwizard on camera (as sender).

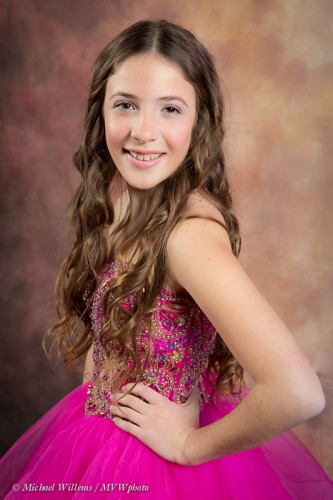
All you need to do simple portraits like this:

But the real minimum is this:

1. One light stand

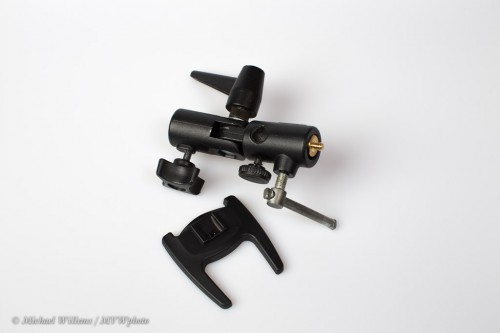
2. One bracket like this:

3. One remote flash to put on that bracket

4. One umbrella to put into that bracket

5. One way to fire the remote flash using TTL (the on camera flash is set to not flash, but to just send “morse code” commands to the remote flash). This local master flash can be a large flash (SB-900, 600EX) on your camera, or on certain cameras like most Nikons and many recent Canons, the pop-up flash.

And that is really all as a minimum!

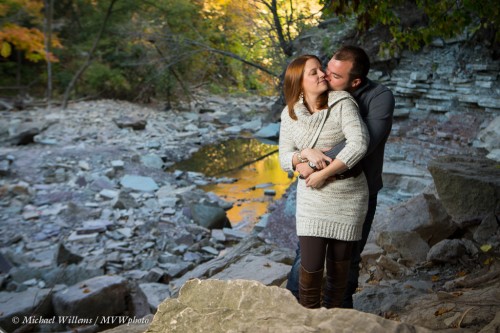
When using that, you simply mix available light with flash, using the techniques outlined on this blog. Then you can do shots like this, of Dan and Kristen, whose engagement photos I made recently in Hamilton:


You can do this too.

Here’s a quick portrait of Ivan, the manager of Mississauga’s Vistek store.

Took about… oh, all of one minute.

Here’s how.

  1. Set camera to manual exposure.
  2. Select values for Aperture, ISO and Shutter Speed that will make the room go dark. Here, that was 1/160th sec, f/8 at 100 ISO.
  3. Put a flash on the camera in MASTER mode (a Canon 600EX here, set to using light, not radio, as a master). (You can use the popup flash on a Nikon or on modern Canons like the 7D, 60D, etc.)
  4. Make sure that this master flash will not fire during the shot – it fires only commands (“morse code”) to slave flashes, prior to the shot. Set this on your flash or camera.
  5. Hold a slave flash (in my case a 430EX in slave mode) in your left hand.
  6. Ensure that this flash in in TTL slave mode on the same channel as your master flash.
  7. If the room is very small, put a grid (eg a Honl Photo 1/4″ grid) on the slave flash.
  8. Aim that flash directly at the subject (really).
  9. Focus, recompose
  10. Shoot!

It really was as quick as that. When you learn good technique, you too can be quick with creative shots like this.


Another example

…of outdoor flash here.

Take a typical back yard on a sunny day. Set your camera to “P”, or the green AUTO mode, or A/Av mode, and click.

Mmm. Why do we avoid just snapping? Because it can be a little boring and it gives you no control. Let’s take control, instead, and

  1. Darken the background (I do it in manual mode, or you can do it by using “-” exposure compensation). Set shutter, aperture and ISO to give you a dark background (dark colour is saturated colour)
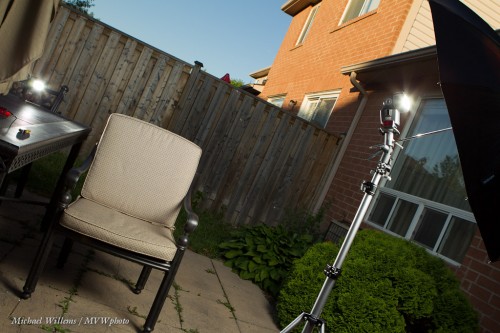
  2. Add a flash or two, using wireless TTL (wireless with manual flash power setting is better if you have the time and things don’t move position while you are shooting, but TTL is faster – I used TTL here):

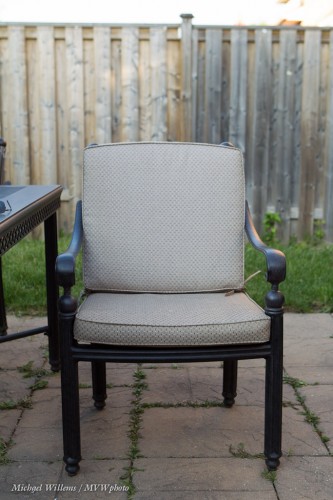
…which gives us a chair like this:

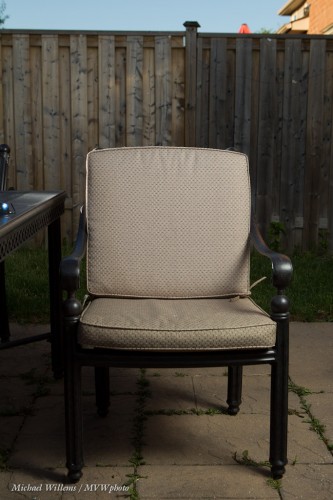
And a pic like this:

See how rich and blue the sky is (in the first picture it was featureless white)?

That’s a stock quality image and the point is, you can shoot it in seconds. Learn flash (from me in a private session, or wherever I teach) and your pictures will become immeasurably better.


Take your flash off camera

The best way to improve your flash images is to take your flash off the camera.

As I did here in last night’s Mastering Flash class:

Student, lit with flash (Photo: Michael Willems)

You see, that is direct flash – unmodified. Off-camera, using remote TTL (or I could have used a cable).

So yes, it can easily be done – as long as the flash light axis is not the same as your lens axis. Straight into a woman’s face from above is light we love – but crucially, straight into her face does not mean straight from your camera’s perspective!

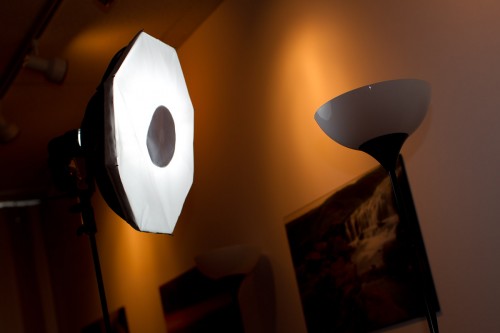
Now, do not get me wrong: modified is great. Like with a small softbox:

Which from the front looks like this (note the dark circle that prevents light spots):

Which, when combined with a second flash camera right to add edge/hair light, gets me this, of another kind student volunteer in last night’s class:

Student, lit with flash (Photo: Michael Willems)

Simple, no? Just remember:

  • Axis of light <> axis of lens.
  • TTL is fine, if you know how it works.
  • Wireless TTL works very well indeed indoors (and with clever management can be used outdoors also).
  • Keeping it simple often works well.

Simple. With just one or two flashes and a modern cameera you can produce excellent work. (Once you know how it all works, and that is we come in!)


Lunch time!

And when you are a photographer like me, you may take that as a photo op. I cannot even look at a can of soup without thinking “Hmmmmm….”. In terms of photos.

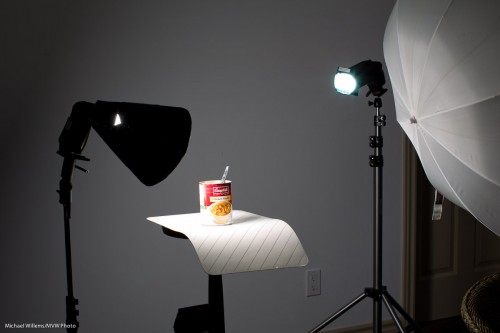
And that leads to this quick setup:

The remainder of lunch about to be photographed with speedlights (Photo: Michael Willems)

The remainder of lunch about to be photographed

That setup was a TTL setup, to save me time. (Connecting Pocketwizards and so on would take a few minutes. Hey, I was hungry – what can I say).

I have, here:

  • Main light, on our left, a 430 EX II speedlight with a Honl Photo Speed Snoot
  • Edge light, a second 430 EX speedlight with a Honl Photo Speed Snoot and a blue/green gel.
  • The umbrella is merely being used as a reflector, to fill in the right a little.
  • A striped place mat for the subject to sit on.
  • A wall, far enough away to be dark, as background.

The camera is a 1D Mark IV with a 580EX II speedlight on it.

And that gives me…:

Lunch, lit with speedlights in wireless TTL mode (photo: Michael Willems)

Lunch, lit with speedlights in wireless TTL mode

So now to bed quickly: I am teaching “Advanced Flash” with Guest Star David Honl (yes, that David Honl) today Saturday 11am-3:30pm in Toronto.

One is a great number.

As you know, for a good flash picture you need many flashes. Or at least several.

False.

Sometimes you want to do it the dramatic way. In that case, the number of flashes is not very important; the location of the flash, however, is.

And the worst possible location is “on your camera”.

So you take your single light source off the camera. If you own a Nikon camera, or a Canon 60D – or the Canon 7D I took this picture with in yesterday’s Canon 7D class in Toronto, it’s simple.

  1. Using your camera’s menu, you make its pop-up flash into the “master” (Canon) or “commander” (Nikon).
  2. Ensure that you disable the “master’s” own flash function: it should only fire commands (“Morse code”) at the remote flash (430EX, 580EX, SB600, SB800, SB900, etc) that you are holding in your left hand…
  3. …which you have set to “slave” (Canon)/”remote” (Nikon) mode.
  4. You then ensure that the cell on the slave flash (on the front of a Canon, on the side of a Nikon) can see the command flashes emitted by the master.

A lot of words. What it means is that with just the right camera and a simple single hand-held flash you can create dramatic side-lit images like this, of a student in last night’s Toronto course:

And this, of another student:

Aren’t those great images? They show, I hope, that you can indeed take interesting images with a single flash aimed straight at your subject. As long as that single flash is not positioned on top of your camera.

About the settings. I set the camera in Manual exposure mode, and I made my settings right to create a dark background – i.e. I wanted to basically see only the flash light in the image.That meant 400 ISO, 1/125th second, f/5.6 on my 50mm f/1.2 lens. Razor sharp and dramatic light.

A note. I just want to remind you all that to learn these and many other advanced techniques, you have one chance to learn from me and, all the way from Los Angeles, my special guest star David Honl (the inventor of the great range of Honl Photo modifiers) on March 19, in Toronto. Just click here to book – in one day, just three weeks away, learn how to use flash, the most exciting light. There is still space, but to be assured of a spot, you need to book now. I promise you will be delighted with what you learn.