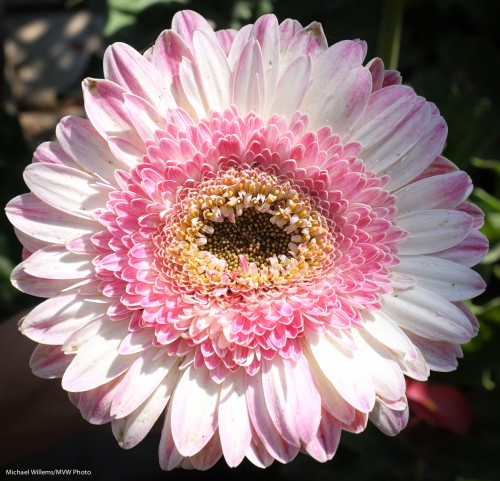
Toy, but not.

I have a Fuji x100 camera—the original version—and I love it. Its cool looks, its brilliant dual-mode viewfinder (optical or electronic); and more.

Fuji X100 (Photo: Michael Willems)

But the one niggle has been its image quality, or the lack thereof. Everyone raved about it; I found it average, if that.

Until I set it up correctly.

And here’s what works for me:

  • First, upgrade the firmware to the recent version, 2.10. To see what you have, turn off, then press DISP/BACK while turning ON.
  • Set image quality to RAW + Large/Fine JPG.
  • Set Film Simulation to B/W plus Red Filter (or B/W plus Ye Filter).
  • Set focus to Manual (using the switch by the lens).
  • Set MF ASSIST to Focus Peak Highlight—High.
  • Set Sharpness to M-Hard.
  • Set NOISE REDUCTION to LOW.

The latter one is essential; the built-in noise reduction makes it look a little plastic. With these settings, I get excellent images even at high ISO values.

B/W is of course an option; I like top shoot B/W, but because I shoot RAW plus JPG, the RAW image still contains all the colours, so I can do my own conversion, or go back to colour, as I desire.

Learn how to use it. E.g. macro mode can be activated by simply hitting the macro button twice; no extra confirmation steps are needed.

Manual focus is a misnomer: in this setting it can be manual focus, but you can also just focus by pressing the AFL/AEL button on the back. So it is really “autofocus by separate back button, or manual if you like”.

This setup is essential in that it gives me excellent image quality and convenience in focusing and general use. Now, it is even more a great camera. Excellent for street photography, general use—or cats.

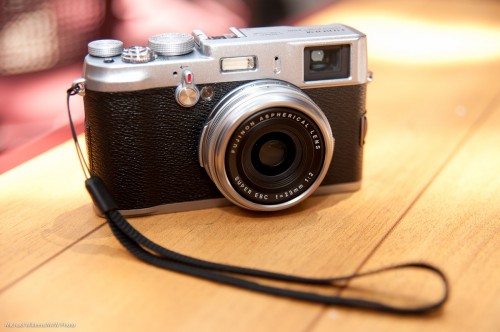
 

Fuji Happiness

Those of you who have a Fuji X100 APC-C sized small camera: the new 1.30 firmware is out. Maybe it has been for a while – reminder to self to check regularly!  Download it from here.

Then upgrade, ignoring the Fuji instructions – you do not need the extra file. Just the FPUPDATE.DAT file. Once you have that:

  1. Insert a fully charged NP-95 battery into your X100.
  2. Format your SD card in your camera. (Backup your data first!)
  3. Connect the card to your computer.
  4. Copy the FPUPDATE.DAT file to the root directory of the SD card.
  5. Insert the SD card into your camera.
  6. Turn the camera on while holding down the [BACK] button to start the firmware update process, and follow the on screen instructions.

You will need to reset date/time and all custom fuctions.

And you will now have a camera with a few major upgrades since last year. Among them:

  • Better Autofocus
  • The RAW button can now be used as a programmable Function button too – thank God!
  • Many bugfixes and other small functionality improvements

Fuji has a winner with the X100, as I have said before – more importantly, Fuji, unlike some other camera makers:

  1. Listens to its customers;
  2. Acts quickly to implement their requests;
  3. Sees  an expensive camera like the X100 as an ongoing project, not as a “I’ve sold it and now on tho the next project”

…all of which I find very refreshing!


Sin against the rules?

Two questions.

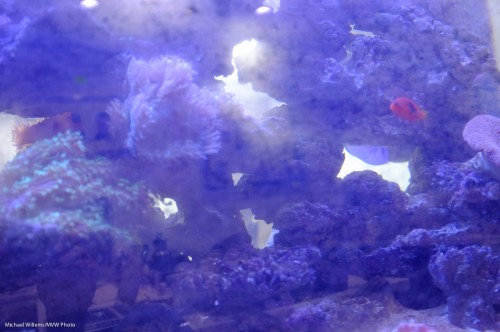
First: Can you shoot an aquarium whose glass is dirty? Like this?

Furthermore, can you do that using a wide angle lens instead of a macro lens? And when there is little light? At high ISO? Surely not.

Yes, you can. Provided that you:

  1. Get close to the glass – very close. This defocuses the dirt.
  2. Do not overexpose (underexposure makes black blacker, and hence helps make grey dirt go away).
  3. Ensure that behind you, it is dark, so you avoid reflections.
  4. Shoot at fairly low F-numbers.
  5. Are patient.
  6. Are willing to do a little post work if needed (to makes blacks darker and whites brighter).

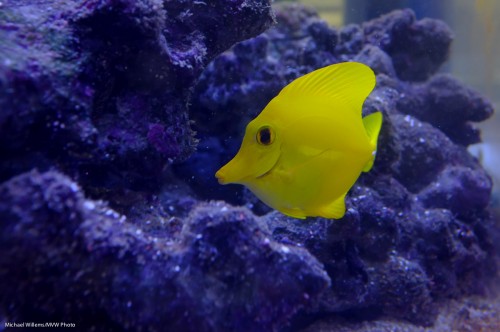
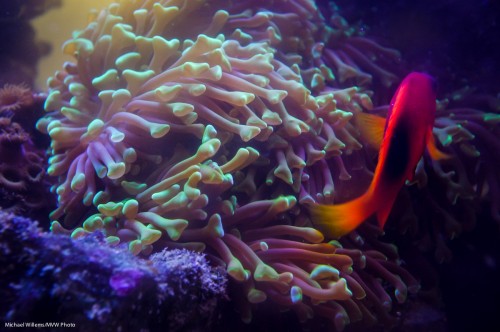
Examples here – shot this morning with my Fuji X100 camera with fixed 23mm lens (equivalent to 35mm), at f/5.6, 1/60th second, at 800 ISO.

800 ISO? Is that not grainy? Well, apparently it is quite acceptable.

(More aquarium tips elsewhere on this site – search for “aquarium” on the right.)

Next question. Can you shoot JPG and get quality?

No. Yes. Wait. Of course you can. As long as you get the shot right!

On the Fuji I tend to shoot JPG, against all my usual advice – because I tend to get everything right (white balance, exposure, and so on). And these are usually not client shots, hence I feel I can just shoot JPG, unless they are for publication.

So the above shots were shot as JPGs. So yes, it can be done – though I would normally recommend RAW, since more mistakes can be fixed more easily. But when you have to, and have the ability to consistently get “close enough”, you can indeed shoot JPG. QED.


Fuji X100 update

Those of you who have a Fuji X100: the new 1.11 firmware is out. Download it from here.

Then upgrade, ignoring the Fuji instructions – you do not need the extra file. Just the FPUPDATE.DAT file. Once you have that:

  1. Insert a fully charged NP-95 battery into your X100.
  2. Format your SD card in your camera. (Backup your data first!)
  3. Connect the card to your computer.
  4. Copy the FPUPDATE.DAT file to the root directory of the SD card.
  5. Insert the SD card into your camera.
  6. Turn the camera on while holding down the [BACK] button to start the firmware update process, and follow the on screen instructions.

You will need to reset date/time and all custom fuctions.

And you will now have a camera with faster close-by AF.


Eyes Skyward

Want a dramatic sky?

Dramatic sky in Oakville (Photo: Michael Willems)

The simply do the following:

  1. Aim at the sky – fill your entire viewfinder with it.
  2. Lock your exposure, by pressing the “AE-L” button (Nikon) or “*” button (Canon).
  3. Aim down to compose the way you want.
  4. Focus on a close-by object (by pressing the shutter half way and holding it after the beep).
  5. Shoot!

Simple, innit?

And there are two ways to do this:

  • If you turn on your flash, the close by object gets lit up, as in the above image I took in Oakville on a walk, with my excellent Fuji X100.
  • If, on the other hand, you did not turn the flash on, the close by objects would now all be silhouettes. Which can also be nice.

You’re the boss-  which is what photography is all about!


Classy!

Fuji – I love your X100 camera.

I also love Fuji’s Canadian outfit. Who just sent me a certificate for a free 13×20″ mounted art canvas print, just for buying the X100!

And who iterated their service level: it is free, and better than Canon Canada’s CPS (which I no longer use because it costs money).  Fuji promises two hour email/phone support. Two business day repairs. Free shipping. Loaners if repairs take time. Wow!

Here’s a few more snaps taken with this little camera recently in Toronto and Niagara, respectively:

Tip of the day: For an entire day, shoot with one focal length, namely 35mm on a full frame camera or 24mm on a “crop” camera. You will see this enforces a certain discipline of compositional thought.


Pink

When walking through Toronto recently, I noticed this picture you saw a few days ago:

Pink bike in Toronto (Photo: Michael Willems)

Tip One of the day: when you see an interesting colour, take a shot (which is why you always have a camera handy – right?).

Tip Two: And as said in a post a few days ago, please do not automatically shoot it from 5 feet above the ground. See if tilting, or getting down on the ground (as here), or standing on a chair gives you a more interesting picture.

Tip Three. Use a little fill flash (as I mentioned the past few days).  The Fuji X100 and its tiny fill flash did all this.

Let me share how boring this shot is when shot from higher up and without fill flash:

Point proven.


Tip time: Fill Flash

Tip time: fill flash and how it works.

Fill flash means flash “helping a little”. It is not a particular type of flash; it is a particular use of flash.

In fill flash, the flash is used to light up the foreground a little, to get rid of shadows. On bright days, say, or when backlighting, or when a subject it being hit by harsh sunlight.

As in this example:

Yonge-Dundas (Photo: Michael Willems)

The sign above is lit up by my Fuji X100’s little flash, on a bright summer day.

Tip one: traffic signs will light up with minimal added light, since they are designed to reflect brightly.

Tip two: when you use exposure compensation to decrease the exposure to get a darker blue sky, the flash may also decrease in power. It does that on Nikon, but not on Canon. This is an arbitrary design decision. You can solve it by either of these two options:

  1. increase the flash (i.e. opposite adjustment) using Flash Exposure compensation;
  2. Simply set the ambient exposure in manual mode. That way flash is not also adjusted.

Tip Three: when it is bright, turn on high-speed flash (“Auto FP Flash” on Nikon) and get very close to your subject.

One more:

Pink bike (Photo: Michael Willems)

Try fill flash – start in program mode, then work your way up to manual modes and adjustments.


Fuji X100 tips

Two more Fuji X100 tips for you today. This little camera continues to amaze me.

First: turn off the shutter sound. And perhaps also the focus chirp, although I must admit I find it hard to dispense with that altogether, so I leave it on but turn its volume down to the minimum. Why add a shutter sound when the super-quiet operation is exactly why you bought a rangefinder-like camera in the first place?

Second: pre-focus. Do this as follows: set focus to “manual”, then aim at your subject, then press the AF-L/AE-L lock button to focus. The camera now focuses (i.e. manual was not all that manual). You can now let go of the AE-L/AF-L button: focus is taken care of. You can now worry about moment, composition and exposure.


Solution to many problems: ISO

As you know, an exposure is determined by three factors:

  1. Aperture: the larger (ie the smaller the f-number), the more light gets in.
  2. Shutter: The slower the shutter, the more light gets in.
  3. ISO: the higher the ISO, the less light is needed.

So from this “triangle”, the following follows: if you want higher shutter speeds, either lower the f-number or increase the ISO.

And increasingly, the latter is an option.

In the last day or two, I shot the following as JPG images (imagine, me shooting JPGs) in the X100 camera. View them at original size (click, then click on the “full size” link (where it says “Full  Size = 1200×800”), then view that on your Mac or PC at full size).

Now realize, all I did to these is crop a little in a few cases, and resize for these web images – other than that I did not touch them. They were shot as JPG files with standard settings: no extra noise reduction or anything else. Just standard.

First… 800 ISO used to be high. Now it gives you this on a point-and-shoot. Admittedly, the Fuji X100 point and shoot:

X100: Flower at 800 ISO (Photo: Michael Willems)

Indistinguishable from a 100 ISO image of just a few years ago!

320o ISO used to be impossible. Now look at this:

Little Italy, 9 July (3200 ISO X100 photo: Michael Willems)

(1/15th sec at f/2, 3200 ISO).

Little Italy (X100 Photo: Michael Willems)

(1/20th sec at f/2, 3200 ISO).

Little Italy, 9 July (3200 ISO X100 photo: Michael Willems)

(1/15th sec at f/2, 3200 ISO).

Couple in Little Italy, 9 July (3200 ISO X100 photo: Michael Willems)

(1/80th sec at f/2, 3200 ISO).

Wow, what quality! Surprised to see the pic, the couple remarked “but I did not see you flash”. Yes, that is a big benefit of high ISOs.

And let’s take it up one more notch. Here’s 6400 ISO:

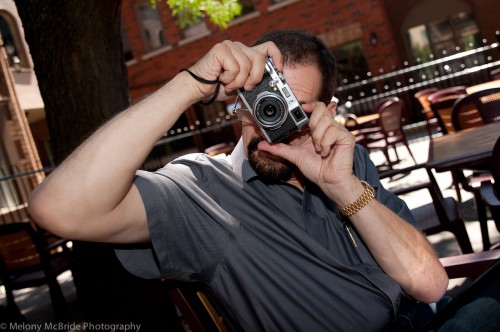
3200 ISO: X100 owner in Mississauga (Photo: Michael Willems)

Wow. That is 6400 ISO? Yes it is. Can I make an 8×10 print from that? You bet, and more.

So what does this mean?

It means that I can now shoot at 3200 and above wherein the past 800 was the absolute limit. That is 2-3 stops of extra light.

This in turn means that with a fast moderate wide angle lens I can now shoot pretty much in the dark: an outdoors restaurant, where amazingly, the camera actually sees more than I do, and it does it with great quality.

So, with the right equipment you no longer need to be afraid to shoot at high ISO values. And that means hand-held night photography now becomes a real option. I urge you to take advantage of that. See how far your camera can go and use it.