Pink

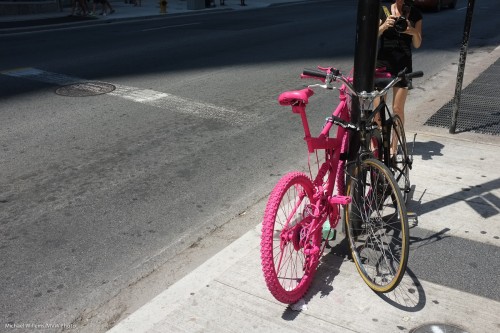
When walking through Toronto recently, I noticed this picture you saw a few days ago:

Pink bike in Toronto (Photo: Michael Willems)

Tip One of the day: when you see an interesting colour, take a shot (which is why you always have a camera handy – right?).

Tip Two: And as said in a post a few days ago, please do not automatically shoot it from 5 feet above the ground. See if tilting, or getting down on the ground (as here), or standing on a chair gives you a more interesting picture.

Tip Three. Use a little fill flash (as I mentioned the past few days).  The Fuji X100 and its tiny fill flash did all this.

Let me share how boring this shot is when shot from higher up and without fill flash:

Point proven.


Flash Tip: Bright Days

Following on from my previous post, one more quick flash tip.

On bright days, decrease your exposure. Then use flash to fill in the foreground.

Here: a bright recent day.

Bright Day (Photo: Michael Willems)

Not bad, but can we do better? I woujld like the sky to look blue, not washed-out. For blue, I need to decrease my exposure.

Which I do (using manual or minus exposure compensation),. Nic eblue sky – then I turn on teh flash to fill the foreground. I make sure I use high-speed flash if my shutter speed wants to exceed 1/200yh second.

All this now gives me this:

Bright Day (Photo: Michael Willems)

Not bad, eh?

Finally – also note the use of red, green and blue. All in one image. All three primary colours, saturated, in one shot makes the photo visually interesting.


August 13, Joseph Marranca and I will be doing a Creative Light workshop where I guarantee we’ll use light just like this. There is still space if you book now!

Tip time: Fill Flash

Tip time: fill flash and how it works.

Fill flash means flash “helping a little”. It is not a particular type of flash; it is a particular use of flash.

In fill flash, the flash is used to light up the foreground a little, to get rid of shadows. On bright days, say, or when backlighting, or when a subject it being hit by harsh sunlight.

As in this example:

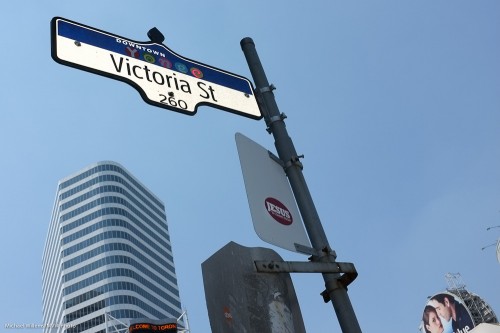
Yonge-Dundas (Photo: Michael Willems)

The sign above is lit up by my Fuji X100’s little flash, on a bright summer day.

Tip one: traffic signs will light up with minimal added light, since they are designed to reflect brightly.

Tip two: when you use exposure compensation to decrease the exposure to get a darker blue sky, the flash may also decrease in power. It does that on Nikon, but not on Canon. This is an arbitrary design decision. You can solve it by either of these two options:

  1. increase the flash (i.e. opposite adjustment) using Flash Exposure compensation;
  2. Simply set the ambient exposure in manual mode. That way flash is not also adjusted.

Tip Three: when it is bright, turn on high-speed flash (“Auto FP Flash” on Nikon) and get very close to your subject.

One more:

Pink bike (Photo: Michael Willems)

Try fill flash – start in program mode, then work your way up to manual modes and adjustments.


Flash tip of the day

When you are using TTL flash (metered, automatic), you sometimes get too-dark foregrounds.

This can be because a setting is wrong, or because there is just not enough power available from your flash. It is important to know which one it is!

The settings that affect your flash brightness are:

  1. Aperture
  2. ISO
  3. Shutter, after a point (because exceeding the synch speed and using “fast flash” means you lose power)
  4. Distance
  5. Flash Power
  6. Flash zoom

My trick: to ascertain whether it can be done at all, fire a test shot using manual flash at full power!

  1. Set your camera to its max sync speed (eg 1/200th sec)
  2. Set flash to manual (take the flash off TTL and set it to M).
  3. Adjust it to full power (not TTL but M, and power at 1/1, or 100%).
  4. If your subject is centered, zoom in the flash head (lighting edges that have no subject only wastes power).

If your picture’s flash subject is now still too dark, it cannot be done. Open the aperture or get closer.

But if your flash subject is now blown out, it means your picture can be done with current distance. Go back to TTL, figure out what you are doing wrong, fix it, and try again!

Flash balancing, step by step

Many of you have asked me to give a simple step-by-step instruction of how to balance light using flash. OK, so here we go.

Step one: the normal shot.

Say you are shooting outdoors. And the background is bright. So you get this shot:

Flash demo photo by Michael Willems

1. Background too bright

OK for the foreground – but the background is too bright.

Step two: expose the background right

So you need to darken it. If, say, you are in Aperture mode, just use exposure compensation of, say, -1 to -2 stops. Now you get this:
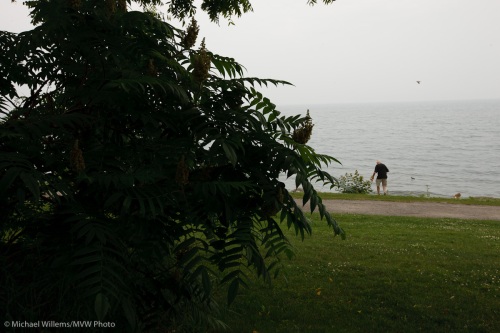
Flash demo photo by Michael Willems

2. background ok, foreground too bright

Great, the lake is visible.

But now the foreground is too dark. So you need to brighten it.

Step three: expose the foreground with flash.

OK: turn on your flash. That gives you this:

Flash demo photo by Michael Willems

3. Better, now with flash

Much better. If the foreground is too bright, use flash exposure compensation (not exposure compensation!) to darken the flash. Or if it is too dark, you are probably too far away – get closer or use higher ISO, if able.

If your shutter speed exceeds your flash sync speed (around 1/200th second), reduce it or use Auto FP Flash/High Speed Flash (in that case, get really close).

Now you can make shots like this:

A Park Bench in Oakville (Photo by Michael Willems)

A Park Bench in Oakville shot with flash

(Can you also see the half CTO warming gel I used?)

And you can get more dramatic: here, I underexposed the background by two or more stops:

A Stop Sign in Oakville (Photo by Michael Willems)

A Stop Sign in Oakville (Photo by Michael Willems)

Have fun!

Outdoors with flash: what mode?

Let’s assume you follow my advice and use your flash, as fill flash, outdoors. Say for pictures like this.

A baseball team

A baseball team

In that case the question will be, what mode do you use on your camera? You want aperture in a certain range to ensure sufficient, but not too much, depth of field, and you want the shutter in a range that ensure sufficient stability but that is limited at the upper end by the flash sync speed (normally around 1/200th second).

  • Program mode: this will work, but you get no control over either aperture or shutter speed. Not the preferred mode unless you are in a hurry.
  • Manual mode: you meter for the background and set your camera accordingly. Flash lights up the foreground. This is practical when you know aperture and shutter speed and their effects well, and when the light does not vary too much.
  • Aperture mode: good for determining the depth of field. But there is a drawback. Outdoors, if you open the aperture, your shutter speed could easily exceed your flash sync speed. Result, an overexposed picture. Or if you stop down the aperture, the shutter speed could get so slow you get blurry images.
  • Shutter speed mode: if it is bright, you can set your shutter speed to just below your sync speed, say 1/200th second. The camera will now choose whatever aperture suits this. The risks are fairly low – worst case, you get a wider or narrower aperture than you wanted. If it is dark and your ISO is low, you can get an underexposed image.
  • “Aperture and shutter priority”: on some cameras you can select “Manual exposure, plus auto ISO”, which effectively means “aperture and shutter priority”. If you set your aperture and shutter wisely, the ISO will be in an acceptable range. The danger is that you need lower than available ISO (overexposed picture results) or that you need high ISO (noise, or “grain”, results).

As you can see here, there are certain strategies, but there is not one perfect one that is easy to use at all times. That is why photography has a technical aspect you need to learn.

A different approach: Rather than worry about modes too much, look at what they do. You need to look through your viewfinder and be aware of shutter speed, aperture, and ISO. Look out for:

  • Shutter too slow: blur
  • Shutter too fast: flash sync speed will be exceeded, and overexposure results
  • Aperture fully open: overexposure will occur, and depth of field will be narrow
  • Aperture too closed: too much will be sharp
  • ISO at its lowest: overexposure may result
  • ISO too high: noise (“grain”) will result.

Then adjust whatever you like to get all three variables into the right range.

For the shot above, I used shutter speed priority with my shutter speed set to 1/200th second. I chose an ISO of 200 to get into an acceptable aperture range (I was aiming for f/5.6).