Afternoon = Gel

Another flash tip for you today.

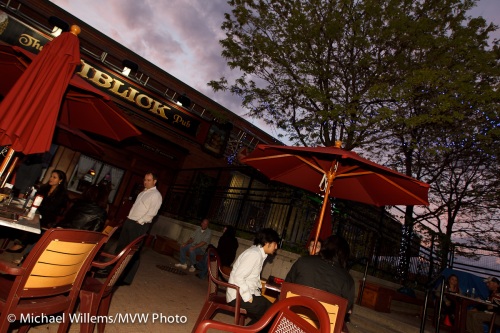
Later afternoon pictures. You can make them look better by adding your own “golden hour” glow. Like this:

Patio at dusk, photo by Michael Willems

Patio at dusk, photo by Michael Willems

To take a picture like this, you might do the following:

  • Use an on-camera flash while there is still light;
  • First set your camera’s exposure (ISO, aperture, shutter) to get a nice background sky. Ignore the foreground for now.
  • Then position yourself such that there is no close subject (remember the inverse square law).
  • Use a half CTO gel on the flash (I used a Honl Photo half CTO gel on the speedstrap on my 580EX);
  • White balance to “Flash”.
  • Take a test shot. If the flash is too bright or too dark, use Flash compensation (+ or 1) to adjust. If the background is not right, adjust ISO, shutter or aperture.
  • A wide angle lens makes it easier.

And Bob’s your uncle: nice colours.

Flash balancing, step by step

Many of you have asked me to give a simple step-by-step instruction of how to balance light using flash. OK, so here we go.

Step one: the normal shot.

Say you are shooting outdoors. And the background is bright. So you get this shot:

Flash demo photo by Michael Willems

1. Background too bright

OK for the foreground – but the background is too bright.

Step two: expose the background right

So you need to darken it. If, say, you are in Aperture mode, just use exposure compensation of, say, -1 to -2 stops. Now you get this:

Flash demo photo by Michael Willems

2. background ok, foreground too bright

Great, the lake is visible.

But now the foreground is too dark. So you need to brighten it.

Step three: expose the foreground with flash.

OK: turn on your flash. That gives you this:

Flash demo photo by Michael Willems

3. Better, now with flash

Much better. If the foreground is too bright, use flash exposure compensation (not exposure compensation!) to darken the flash. Or if it is too dark, you are probably too far away – get closer or use higher ISO, if able.

If your shutter speed exceeds your flash sync speed (around 1/200th second), reduce it or use Auto FP Flash/High Speed Flash (in that case, get really close).

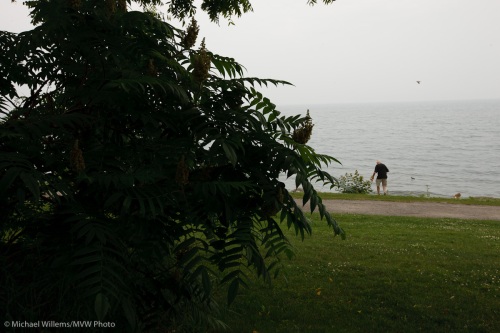
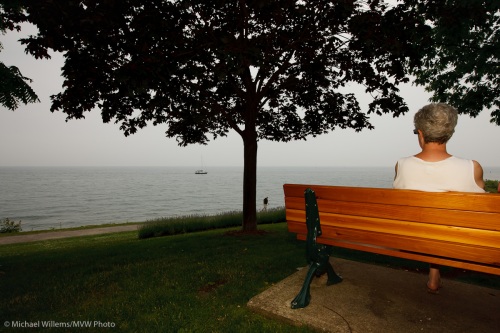
Now you can make shots like this:

A Park Bench in Oakville (Photo by Michael Willems)

A Park Bench in Oakville shot with flash

(Can you also see the half CTO warming gel I used?)

And you can get more dramatic: here, I underexposed the background by two or more stops:

A Stop Sign in Oakville (Photo by Michael Willems)

A Stop Sign in Oakville (Photo by Michael Willems)

Have fun!

Using light today.

I shot Victoria Fenner today. But only, you will be glad to know, with a camera.

Let me talk you through that, shall I?

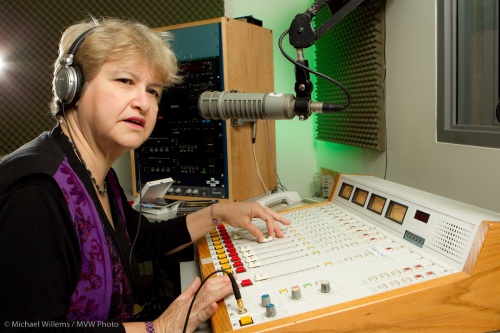
Victoria is an audio expert. She used to run the studio at McMaster University that we shot this in. We decided to shoot her doing her thing – and sound is her thing. So we shot in a studio first:

Camera: I shot her with a Canon 1D Mark IV. The camera was on manual at 100 ISO. I used a 24-70 lens set to around 24mm – meaning around 30 “real” mm.

Light: the camera was equipped with a 580 EXII flash to act as e-TTL “master” to drive three 430EX speedlites:

  1. The “A” flash through an umbrella on camera right, shining into Victoria’s face. An umbrella throws nice soft light, great for faces. (There is a certain irony in the fact that we use the word “umbrella” to name this thing that throws around this nice light. Umbra means shadow!)
  2. One “B” flash with a green Honl Photo gel in the background – I love adding a splash of colour, and green goes very well with purple.
  3. Another “B:” flash, fitted with a Honl Photo 1/4″ grid, as hair/accent light shining toward the camera. You can see it just outside the field of view.
  4. I set an A:B ratio of 4:1 to 8:1.

All this took about ten minutes to set up, and ten minutes to take down.

Then we shot some outdoors. For this, I used two flashes off camera: one into a Honl gold/silver bounce card; the other using a grid, as before. Yes, in bright sunlight you can fire these flashes using light-controlled TTL.

This was a bright day in April around noon. But it does not look like noon light, does it? I shot in Aperture mode, with -2 to -3stops exposure compensation. That darkened the background to give it colour saturation. The flashes took care of the foreground.

Balancing light

One subject photographers need to learn all about it balancing light. In particular, I mean balancing background light with foreground light.

If you take one of my workshops I’ll teach you all about “overpowering the sun”.

As an illustration of that, three years ago almost to the day I took a few snaps of my son in Army Cadet uniform. The sky was mid-day light blue, but I used three off-camera flashes, two of which were in umbrellas and one was direct, to overpower the sun and make the sky dark:

I used the 5D in manual exposure mode, set to -3 stops from ambient, and used TTL metered flash. Piece of cake. And yes, remote flash using light control does work in super bright sunlight, as long as you keep line of sight between the master and slave flashes.

Can you also see that for this portrait I used a very wide lens? Even though you are not supposed to do that for portraits? That is because it is a situational portrait. Where the environment is as important as the subject. Just keep your subject’s face away from the edges – centre, or near the centre, is good.

Let there be light

..and let it be managed.

I have talked about this many times before, and I will do it again. When you add light, and manage it, massage it, and work with i, you get drama, cheerfulness, whatever you like. So when you make the light, you make the mood.

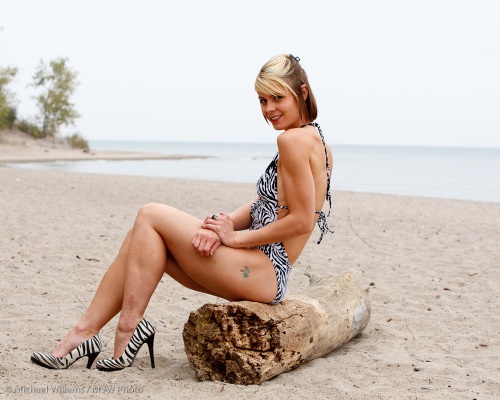
Case in point. In the model shoot I did Monday on Toronto Island, here’s the light the way it might look to a casual observer, and the way it might appear in a properly exposed photo:

MVW_2600

Fine. Nice. Pretty young lady (Miss Halton, incidentally) on the beach.

Now let’s work with that. That background is a bit bland to my taste, so let’s darken it. The colours on the model are OK but I’d like them to stand out more.I want drama, and I want the model to stand out, not to be just a thing on a beach.

So first I turn down the ambient exposure. Two stops.That will make light blue into dark dramatic blue. Then I add a flash, on a light stand – shot through an umbrella to get soft light.  I fire that from my on-camera flash using E-TTL II IR technology. I turn the flash up or down as needed.

I now get the result I had in mind.

MVW_2601

That’s better.

And more importantly: that’s entirely different. And that is the photographer’s task, to make things the way he or she wants them. You can say you like, or you don’t like – but you can’t say it isn’t different!

How I rate photos in Lightroom

It occurs to me that it may be helpful to share my “rating”-workflow in Lightroom. I go through the following sequence:

  1. Import everything as 2 stars
  2. Go to grid view and step through them, and reject any that are technically bad (e.g. out of focus or badly exposed, or the subject is blinking). They get an “X” marking. I exclude X from my view.
  3. Go through them again and rate any that “could possibly be used” as 3.
  4. Go through the threes again and rate any that are “great in this shoot” as 4.
  5. Go through the fours again and give any that are “great and can be used even outside this shoot as portfolio shots” a five rating.
  6. Then I select just the 4 and 5 stars rate them all as PICK.
  7. Then I step through the 3 stars and decide with of them I want to use; I rate those as PICK also.
  8. Then I check for doubles and unpick those.
  9. Then I do any post on my picks.

Done.

Here’s a couple of (unedited)  4-star images from yesterday’s Toronto Island model shoot:

MVW_2386-2

MVW_2360

(70-200 f/2.8 IS lens on 1D MkIII, manual exposure -2 stops from ambient and key flash though umbrella, fill flash on camera.)

Balance light

You know the problem. You shoot a living room with large windows and what do you get?

OK outside. A bit light but OK. But dark furniture. Like, silhouettes.

Ah no – you went to a photo course, so you know about “exposure compensation” – the “+/- button”. So you turn that up to, oh, plus two stop (to make it brighter) – and yes, now the furniture looks light. Nice.

But uh oh – the window is now all white. Nothing visible. Like a gateway to heaven in “heaven can wait”.

Fortunately, you have also done a “mastering flash” course. So you know to:

  1. Turn exposure compensation down to make the sky nice and blue
  2. Then turn on the flash (and turn it around so it lights up the wall behind you)
  3. Then take a test shot
  4. Then decide whether to use “flash exposure compensation” – the “plus minus with flash next to it”. This turns the flash power up or down. You decide you need some more light on the furniture so you turn this to plus one stop.

Now here’s your picture:

MVWS0145-2

Nicer, no? Try this technique if you haven’t yet. And you can compete with the best interior photographers.