“I want to adjust a bunch of pictures by increasing their ISO by a stop”. Is that something you often want to do?

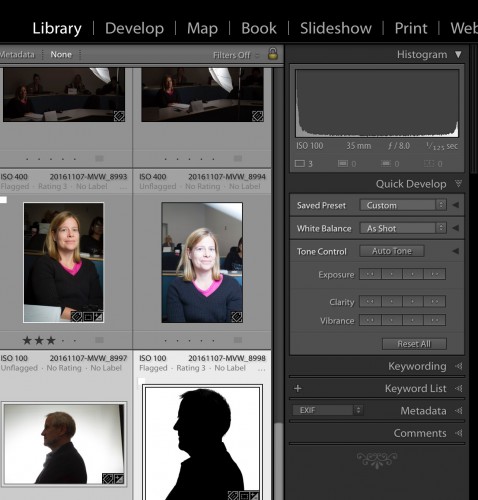
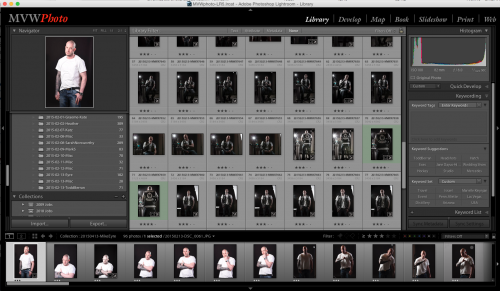
In that case, you have probably run into a problem. Yes, you can adjust one, then mark the rest in the DEVELOP module’s negative strip and SYNC them:

screen-shot-2016-11-08-at-20-21-49

Ah. But now they are all set to exactly +1 stop – not “whatever they were plus 1 stop”. And that, depending on how you got here, could be a problem. If you have previously adjusted some individually, you will lose those individual tweaks.

The solution?

Do it in the LIBRARY module. Mark them all and in “Tone Control”, adjust the exposure (or clarity, or vibrance) to the relative amount you would like to add. It will be added to the prior value, instead of replacing it.

screen-shot-2016-11-08-at-20-21-27


That’s it. Just one of those little nice-to-knows!


Lightroom Bug with Sierra

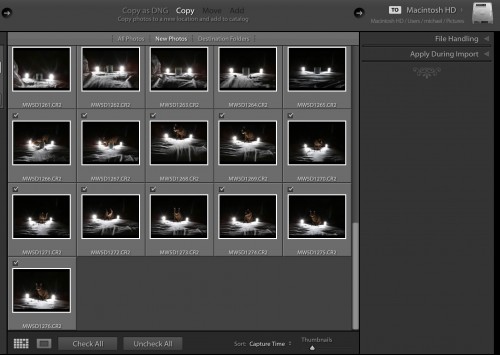
If you have upgraded your Mac to Sierra, the new OS, Lightroom may show a bit of a bug in the Import module.

When trying to import, you see this dialog:

screen-shot-2016-10-12-at-12-34-21

A few things are missing there, aren’t they? “File Renaming” and in particular, the essential “Destination” dialog is missing.

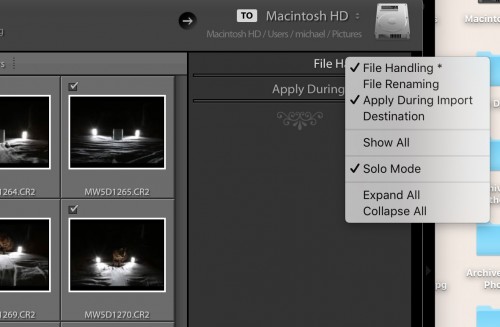
The solution? For now, until the bug is fixed, just right-click on one of the two that do show, File Handling or Apply During Import:

screen-shot-2016-10-12-at-12-34-52

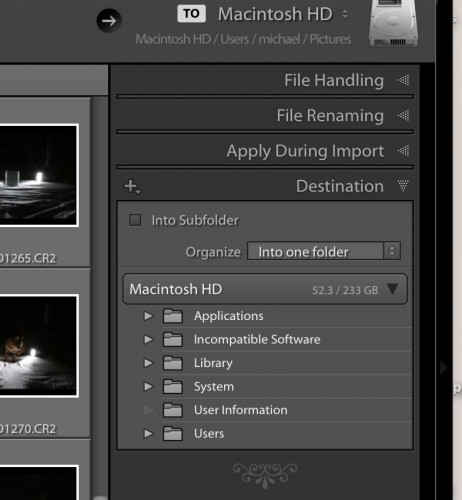
…and then click on the two missing dialogs, “File Renaming” and “Destination” to activate them, so a tick mark appears next to them too.

You now see all four again, and you can set your destination as always:

screen-shot-2016-10-12-at-12-35-10

So although this little bug is annoying, it is easy to bypass.

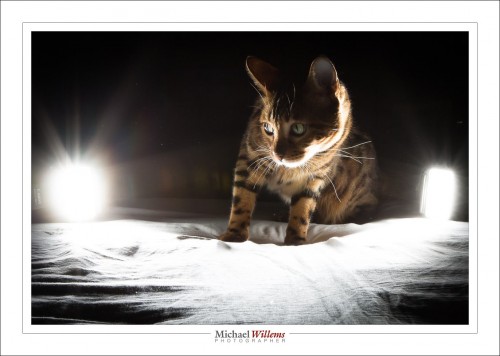
Now to celebrate, here is Mau Mau, surrounded by (and lit by) two flashes:

20161012-mw5d1272-1200

Taken at 100 ISO, 1/200 sec, and f/22, with the flashes set to 1/16 power, using a Yongnuo YN622C-TX on the camera and a YN622C connected to each one of the the flashes.


Lightroom Rocks, But Get The Right One

Lightroom is the core app around which my business revolves. I love it; it quadruples my productivity; the math they did to make it work is incredible, and frankly, if they charged $1,500 instead of $150 I would still buy it.

The caveat? I have said it before: I am not a fan of Adobe CC. “CC” stands for “Creative Cloud”, and it is a suite of products for a monthly fee. Great technology, wonderful, and worth a lot—but not that much.

First, even with upgrades over the years, that monthly fee works out much higher than the stand-alone product, if Lightroom is all you use, And most photographers do not need Photoshop. Illustrators do, but we’re not illustrators.

But that is not my main gripe. My main objection is: I buy a product that is completely essential to my company and hence to my income. And now when I have the CC version, Lightroom “calls home” at regular intervals to check whether I am allowed to use it. Didn’t pay bill? No Lightroom for you. Bank screwed up? No Lightroom for you. You’re in Africa when it’s time to call home, so no Internet connection can be made? No Lightroom for you. Database problems? No Lightroom for you. Account hacked? No Lightroom for you. And so on. And these things really happen—they are not mere theoretical possibilities.

I simply cannot allow mission-critical software that necessitates me asking politely for permission to please use it.

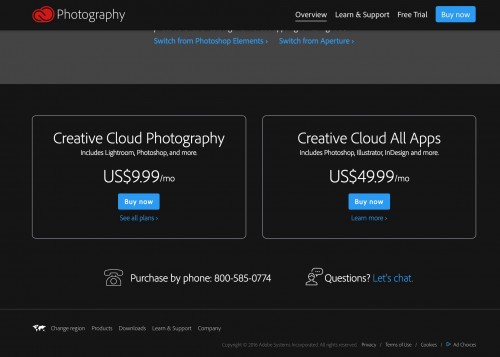
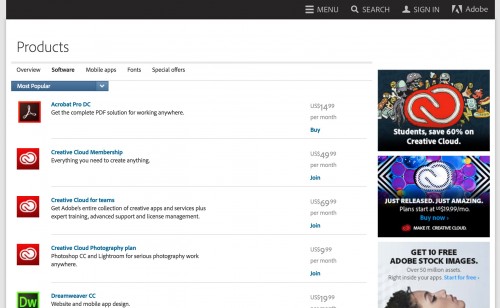
So I, and you too may want to, buy the stand alone version for $149 once only, instead of the CC version for the “introductory” (i.e. will-go-up) fee that starts at US$9.99 per month.

But how?

Good question! It takes me 15 minutes each time to find it. Eventually by listing all products, you get a screen like this:

screen-shot-2016-09-24-at-16-31-02

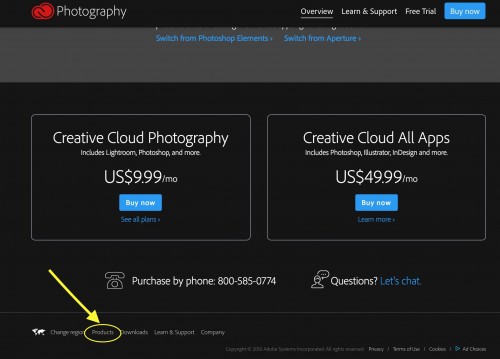
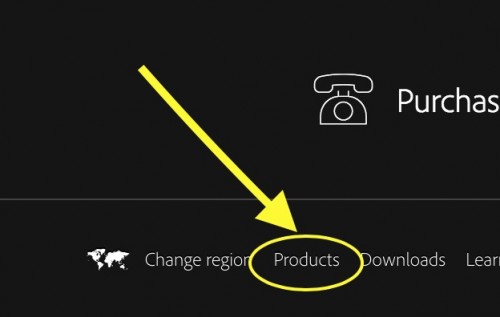
And you see, at the bottom on the left, the tiny, tiny “Products” link?

screen-shot-2016-09-24-at-16-57-19 screen-shot-2016-09-24-at-16-57-30

Yeah, that one. That takes you to this page:

screen-shot-2016-09-24-at-16-41-27

..which contains:

screen-shot-2016-09-24-at-16-41-50

That is, as far as I have been able to tell, the only way to get to the non-CC product. While it is still available. Which will not be forever.

The link above is for Canada, but there’s similar pages for others.

You may also be able to buy copies in a box, in stores like Henry’s. But that too is very hard to find.

Back to regular business. But if you have not checked out Lightroom: go get it. Free 30 day eval, after which you decide to buy it—or not.

And if you have bought it, do consider having me help you set it up properly, and fix any errors. Good news: anything you get wrong can be fixed later. Lightroom really is a fantastic app, but you do need to put some thought into how to organize your files. A few hours of private consulting and you too, like me, will dramatically increase your productivity. Drop me a line or give me a call to explore the options, and see http://learning.photography.


Wonderful Willems Warhol

I am surprised at the willingness of people to buy Lightroom “presets”. There’s people who sell these sets of edit presets for good money—I see them hyped on Facebook daily, and then I see friends “liking” them and “forwarding” them—and there’s a lot of buyers who think they are buying something really valuable.

And they are. But it is value they could have just as easily (and more quickly, and a lot more cheaply) created themselves. They are just settings of the controls.

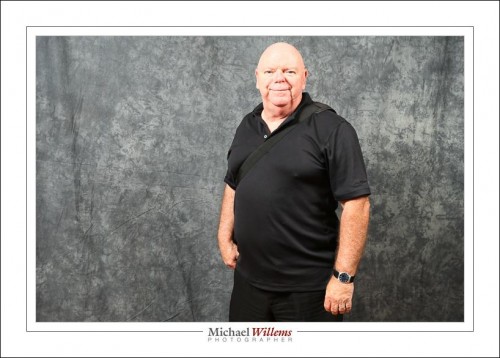
But all right. If you really have too much money, I will gladly sell you the “Wonderful Willems Warhol” preset. An amazing value at $19.99, it turns this recent “OK” portrait of my friend Rob McNaught…:

20160730_144513_014_1dx_9479-700

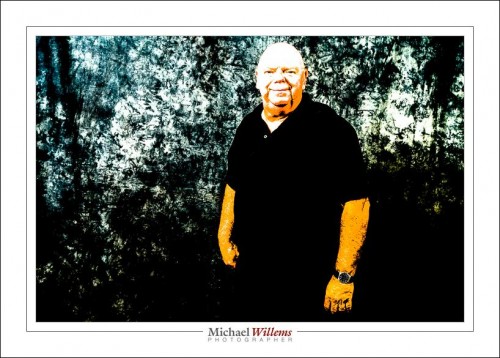
Into this Utterly Amazing Andy Warhol-like creative creation:

20160730_144513_014_1dx_9479-700-2

Wow, eh. But there’s even better news; for you, my good friends, it’s only $4.99 if you order today! Yes, that’s right: I will sell you the Wonderful Willems Warhol Special Art Effect for just $4.99! And you can use it as often as you like: no restrictions, and no license fee! So you are really buying an infinitude of artworks for just a few bucks. Have you ever seen better value?

Oh wait. No, that’s wrong. No.

No, I will not sell it for $4.99. Instead, I’ll sell it to you for $0.00.

For nothing. Naught. McNaught. Yes, really.

Why? Because if I charged you any money for this, I would feel bad. For two reasons. First, these presets are easy to make. Twiddle your settings, and hit the little “+” button on the left, give the new preset a name and you are done. $5 for that is asking too much. And second, by paying some guy $5 for a couple of settings, you are getting that guy to do your creative work for you. A picture created with that preset will be as much mine at it would be yours.

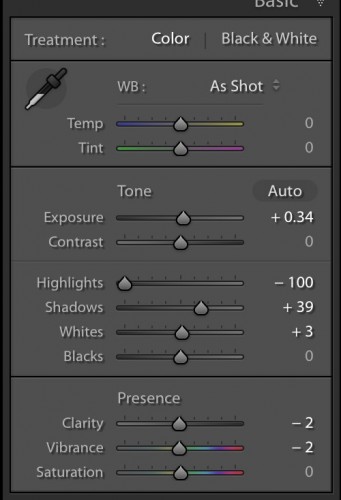
But if you want that one, here you go. Go to Lightroom’s DEVELOP module, and apply the following changes to an image:

[1] In GENERAL, change Exposure, Highlights, Shadows, Clarity and Vibrance as follows:

screen-shot-2016-09-18-at-23-42-29

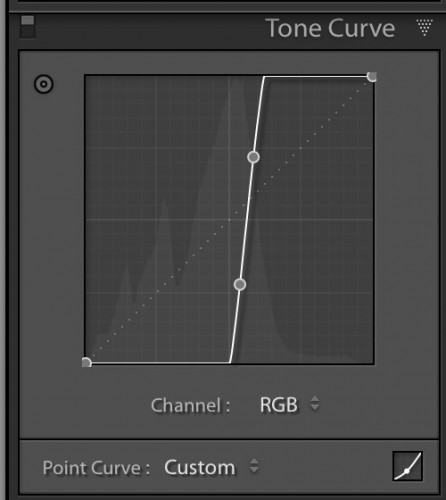
[2] Change the Tone Curve as follows:

screen-shot-2016-09-18-at-23-42-50

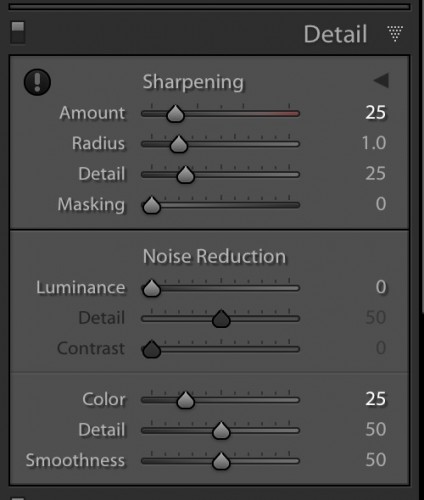
[3] And finally, change Detail settings as follows:

screen-shot-2016-09-18-at-23-43-23

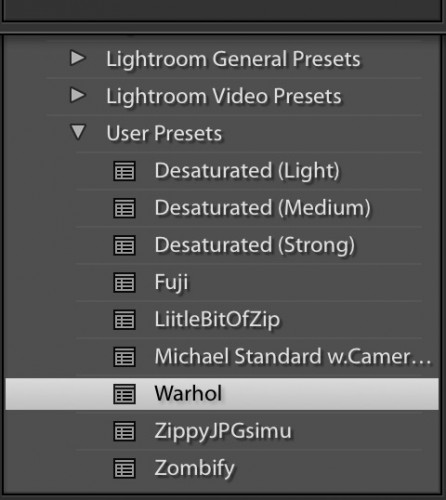
Now on the left, above the Presets section, hit “+” and give it a name, like “Warhol”. You will now see it added to your User Presets:

screen-shot-2016-09-18-at-23-41-44

And you are done!

That preset took a minute to work out, and I did it all myself. Is that worth paying lots of money for? Lightroom’s functionality is worth every penny, but should you pay that much for someone telling you how to set that functionality? If you think the answer is “yes”, then my three-hour Lightroom course has just gone up to $3,000. Personally, I think it’s like selling someone an iTunes preset called “Loud” that turns up the volume.

My advice: work out what changes you want, and then figure out how to achieve them in Lightroom, i.e. “what control do you need to increase or decrease to get the desired effect?”. That way, you have done the work, and you’ve saved some money. And you have gained extra insight into the wonders of editing in Lightroom. And you get to play, and discover new stuff.

Enjoy! (And sorry, Gavin, Coles, and the many others who sell presets. But don’t you think we should teach our students how to edit, rather than sell them ready-made edits?)

Huge Adobe Bug

And this is why I hate “permissions”, “Creative cloud”, and so on: corporations deciding what *I* do.

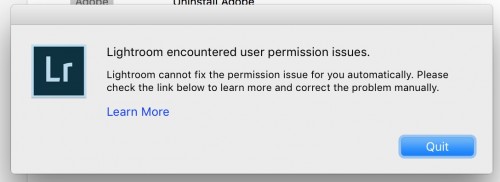
After the update of Adobe Lightroom 6.4 to 6.5, it will not start:

Screen Shot 2016-03-23 at 12.48.18

Huge, huge bug! Adobe.. this is mission critical!

The solution:

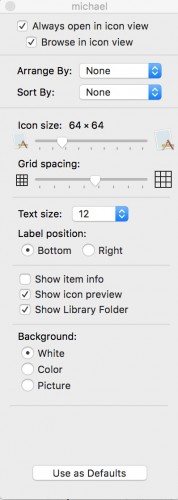
First, go to your home folder in finder, and in “VIEW OPTIONS”, enable “Show Library Folder”:

Screen Shot 2016-03-23 at 12.57.18

Now go to all three of these folders:

  • [home]/Library/Application support/Adobe
  • [home]/Library/Caches/Adobe/
  • /Library/Application support/Adobe

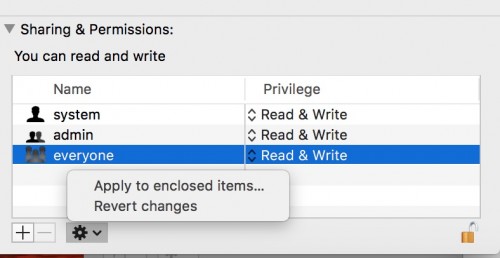
And for both those folders, right-click on the folder and  INFO.

Then, change the access rights so that EVERYONE has READ/WRITE, not just READ.

But also, click on the lock to open it and then click on the gear to apply to enclosed items:

Screen Shot 2016-03-23 at 13.01.38

And now it will start.

But security… all rights to everyone? Doesn’t look secure to me! So beware before you upgrade.


RAW has space. Lightroom has attitude.

…and together, those two mean you need to do something sometimes.

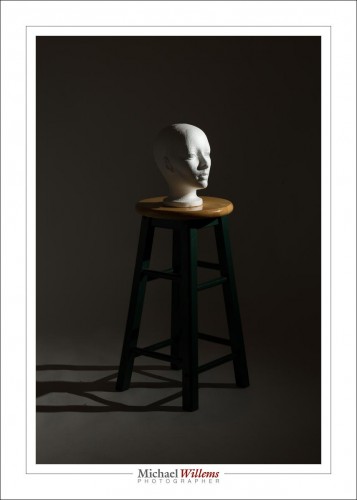
Here’s a studio shot from just now:
20160316-1DX_7009-1024

That’s fine. But it appears in Lightroom like this:

Screen Shot 2016-03-16 at 13.23.52

…it only begins to look overexposed when I move “Highlights” to +30! While on the back of the camera it looks much more overexposed.

In fact, I have to push “Highlights” to +80 (almost all the way to the right) in order to see what I am seeing on the back of the camera:

Screen Shot 2016-03-16 at 13.23.18

Why is this? Because of two phenomena that combine, in a sort of perfect storm:

  • A RAW image has a lot more space than a JPG. And what you see on the back of the camera is the built-in JPG preview that every RAW file contains.
  • In addition to this, Lightroom “protects” us. If you blow out a background, for example, Lightroom pulls back the brightness to make that background NOT overexposed, as long is there is any room at all in the RAW file.
  • So combining these: unless you make it really extreme, when you see blinking on your camera, you will get an image without overexposure on your computer. If you are “overexposing” by a stop on the camera, you will not even notice that on the computer.

That is all very well, unless you want to overexpose. Like in the case of a background that you want to have pure white. Lightroom thinks it knows bette rthan you do, and that, in my opinion, is not a good thing.

Fortunately you can fix it by the method I describe above, or by using the earlier 2010 Camera Calibration process (bottom right panel in the DEVELOP module). Just so you know.


This is one of the things we will talk about at my Lightroom/Computer seminar this Saturday.  There is still space: Sign up soon if you are interested: space is strictly limited.

Workflow, again

Another note on workflow.

You need to rate your images, to separate the good from the less good. But this only works if the process is:

  1. Quick.
  2. Unequivocal, objective.

Lightroom helps in both cases. The “quick” is addressed by the following process. First, you rate all images to a standard, say 3 stars, namely the standard that most of your pictures will be; and now you only mark the exceptions. That takes half the work away. And to actually mark those exceptions, you simply use the number keys on your keyboard (“1” for one star, “2” for two stars, and so on) combined with right arrow (“next”) and left arrow (“previous”) in the negative strip.

This only works, as said, if your system is clear. A system that needs you to indicate “how much you like an image” will not work: it has to be more objective.

My system is as follows:

  • One star: this image is technically bad; too bad to fix in post-production editing. It is out of focus, or too under= or overexposed, say.
  • Two stars: this is technically OK, but it is not an inspiring image. A snapshot. Something you’d rather not use of you do not have to.
  • Three stars: this is an image that meets my standard; i.e. one that I would be willing to share with a customer. (That does not mean I will share it).
  • Four stars: this is one of the best shots in this shoot.
  • Five stars: this is a portfolio shot.

Note that the ratings indicate the end status; i.e. after editing, not the way it looks now.

Your system may be different, but be sure that like me, you design a system that is simple and objective in the sense that it is not open to interpretation.

As a result of the system described here, I can rate a shoot in a few minutes, even when I have hundreds of images.


Work. Flow.

Your workflow needs to be exactly that: a flow. A logical sequence of actions.

In my case, that means:

  1. Import the images.
  2. “Asset Manage” them: add keywords; rate them 1-5; backup.
  3. Then from the ones marked 3 and over, pick the ones to actually use.
  4. Edit only these.
  5. Mark the edited ones as finished.
  6. Select the finished ones and output them for use.

So it is basically “input – handle – select – edit – use”. And whether you are a pro or an amateur, it is going to be the same flow for you.

And that flow is where you need to save time: you do not want to spend an hour making photos, followed by two hours in Photoshop.

That is where Lightroom comes in. Lightroom is a one-stop workflow tool. It handles all the steps above: ingestion—asset management—editing—using. And it does it in an amazingly efficient way.

Evidently, if you can save time in Lightroom, it saves time overall. And that is where Wacom comes in. I now also use a Wacom Intuos tablet, which I find very useful; much more useful than I would have imagined. Part of the reason is better quality than the last time I looked, years ago. And part is new functionality. Like customizable buttons per app.

This tablet is especially useful when editing, and especially because of its pressure sensitivity. When using the brush, the harder I press, the more brush effect I get.  Very cool. Skin fixes and other local edits are now much quicker—and that saves me a lot of time. This functionality is simply not available on a mouse.

In the next weeks I will keep you up to date as to how I am using the Wacom tablet. I will start with customizing the buttons: how do I do it? What functions are most useful? As I sort it out, I will give you my recommendations. Stay tuned.


Lightroom 6

Yesss… Lightroom 6 is out. And that is a reason to rejoice.

After a complicated upgrade (I had real trouble finding the “buy it as an app” option: Adobe really wants the extra revenue of the Creative Cloud, so it pushes you there), and after a subsequent day of converting catalogs (my one catalog contains a quarter of a million photos) I am playing with it now.

Cool.

First, the feature you do not see: speed. Reports talk of a significant speed increase. I have not seen a giant difference, but based on reports, I am sure I will. It sure is not slower. Faster is good.

Second, the one feature that was cool in iPhoto (now: photos): face recognition. It has now been added to Lightroom, and it works well.
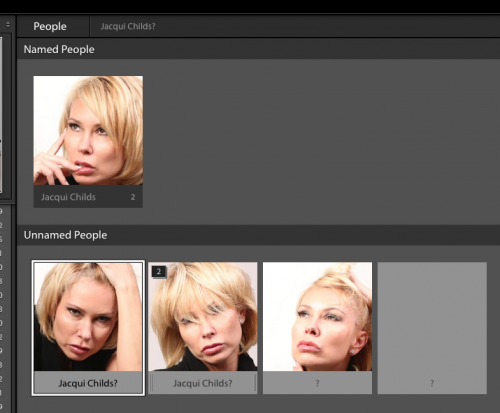
The feature is intuitive: I have not had to read any sort of manual, so far. Lightroom recognizes where faces are in your pictures, and it guesses who they are with an amazing degree of accuracy. You start it; it identifies faces; you conform its guesses or correct it and name the people, and you are done. I did 2015, and am now am doing the preceding years. It will take me a while, but it’ll be well worth it.

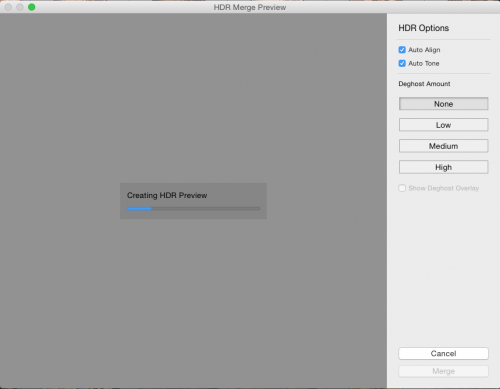
Another new feature: HDR, “high dynamic range”. You are now able to take a photo multiple times (2, 3, 10, whatever) with varying exposure, and pull them together into one HDR image. Gone are the days that dynamic range was something to worry about. Select the various photos, do some settings, like deghosting (see below), and you are done.  Lightroom creates a new images named …-HDR.dng: a full DNG. Finally, a good use for the DNG format. And much better than creating a JPG.
Next: Panoramas. You can stitch together pictures that lie beside each other into one wide panorama. Another feature that until now needed additional software. Both Panoramas and HDR appear in a new PHOTO option:
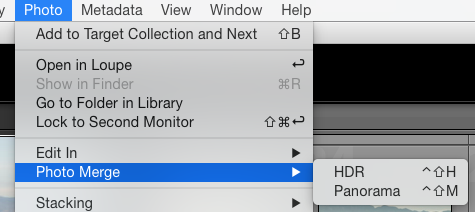
So now you choose “Panorama” and wait as it is built in front of your eyes. You even have an “Auto crop” option: marvellous. And again, a huge, excellent file is built in front of your eyes, as it were. And again, it is a .DNG file, a huge advantage over other software, that creates JPG files. And look what I just created: the city of Las Vegas at this size:

Yes: 25,000 x 3412 pixels. That is, an 85 Megapixel DNG file. Wow!

Here is a small version, “just” 5,000 pixels wide, that I deliberately saved with a logo and at that “small” size and with high compression, i.e. low image quality (it is, after all, a copyrighted image). It still shows the point very well though when you view it at full size. Go ahead and view at full size:

Fantastic, no? I will be doing this all the time now.

I see all sorts of other advantages and incremental improvements in version 6.

Let me give you just one cool little timesaver. To use the entire dynamic range of your image, take a grey, low contrast image, where the bottom end of the histogram does not reach “0” (the left end) and the top end does not reach 255 (the right end) (i.e. the blacks are not black and the whites are not white).

Now, in DEVELOP, in the BASIC module, shift-doubleclick on the words “Whites” and “Blacks”. Lightroom automatically drags blacks down and whites up until you are using the full dynamic range from 0 to 255. Cool, or what!

In the next little while I will document some more of these advantages and tricks, but for now, let this be enough reason already to upgrade. Enough reason by far. Have fun!

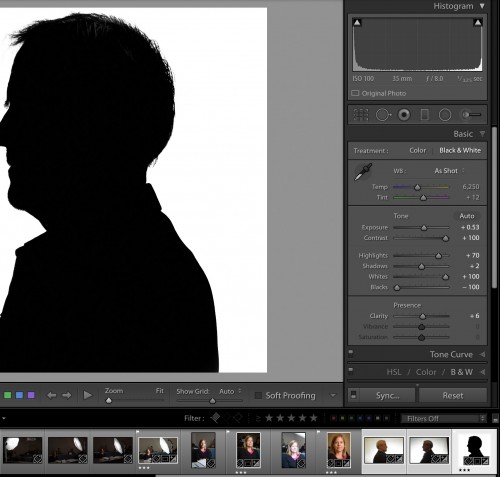
 

Yes, you can.

I teach Lightroom, among other favourite things I teach. And that means I see many students’ computers.

And often, I see less than I expect. Often, options, important options, are missing.

Like the toolbar.

What toolbar?

No toolbar there.

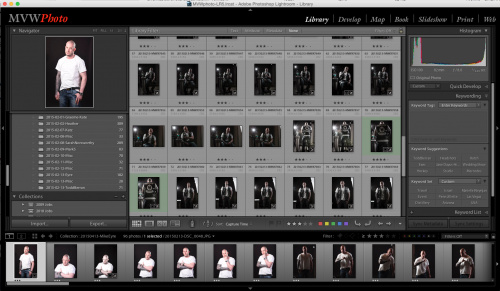
I mean the toolbar that appears when you turn it on by pressing the letter “T” (it toggles, so if it is already there, it will be removed), or by using the menu function VIEW–TOOLBAR. This toolbar, in other words:

See it there, between the grid and the negative strip?

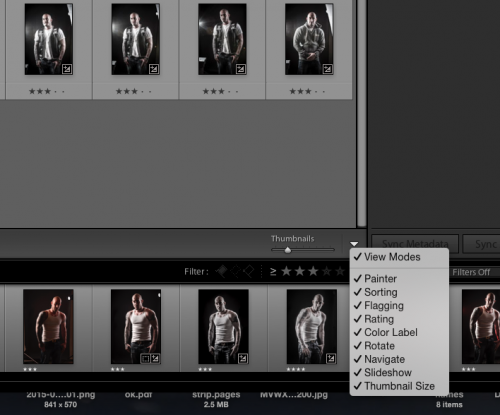
Now, within that toolbar, see the last option, that pulldown arrow? Click on it and you see a bunch of options. You may want to turn those on:

Now your toolbar will have all the tools. Check them out, then disable the  ones you are sure you will not use.

Another option that is often missing is also a very handy one: the filter bar. At the top. You toggle that one by first being in the LIBRARY module (press “G” to go directly to the Grid view, for instance), and then pressing “\” (the backslash key).

(NOTE: In the DEVELOP module, the backslash key \ has a different, but also very useful function: it shows you the “before” view of a picture. In other words, the picture as it was when you imported it, or when you made the virtual copy. The image at the start of its edit history, in other words).

There are many, many other cool little tools in Lightroom. You do not need to use all of them, but I recommend that you use the ones you like; the ones that are good for your way of working. And there is one simple way to learn them: just check out all the menus and try every function. Learn them. Yes, you can!


End notes:

First, I teach Lightroom, and I will help you set up your Lightroom installation: file structure, import methods, backups, disks, and more. Worth every moment of the session I assure you.

Second, Lightroom only takes a few days to learn and is 100% worth your time and effort. Learn it. And as a supplement to my teaching and consulting, also watch my tips videos: see www.youtube.com/user/cameratraining/videos.

Third: just saying: if the subjects interest you, then my e-books (see http://learning.photography) are worth your money also. As is my teaching (see the same site).