
…and together, those two mean you need to do something sometimes.
Here’s a studio shot from just now:

That’s fine. But it appears in Lightroom like this:
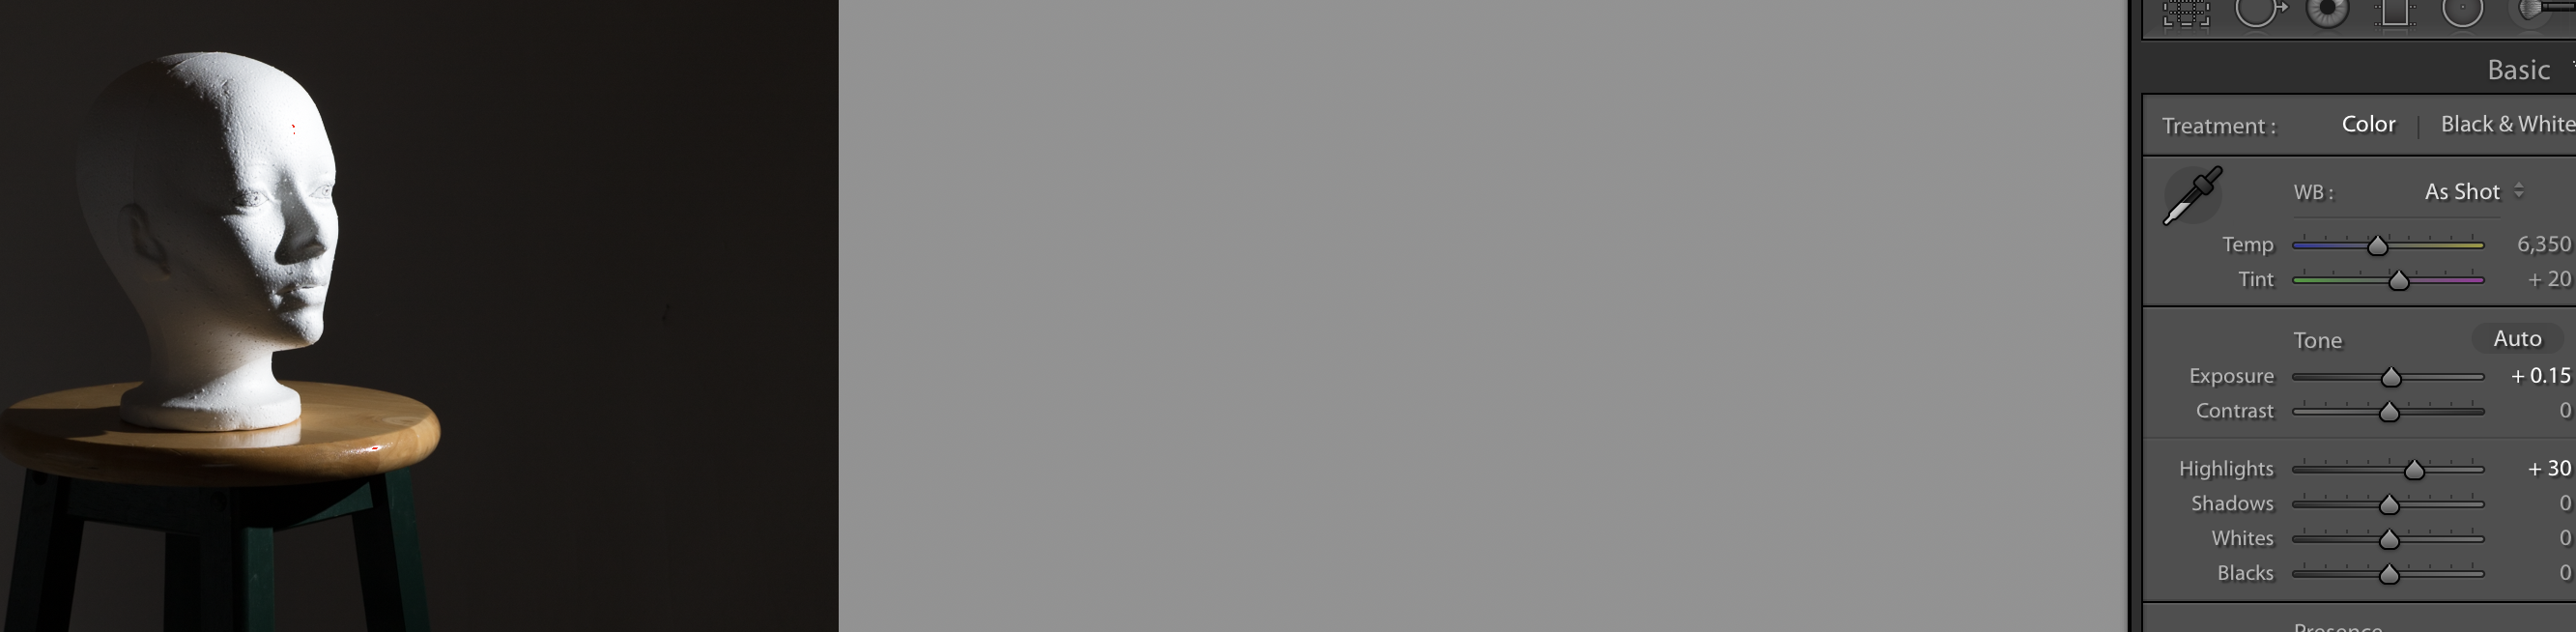
…it only begins to look overexposed when I move “Highlights” to +30! While on the back of the camera it looks much more overexposed.
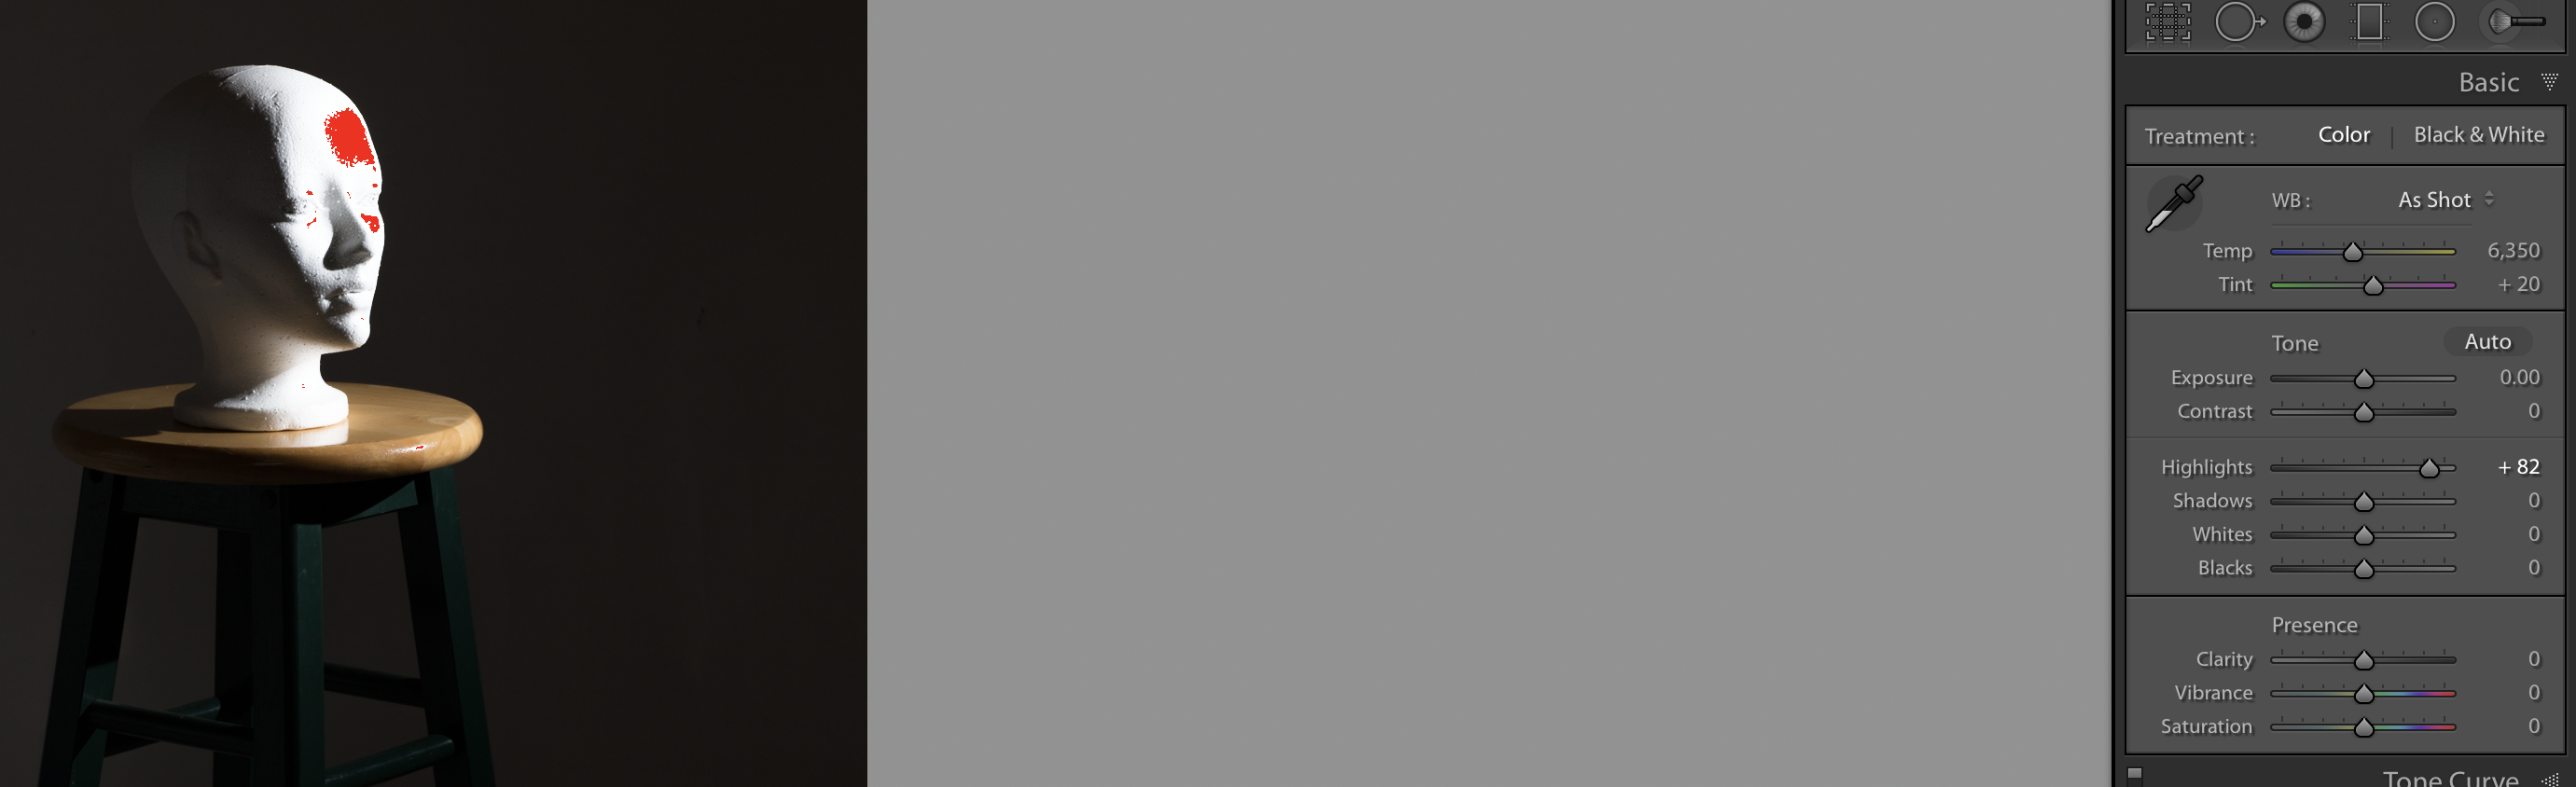
In fact, I have to push “Highlights” to +80 (almost all the way to the right) in order to see what I am seeing on the back of the camera:
Why is this? Because of two phenomena that combine, in a sort of perfect storm:
- A RAW image has a lot more space than a JPG. And what you see on the back of the camera is the built-in JPG preview that every RAW file contains.
- In addition to this, Lightroom “protects” us. If you blow out a background, for example, Lightroom pulls back the brightness to make that background NOT overexposed, as long is there is any room at all in the RAW file.
- So combining these: unless you make it really extreme, when you see blinking on your camera, you will get an image without overexposure on your computer. If you are “overexposing” by a stop on the camera, you will not even notice that on the computer.
That is all very well, unless you want to overexpose. Like in the case of a background that you want to have pure white. Lightroom thinks it knows bette rthan you do, and that, in my opinion, is not a good thing.
Fortunately you can fix it by the method I describe above, or by using the earlier 2010 Camera Calibration process (bottom right panel in the DEVELOP module). Just so you know.
This is one of the things we will talk about at my Lightroom/Computer seminar this Saturday. There is still space: Sign up soon if you are interested: space is strictly limited.