Metering 101

Light meter at “zero” means a good picture. Right?

Wrong.

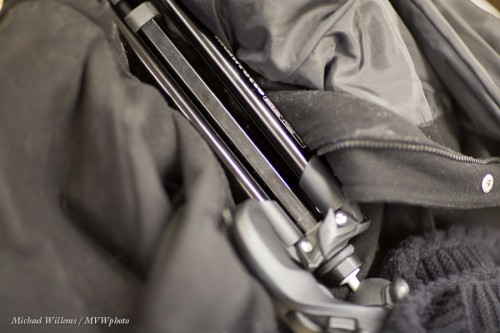
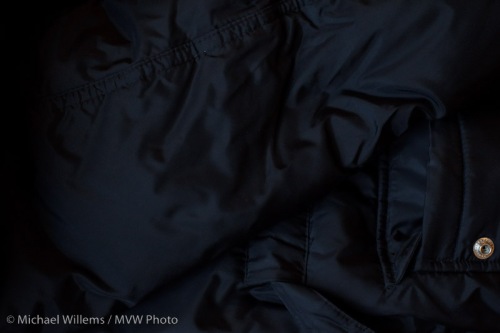
Shoot something black, filling the entire viewfinder with that object, and make sure the light meter points at “zero” as you are pointing at the subject (use the viewfinder!). Take the picture.

You get this:

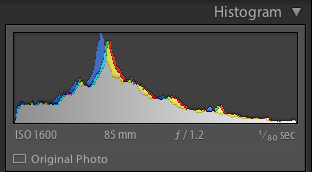
The histogram shows why this is bad:

A histogram of a black object should peak on the left (the dark side).

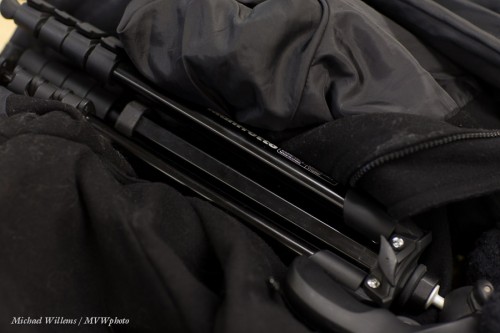
Now do it again, with the light meter pointing at –2 (minus 2):

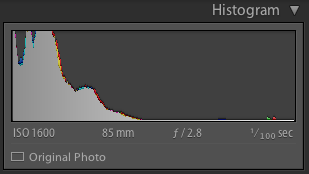
Perfect. Look, the histogram is right for this type of scene:

The moral of this post:

  • “The meter displays zero” does not equal “this will be a good picture”. It merely means “this will be a mid-grey picture, neither dark nor light”.
  • “The meter points to minus” does not equal “this will be a bad picture”. It merely means “this will be a dark picture”.
  • “The meter points to minus” does not equal “this will be a bad picture”. It merely means “this will be a dark picture”.

And there you have it. Now you understand the camera’s built-in light meter.


Exposure metering basics

In the continuing series on flash and its complexities that I started yesterday, time for the next basic subject. And that is “metering” and “exposure compensation” while not using a flash. (Yes, to understand flash you need to first understand non-flash exposure basics. So bear with me in this series.)

What does your light meter do?

When you press down the button half way while pointing at your subject, you activate the light meter – and the camera now does one of two things:

  1. If in manual exposure mode (M), it merely shows you a light meter in the viewfinder. You can now adjust aperture, ISO and/or shutter speed, and when you achieve “meter in the middle” this means “well exposed (if the subject is mid-grey)”.
  2. Or when you are in an automatic mode (P, A/Av or S/Tv), the camera itself sets aperture and/or shutter to make the meter go to the middle. The picture will therefore be well exposed (if the subject is mid-grey).

Let’s look at that qualification: “well exposed (if the subject is mid-grey)”.

  1. Your light meter –  a reflective light meter – is calibrated to give you the “zero” reading when your subject is exposed to look mid-grey, i.e. neither very dark nor very bright. That’s just how it was decided it should work. Because most of the world is like that.
  2. So as long as what you are shooting is neither dark nor bright, all is well. Aim at zero and shoot, and all well.

So what if you are shooting dark or light subjects?

Let’s start with what happens if you are aimed at a dark subject:

  1. Setting the meter to zero gives you a light grey subject – not a black subject!
  2. So you need to somehow make the meter point at minus – say, minus two for a black subject.
  3. That way the subject will not look grey, but darker.
  4. Which is good – because since it is darker, it needs to look darker!

And what if you are aimed at a bright subject?

  1. Setting the meter to zero gives you a light grey subject – not a white subject!
  2. So you need to somehow make the meter point at plus – say, plus two for a totally white subject.
  3. That way the subject will not look grey, but lighter.
  4. Which is good – because since it is lighter, it needs to look lighter!

Your light meter does not know whether you are shooting a coalmine in the dark (total black)  or a snow-hill on a bright day (total white). It cannot know. So you will always need to compensate for this.

How do you adjust?

If you are using manual, you adjust aperture or shutter or ISO until the mater moves to the desired setting. If in an automatic mode like P, Tv/S, or Av/A, you use exposure compensation (“the plus-minus button”) and set that to minus or plus – the camera now adjusts aperture, shutter or ISO.  So the adjustment

Real-life example 1:

Here, a viewfinder-filling black bag with the camera on “P” (or on “M” where we make the meter go to “zero”):
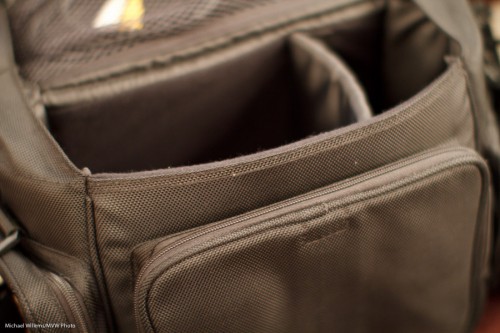
And here, the same viewfinder-filling black bag with the camera on “P” with exposure compensation (the +/- button) set to minus two (or on “M” where we make the meter point at -2):
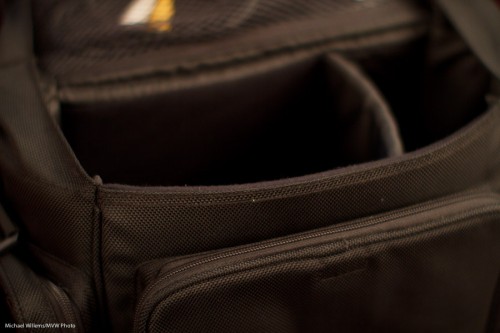
“But making the exposure go to minus two will make the subject all black, Michael”.

Yeah. And that is what we want, since it is black!

Real-life example 2:

Here, a viewfinder-filling white sheet of paper with the camera on “P” (or on “M” where we make the meter go to “zero”):
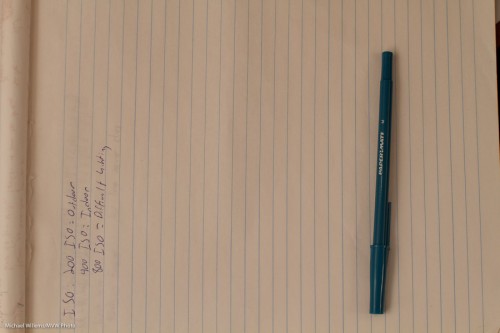
And here, the same viewfinder-filling white sheet of paper with the camera on “P” with exposure compensation (the +/- button) set to plus one (or on “M” where we make the meter point at +1):
“But making the exposure go to plus one will make the subject all bright, Michael”.

Yeah. And that is what we want, since it is bright!

Conclusions:

So, no magic. Just logic. Simple:

  1. If a subject is lighter than average I need to make sure it shows as lighter than average, and if a subject is darker than average I need to make sure it shows as darker than average.
  2. I can make these adjustments in manual mode by changing aperture/shutter so that the meter does not point at zero.
  3. Or I can make these adjustments in automatic modes by using exposure compensation (and now the camera does exactly the same: it adjusts aperture and/or shutter).

In the next while, more – but first, start by understanding this. A good way is to use manual mode for the entire day tomorrow, and only available light.

Have fun!

Beginners’ rules of thumb: Exposure

When shooting in auto modes (P, A/Av, S/Tv etc), you will need to adjust exposure often. How? Quick rules of thumb for you today.

What to adjust. If the non-flashed part of your pic (what’s lit by available light) is too light or too dark, use exposure compensation (the plus/minus symbol). If the flashed part of your picture (what’s mainly lit by your flash)  is too light or too dark, use flash exposure compensation (the plus/minus symbol with a lightning symbol next to it, or adjustable via the menu).

How to adjust. If what you see is too dark, use plus. If what you see is too light, use minus.

How to predict. When shooting a very dark subject or scene (coal mine), you will need minus. When shooting a very light subject or scene (snow scene), you will need plus.


High-key black and white

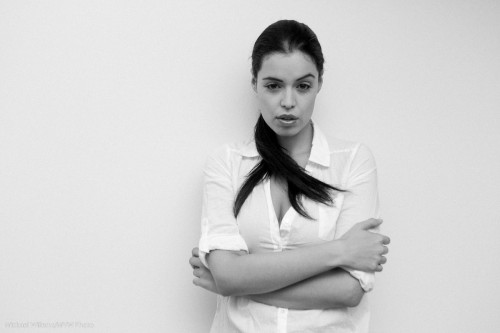
One of my favourite photo styles is this: high-key black and white, against a simple white background. This reduces the clutter to a minimum and starkly emphasizes the subject. Like in this image from the 20 November Mono, Ontario all-day workshop:

Tara, by Michael Willems

What I would say if I were to discuss this:

  • The image screams out “black and white”.
  • Clothes (white)  and wall (white) both disappear. I like the emphasis this gives the subject and the pose.
  • I like the 1970s feeling. I added a little grain to this image in Lightroom to emphasize that.
  • Slight, very slight, soft beautiful shadows are important.
  • Light is simple: one flash bounced behind me.
  • Of course you use exposure compensation and the histogram to check your exposure. But you knew that. Hit the right side (just).

Try a portrait like this! All you need is a white wall, a camera, an on-camera flash, and a model in white.

Confusion reigns…

…but I am here to help you sort it out.

I hear a lot of beginning (and some advanced) students who confuse white balance with exposure.

This confusion is not surprising, since both have something to do with “this picture of a white wall, say, is not white enough”, and they both occur together very often.

So here’s the summary:

  • White balance is about the colour (it ought to perhaps be called “colour balance”).
  • Exposure is about the brightness.

So ask yourself what you mean when you say “that white surface is not white enough”!

  • If it looks too yellow, say, then it is white balance you need to adjust (the WB setting on your camera).
  • If it looks too dark, it is exposure (the +/- setting, “exposure compensation”).

And of course since they occur together,you may well have to do both. Get the colour right first, then the exposure.

Confusion lessened?

Autumn tip

A quick tip for those of you who, like me, are in the part of the world where autumn is coming.

If you want beautiful fall colours, you need to keep two things in mind:

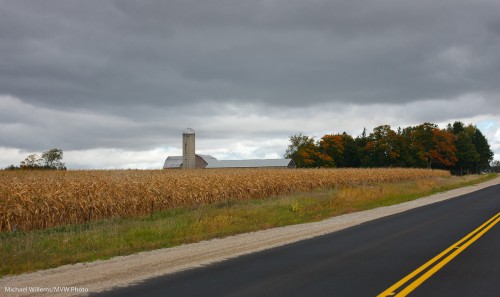
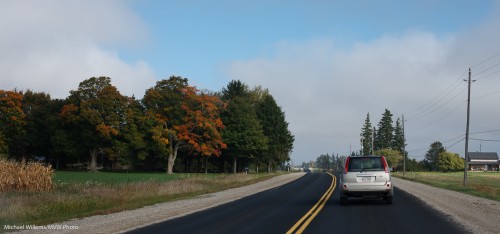
  1. Brightness. Expose properly, and when vegetation is concerned that means expose less than your meter wants. Foliage is dark and you need to tell your camera that. So use exposure compensation as needed – minus 1 stop is not uncommon.
  2. Colour. Be sure to set your camera to the correct white balance. This usually means “daylight” or “cloudy”: the default “auto” (AWB) setting may get rid of the beautiful radiant colours.

And the colours are starting. Here, a couple of shots I shot while on my way to Drumbo this past weekend, to shoot the Drumbo Country Fair. Those colours are on their way:

Fall is coming: Drumbo, Ontario, Sep 2010

Fall is coming: Drumbo, Ontario, Sep 2010

Of course I could not possibly have been shooting this handheld while driving: that would not be allowed in Ontario. Right?

Fall is coming: Drumbo, Ontario, Sep 2010

Fall is coming: Drumbo, Ontario, Sep 2010

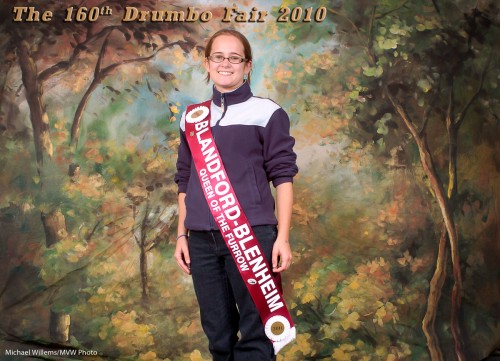
And here’s a snap from what I was shooting:

Drumbo, Queen of the Furrow

Drumbo, Queen of the Furrow

One more tip: for best fall colours, either shoot late in the day (the “golden hour”), or early in the morning (if you can get up, early morning light is just as beautiful, plus there is little wind). And know where the sun is!

Dark

Always carry your camera, even at night.

I just got back from teaching, after an executive portrait shoot this morning.

But I want to talk not about light, but about lack of light. And how when it gets dark, you do not put away your camera. Like I carried mine, just the other night in Montreal:

Montreal, night scene, handheld photo by Michael Willems

Montreal, night scene, handheld (Aug 2010)

Montreal, night scene, handheld photo by Michael Willems

Montreal, Rue Hutchison, Aug 2010

Montreal, "The Shining", handheld photo by Michael Willems

Montreal, "The Shining", handheld

All those were handheld shots.

Tips for those:

  • Hold the camera steady!
  • Use a wide lens, since they are more forgiving of motiong
  • Make it a fast one the fastest you can get (I used a 16-35mm f/2.8 on a full-frame camera);
  • Use a high ISO if handheld (but low if using a tripod);
  • Expose down 1-2 stops (use manual, or use aperture mode and Exposure Compensation “minus”) ;
  • Shoot multiple times to make sure!

If you do it that way, it is easy. And you will be happy with your images.

Black and white

And this time I do not mean “as opposed to colour”. I am repeating myself here, but it is worth doing: a few words about metering light and how your camera does it, and how to fix it when it does a less than stellar job. I get so many questions abut this, it seems worth going over it again.

Let’s analyze this exposure puzzle. It has three elements.

ONE. Your camera’s light meter is a reflective meter. It measures light reflected off your subject. So it does not know how much light is hitting your subject – it only knows how much is reflected. That is one part of the puzzle.

TWO. Your camera also does not know what the subject is. That is the second part of the puzzle.

THREE. Your camera’s job is to:

  1. See how much light there is
  2. Then set aperture, shutter, ISO (or some of those – depending on what exposure mode you are in) to ensure that that observed quantity of light gives you a well-exposed picture: not too bright, not too dark. This is a narrow range of acceptable light on your sensor: a bit too little and it’s underexposed; a tad too much and it’s overexposed. Your camera’s job is to keep the light on your sensor within that range.

That is the third part of the puzzle.

So let’s put them together.

Usually, they go together well and you get a nice picture of whatever you are aiming at. Done.

But when does this not work? When your subject is meant to be dark – because it is. Or when your subject is meant to be bright – because it is.

Exercise. in Program mode “P”), and using no flash, and taking care to fully fill your viewfinder with it, shoot a ski hill. Or a white sheet of paper made to look like one:

Looks grey! Because that is the camera’s job.

Now shoot a coal mine. Or a coat that is as black as one:

What the… that also looks grey!

That is because the camera does not know it is meant to be black. By default, your camera makes everything “in between” in terms of brightness.

Solution. Now find the Exposure Compensation button on your camera. It looks like a “+” and a “-” with a diagonal line separating them. Plus means “turn up the brightness”, minus means “turn down the brightness”. (It does this by varying whatever it is varying of shutter speed, aperture or ISO, but only “more so”). You may have to hold the button while turning a wheel, and you can see what you are doing as a number or as a graph on the top of back of your camera, depending on which camera you have.

Find the control and turn the value up to +2 and re-shoot the ski hill. Now you get:

That’s better. Check the histogram to ensure it is not stuck against the right side (“overexposed”).

Now set the Exposure Compensation to -2 (minus two). Re-shoot the black coat. You get this:

Finally. A black coat!

So now you know:

  • When your picture looks too dark, use +/- set to plus and retake the picture
  • When your picture looks too bright, use +/- set to minus and retake the picture
  • This is most likely to be needed when your subject is very dark (coal mine, black coat, dark night) or very bright (beach, snow, white marble room, piece of paper, person against a white wall).

That is actually quite simple!

Notes:

  • Do not use flash – that’s a separate subject (and it has a separate adjustment)
  • You can also spot meter to a grey subject to avoid the need for exp comp
  • You can use manual and use the displayed meter in the same way (minus mens darker, plus means brighter).

Try it and you should, from now on, have no problem exposing right.

A rose by any other name

I took this “grab-shot” at the Kodiak Gallery the other day with a Canon 7D and 50mm f/1.4 lens:

Canon 7D, 50mm f/1.4 at f/1.4, 1/250th sec, 800 ISO

This shows that with the right lens, you do not need flash. You also do not need a macro lens every time. You can use what you have, if you keep your eyes open.

Also note:

  • The secondary subject blurred in the background
  • I used exposure compensation (+) to ensure the white background showed as white, not gray
  • I am not afraid to go to 800 ISO or beyond to get the right fast shutter speed.
  • I am using off-centre composition, rather than Uncle Fred’s “subject in the middle”

Simple. Just keep your eyes open.

Snow snaps

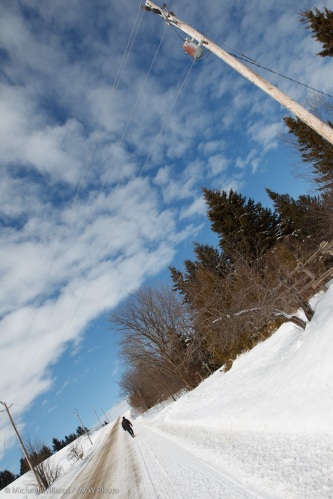
In preparation for an upcoming two-day Country Photography Workshop I am organizing with a colleague on 3+4 April (ask me about it!), I took a few snaps in the snow yesterday with the 1D Mark IV. Interestingly, it meters more accurately than the 1D Mark III: I needed less exposure compensation since even evaluative metering was biased more towards the selected focus point. (This is odd since focus-point tied spot metering works less often).

Can you tell I like wide angles?

Snow tips:

  • Set exposure carefully for most images, emphasizing background saturation. Use a grey card or spot meter off treees, or off the sky, and adjust starting from that.
  • Bring a spare battery.
  • Careful bringing the camera into the house afterward: use a plastic bag.
  • Meter carefully and use the “highlights” view and the histogram to ensure you are not blowing out the snow – but you are getting close.
  • Use flash to light up close objects (see how I did it?)
  • High-speed flash is needed if the time exceeds 1/250th – it can be left on since the camera will only use it when needed – but it will cut effective flash power by at least 50%.
  • It is very hard to see  your images: bring a Hoodman Hood Loupe and let your eyes acclimatise.

One more snap and it’s back to the order of the day:

Again, flash and careful exposure gives it that nice saturated look.