Snow Tips

Snow. The many inches I got here in the last day or two prompt me to write you a quick post about snow pictures. And how to take them safely.

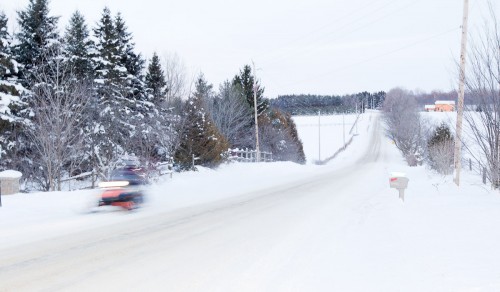
Pics like this:

Snow scene outside the driveway

The things to keep in mind are:

  • Exposure: expose to make the snow bright. If you are using a semi-automatic mode (like A/Av) or an automatic mode like P, you will need to use exposure compensation: usually +1 to +2 stops. Use the histogram to verify.
  • White balance. On a sunny day, snow is blue. Setting your white balance to “daylight” minimizes this problem.
  • Camera safety. When going back inside to where it is warm, your camera will mist up. To avoid this, wrap it inside a tightly closed ziplock or ordinary plastic bag, and let it warm up in there. No condensation!
  • Flare. Use a lens hood to avoid flare.
  • Lens safety. if it is snowing, use a filter on the lens to avoid water getting in.
  • Battery. Carry a spare, because your camera’s battery will not last all that long if it is cold. Put a warm spare in and warm up the cold battery, and you will be fine.

Simple tips that make the difference between missed opportunities and nice pictures.

And yes that is a snowmobile in the picture. Ontario. Snow. Cold.

Snow snaps

In preparation for an upcoming two-day Country Photography Workshop I am organizing with a colleague on 3+4 April (ask me about it!), I took a few snaps in the snow yesterday with the 1D Mark IV. Interestingly, it meters more accurately than the 1D Mark III: I needed less exposure compensation since even evaluative metering was biased more towards the selected focus point. (This is odd since focus-point tied spot metering works less often).

Can you tell I like wide angles?

Snow tips:

  • Set exposure carefully for most images, emphasizing background saturation. Use a grey card or spot meter off treees, or off the sky, and adjust starting from that.
  • Bring a spare battery.
  • Careful bringing the camera into the house afterward: use a plastic bag.
  • Meter carefully and use the “highlights” view and the histogram to ensure you are not blowing out the snow – but you are getting close.
  • Use flash to light up close objects (see how I did it?)
  • High-speed flash is needed if the time exceeds 1/250th – it can be left on since the camera will only use it when needed – but it will cut effective flash power by at least 50%.
  • It is very hard to see  your images: bring a Hoodman Hood Loupe and let your eyes acclimatise.

One more snap and it’s back to the order of the day:

Again, flash and careful exposure gives it that nice saturated look.

Snow

I have a reminder for you of how to expose for snow.

Snow and sand (yes, beaches to a camera look just like snowscapes) are brighter than your average scene.

So to get them to look natural, i.e. to get them to look bright, you need to tell the camera it is looking at a bright scene.

Unless you do this, the scene will look dark.  The camera, by virtue of its reflective light meter technology, tries to make everything look mid-grey (we call this “18% grey”). Like this:

Not bad. But unless you want the dark look for effect, it’s not good either; it was brighter than that outside my second home, the other day.

With +1 stop exposure compensation (that’s the plus/minus button), it looks like this:

And that is better. Your guideline:

  1. Snow should look white, not grey.
  2. The histogram should have a peak (the snow) on the very right, just before the end of the graph.

So use Exposure Compensation, have fun, and dress warmly.

Or if your thing is a beach, don’t dress at all.