Fast lenses, and why again?

I regularly mention that the lens is the most important part of your equipment. Great lenses especially add to your photo-taking capabilities. Now let’s look at one aspect of that greatness again: the “speed” of a lens.

Speed is of course a misnomer. When we say “a fast lens” we simply mean “a lens with a large aperture (low “f-number”). This large aperture lets in a lot of light, which makes it possible to shoot at faster shutter speeds at the same ISO, hence the word “fast”. So a low f-number means you can obtain faster shutter speeds under the same conditions.

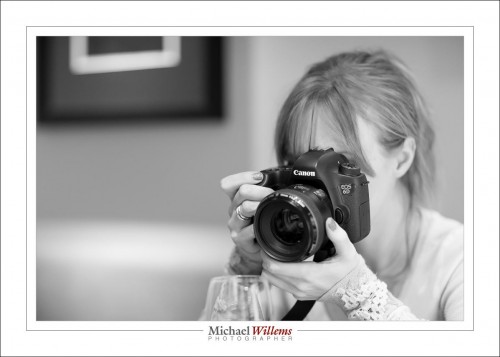
Like the 50mm f/1.2 lens I am selling (sadly; but I bought the 85 f/1.2 and I cannot financially justify keeping both these lenses; and for wedding portraits, the 85 will be more useful).

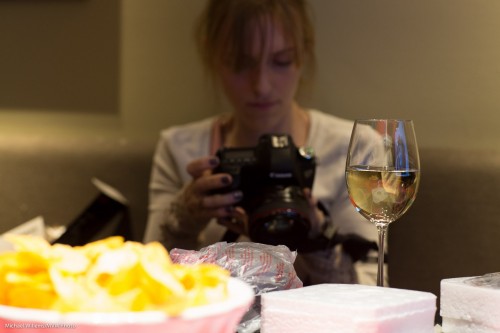
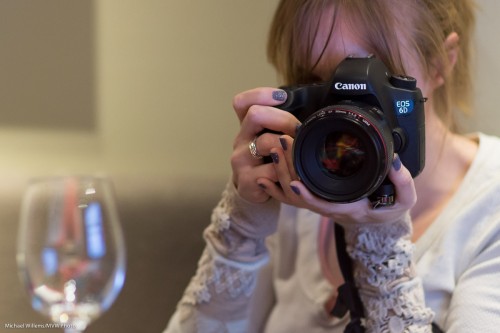
Here’s student Becky with the 50 f/1.2L mounted on her Canon 6D last night:

I was able, by using the large aperture of my own f/1.2 lens, to take that picture at a fast shutter speed, handheld. And I get a blurry foreground and background at the same time,  which helps me to emphasize the subject.

How fast? Let’s look at a real example from last night.

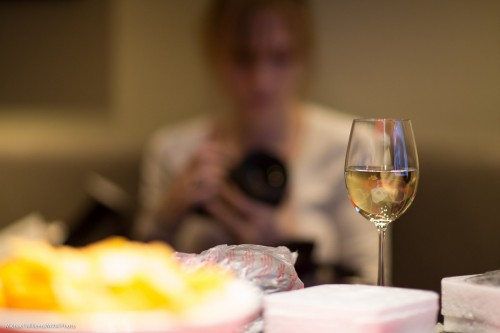
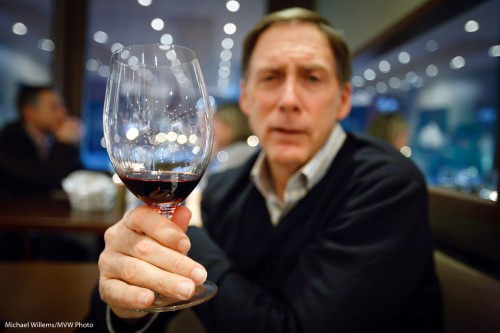
A shot of a glass of wine. That is what I focused on, so that is, of course, sharp:

I shot that at f/4.5, which is typical of the kind of lowest “f-number” that a kit lens would allow you to use. At 1600 ISO, that necessitated a shutter speed of 1/30th second. That is at the limit of what I can hope to do handheld; in fact it is beyond that “rule of thumb” limit, with an 85mm lens. So I am lucky that the shot is sharp. Also, I am lucky that nothing in the photo moved, because pretty much any motion would show, at that slow a shutter speed. And yes, the background and foreground are blurry – but they could be blurrier.

Now the f/1.2 lens, this time wide open at f/1.2:

The “f/1.2” means that:

  1. At the same ISO value, I now needed only 1/320th second shutter speed. I.e. a much faster shutter speed (i.e. less time; shorter time period; all these mean the same thing).  That means I can easily hand-hold, and also I need not be afraid of motion.
  2. The lower f-number also allows me to through both Becky and the chips in the foreground way out of focus. The glass is still sharp (I am, after all, focusing on it!), but the depth of field at this low f-number is extremely shallow; meaning that foreground and background are very blurry indeed.

Now, I do not of course always want shallow depth of field; but the point is, that with a fast lens, I can. And that expands my picture abilities; in a dark evening setting I can shoot handheld without flash, and if I want, I can get extremely blurry backgrounds. And that is one of the reasons that I use an SLR in the first place. And any SLR would do this – it’s the lens, not the camera, that determines these things.

Which is why I am happy to spend on lenses. What’s not to love?

And a good lens lasts decades, both in technical terms and in value. So if you are going to spend, and why not; then spend mainly on lenses.

 

Learn Focal Lengths

One thing that good photographers know is  “what focal lengths do”. There is such as thing as “the right focal length for a picture”, or perhaps better, “the right types of picture for a given focal length”. And a good photographer knows these. The pictures tend to then fall into place.

We all know – I hope – that you do not do a headshot with a 16mm lens. And we all know that landscapes and travel do like that focal length.

But in general, what is appropriate?

It depends. On you and your taste. But there’s often a good range. Look at the following examples – and keep in mind, the lengths I mention are for a full frame camera. If you have a crop camera, divide by 1.5/1.6. So a 35mm lens in my examples would need you to use a 24mm lens on a crop camera.

With that in mind, let’s look at some portraits.

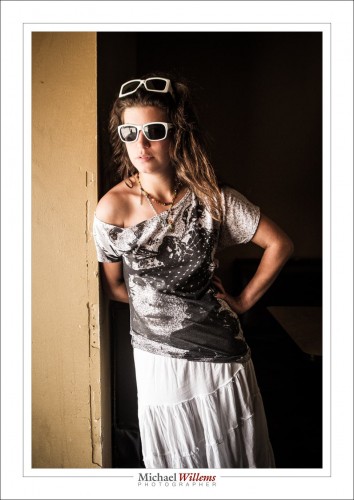
35mm:

50mm:

65mm:

85mm:

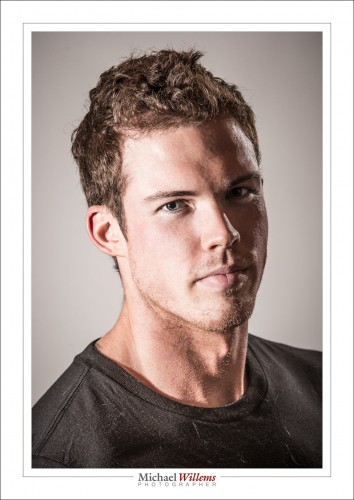
200mm:

Are you beginning to see patterns? Develop your own preferences and “usual lenses” – they probably will not vary much from mine – and you will be much quicker deciding how to shoot what. A prime lens is a great way to learn, by the way. It’s why we love primes.


Another note on primes…

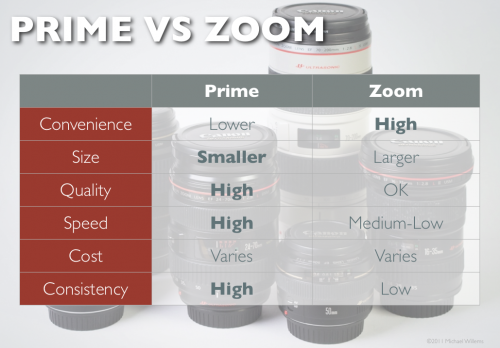
“Why should I buy a prime lens”, I am asked often. The answer is always the same: sharp, small, fast, and consistent. Oh – and fun.

Look at this photo:

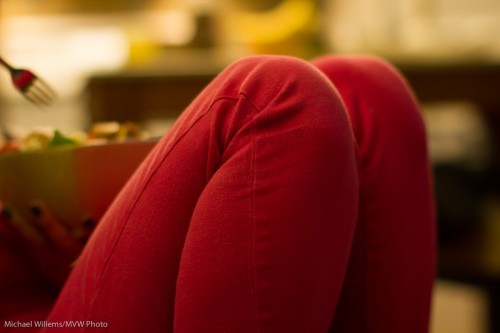
A typical prime shot: 50mm lens on a crop camera (meaning a “real” 80mm). In available light, I used the following settings:

  • Manual exposure mode.
  • 800 ISO
  • 1/80th second shutter speed
  • f/1.6 aperture.

Let’s say I had used a consumer lens: f/5.6 at 50mm. That’s almost four stops slower, so I would have had to use either:

  • A slower shutter, like 1/6th second; meaning a shaky picture;
  • Or 12,000 ISO, meaning a grainy picture;
  • Or a combination, meaning a little of both.

And the background would not have been nice and blurry, and simple.

Even an f/2.8 zoom lens would have meant 1/25th second or 3200 ISO, or a combination. And again, less blurriness.

So in real life available light situations, a fast prime can be invaluable. So you can document everyday moments and tell everyday stories, which are often the best. Here, the storytelling is done by the simple composition, the leaving out of the face, and the fork hovering expectantly.


Prime primer

I teach “Lenses” this afternoon (Saturday) at Vistek in Mississauga before leaving for the Sunday workshop in Timmins, Ont.

So while I am on it, let me see if I can give you some input as to why you might want a prime lens. I have explained before of course (consistency, sharpness, size, wider aperture..) but a picture, well, a picture tells 1,000 words.

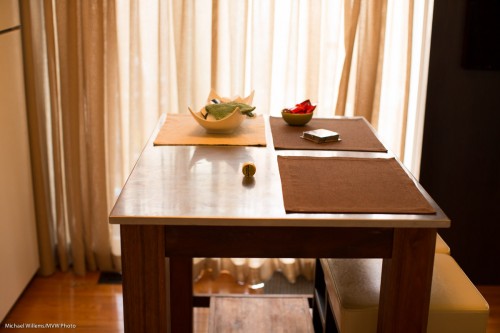
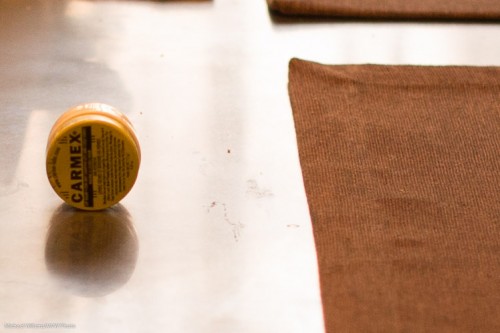
Here’s my kitchen island:

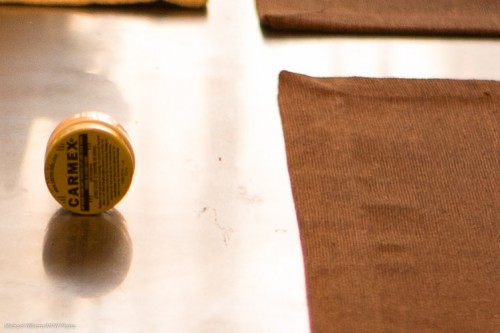
Now let’s look at 1:1 pixels. Straight out of camera, and pixel for pixel; 1/80-th second at 800 ISO.

First, the 24-70 f/2.8 zoom at f/2.8, set to 50mm:

And the 50mm f/1.2 lens, also set to f/2.8:

Both are good. But when you look closely, really closely, especially at the cloth material, you see that the 50 is much sharper.

No surprise, it is stopped down while the 24-70 is wide open. But that is the point, isn’t it? In real life use the prime often gives me sharper pictures.

This fact, and a million others, in the “Lenses” course at Vistek Mississauga (after “Flash”, also a great course, if I say so). See you there perhaps!


Michael’s Top Ten Dicta

Legally speaking, a Dictum is “a statement of opinion or belief considered authoritative though not binding, because of the authority of the person making it”. More generally, it is “a noteworthy statement: as (a) : a formal pronouncement of a principle, proposition, or opinion; (b) : an observation intended or regarded as authoritative.” Google it if you want.

So, assuming you know me and trust my judgement, you may well be interested in my Top Ten Dicta:

  1. Bright pixels are sharp pixels. The more you make your subject bright pixels, the more it will be sharp and crisp. Noise hides in the darkness, like cockroaches. Light your subject and it becomes sharp.
  2. Go wide and get close. Wide angles combined with proximity to something introduces depth and perspective into y our images.
  3. Indoors flash: point your flash up, 45 degrees behind you. This gives you the correct light angle for close-by portraits, like in events.
  4. Indoors flash: Use the “4-4-4″ rule” as your camera setting starting point: Camera on manual, 400 ISO, 1/40th sec, f/4. Then adjust for brighter or darker rooms, to give average ambient exposure of around -2 stop.
  5. Turn baby turn. Feel free to angle your shots whenever you like. Composition, simplifying, energy: whatever your reasons. It’s cool, it’s allowed.
  6. You, and the lens, make the picture. Cameras are cool – I buy a lot of them – but the picture is made by you – even an iPhone can produce cool shots – and more technically, by the lens. A good lens on a cheap body is great. A cheap lens on a good body, not so much.
  7. Go Prime If You Can. Prime lenses lose on convenience but win in every other way. I love my 35mm f/1.4 lens.
  8. Use off-centre composition and the rule of thirds in your compositions.
  9. Get close: fill the frame. This so often makes your images better, it is worth stressing as a Dictum.
  10. Simplify! Ask yourself: is everything in my image the subject or the supporting background? If not, get rid of it. A circle has 360 degrees.

That’s my wisdom in a nutshell. Do you know, understand, feel, and above all use all ten principles above?


Learn about these and much more in one of my training or private coaching sessions. There is 10% December Discount – this is a great time to consider buying a friend a session with me: buy a Gift Certificate for the holiday season!

Cannot.

You cannot shoot a portrait handheld at 1/15th second. And you cannot shoot a portrait at f/1.4.

Right?

Portrait at f/1.4 (Photo: Michael Willems)

So that was shot as follows:

  • Canon 1D Mk4
  • 35mm prime lens (equivalent, therefore, to around 45mm)
  • TTL Flash (580EX) bounced 45 degrees up, behind me
  • Flash equipped with a half CTO gel; white balance set to “Tungsten”
  • 1/15th second at f/1.4, ISO 400

Wonderful background bokeh, no? And don’t you love the vignetting that this lens gives me wide open?

Of course, if you shoot at f/1.4, be careful that what you need in focus is in one plain (the camera and the face, here). And at 1/15th, handhold carefully and use fl;ash (1/1000th) to light your subjext.

So yes you can do it, and it’s probably best to sometimes push boundaries a little, and let go of rules of thumb, useful as they may generally be.


Prime primer.

Today, I would like to share another note on prime lenses. An oft-recurring theme here at Speedlighter.ca.

“Prime” lenses, as you know, are what we call non-adjustable lenses, i.e. non-zoom lenses. A zoom lens has varying focal length (e.g. “16-35mm” or “70-200mm”); a prime lens has just one focal length (e.g. “50mm”).

So remind me – why would I want prime lenses, again? Surely zoom is much more convenient?

Yes. As I wrote before, a zoom lens is indeed more convenient. But it is not always better. In fact I shoot with primes as often as I can, for good reasons. Some of those reasons here:

A prime lens is often smaller and lighter, and almost always better quality. Primes are usually faster (they can go to a lower f-number, i.e. they have a larger aperture).

But two benefits are often neglected, and yet these are very important.

When you are learning, the prime lens teaches you the relationship between aperture and depth of field very well. You may recall from the post the other day that aperture, lens focal length and distance to subject all affect the depth of field in a picture. With a zoom lens, it is hard to get a handle on this, since you are changing one of those variables with every shot. With a prime, you really come to feel this relationship.

When you are shooting, a prime enforces consistence and discipline. Instead of every shot being different in look and feel from the last one, you get a “style” for the shoot. Your distance to the subject will be more consistent. Your settings for flash compensation and exposure are more consistent and hence, easier to handle.

And that is why I love to shoot with my three primes, whenever I can.

So yesterday, reader Leaman, responding to a previous post on this subject, asked:

Going through some of your older blogs and came across this post hoping to get some advice.

I have been thinking about getting a second lens for my Rebel series camera and am torn between primes and zooms. Specifically, I was looking at the EF-S 17-55 f.28 zoom vs getting both the 24mm f2.8 and 35mm f2.0 primes. I already own the 50mm f1.4.

Assuming that cost is not a factor, could you give me your thoughts? From my readings in your event photography shoots, you typically use a zoom as a walkaround and swap for a faster lens as needed.

Considering the 24 and 35 primes that I’m looking at are no faster/slightly faster than the zoom lens, would it make sense still to get the zoom lens? The only thing I think the zoom has in benefit over the primes is the versatility of less lens swapping. From reading my reviews (maybe you have your own reviews from experience as well) the build and picture quality between the 3 are not that far off from each other.

Well, first off, I would say that a whole stop faster, since you are talking about one f/2.0 lens, is more than just slightly. That stop can make all the difference, especially with side lenses where it can be tough to get selective depth of field. And for the 24mm lens, the other benefits still hold.

When shooting an event, I regularly use a zoom, true; but there are many situations where I do not. Low-light events, for example. And the 35mm prime lens is my favourite, for the reasons outlined above. But at the longer end, zoom is more important – so I often use 35mm prime plus 70-200mm zoom.

So Leaman, while indeed there is not one right or wrong answer, and it depends on what you shoot – but without knowing more, personally I would recommend the primes.


Primes. Why?

Today I would once again like to chat for a moment about using prime lenses. This is a regularly recurring theme here at Speedlighter, because primes are beneficial in many ways.

50mm prime lens, set to f/1.2

A prime lens is a lens that does not zoom in or out. It is fixed. Like a 35mm lens, or a 50mm lens, rather than a 17-55 or 70-2oo zoom lens.

So that is a drawback, right? Zooming is more convenient than walking back and forth or than changing lenses all the time.

But prime lenses have many benefits, three of which are pretty well-known.

    1. They are usually sharper than zoom lenses, and often have less distortion around the edges.
    2. They are usually faster (wider aperture,lower “f-number”), meaning blurrier backgrounds and better low-light performance.
    3. They are often smaller and lighter than zoom lenses.

      There are, however, three other benefits, and these may surprise you.

        1. They enforce consistency in a shoot. You do not have a different look and feel for every image!
        2. “Work it out once during a shoot, you have worked it out for all other shots too”. When you zoom, each shot works differently. Use a prime, this is more predictable. Hands up everyone who likes “predictable”?
        3. Primes really teach you about depth of field, shutter speed, and how these work together. Using a zoom lens it can be very difficult to get a grip on how all these factors work together. Using a prime, you get to really understand how aperture, depth-of-field, distance, ISO, and shutter all work harmoniously together – an understanding every photographer needs.

          This is why I shoot with 50mm and 35mm prime lenses as often as I can.

          35mm prime lens

          35mm prime lens

          35mm prime lens

          35mm prime lens

          50mm lens

          50mm prime lens

          If you can, get yourself at least a 50mm prime lens.

          (Note that the examples here were shot on a full-frame camera, so 50 means 50. If you had a crop camera, like a Digital Rebel or a D90, you would want to use 24mm and 35mm lenses where I use 35mm and 50mm lenses.)

          Prime primer

          Why do I shoot events with a prime lens?

          My favourite lens is the 35mm f/1.4 lens on my full-frame camera.

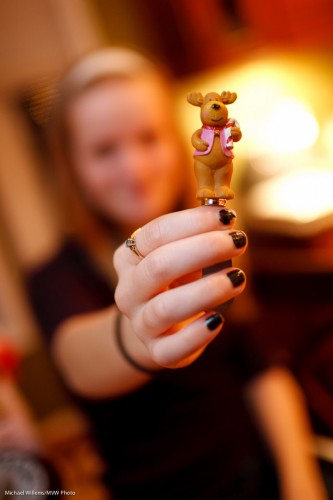
          Party figurine at f/1.4

          I like primes because they:

          1. Are often smaller and lighter than zoom lenses.
          2. Are generally sharper as well.
          3. Are faster (meaning they have a lower f-number/bigger aperture) so that (a)  I can shoot in darker surroundings.
          4. Are faster (meaning they have a lower f-number/bigger aperture) so that (b) I can blur backgrounds more dramatically.
          5. Force me to use one view angle, meaning that (a) both my pictures and settings are more consistent.
          6. Force me to use one view angle, meaning that (b) I need to tilt and move more rather than zoom to achieve the right composition.

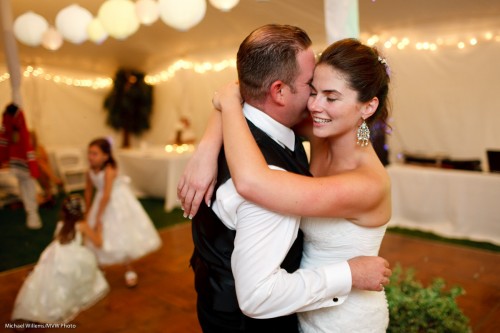
          I love the 35 because it is also the perfect length for “grip and grin” party pictures.

          For beginners, there is an additional huge benefit: by not zooming but using the same focal length, you get much more quickly to a deeper understanding of the relationship between aperture, focal length and depth of field.

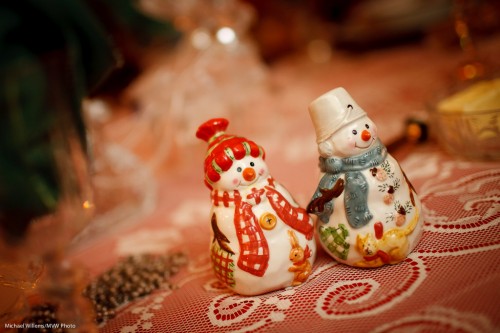
          Happy Xmas figurines

          There is a lot of benefit there. So I shot two events in the last two nights, and you can be sure my 1Ds camera was my main camera, and it was fitted with the 35mm prime lens.

          (As I have pointed our here before, if you have a crop camera, like a D90, Rebel, or 60D, you will want a 24mm lens instead, since 24 x 1.5 = 36).

          Cheers.

          The other day, before a course I taught, here’s a friend and student holding out his glass of Merlot – no, it was not a Merlot, it was an Italian red:

          Bruce holding glass

          Isn’t that a nice shot?

          So here are a few notes, numbered for your convenience, to help you take the same.

            1. As I point out time and time again, a shot that “makes the viewer put it together” is often great.
            2. A blurry person is often also appreciated by… the person, if they are shy. When people (ladies and teenagers, often!) say a panicked “no pictures”, try this.
            3. I used a 16-35 mm lens set to 30mm on a full frame camera, set to f/2.8.  On a crop camera, you could use a 24mm prime lens, for example. On my 1Ds I could also have used the 35mm prime. This would have been my favourite lens for this shot.
            4. The wide angle gives you those wonderful converging lines.
            5. The wide open aperture of f/2.8 enabled me to shoot at 1/15th of a second using available light – at 3200 ISO.
            6. The blur also gives me a simple image with no distractions.
            7. It is very important that the lens is wide open. Look at the out-of-focus lights. They are circles. If the lens had been partly stopped down (to f/3.2, or f/4, say) you would have seen octagons or hexagons instead of circles.
            8. And yes, you can shoot at 3200 ISO with a good camera. Point-and-shoots will not do this, even with Lightroom noise reduction.
            9. That speed of 1/15th second is still a bit slow. You could easily get motion blur. So I took 3 or 4 pictures, of which this one was razor sharp.
            10. I focused carefully, using one focus point, on the glass.
            11. I had the subject move his glass forward, and I moved as close as the camera would let me focus. This makes the background go blurrier.
            12. Finally, I had to get the white balance right in post. This is very important with available light shots, which can otherwise take on an orange/yellow cast.

              A little work – some thought goes into even a simple snap. But do it, think, and you get nice shots where you would not have expected them. And that is what sets you apart from Uncle Fred.