6D

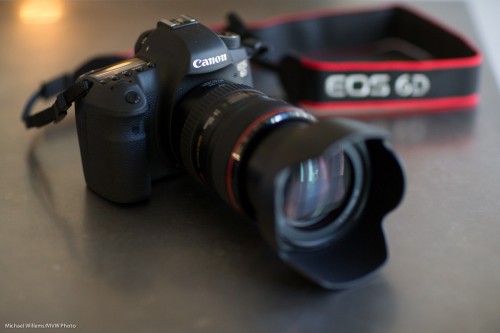
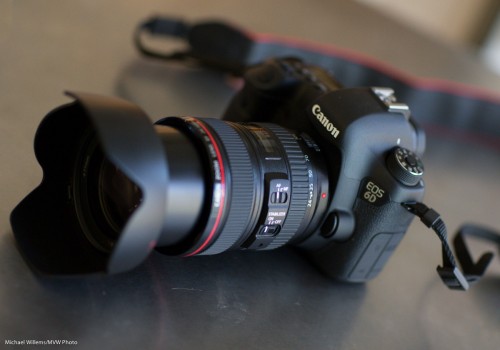
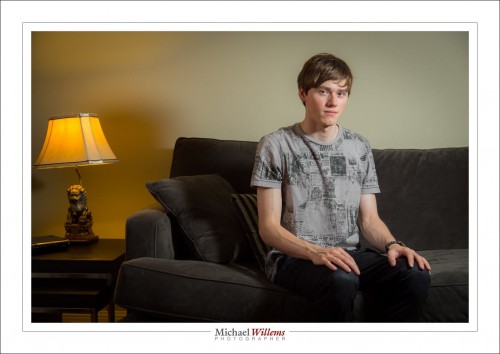
My oldest son Jason uses a Canon 6D with 24-104 f/4L lens, and I had the chance this weekend to play with it a little. Here’s a portrait I just made, of Jason, with the 6D and that lens:

Here my first impressions: Love it!

OK, that’s that.

But wait.. there’s more!

The 6D is basically a low-end full-frame camera. I have always said that full frame will prevail (the sensor is the same size as 35mm film, meaning bright, large, viewfinders, great high ISO performance, and very shallow DOF (“blurry backgrounds”) when you need. Full frame is the way to go, and the 6D does not disappoint.

So why is it “low end”? It isn’t, really. Of course in order to not cannibalize the 5D and 7D sales, Canon left off some things that the 7D, 5D, and so on do have. For instance, there are fewer functions available via buttons (White Balance and Flash Exposure Compensation are two notable missing functions that now need menu or quick menu access).  The frame rate is lower. There are no dual cards slots. The focus system has fewer spots than the 5D, 7D or 1D series.

Do these matter? Not really. I could live without them. This camera looks and feels great; the shutter is quiet even without the “quiet mode” engaged; build quality and sealing are good: I would be delighted with this camera.

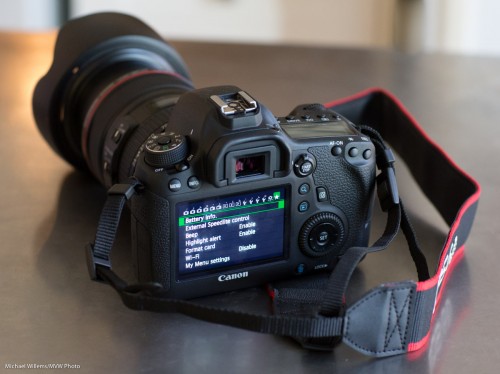
There are many pro features included that I had expected Canon to leave out. Lens adjustment, copyright info;  all these are there. There are even all-new functions like built-in GPS and a pretty good working WiFi mode. The mode button locks. The Quick menu is the same as on the 7D, 5D3, and 1-series. (TIP: in this quick menu, set the joystick to move focus point without further button presses, and invert Av/Tv wheels in M mode).

Minuses? Well, for me these are minor:

  • The menus are not getting clearer (getting rid of the colours is not very clever).
  • The language in some of the new menus is atrocious (after setting copyright info, for instance, instead of a simple “OK”, I need to press MENU, whereupon I see “[OK] has been selected. The settings screen will close after saving the text entered”, then a choice of  “Cancel” or “OK”.  Huh?
  • White balance and Flash Exposure Compensation (“FEC”) are only available via the quick menu. Of course for FEC you can use the flash itself.
  • The viewfinder is, I think, a 97% viewfinder, not a 100% viewfinder
  • We have the traditional 9 AF points in a diamond, rather than the 7D or 1D’s excellent AF system.

But as said, these are minor, and the pluses mentioned outweigh them easily.  Amazing camera – don’t we love the free market? Thank you, Nikon and Canon, for engaging in this eternal great arms race. I would be delighted to have a 6D as a second camera when shooting anything; or as my only camera if I were on a budget and could not afford a 5D3 or 1Dx. Great camera, right at the right time.

 

A simple lighting setup?

What one person finds complicated, another finds simple.

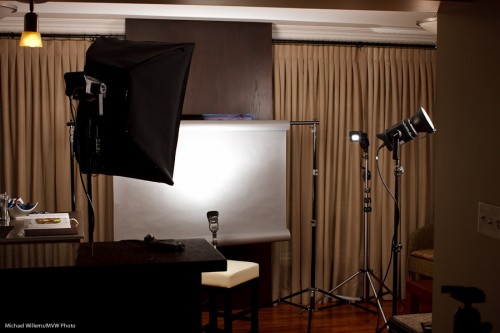
And vice versa. A friend who visited the other night reminded me of this, when I talked about the simple four-flash light setup I was using for a headshot:

And as he said that, I realized that perhaps it’s not simple.

But if you want to take portraits, then it should be. In other words, without knowing how to do a “traditional” portrait setup, it is hard to do creative portraits. No, that does not mean you need to make all portraits traditional – you can do great stuff with one off-camera speedlight and a grid.

But you need to know how a traditional portrait is made. Which is with:

  1. A backdrop (paper roll, here).
  2. A main, or “key” light, in this case a Bowens strobe with a softbox.
  3. A fill light (Bowens strobe with umbrella, in this case).
  4. A hair light (speedlight with Honl Photo grid and egg yolk yellow gel).
  5. A background light (speedlight with Honl Photo blue-green gel).
  6. A way to drive them: Here, I used one strobe and two speedlights fired by pocketwizards; one strobe by the light-sensitive cell.
  7. Metering: I used light meter to arrive at f/9.0 at 100 ISO and 1/200th second.
  8. Ratios: I set the fill two stops darker than the key. And the hair and background light by trial and error (I got them right first time – done it before).

A note about those gels: colour makes a difference. I love the blue-green gel on the background, to contrast with the red hair – contrast is good. That’s why the butcher uses green plastic between the red meat – to make it look redder. (Oh wait – butcher? We buy meat at the supermarket now, in neat little packages. Dumb me.)

Anyhow – parsing makes things simpler. If you are faced with a complex situation, parse it, i.e. take it apart, one thing at a time. Analyse each layer until you understand it, then go on to the next layer. And before you know it, you will be saying “that’s simple”.

That’s what you learn when I teach you: how to make complex situations simple by understanding the elements, then building on those. Deductive learning, if you will.

And what does the setup above produce? Portraits like this:

Headshot (Photo: Michael Willems)

(Canon 7D at f/9.0, 1/200th sec, 100 ISO)

A plug, if I may: if you, too, need an updated headshot, and live in the Greater Toronto Area, do call me. For Facebook, your resume, LinkedIn, or your web site: a good headshot helps, and Headshots Specials are on during the month of September!


“One step at a time” lighting technique

You have heard me say it many times: “bright pixels are sharp pixels”.

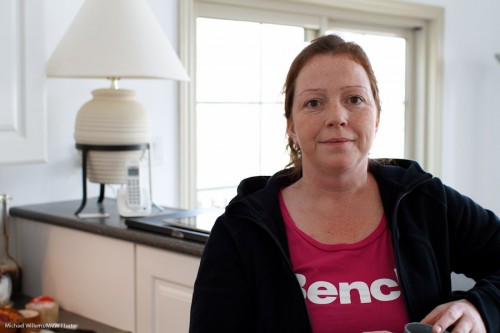
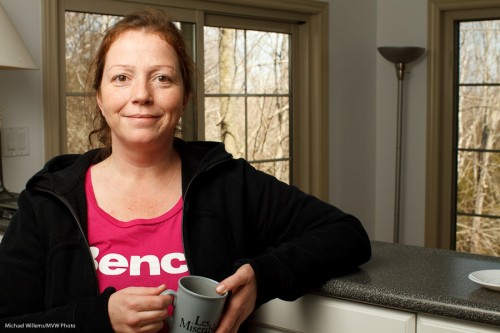
Let’s say you want a picture of a lady. Just let’s say that.

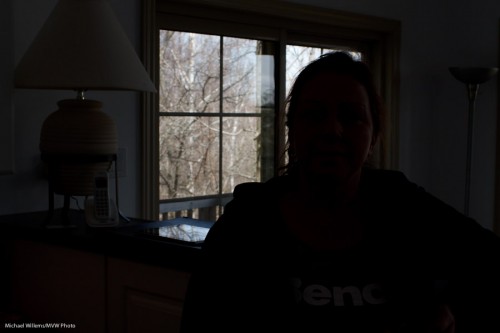
So then you put a lady by the counter. Because there’s a bright background behind her, and you know your camera, you use Exposure Compensation to avoid her turning into a silhouette. I used a Canon 7D with a 35mm prime lens. And hey presto, here’s the snap – and that is all it is, a snap:

The background is now too bright, and the person is “dark pixels”, meaning the picture misses that crisp sharpness you were after.

So now let’s take it in steps.

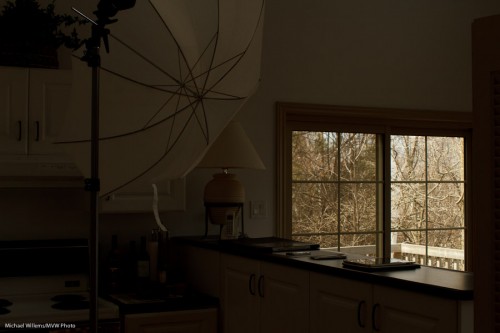
First, decrease the exposure to get the background right. Use manual, or use exposure compensation (minus!). In my case, it was manual exposure mode, 200 ISO, and 1/200th second at f/8, which gave me this (and that should not be a surprise to those of you who know the “sunny sixteen rule”):

Better – for the background. Now we have a nice dark background, and we can see the trees, and so on.

Now the next step: to light up the foreground!

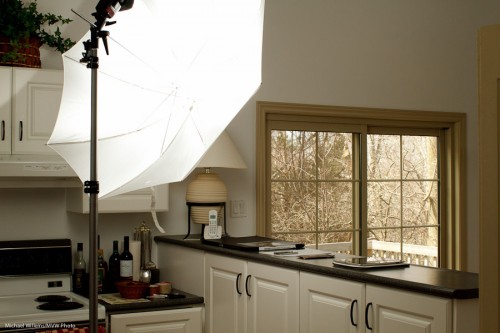
Flash is evidently called for. So I used a light stand with a flash-and-umbrella mount on top, with a simple 430EX flash on it, shooting through an umbrella:

Now I do the following:

  1. I set the flash to “slave” mode (“remote” on Nikon”)
  2. If I have a 7D, or a 60D, or a Nikon, I use the popup flash to fire that remote flash in TTL mode. If I have another Canon, I use a 580EX on my camera to fire the remote flash.
  3. In both cases, I ensure that the on-camera flash (popup or 580) is disabled, other than sending commands.
  4. Since the background is white, and I am using TTL rather than manual flash, I use flash compensation, +2/3 stops.
  5. I set my White Balance to “flash”.

And now when I fire, the umbrella lights up:

Which, finally, once we ask the lady to stand by the counter again, leads to this shot:

(Thanks for being the patient model, Lita!)

I have now achieved what I wanted: Lita is “bright pixels”, and the background is nice and colourful. Other than explaining, this all took just a few seconds, of course.

The technique above is just one of the many things students learn on my Flash courses. The last Mono, Ontario course ever is “Creative Lighting” with Joseph Marranca, on April 23rd – and there are only a few places left. Just saying!

Classic Portraits

Here’s one tip for classic portraits: you can use classic backgrounds.

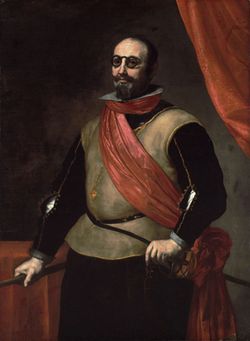
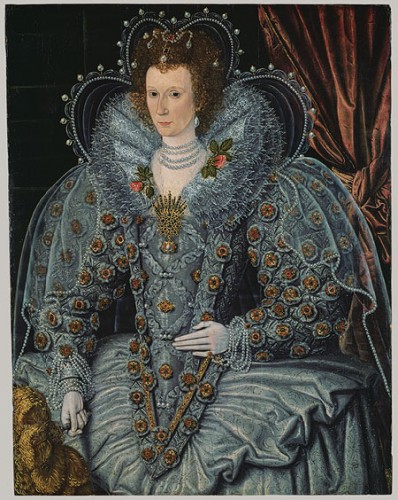
In the 17th century, that meant an elegant drape behind the subject, to provide:

  1. Nice texture;
  2. Elegance;
  3. A sign of wealth and comfort;
  4. A nice curve.

Somewhat like this:

1630 - portrait

You do wonder how people walked around in those Halloween costumes. But anyway, back to backdrops. Why not do that today?

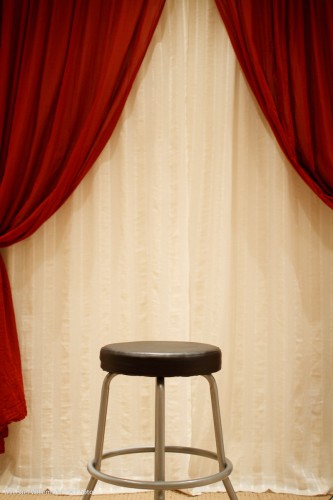
My student Melony built this in her home studio.

Home Studio Backdrop System

Against a wall, two curtain rods: the back one with white curtain hanging from it, and the front one with red curtain. Both operable independently so you can open or close either or both. Easy, and it is not in the way of normal use of the room.

And with proper, light and white balance, this results in portraits like this:

Student Melony in home studio

That kind of setting is very suitable for family portraits. Even in 2010. Many times, I much prefer this to a standard white or black backdrop, or to a muslin.

I might even say especially in 2010. Tip: go to an art museum if you want to see great portraits.

How did we light that portrait?

  1. A softbox to camera left
  2. A fill light behind me to camera right

Questions?

  • Why a softbox? Because it does not spill light everywhere, like an umbrella. Umbrella = safe; softbox = more controllable, and hence more for art.
  • Why the fill light? Because without it, even in a small studio, the non-lit side of your subject can get a bit dark.
  • And if the light is too bright even at the lowest setting? Move it back.
  • Could we have used a reflector instead of a fill light? Absolutely.
  • But will you sometimes want a roll of paper for a neutral, simple background? Of course. Having a drape does not mean you have to use it every time.
  • What kind of lens were you using? A prime (fixed) 35mm lens on a crop camera (the Canon 7D). That means effectively a 50mm lens, which is perfect for half body portraits like this.

So, a classic portrait does not have to be complicated: a few simple tools and you have great options.

7D or 60D?

My friend and student Ed asked (and this is the abbreviated version, his question was more nuanced): “should I buy a Canon 60D or a 7D to replace my Digital Rebel”?

Because this type of question comes up often – one camera versus another one, and use the difference for lenses – like “a D90 plus a lens versus a D300 without one” – I thought I would share my answer here. It may give you some ideas as to the factors that affect a difficult choice like this.

These are both great cameras. They both have the same sensor and the same video.

The 7D does not have the cool articulating mirror, true, but it has other advantages that made me buy one:

  • The 7D has a titanium body (60D is plastic)
  • Weatherproofing.
  • A much better, entirely new focusing system.
  • Better controls (e.g. a switch for video/live view selection; more controls accessible via a switch rather than a menu).
  • More customization options
  • Better viewfinder (100%)
  • More settings in video (e.g. the option to use Av mode)
  • Faster: Two processors rather than the 60D’s one means that you get 8 frames per second when shooting sport. That’s FAST!

Clearly, there is no good or bad – both good. But

  • If you want a sturdier, weatherproofed camera with the latest focus system (more points is good: you will only use one, but you have more to choose from for that one, in a bigger area), and if you shoot sports, then the 7D for sure.
  • But since lenses are more important than cameras for the image quality, if quality is important and the other factors are less so, then go for a cheaper camera and better lenses.

As said: either is good.  But I hope this brief discussion shows there is no clear winner in these things, since the factors that go into your decision are multifaceted and complicated.

Nature close up

Nature can be beautiful, as in the snap I made in downtown Toronto yesterday afternoon:

Bird, Fountain and Flowers (Toronto, 29 August) - photo by Michael Willems

Bird, Fountain and Flowers (Toronto, 29 August)

Sometimes, as in this example, nature is best seen close up; sometimes better using wide angles.

That is the kind of thing we will be going over in the upcoming full-day Nature Walk workshop, which, take note, has now been brought forward to 11 September. It is also one of the subjects I go through in the Henry’s “Creative Urban Photography” half day walkaround I do in Oakville.

Choosing the right angle is a very important part of making (not “taking”!) a photo, and it is one of many subjects covered.

Oh, the photo? A 70-200mm f/2.8L lens, set to f/4 (I wanted the bird to be sharp, and these birds never sit still for more than a moment). At 200 ISO, that gave me 1/250th second. I used the Canon 7D camera, because its 1/6 crop factor gave me a longer reach (the 200mm effectively became 320m).

Colour has to be real

Right?

Um, no, of course not: colour is a tool for you to use in your artistic endeavors.

And colour can be anything you like.

A few nights ago, I though I would see how long it would take me to recreate a lighting setup that my friend Dave Honl (yes, he of the excellent Honl Photo modifiers) did recently. So I looked at his shot and put it together the same way he shot it, in exactly 20 minutes:

Fun with gels, Photo Michael Willems

Fun with gels

That is including:

  • Setting up four light stands.
  • Connecting four flashes (3x 430EX, 1x 580EX) to Pocketwizards using Flashzebra cables.
  • Mounting these on the light stands using ball heads etc.
  • Equipping the key light with a 1/4″ grid and an Egg Yolk Yellow gel.
  • Equipping the fill light with a 1/4″ grid and a Follies Pink gel.
  • Equipping the hair light with a small snoot and a Steel Green gel.
  • Equipping the background light with a long snoot and a Rose Purple gel.
  • Setting the power levels correctly (by trial and error, combined with histogram: key light = 1/4 power, fill=1/8, hair=1/8, background=1/16).
  • Setting the camera up correctly (I used the 7D and set it to manual, 100ISO, 1/125th, f/6.3).

Huh? Egg Yolk Yellow, a crazy bright colour, to light the face? Are we crazy?

No, just having fun. Yes, of course Dave could have made his shot using no colour. Here’s what the same shot looks like without the gels. (Of course I switched the camera to an aperture one stop tighter, namely f/9, to compensate for the extra light once I removed the gels):

Grids and snoots, photo Michael Willems

Grids and snoots

Yeah, nice, and appropriate for a corporate head shot. But compared to the previous, it is kinda boring, no? So next time you shoot someone, unless they are a law firm executive, you might have fun and try some colour. You don’t need to go crazy and use four colours, but a splash here and there can really help your picture come alive.

By the way, what was the colour of the backdrop?

White.

Remember the following equation:

White – light = black

Similarly, in practice, black + enough light = white.

And finally, a real person: my son Daniel (“sigh, not again, Dad”):

Daniel, photo Michael Willems

Daniel in colour

But here’s the thing. After seeing it, he grinned and said “Rad.”. That‘s a first!


Can you use a Canon 7D at high ISO?

Yes you can. Especially when you use Lightroom 3 noise reduction.

I want to show you this picture again – a repeat, but now with full sized crops and re-edited with Lightroom 3’s magic noise cancellation.

Here is the cat, shot with my 7D and a 50mm lens set to f/2, at 3200 ISO. And.. pushed 1.67 stops.

Meaning I underexposed, and increased exposure on the computer. This results in the worst noise you will ever see, much worse than you will see when using the camera properly.

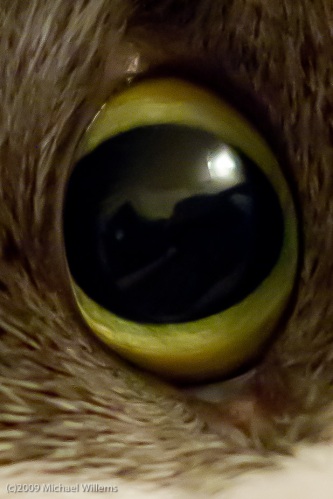
Here is a detail from it, in the original size crop with no noise cancellation. Click to see it at real size.

Cat's eye with noise, shot by Michael Willems at 3200 using a Canon 7D

Cat's eye with noise

Now we apply 90% noise reduction. Magic:

Cat's eye with noise reduction, shot by Michael Willems at 3200 using a Canon 7D

Cat's eye with noise reduction

The finished picture:

Cat with noise reduction, shot by Michael Willems at 3200 using a Canon 7D

Cat with noise reduction

So do not be afraid of high ISO when you need it. It’s fine. Relax.

Focus where you want.

…where you want, I mean. Not where the camera wants. So as a tip for beginners and reminder for others, a few words about how to focus.

When you look through your viewfinder, you see focus areas, also known as focus points. Depending on your camera there are three, five, seven, nine, or even 11 of 45 of them.

When you press the shutter button half way, the camera indicates one or more of these by flashing them; then it beeps. As long as you hold your finger on the shutter button, these selected focus points stay active. Meaning that when you press down, that’s where the camera will focus.

How does it select which points to use?

It looks at all the focus points, and selects those that are on the closest subject. That’s how. So you’ll get this:

And therein lies the problem. What if you want not my hands in focus, but my face? Or what if you are shooting a relative in the forest and you keep getting that closest branch in focus rather than the relative?

That’s why you can disable this automatic selection of focus points.  And most people do most of the time. Ask a pro how many focus points he or she is using and the answer is almost always “one”.

Then you can:

  1. Select a suitable focus point
  2. Aim that one point at your subject
  3. Press half way down until your focus points locks and the camera beeps
  4. Hold your finger on the shutter, do not let go
  5. Recompose if necessary
  6. Press down and take the picture.

Q: In a portrait, what really needs to be sharp?

A: The subject’s closest eye. The rest is optional.

My student yesterday in a Henry’s Canon 7D class, taken with the 7D with 35mm f/1.4 lens using available light and, um, a TV:

Advanced users, did you know the following:

  • Focus selection is done in areas that are actually wider than the indicated focus spots.
  • The centre spot is the most sensitive.
  • The faster your lens (low F-number), the better it works.
  • Focus squares detect lines. The centre spot is sensitive to horizontal and vertical lines. Others can usually detect only horizontal or only vertical lines!

Well, now you do.

And if you are new to this, here is your assignment: reproduce this photo. Hand sharp in the very corner of your photo.

(Use aperture mode with a low “F-number”, or use program mode and get close).

New firmware for Canon 7D

There’s new firmware for the 7D, here: http://web.canon.jp/imaging/eosd/firm-e/eos7d/firmware.html

I’ll update mine this morning.

UPDATE: I just updated it. All well, but note, the upgrade reset my image number to 1, which I do not like. (NOTE: never use “do not import suspected duplicates” to ON in Lightroom, since LR appears to look just at the file number. This has cost me images!)