Colour has to be real

Right?

Um, no, of course not: colour is a tool for you to use in your artistic endeavors.

And colour can be anything you like.

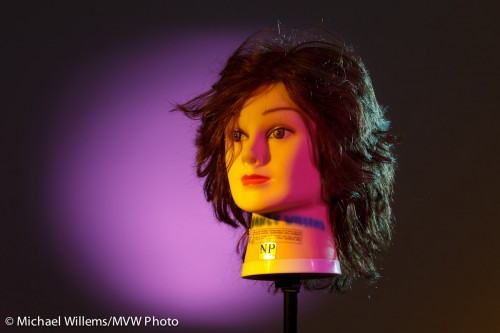
A few nights ago, I though I would see how long it would take me to recreate a lighting setup that my friend Dave Honl (yes, he of the excellent Honl Photo modifiers) did recently. So I looked at his shot and put it together the same way he shot it, in exactly 20 minutes:

Fun with gels, Photo Michael Willems

Fun with gels

That is including:

  • Setting up four light stands.
  • Connecting four flashes (3x 430EX, 1x 580EX) to Pocketwizards using Flashzebra cables.
  • Mounting these on the light stands using ball heads etc.
  • Equipping the key light with a 1/4″ grid and an Egg Yolk Yellow gel.
  • Equipping the fill light with a 1/4″ grid and a Follies Pink gel.
  • Equipping the hair light with a small snoot and a Steel Green gel.
  • Equipping the background light with a long snoot and a Rose Purple gel.
  • Setting the power levels correctly (by trial and error, combined with histogram: key light = 1/4 power, fill=1/8, hair=1/8, background=1/16).
  • Setting the camera up correctly (I used the 7D and set it to manual, 100ISO, 1/125th, f/6.3).

Huh? Egg Yolk Yellow, a crazy bright colour, to light the face? Are we crazy?

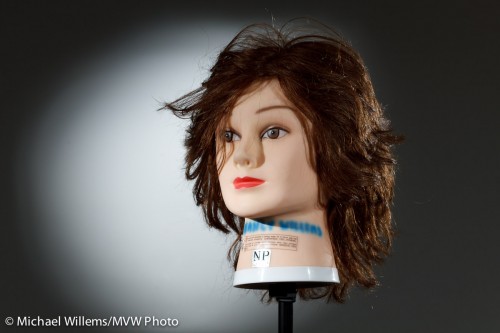
No, just having fun. Yes, of course Dave could have made his shot using no colour. Here’s what the same shot looks like without the gels. (Of course I switched the camera to an aperture one stop tighter, namely f/9, to compensate for the extra light once I removed the gels):

Grids and snoots, photo Michael Willems

Grids and snoots

Yeah, nice, and appropriate for a corporate head shot. But compared to the previous, it is kinda boring, no? So next time you shoot someone, unless they are a law firm executive, you might have fun and try some colour. You don’t need to go crazy and use four colours, but a splash here and there can really help your picture come alive.

By the way, what was the colour of the backdrop?

White.

Remember the following equation:

White – light = black

Similarly, in practice, black + enough light = white.

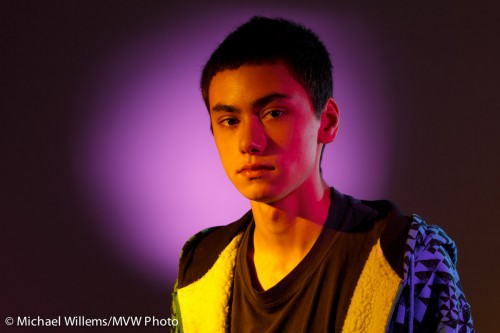
And finally, a real person: my son Daniel (“sigh, not again, Dad”):

Daniel, photo Michael Willems

Daniel in colour

But here’s the thing. After seeing it, he grinned and said “Rad.”. That‘s a first!


Less can be more

Less can be more. We sometimes make things complicated as photographers: we get gear-itis. Yeah, me too.

But you can keep it simple. Richard Avedon shot much of his work with a view camera and a white sheet on the shady side of a building. Period. For the longest time, Robert Mapplethorpe shot with a simple Polaroid camera with no settings to speak of.

So while I teach complex lighting, and I teach making complex technologies like TTL understandable, sometimes it can be simple.

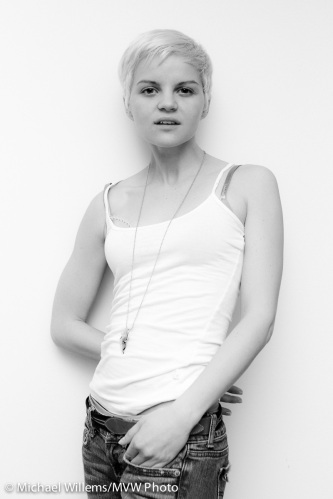
Look, for example, at this recent shot of model Lindsay:

Model Lindsay, photo by Michael Willems

Lindsay, photo by Michael Willems, 2010

This is simple how?

  • A simple background. A white wall. I love white walls.
  • Simple lighting equipment. Just one flash, namely a 580EX speedlite on the camera.
  • Simple lighting setup. That flash was aimed at the wall and ceiling behind me. Using TTL, so no metering was necessary (just flash exposure compensation of about +1.3 stops)
  • Simple colour (namely: no colour. I love black and white).
  • Simple clothing. White top for high-key effect. Jeans for a contrasty dark area.
  • Simple pose.
  • Simple post work (just slight exposure adjustments as needed and skin fixes where necessary).

Sometimes less really is more. Don’t you think?

So here is your assignment, should you wish to accept it: find a white room and shoot a high-key portrait like this. Aim the flash behind you. Expose well: to the right. Have fun!

A softbox to the rescue

LumiQuest_Softbox3

I have been playing with my new flash tools. I shoot things with three Canon 430EX Speedlites, driven by a 580EX speedlite on the camera. I use Honl Photo speedstraps, grids, snoots, and gels, and a Lumiquest softbox of the type pictured above.

But sometimes it is easier. The portrait on the right was of my friend and colleague Peter West an hour ago, on the Lakeshore Road in Oakville.

MVWS6680

I shot Peter with the 1Ds MkIII with 50mm f/1.4 lens, set to “P” mode for a change.

On the camera, the 580EX flash that was not actually contributing light (master flash disabled). In my left hand, fired by the 580 EX’s infrared remote control, a 430EX flash fitted with a Honl speedstrap, a Honl 1/4 CTO gel to warm the light, and the Lumiquest softbox (available from Henry’s; description here).

I used two stops negative exposure compensation (-2 stops). That makes the background sky nice and blue and it makes the unlit face of Peter’s face two stops darker than the lit part. That’s what you want.

It is easy and it is effective. By using these simple techniques, even your snapshots can be well-lit and dramatic.