Shampooey Goodness™

You have heard the term “hair light”? It’s the Shampooey Goodness™ look that makes hair look alive and wonderful. That is why we use it in portraits.

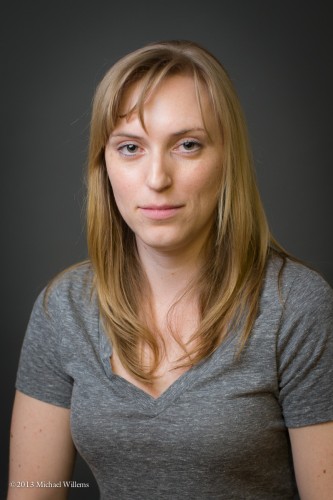
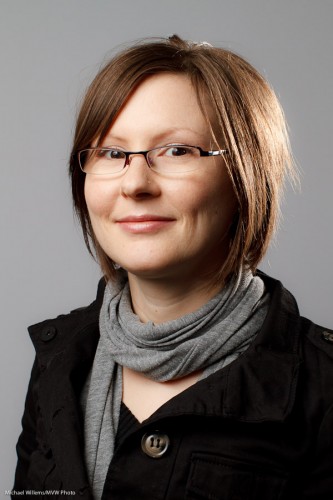
In yesterday’s flash course, I shot a few images of one of the wonderful students, especially to show you in today’s post. Here’s Becky lit with a single TTL flash (a 580EX shot through an umbrella) without the Shampooey Goodness™ secret ingredient added:

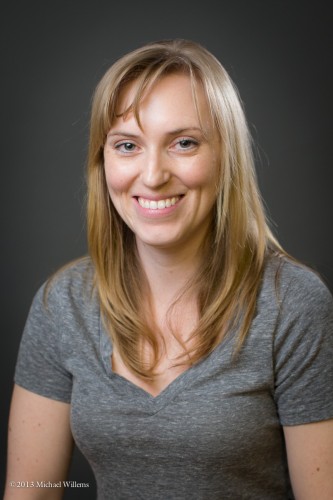
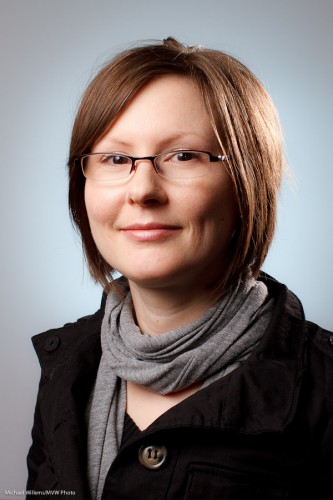
Pretty – but now let’s add a second flash, behind her, fitted with a Honl Photo Speed Snoot (a rolled up tube, that concentrates light). That gives us the desired Shampooey Goodness™, and now, in this scientifically objective and neutral comparison, we get:

See what I mean? That’s why we so often in portraits like to add a “hair light”.

Of course there’s something else missing from this image. Can you see what?

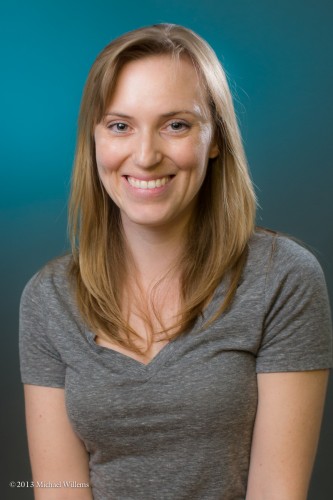
Yes – that background is a little dull. So we add a third flash, fitted with a blue-green gel:

Bingo. A great subject, soft light, Shampooey Goodness™, and a lit background. That’s how you do a portrait. Three TTL flashes with simple, small modifiers.

___

NEW: Learn this from me personally in Hamilton, Ontario on April 10 or May 14: www.cameratraining.ca/Studio-Ham.htmlsee the full schedule on www.cameratraining.ca/Schedule.html and sign up today.


Sam The Studio Man

When I prepare a tricky shot, I tend to use  stand-in model while I work on light, so the model does not need to stand there for half an hour while I adjust and move lights.

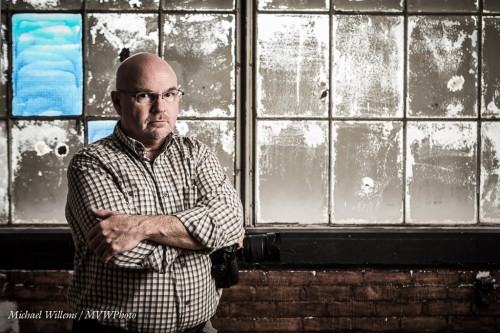
But these stand-in shots are often good, which is why I use them. While preparing to shoot model Danielle, I shot Sam Taylor, who runs the studio I teach in (see www.cameratraining.ca and click on “Schedule”).

I set my exposure for the window: 1/60th sec, f/5.6, 400 ISO. Then I added a strobe with a softbox, and I moved Sam far enough from the window so the strobe would light him up (from 45 degrees above), but would not light up the reflective inside of the window too much. And then I set flash power according to my camera settings. Finally, I did a little desaturating in Lightroom. Result:

Short lighting, great grunge, serious expression, rule of thirds, good balance of background and foreground. A tricky shot, and one I am delighted with.

One of my students remarked on how refreshing it was to see the problem solving process, and to realize that photography is in fact problem solving, yes it is. When I set up a shot, I do not have all the answers, but I see what I want, and I know how to solve problems “step by step” until I get that result.

And sometimes you change your mind. In the final model shot, I could not move the model away from the window, as she sat on the sill. Hence I could not get rid of a shadow cast by the snooted speedlight I ended up using. So then the shot changes entirely: if you cannot beat the shadow, embrace it! To spare those of you who are sensitive, I shall not show you that shot here (it’s a nude),  but if you are interested, click here to go to my tumblr feed.

(By the way: have you considered being photographed this way? if not: consider it. Some beautiful shots of yourself like this are worth making. If you don’t, you may well regret it later in life).


Let there be light.

When you shoot a studio portrait, you can use big studio lights – or small speedlights.

Because they are smaller and lighter, I tend to use small speedlights whenever I can.

And that does not mean compromising quality. Take this example. I took this shot of a very nice model and student during a course the other day, using TTL speedlights:

How is this done?

  • One flash on a light stand into an umbrella (the “A”-flash), on our left. High enough to give us nice catch lights in the eyes, but no reflections in the glasses.
  • The hairlight is one snooted speedlight (the “B”-flash) on the right (using a Honl photo snoot). I made sure this hairlight only lit of the hair, not the cheeks. That is what the snoot is for.
  • I used a Canon 7D with a 50mm lens.
  • I set the camera to manual, f/8, 1/200th second, 200 ISO. Normal settings for studio light. I made sure auto ISO was disabled.
  • The flash was set to its normal TTL mode.
  • I used flash compensation of, if I recall right, +1/3 stop.
  • The “A:B ratio” was set to 3:1, meaning A was three times stronger than B.

I could have metered and used Pocketwizards and the flashes set to manual, and if I had done many portraits, I would have. But for a quick shot like this, I think TTL is a better way, since it is very quick. Indoors, wireless TTL is a no brainer, and it works:  the on-camera flash, which is only used to direct the slave flashes, can be seen by any flash in the room. On a Nikon, or a Canon 7D or 60D, I need only the camera and its pop-up flash. On any other Canon, I would also need a 580EX flash on the camera, to direct the slaves.

But the portrait above is missing something, no? The background is a bit, well, bland.

So we add one more light, using a grid. And a gel. For the gel, I choose a complimentary colour: complimentary to the hair colour. So for brownish-reddish hair I use a beautiful blue-ish gel.

Now we get:

Better, no? Nice portrait, and it took only one light stand, one umbrella, three flashes, one grid, one gel, one 5″ snoot.  All this is affordable, small, light.Professional portraits are now within reach of everyone.

Snoots

Leading up to this Saturday’s Advanced Flash course in Toronto, with Guest Star David Honl, (just a couple of spots left), I thought I might share another flash modifier tip today.

And that is the use of snoots.

A snoot is a long appendage to your light that causes the light to be directed in a narrower beam.  So when you really want to direct the light to go just where you want to, and nowhere else, you use snoots.

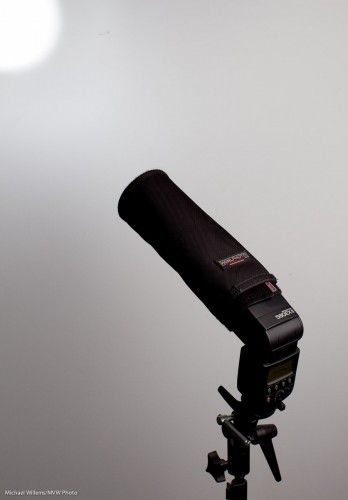
The best snoot for small flashes like a Nikon D700 or D900 or a Canon 430 EX II or 580 EX II are Honl Photo snoots (and no, Dave is not paying me to say that – it’s just that I use them almost daily in my flash work, and love them).

The snoot is also the bounce reflector, just rolled up. So it stores flash and mounts as a sturdy snoot in seconds:

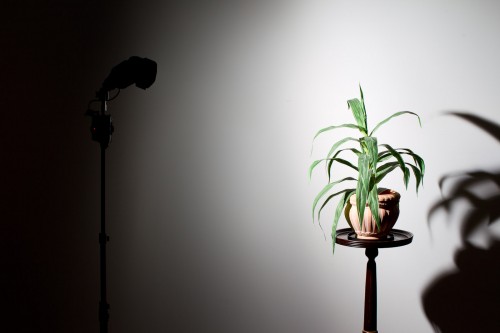
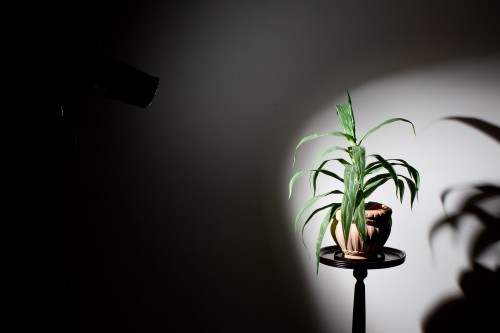
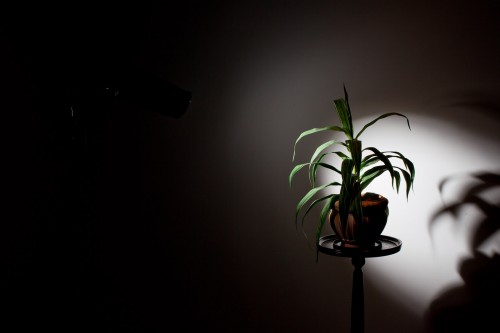
Remember, from yesterday’s post, the plant lit with a grid? If instead of lighting up the whole wall, I want to direct the light to a smaller area with a nice soft edge, I use a grid, like so:

But what if I want a more clearly defined light area?

Then I use a snoot. If instead of a grid I stick a short Speed Snoot to the flash’s speed strap, I now get this:

And if I want a smaller area? Simple, then I use the long snoot:

How do you often this type of snoot? As a hair light. Or in creative lighting: remember, creative light is not about what you light: it is about what you do not light. And that is what snoots are all about.

Light as a creative tool

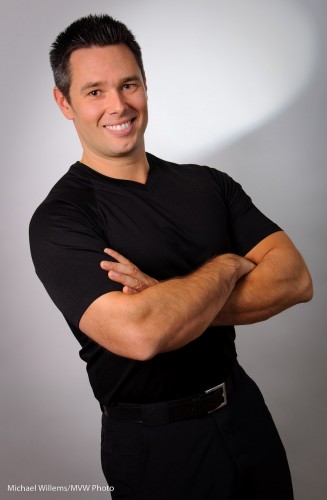
A quick tip today. Look at this portrait of a personal trainer which I helped a student take earlier today:

Portrait of Travis

Standard key light (a small strobe), fill light (in an umbrella) against a white background. But instead of onto the head, which is already separated from the background by its colour, I turned the hairlight onto the background.

And because it has a snoot on it (a Honl Photo snoot, attached to a speed strap), I get this nice parabola-shaped beam of light behind the subject’s head. A technique worth using occasionally. Avoid getting stuck in the “same old light” category!

(The parabola reminds me of a satellite, somehow. Probaby because have an engineering degree?)

Portrait note

One more from Sunday’s course.

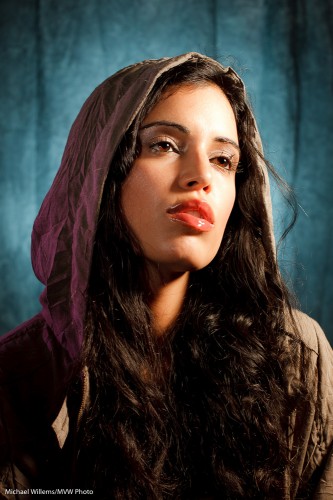
This time, a portrait of model Tara that I made to help explain multiple flash TTL. Straight out of the camera it is:

Multiple-flash TTL lighting

Multiple-flash TTL lighting

How was this made?

With a small Traveller 8 softbox on the main light, a gridded gelled flash for the background, a snooted flash for the fill light, and a gridded gelled flash for the edge light.

Four speedlights, and all using TTL.

A few things to remember in such portraits:

  • You need a catch light in the eyes.
  • Set your white balance to “flash”.
  • If you have space, longer lenses are good (in this case, though, I use a 50mm prime lens).
  • Avoid the ambient light doing any work: choose 1/125th second at f/5.6 or f/8, say; and be sure to disable “Auto ISO”.
  • Lighting is all about what you do not light: avoid bathing the room in photons. Think about what you light, and how.
  • With Canon’s e-TTL or Nikon’s CLS/iTTL, you only get two or three groups of light. So if you have four lights, some of them will have to be in the same group. My fill and edge light are thus both in group “B”.

Keep those in mind and your portraits will be well lit.

Colour has to be real

Right?

Um, no, of course not: colour is a tool for you to use in your artistic endeavors.

And colour can be anything you like.

A few nights ago, I though I would see how long it would take me to recreate a lighting setup that my friend Dave Honl (yes, he of the excellent Honl Photo modifiers) did recently. So I looked at his shot and put it together the same way he shot it, in exactly 20 minutes:

Fun with gels, Photo Michael Willems

Fun with gels

That is including:

  • Setting up four light stands.
  • Connecting four flashes (3x 430EX, 1x 580EX) to Pocketwizards using Flashzebra cables.
  • Mounting these on the light stands using ball heads etc.
  • Equipping the key light with a 1/4″ grid and an Egg Yolk Yellow gel.
  • Equipping the fill light with a 1/4″ grid and a Follies Pink gel.
  • Equipping the hair light with a small snoot and a Steel Green gel.
  • Equipping the background light with a long snoot and a Rose Purple gel.
  • Setting the power levels correctly (by trial and error, combined with histogram: key light = 1/4 power, fill=1/8, hair=1/8, background=1/16).
  • Setting the camera up correctly (I used the 7D and set it to manual, 100ISO, 1/125th, f/6.3).

Huh? Egg Yolk Yellow, a crazy bright colour, to light the face? Are we crazy?

No, just having fun. Yes, of course Dave could have made his shot using no colour. Here’s what the same shot looks like without the gels. (Of course I switched the camera to an aperture one stop tighter, namely f/9, to compensate for the extra light once I removed the gels):

Grids and snoots, photo Michael Willems

Grids and snoots

Yeah, nice, and appropriate for a corporate head shot. But compared to the previous, it is kinda boring, no? So next time you shoot someone, unless they are a law firm executive, you might have fun and try some colour. You don’t need to go crazy and use four colours, but a splash here and there can really help your picture come alive.

By the way, what was the colour of the backdrop?

White.

Remember the following equation:

White – light = black

Similarly, in practice, black + enough light = white.

And finally, a real person: my son Daniel (“sigh, not again, Dad”):

Daniel, photo Michael Willems

Daniel in colour

But here’s the thing. After seeing it, he grinned and said “Rad.”. That‘s a first!


Why use a hair light?

One of my favourite ways to use a light is a hair light. Add it to almost any picture to add some interest, contract, and separation from the background.

So you go from this picture of a very nice student in one of my classes recently:

A picture showing good lack of a hair light

Lacking a hair light

…to this subsequent picture of the same young lady:

A picture showing good use of a hair light

Using a hair light

Much nicer, no? And look, even the smile improves!

OK, I am kidding about t he smile. But the picture is better. A dark-haired person against a dark background particularly needs a hair light.

It is aimed directly at the subject from the back, usually diagonally. Use a grid (like the Honl Speed Grid) or a snoot for even more controlled light (like the Honl Speed Snoot).