See spot run!

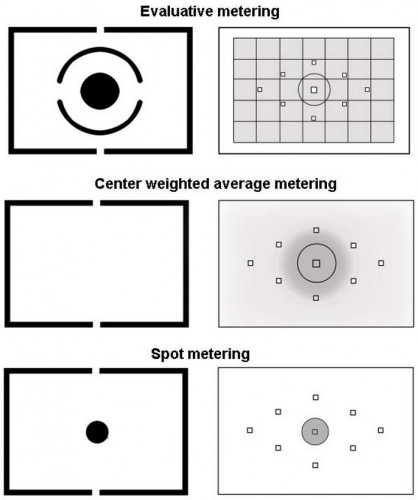
Your camera behaves in one of several possible ways when spot metering; and it behaves in one of several ways when using evaluative metering.

When spot metering (at the bottom in the graphic):

  • The camera only meters what is happening at the centre spot
  • OR the camera only meters what is happening at the focus spot you have selected.

It is easy to determine what it is on your camera. Shoot a scene with dark and light areas. Taking care not to move the camera at all between shots, shoot with the spot aimed at a light part of the shot; then shoot with the spot aimed at a dark part of the shot. If the exposure varies, your camera meters at the focus spot; if not, it meters at the centre spot.

When doing evaluative/matrix metering (a the top):

  • The camera evaluates the entire picture, and chooses the best exposure to suit the entire photo.
  • OR the camera evaluates the entire picture, and chooses the best exposure to suit the entire photo, biased to the selected focus point.

Again, it is easy enough to determine which one it is, using the same test.

My Canon 7D, for example, does the first option (centre point only) when spot metering, and the second option (bias to chosen AF point) when set to evaluative metering; while my 1Dx can be set to do either (using a custom function named “Spot meter. linked to AF pt”). The 7D, therefore, might seem to only do spot metering when it is not set to spot metering. Can you see how this can be confusing?

Did you know which it is, on your camera, before testing? If not, this will explain a lot of the “incorrect exposures” you have been seeing over the years. Yes, you need to know this stuff!

I remember a hardcover book. Pastel coloured pictures. “See Dick. See Jane. See Spot Run. Run Spot Run”. My memory is visual.


Your light meter is not perfect

Your camera’s light meter is a reflected light meter.

Here’s how it works. And you need to simply accept and remember the following:

The in-camera light meter is designed to give a good reading when aimed at a mid-gray (“18% grey”) subject.

By implication, this means that when you aim at a non-midtone subject (like a dark subject or a light subject) the image will be incorrectly exposed.

In other words, because the camera “thinks” that it is looking at mid-grey it will try to render the subject as mid-grey.

One solution is to set your exposure manually while looking at a grey card; then using that exposure for your subsequent pictures taken in that light. That way I get pictures that are right regardless of the subject’s brightness.

Like these two taken at yesterday’s Sheridan College class, of two of my students:

[1] Darker subject, coat, camera:

[2] NBow a lighter subject, dress, wall:

Both were correct at the metered settings of 1/125th second, f/2.8, at 800 ISO. Which I measured off a gray card!


Studio tips

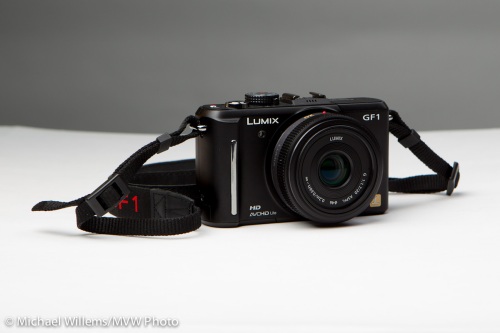
Two studio/product lighting tips for you, prompted by me shooting a few product shots just now for upcoming reviews. Shots like this:

Panasonic GF1, photo Michael Willems

Panasonic GF1, photo Michael Willems

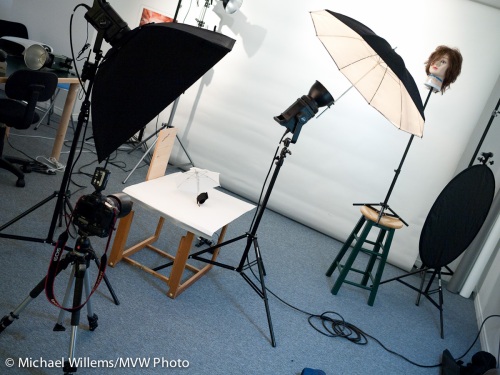
That was taken here:

Product Photo

Product Photo Setup

Which, when seen from behind, looks like this:

Product Setup

Product Setup, with background flash

So what are the tips?

First, avoid stray light, especially on your background. Saturation means “how little white light is mixed in”. A saturated colour has no white mixed in. An unsaturated colour has much white mixed in.

So use a grey backdrop if you can, or just use distance and directional light. Of course since I am using an umbrella and a softbox, much light will stray. So I keep the background far away (you all remember the inverse square law).

So, not this:

Product, too much background light

Product, too much background light

But more like this.

Product, less background light

Product, less background light

Then set your camera to what you like (f/9 and 1/125th for me), and get the background right.

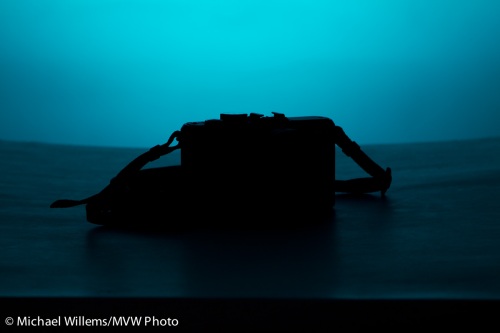
First take a picture with no flash, to ensure that is black; then shoot while activating the background light only. Now get the flash power right: too little and you get a dark background; too much and it turns white. For me, I found this about right:

Product, only background light

Product, only background light

Then you get the rest right, i.e. set the right power for your main lights, and finally, shoot the shot.

Second tip: always use a brush or compressed air to clean your product. Otherwise, hours of photoshopping will result.

Black and white

And this time I do not mean “as opposed to colour”. I am repeating myself here, but it is worth doing: a few words about metering light and how your camera does it, and how to fix it when it does a less than stellar job. I get so many questions abut this, it seems worth going over it again.

Let’s analyze this exposure puzzle. It has three elements.

ONE. Your camera’s light meter is a reflective meter. It measures light reflected off your subject. So it does not know how much light is hitting your subject – it only knows how much is reflected. That is one part of the puzzle.

TWO. Your camera also does not know what the subject is. That is the second part of the puzzle.

THREE. Your camera’s job is to:

  1. See how much light there is
  2. Then set aperture, shutter, ISO (or some of those – depending on what exposure mode you are in) to ensure that that observed quantity of light gives you a well-exposed picture: not too bright, not too dark. This is a narrow range of acceptable light on your sensor: a bit too little and it’s underexposed; a tad too much and it’s overexposed. Your camera’s job is to keep the light on your sensor within that range.

That is the third part of the puzzle.

So let’s put them together.

Usually, they go together well and you get a nice picture of whatever you are aiming at. Done.

But when does this not work? When your subject is meant to be dark – because it is. Or when your subject is meant to be bright – because it is.

Exercise. in Program mode “P”), and using no flash, and taking care to fully fill your viewfinder with it, shoot a ski hill. Or a white sheet of paper made to look like one:

Looks grey! Because that is the camera’s job.

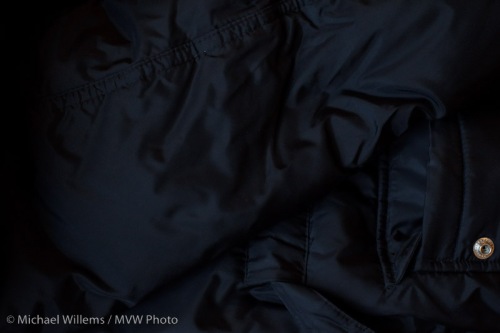
Now shoot a coal mine. Or a coat that is as black as one:

What the… that also looks grey!

That is because the camera does not know it is meant to be black. By default, your camera makes everything “in between” in terms of brightness.

Solution. Now find the Exposure Compensation button on your camera. It looks like a “+” and a “-” with a diagonal line separating them. Plus means “turn up the brightness”, minus means “turn down the brightness”. (It does this by varying whatever it is varying of shutter speed, aperture or ISO, but only “more so”). You may have to hold the button while turning a wheel, and you can see what you are doing as a number or as a graph on the top of back of your camera, depending on which camera you have.

Find the control and turn the value up to +2 and re-shoot the ski hill. Now you get:

That’s better. Check the histogram to ensure it is not stuck against the right side (“overexposed”).

Now set the Exposure Compensation to -2 (minus two). Re-shoot the black coat. You get this:

Finally. A black coat!

So now you know:

  • When your picture looks too dark, use +/- set to plus and retake the picture
  • When your picture looks too bright, use +/- set to minus and retake the picture
  • This is most likely to be needed when your subject is very dark (coal mine, black coat, dark night) or very bright (beach, snow, white marble room, piece of paper, person against a white wall).

That is actually quite simple!

Notes:

  • Do not use flash – that’s a separate subject (and it has a separate adjustment)
  • You can also spot meter to a grey subject to avoid the need for exp comp
  • You can use manual and use the displayed meter in the same way (minus mens darker, plus means brighter).

Try it and you should, from now on, have no problem exposing right.

Metering

Your camera has two, or more usually three, types of light meter built in:

  1. Evaluative/3D Color Matrix meter. You normally use this. This is “smart” metering, where the camera meters areas of the sensor separately. It can handle many types of light situations and is a real improvement on other, older metering types.
  2. Centre Weighted Average meter. You use this when the subject is in the centre and the outsides are dark or light. Backlight portraits are a good example of where this is useful.
  3. Spot Meter. You use this when you have great contrast: simply aim the spot at a subject that is neither very dark nor very light and lock your exposure. This is useful when shooting something in a dark room or in a bright snowscape.

Note also that ambient and flash light are metered separately.

My advice: try all three metering modes and get familiar with them, then learn when to use which one.