Cloudy

As you all know, Apple Aperture is end-of-life. And with that, end-of-competition: Lightroom is the only game in town.

And with that, Adobe is flexing its muscle; it is trying to get everyone to use their “Cloud” subscription model. That way, they get a fee (like $9.99) every month, instead of one payment of $150 for Lightroom forever. Clearly, they are interested in this.

Clearly, I am not interested.

  • First, I would pay much more (In five years I’d pay $600, as opposed to $150 for the app, and even with upgrades perhaps double that over that period).
  • Second, I want nothing with auto upgrades. This is mission critical. I am still using CS3 (very occasionally). If it ain’t broke…
  • The price is $9.99 per product per month, I think. But that is today’s price… subject to change.
  • Third, I want nothing to do with a product that has to go online occasionally to check if I am allowed to use it. No way. What if I lose my password? What if their authentication system fails? What if my Internet connectivity fails, e.g. because I am travelling? No, that just will not do. This is company critical: I need an app that is mine to run without authentication, permission, whatever.

Adobe is making it almost impossible to buy Lightroom today. But the key is “almost”. After a long while online with support, I was today given the “BUY AS A PRODUCT” links:

Normal Users: https://www.adobe.com/products/catalog/software._sl_id-contentfilter_sl_catalog_sl_software_sl_mostpopular.html?promoid=KLXMI

Educational Users: https://store1.adobe.com/cfusion/store/html/index.cfm?store=OLS-EDU&event=displayProduct&categoryPath=/Applications/PhotoshopLightroomSTE

For as long as possible, I shall go on using Lightroom as  a normal license rather than a monthly subscription, and you all may want to do the same.


Post-processing B/W

Toay we have so much power. So much more than in the film days, where we had toi get it all done in camera.

Now, no more. We can shoot RAW and do any desired post processing later.

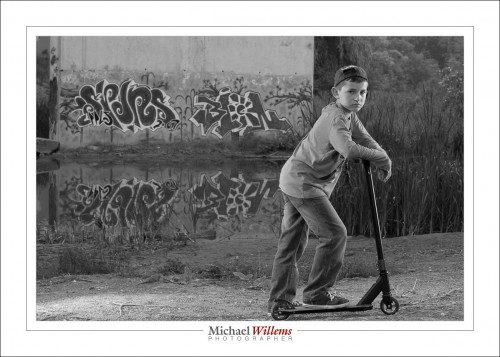
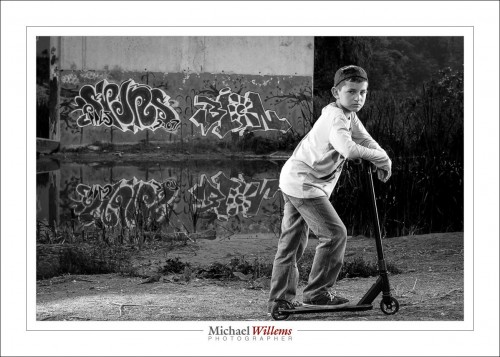
Take this image, one of the “tween and teen” shoot of the other day:

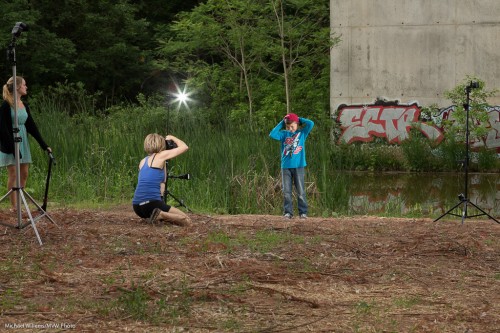
The kids’ mom and I shot that like this:

So I like the vivid colours. But what if I wanted B/W?

I would set my camera to RAW, but picture style to B/W. That way I see B/W on the back of the camera, to give me some idea.

But the moment I get home, in Lightroom I see colour again. So I go to the DEVELOP module, in within that the “HSL/Color/B&W” pane. I select B&W:

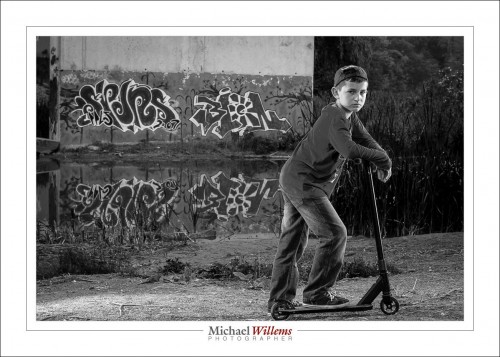
Which gives me this:

That’s nice and all, but as regular readers know, I can now set the brightness of individual colours. Why? Well, for instance, to create contrast between subject and background, or to emphasize or de-emphasize certain areas.

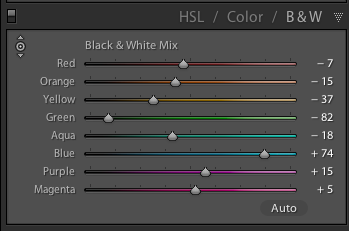
For example, I could make the shirt darker by sliding the “BLUE” slider to teh left. All blue areas (mainly the shirt) would get darker:

Be careful not to go too dark: you will see artefacts: look carefully at the edges of the shirt:

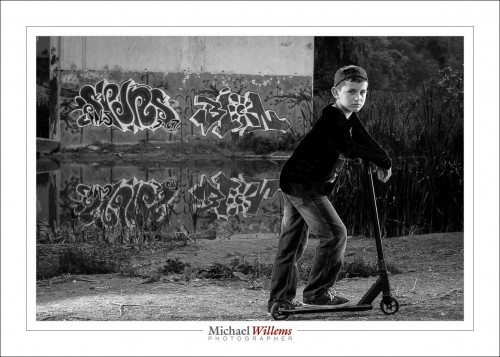
Anyway.. here, I want the shirt brighter. So I tune up blue, and then make various other small adjustments, like making green darker; all of which are aimed at making the boy stand out from the background:

Which gives me my final picture, which looks like this:

Actually, that’s not bad, especially when you consider that in Lightroom, this takes merely a minute of your time.

In the past, we would have used actual filters in front of the lens (e.g. a yellow filter would make the blue areas go darker). The problem is that you cannot readily experiment. Here, you can go crazy (though please don’t). Fun!

___

Come to me for some personal training, if you want to master these techniques. See http://learning.photography. Bring a kid or two and you get two benefits: portraits of the kids and teaching. All you need is to bribe your child in to cooperating for three hours. Easy, right?


Learning the tools

If you have not yet looked at my Adobe Lightroom and other photography videos, then head to my YouTube video channel: www.youtube.com/user/cameratraining. Regular new tips and techniques. Today’s tip: Secrets of the Healing Brush. A few things I bet you didn’t know.

Note: there’s one spot left on tomorrow’s Oakville Advanced Flash course. Contact me if you are interested.


You Need Protection Against Yourself!

Or rather, you don’t.

A somewhat advanced Lightroom tip for studio photographers today.

Adobe Lightroom, since version 4, has protected us from ourselves. Any overexposed areas are automatically brought back as much as possible as part of the RAW conversion, so that they appear not overexposed.

Fine. Until in a studio portrait, you try to deliberately overexpose the background, so that it becomes pure white. Fine, except Lightroom stops you.

Until you change the RAW conversion back to the older, 2010 version. Then you can overexpose as much as you wish.

I just posted a short video about this here:

TIP: Sign up for my YouTube channel, so you hear when I post a new video.


A few Lightroom Starter Tips

Since I am often asked: here’s a few Adobe Lightroom starter tips to get you going. (Lightroom is the app for photo asset management, editing, and output generating).

  • Set up your files using dated folders (named “year-month-day-subject”), in folders per year, with all those year folders under one master folder. That way, if you move them, it’s just one click to tell Lightroom where they now live, or you can move specific years to off computer storage. See this video.
  • Turn on solo mode in all sidebars, so you see only one pane at a time.
  • Learn abbreviations, like D for “Develop” and G for “Grid”.
  • Turn on the XML files (in “catalog settings”):

  • Realize that each module works differently, including many of the keyboard shortcuts.
  • Back up your catalog file (or files): the “.LRCAT” file(s).
  • Learn how to make presets for things you do often (edits, exports, logos, etc).
  • In Develop, press “i” repeatedly to turn on/off the screen info about your image.
  • Learn collections and smart collections.
  • Start keywording your images. (See “smart collections” as to why!)
  • Look at all the menus and read what they do. So often I am asked “how do I do xyz?”, when the answer is right there. You wouldn’t drive a car without at least looking at the controls first, right? Often, people say “wow, you’re a guru”, when all I have done is spend an hour or two looking at the options.
  • Learn the terminology (“panes”, “HSL”, “Module”, for instance) so that it’s easy to google for answers when you are stuck.
  • Use the histogram when editing.
  • Always select sRGB for exports unless specifically instructed to use AdobeRGB.

There’s a whole lot more, but these may help. Also, see my new YouTube channel with tips and tricks. They’re usually about 5 minutes each: watch them all!

___

I teach this stuff. Have me set up your Lightroom and teach you how to use it most efficiently – and we’ll do a photo critique of your work while we’re at it; and I’ll show you how to get the most out of your photos. Contact me for information.


Pro Print Precision!

In my continuing series of posts for everyone – today, a post for pros, or amateurs who take printing seriously. Which you should: a photo is not a photo until you have printed it. And hung it on your wall, preferably.

My advice today is this: print straight from Adobe Lightroom. This has many benefits over “just make a file and print that”:

  1. No intermediate file; no need to go down to the restrictive AdobeRGB or even more restrictive sRGB colour space file formats.
  2. No intermediate file also saves time, confusion, and disk space.
  3. Lightroom contains a very good print engine, with great print setting options.
  4. Set it up once, and it’s good forever.
  5. And most significantly in recent versions of Lightroom: soft proofing.

Everyone who has printed seriously knows that each paper type is good for certain prints only. After you figure that out, you will use one type of paper for prints with a lot of black. Another type for very colourful prints. Another type for prints with a lot of shiny areas. Or a lot of reds. And so on.

Lightroom to the rescue. This is not a full Lightroom course (for that, come to me privately and I will teach you). This note is for those of you who already know Lightroom and computers well.

And for those people, in a nutshell, here’s what you do:

1. SET UP PRINTING:

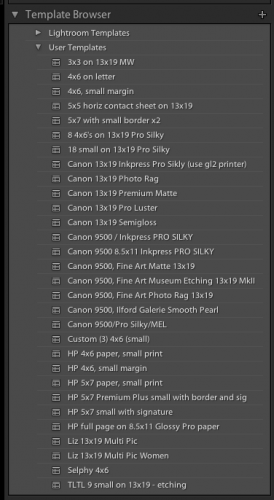
Select your photo, and go to the PRINT module. There, over time you will create a print preset of your own or each combination of printer and paper type (and other preferences, such as layout, margins, etc). Update that whenever you make a change to your preset. That way you invent the wheel once.
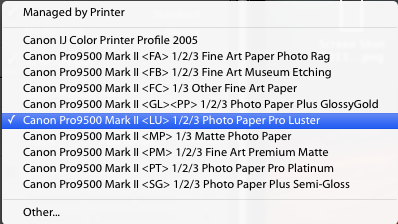
In that profile, make sure under COLOR MANAGEMENT, you do NOT select “managed by printer”, but instead you select the printer paper profile for the printer/paper combination you are using (profiles which you have installed separately; from the printer or paper manufacturer).
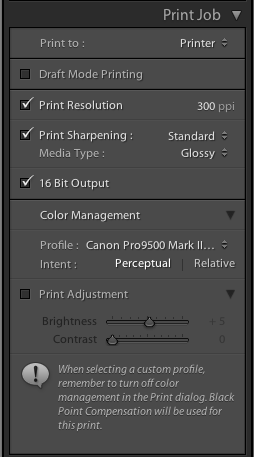
In my case, today, for a print that was Canon Pro Luster paper on my Canon 9500 Mark II pigment printer, so I selected that profile:
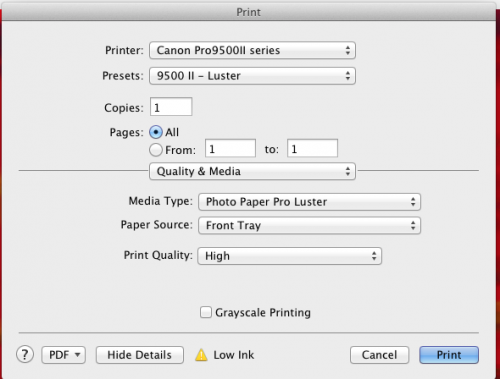
Before you actually issue the print command, the computer’s PRINTER dialog will pop up. In that, be sure to select the same paper (under “Quality and Media”):
OK, that is easy once you set it up, and prints will be reliable and predictable. And right.

2. SOFT PROOFING:

But here’s the fun part. In new Lightroom versions, there is an option called “soft proofing”. And that rocks.

Look under your image. And activate the “soft proofing” option.

You will be prompted to crate a soft proofing virtual copy; go ahead.

And now you can see where the print does, or does not, reproduce well for your selected paper and printer type (or for your selected colour space, if creating a file)!

See the top right, and select the correct profile for what you are printing to. In my case here, Pro Luster paper on the Canon 9500 MkII:

Now, provided I have clicked the little paper mark top right of the graph ON, I see where this photo will not reproduce well on the paper selected.

For instance, take the print I was just creating. A lake Ontario sunset:

Now, if instead of the printer profile I select “AdobeRGB”, I see the following in my soft proofing view:
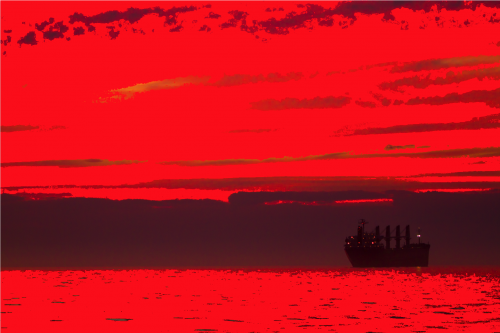
Ouch! All those pure red areas are where the colour is outside of what the selected profile can handle. I.e. they will not look good. So I do not even attempt to print this print the way it is via an AdobeRGB file (yes, now you see how bad AdobeRGB is compared to using a good printer’s entire gamut).

if I select my paper type instead, I see:
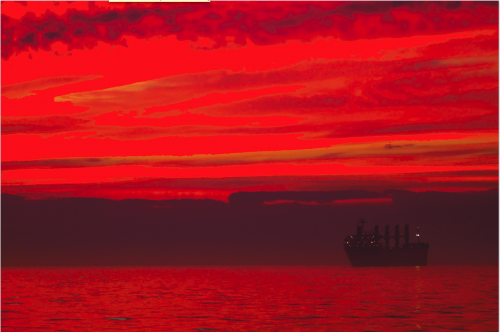
There is still a little pure red stuff going on at the top, but much, much less. (If your print is red itself, like mine here, simply turn the “problem view” on and off repeatedly to see where the problems are.)

So now I can tweak my image in the DEVELOP module until this last bit of warning goes away. I can use HSL to reduce saturation or hue or luminance of the colour in question, or I can change overall saturation, or I can decrease exposure: I have all the options open. And my print will be good. And I do not have to make four test prints to finally find the paper that works well!

The Soft Proofing function is amazing. One more reason to live in Adobe Lightroom, if you are not yet!


____

Want to learn? I have scheduled a special all-evening Flash course in Oakville, Ontario on 3 Oct; as well as a five-evening basic photography course, starting Oct 2, aimed at novice to intermediate users who want to learn to use their DSLR properly once and for all.

These courses are very special in that they are like private coaching: I will only take up to 6 students for each course. The Flash course includes the Pro Flash Manual, and the five-evening course includes course materials and homework. Both are now available for signing up on www.cameratraining.ca/ – see the flash course details on this page.


Spot Visualization

You know those sensor dust spots?

Yeah, I hate them too. When you shoot a sky at a small aperture like f/11, you will see them, sensor cleaning notwithstanding. They’re always there, like little poltergeists that are there to upset you and destroy your images. Modern sensor-cleaning cameras are a little better, but nevertheless, even when 99% of the dust is removed, that leaves the other 1%.

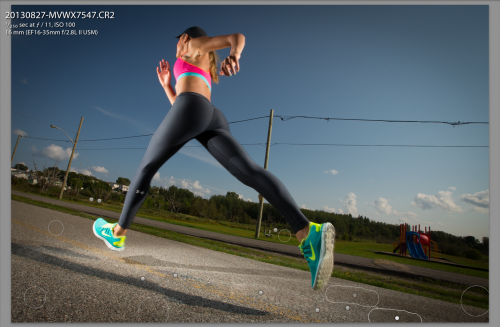
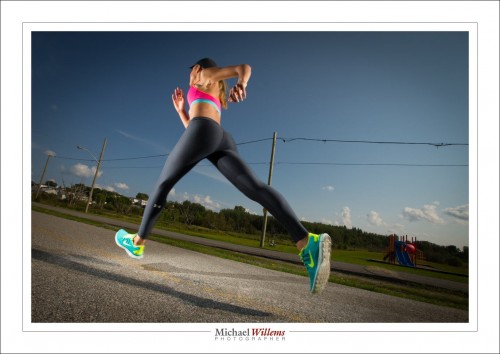
And that is enough. If you look carefully at this, full-sized (keep clicking), you will see some, e.g. top right.

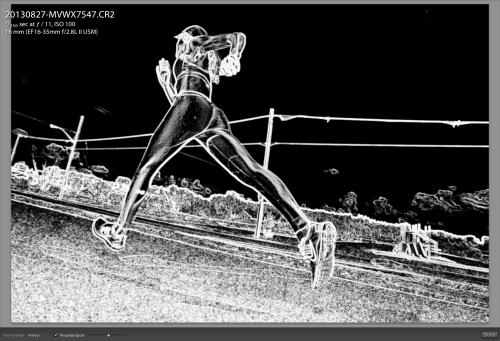
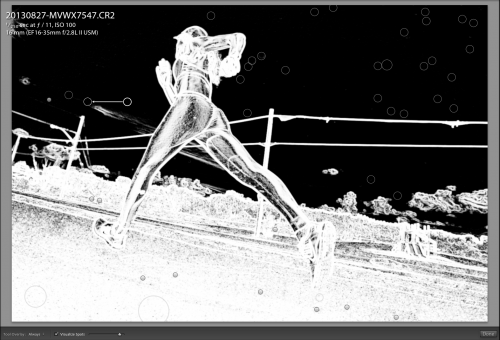
But Lightroom comes to the rescue. In the DEVELOP module, at the top, select the clone/healing tool, set it to healing, and now at the bottom, activate “Visualize Spots”.

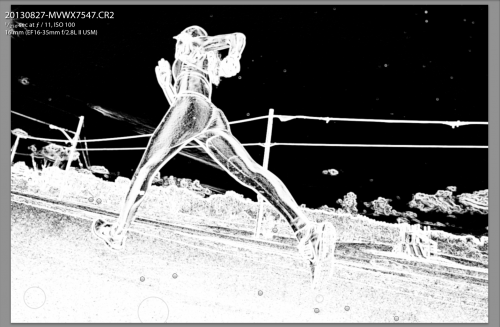
You see no spots? Drag the slider at the bottom to the right so you see them all:

Ouch!

OK, now that you see them, zap them all:

Now go back to normal view, and your image is cleaner than clean. Here;’s my final version (again, for best effect, as with all pictures here, click through to see large):

No dust. Thank heavens.