Gel trick

One thing I sometimes use gels (like my favourite Honl Photo gels) for is to allow me to do background shifting – later.

Let me explain.

Say I take an image of myself like this, with a light blue gel on the flash that lights up the background:

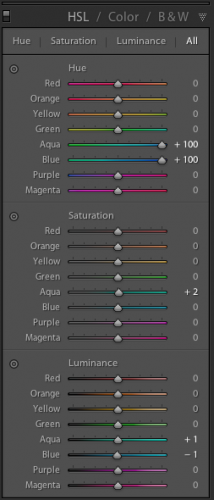
If I do not like that colour – provided it’s a different colour from whatever I am wearing and from my skin – then I can easily change it. In Lightroom, I find the image; then I go to the DEVELOP module; then I select the HSL pane; and in it, change the Hue of the colour (which I select with the pick tool, the little red circle on the left):

And that turns the Aqua and Blue to Purple:

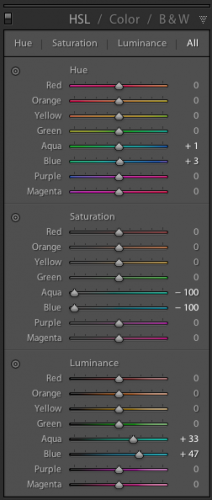
Instead of the hue, I can also change the saturation:

If I drag it down to zero, as in this example, then the colour disappears!

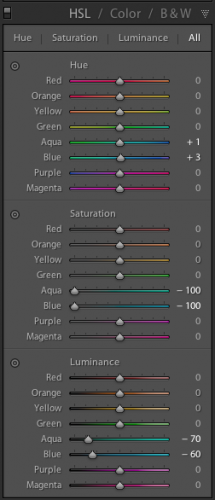
Now, I can change the luminance (brightness) of the area that was originally coloured:

And dragging it down makes the area darker:

So just because I used a specific colour, I can do “studio work” after the fact! Of course I keep these adjustments to a minimum: major changes would not be a good idea (you can get funny edges and noise). But the fact that it is possible, and easy, is often very helpfu;l during real-life edits. Personally, I like my last picture best.

___

LEARN WITH ME – NOW!

  • Who is coming to Oakville this Sunday, noon-4pm, for a Flash course?
  • Who is spending five days in my course at Brock University this August (the Niagara School of Imaging)? There’s still space: my “demystifying digital flash” course is indeed on, so book now! Here’s a video about this course: [click here]


Lightroom 5

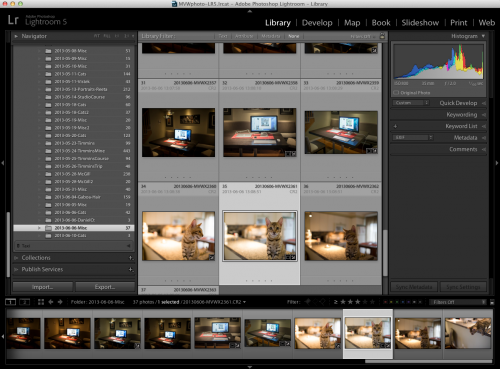
Lightroom 5 (formally known as “Adobe Photoshop Lightroom 5”) has been released. I downloaded the $79 upgrade and converted my catalogs, and here’s my feedback so far.


A reminder: Lightroom is a tool that does asset management, photo editing, book and slideshow creating, printing, and much more: It is the tool for pros and serious amateurs alike.

First, the conversion takes time – much time. The computer seems to be doing nothing but in fact it is working. Just wait – it took me three hours, and might take you many hours more. It’ll get there. Just wait.

New features: lots of little ones; purportedly also many inside (‘better math”).  And some you see.

See a new tool there?

The ones that stand out for me are:

  • The healing tool can now be any shape you like. But note, pressing down COMMAND (or Control or a PC) .
  • The lens correction tool now does auto perspective correction.
  • There is a new “Radial Filter” tool that allows me to apply changes inside (or outside) any oval shape anywhere.
  • Lightroom supports “Smart Previews”, which allow you to edit even while your original images are not connected (e.g. they are on a disconnected hard drive). This is a new option in the IMPORT screen, too. Neat.

There’s no doubt a lot more, but these are enough to justify the upgrade if you rely on Lightroom, as I do, and as many, many amateur and pro photographers do. If you have not yet used Lightroom, please do give it a try.

And use the shortcuts to be really productive!

Like these:

  • Q for healing tool
  • H for hide/ for move sample point
  • Shift after click to hold and view fix
  • F for full screen (and shift-F to getthe “old” behaviour)
  • E loop view toggle
  • S softproof toggle
  • Y before/after toggle
  • R see crop toolo see overlays (from a choice)
  • Z zoom view toggle

…there’s so many more, and the menus tellyou what those are. I recommend you learn these – Lightroom is all about productivity. After all, we all want to be shooting, not editing!

Tomorrow, I feel like some more shooting: we are expecting nice weather here, which means tough but very rewarding shooting.  And that’s what we do, right?

___

The “Pro Flash Manual” is out: have you had a look yet? Flash photography rocks – once you know how it works!


Lightroom issue

Adobe Lightroom is great – I run my life using it – but now I have run into an issue that appears to be a bit of a showstopper. Let me run it by you: perhaps I am missing something.

It’s the watermark I like to add to each image when I create a JPG. If I use text-based watermarks, this works fine, but I cannot use more than one font type, colour, size, etc.

Since as part of my branding I now want a watermark with several font types and colours, this necessitates using a PNG file that I create in another app. Which indeed I can do, and it works:

Alas – it’s not sharp!

The logo is not scaled properly, so it has jagged edges. And the smaller I make the watermark, the worse the problem gets.

Seems this is a bug, and a whopping great one that is not yet, apparently, fixed even in LR5. A purported “workaround” (essentially, generate a full width logo file) is not a useable workaround, unless you want to generate a logo for every export size you will ever generate…

Kind of a showstopper for me… using another app (like PS)  to put on the watermark would double my workflow. So, back to the boring old “one font only” watermark? Branding is very important to me, and I cannot not brand myself properly because of an Adobe bug. Surely there must be a plugin of some sort. Let’s see of others have found what I have not yet found.


Don’t Do This At Home?

Let me modify that title. Of course you can do the following at home – you see, I am going to talk again about extensively modifying your images in post-production.

Unless you are a photojournalist, you can of course do this whenever you feel like it, but my feeling is, you should not do it instead of shooting correctly. Shoot correctly; do the rest in Lightroom or Photoshop – when you have to.

But when you have a bad image, as long as it is an exception, you can often do dramatic stuff with that image.

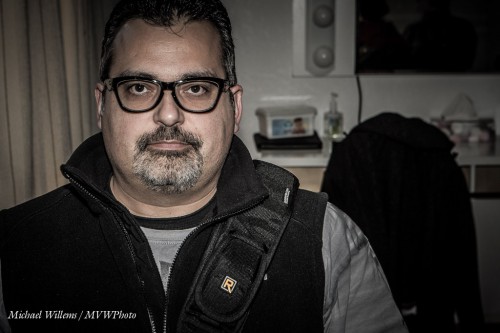
Like this image. A snap shot of one of my students the other week during the Flash course (there’s more flash courses coming very soon, see the schedule). This was not a “real” shot: I was demonstrating how not to do something, if I recall correctly.

Pretty much bad everything (except the subject). Light, exposure, composition: a good example of a mere snapshot.

But then… mmm. Suppose we increase the exposure in post; desaturate the image, pop up the vibrancy, then crop and rotate? Lightroom 4 settings as follows:

  • Exposure +0.7
  • Contrast +25
  • Highlights +10
  • Shadows +55
  • Clarity +100
  • Vibrance -49
  • Post-crop Vignetting: -35
  • Crop to get extra close and to use the “Rule of Thirds”
  • Rotate to straighten verticals

…then, we might actually get a good “dramatic portrait”:

Again, I am not advocating shooting bad images! But when it is the exception, or when you want to do something that cannot be achieved strictly in camera, feel free. By all accounts, Ansel Adams was a huge darkroom user.  If he could do it, you can too. Just make sure you do actually know how to do it without manipulation, as well.


Bright pixels are…

…sharp pixels.

Look a this image:

Dark, but as you know, we can rescue dark images in Lightroom or Photoshop. Especially if, as here, we shot them in the RAW format – which you really always should do.

So, into Lightroom, notch the image’s exposure up a couple of stops, perhaps play with “Whites” and “Shadows” a little, and done! Right?

Yes. But.

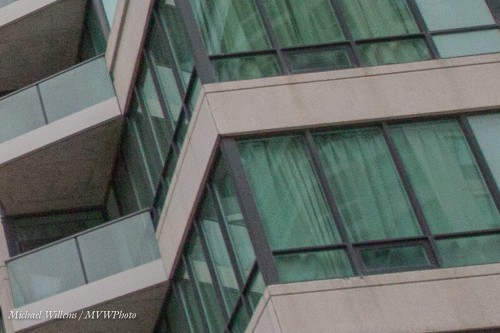
While we successfully increased the level of the dark parts of exposure, we also at the same time increased the noise (“grain”, if you will). Noise, after all, is like cockroaches: it hides mainly in the dark. Look at a small detail:

See? Grainy.

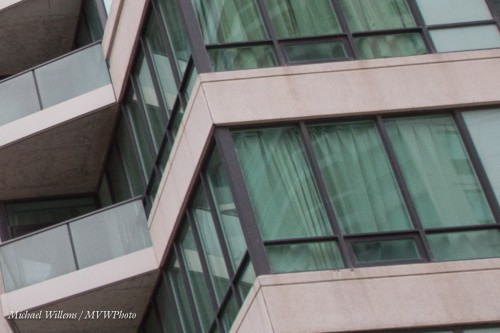
Compare that with the next image I shot, which at first looks just about the same, at least in terms of exposure – I shot this one at a slower shutter speed:

But this one I exposed well – I did not have to electronically increase the exposure, so I did not increase the noise. So a small section of this image looks like this:

If like me you were an engineer, you would say that it has a “higher signal to noise ratio” than the previous, electronically doctored, image.

So that is why we try to expose as correctly as we can, rather than relying on RAW to fix it for us later.

(You can even expose “to the right”, i.e. expose too brightly, as long s you do not lose detail in the bright areas. If you manage to do that successfully, you can pull the image down later, thus increasing the signal to noise ratio. I have written about this here before, look it up).


Grain

Not the kind you eat.. the kind you look at. Grain. Or noise, as it is called in digital pictures. Bad! Grain must be avoided at all cost!

Perhaps not.

  • First: there is a difference between the look of electronic “noise”, which results from the use of small sensors, high ISO values, or great exposure pushing in post-production, and film-type grain. This electronic kind of noise is ugly.
  • Second: while electronic noise is ugly and must be avoided, not so for film grain; not necessarily. Film grain can be very attractive, as in 1960s photos shot on Kodak Tri-X film.

Which is why you can now add film grain in many apps. Like in Lightroom.

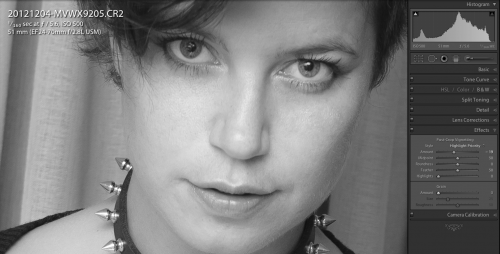
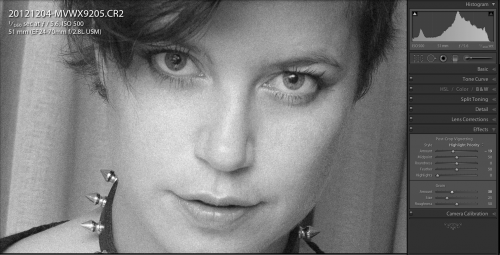
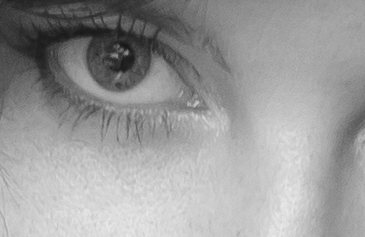
Here’s a detail of a picture. You need to click to see it at original size. This screen print shows the EFFECTS pane in the DEVELOP module:

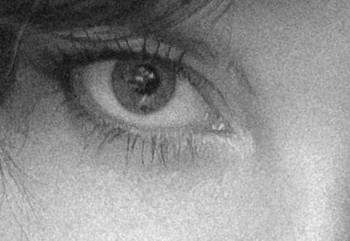
Now the same, with some grain added (look at the slider on the bottom right):

Again, click all the way through to the “Full Size” link. You will see a difference somewhat like this:

I often add some grain to my black and white images, to give it that authentic film look. As an added bonus, this treatment also hides imperfections that can result from sharpening.

Don’t go crazy and add 100% grain to all your pictures – but used judiciously, this is a great addition to your arsenal of tools (if I can be forgiven for mixing metaphors).


Sharing A Shoot

Say you have sot with someone else. Now you want to do your post, and then send them the work you have selected. The RAW files, but also what you have done to them.

If you use Lightroom, that is easy.

Go into the Library module.

Select the shots you have chosen to share. Verify that you have selected them (at the bottom, Lightroom will say something like “125 of 200 selected”).

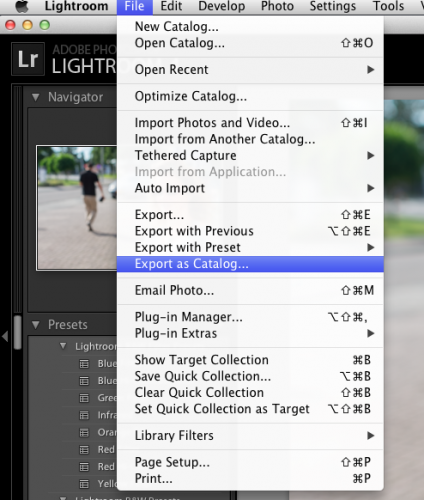
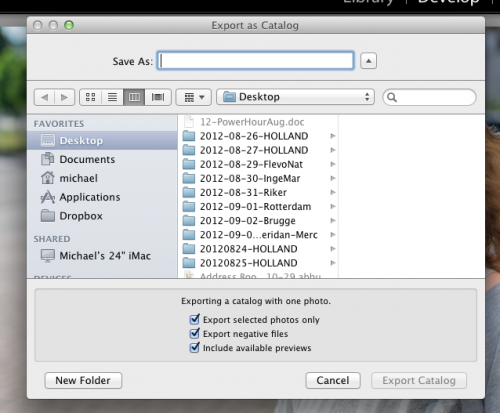
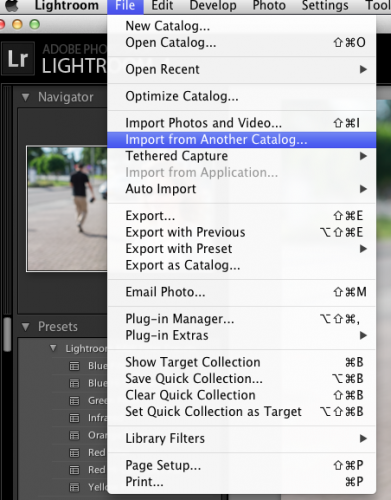
Now go to FILE and select EXPORT AS CATALOG:

Select a location (I like my desktop). Make sure you turn on “Export Selected Photos Only” and “Export Negative Files”!

Now share the resulting folder and all its sub-folders (e.g. via Dropbox – ensure that you have enough Dropbox space).

Then on the  receiving side, select “Import From Another Catalog”, and indic ate te folder in question.

Those folders are now added to your library, and the originals are moved in as well. Mission accomplished!


Web sites in Lightroom

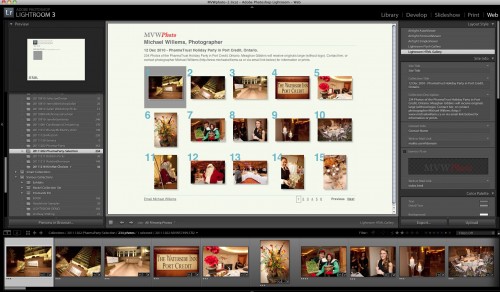
All you need to create web site galleries of your images in Adobe Lightroom is Adobe Lightroom and a web server/FTP server.

In the WEB module, you can lay out your gallery of selected images any way you like.. many templates are available and many settings are available in these templates. For instance, like this:

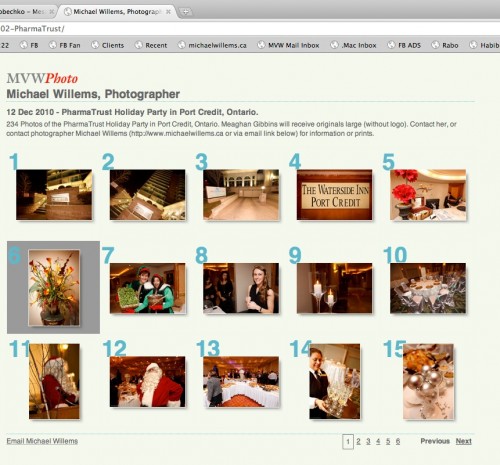
Which, once you upload it to a web server, leads to a web site like this:

I hope this spurs you on to doing something with your pictures: get a web host, learn how to FTP files to it, and share your pictures with friends and family – or with clients – with minimal effort.


Post work or no post work?

A shoot from a shoot yesterday will help illustrate a point I am ambivalent about: whether to do post work that materially changes an image, or not.

The original shot is rough: lit with two speedlights, on one camera and one off camera:

So we do some minor skin adjustments (including a minor “clarity” decrease) and a somewhat major crop:

That crop is essential: simplify, simplify, simplify!

That is all the post work I normally do. It does not materially change the image. My rule of thumb: could I have done this with light? If so, no problem doing it in post.

Beautiful.

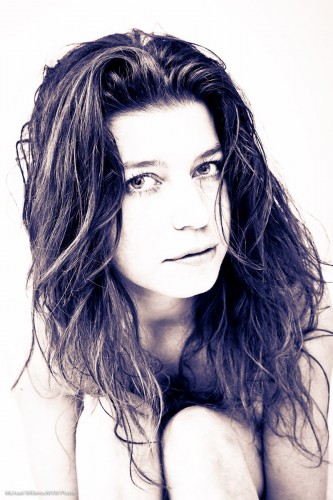
But in this rare case I want a very different look – so now I do a post action in Lightroom to make it look the way I want. Rare for me, but here it is:

Kim Gorenko (Photo: Michael Willems)

What do you think? Allowed in this rare case? Of course by definition you are allowed to do whatever you like – you are the creative artist – but I would counsel against doing too much.


Rescue Ops

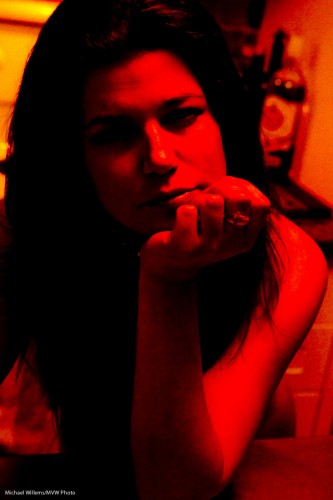
Sometimes an image is spoiled – like when the flash fails to fire.  This happened to me during a very recent shoot – no flash, and to the naked eye the image looked black.

But these images, especially when shot RAW, can sometimes still be used. In the case of the aforementioned image, I did the following in Lightroom’s DEVELOP module:

  1. In the BASIC pane, I increased both exposure and fill light to the maximum setting.
  2. I then would have normall converted to B&W, but in this case I did not, since the tungsten ambient light exposed the image basically in red only.
  3. What I did do, of course, is reduce noise.
  4. Then I added grain – film grain looks impressive.

The result:

Kim in Red - Photo: Michael Willems

Not bad for a spoiled image!

So the two lessons: (a) always shoot RAW, and (b) Do not throw out bad images just yet – they may be useable.